You can create a new Remediation SLA Configuration or modify and apply the existing Default SLA Configuration to groups or devices matching the tags criteria.
Creating a new SLA Configuration
| User access level: Only Organization Admin, Account Admin, and Normal Users with full access can create, edit, and delete SLA Configurations. Normal Users with read-only access can only view SLA Configurations. |
Follow the below steps to specify remediation Service Level Agreement using the Default SLA Configuration in Saner PM.
1. Log in to the Saner web console and select the account you want to work with.
2. Click the Saner icon and select the PM (Patch Management) tool.
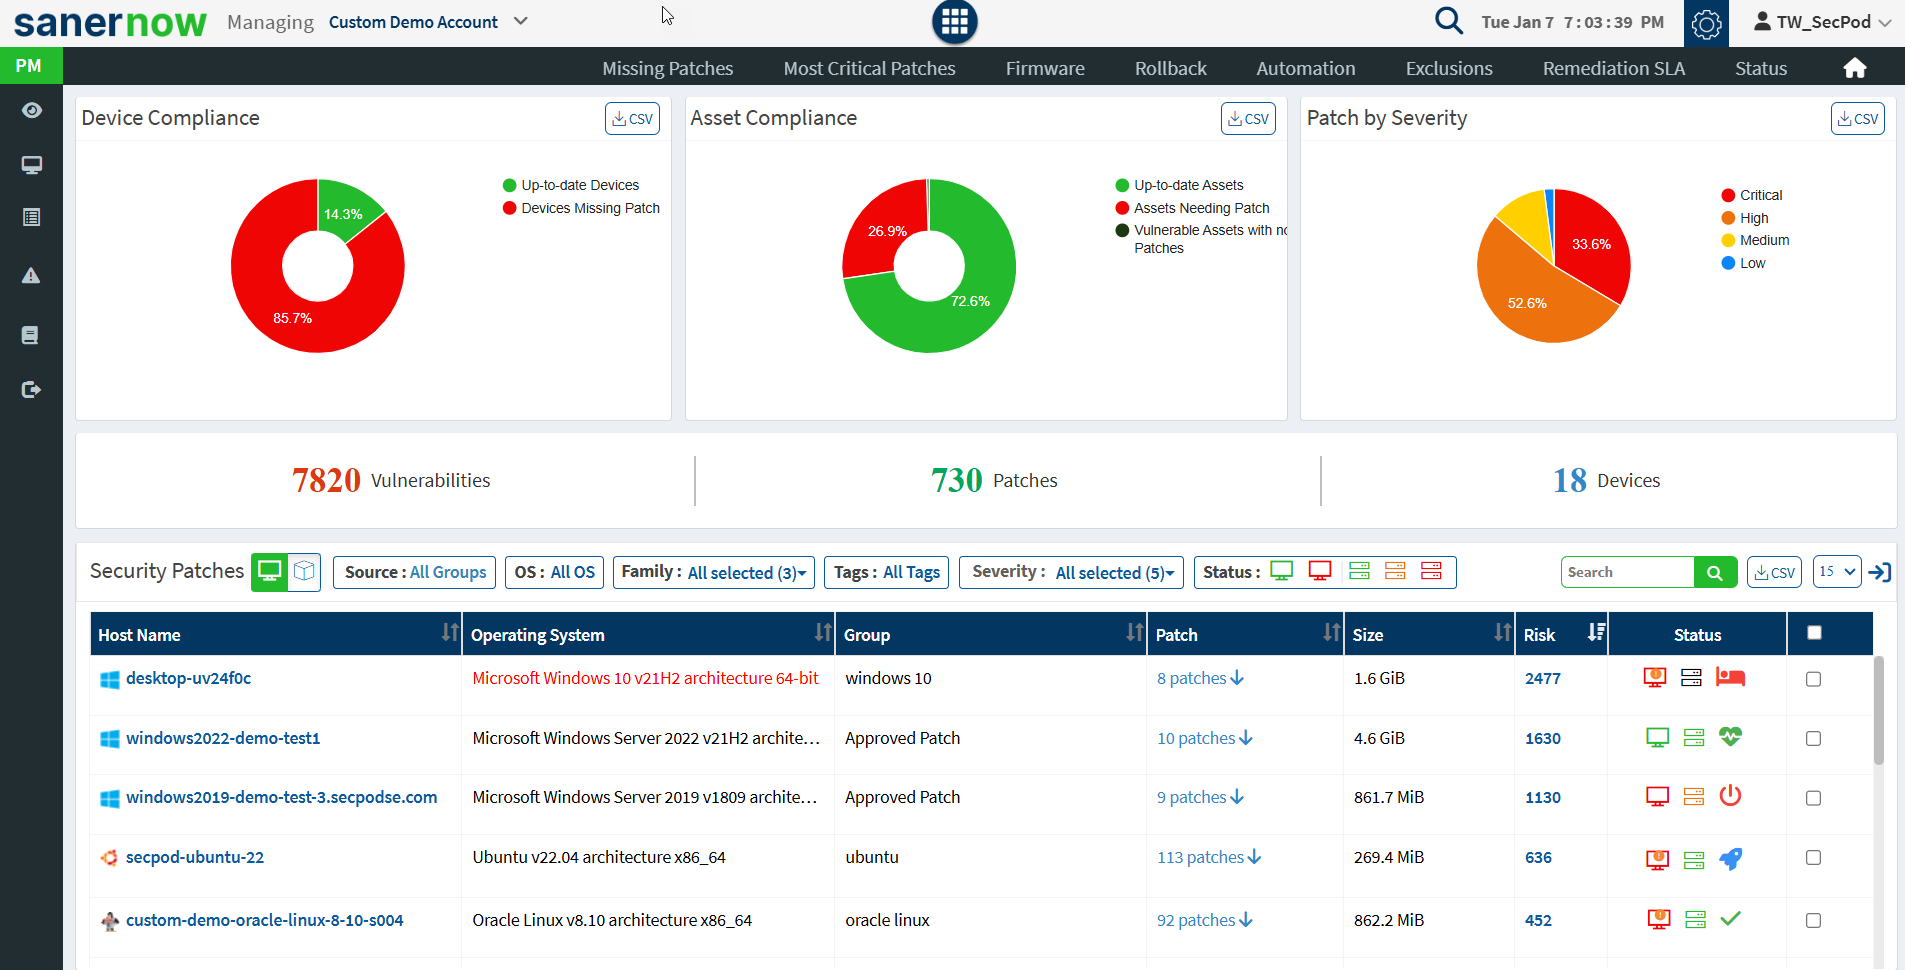
The PM Dashboard appears.

3. On the PM dashboard, click Remediation SLA.
The Remediation SLA page appears, where you can view all the SLA Configurations configured.

3. Click Create SLA Configuration button to create a new SLA Configuration.
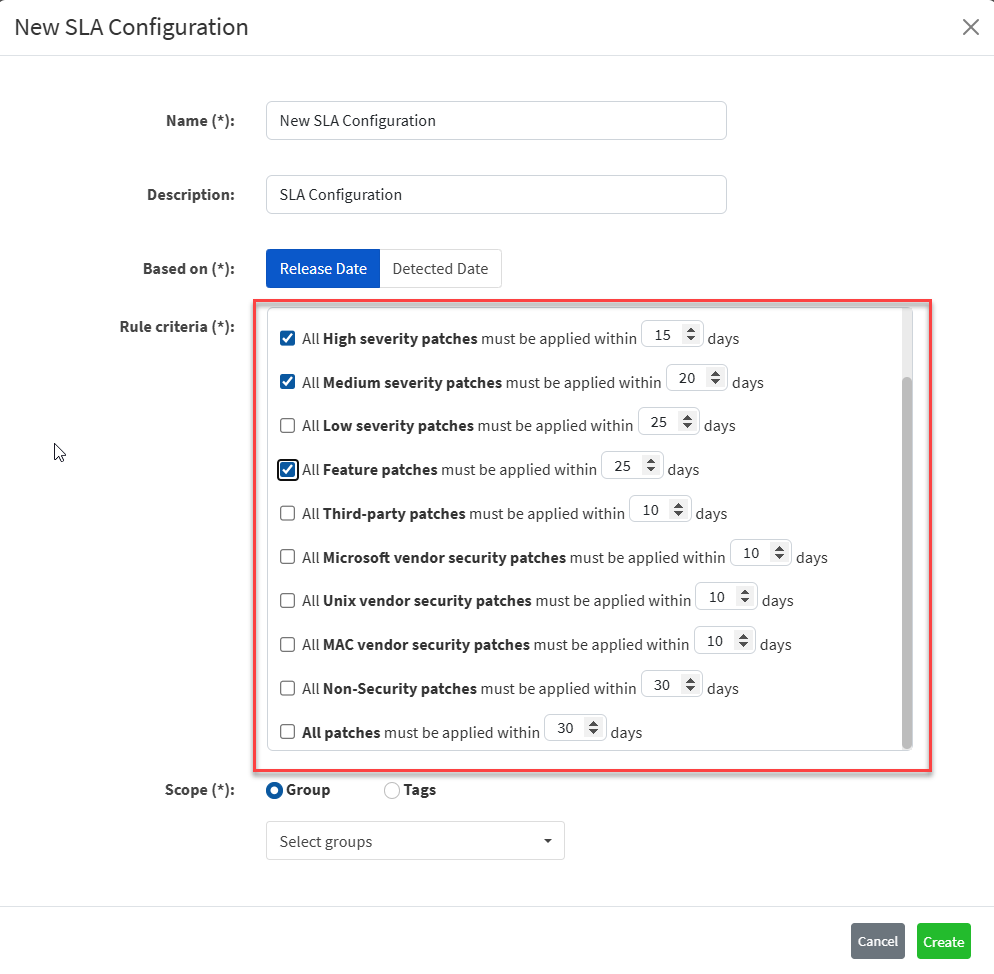
The New SLA Configuration page appears.
4. [Mandatory] In the Name box, provide a unique name for the new SLA Configuration.
5. In the Description box, provide a description for the new SLA Configuration.
6. [Mandatory] In the Based on section, choose between Release Date and Detected Date. If you choose Release Date – Saner considers the date on which the software vendor released the patch during SLA compliance computation. If you choose Detected Date – Saner considers the date on which the Saner detected the missing patch during SLA compliance computation.
7. [Mandatory] In the Rule criteria box, check the boxes next to the rules you want to be part of the newly created SLA configuration. You can modify these values as per your requirement.

8. [Mandatory] In the Scope section, choose between Group or Tags. If you select the Group option, you can select the groups from the Groups drop-down box. Similarly, if you choose the Tags option, you must specify the tag criteria using the Add Criteria button and Apply the criteria.
9. Click Create to create the new SLA Configuration.
Saner creates the SLA Configuration based on the name, description, and rule criteria you selected.
Modifying the Default SLA Configuration
Follow the below steps to specify remediation Service Level Agreement using the Default SLA Configuration in Saner PM.
1. Log in to the Saner web console and select the account you want to work with.
2. Click the Saner icon and select the PM (Patch Management) tool.
The PM Dashboard appears.

3. On the PM dashboard, click Remediation SLA.
The Remediation SLA page appears, where you can view all the SLA Configurations configured.

On the Remediation SLA page, you can see the Default SLA configuration. By default, the Default SLA Configuration is inactive. You must assign a Group ![]() or a Tag
or a Tag ![]() to the Default SLA Configuration to use it.
to the Default SLA Configuration to use it.
4. Click ![]() Edit to assign a Group or Tags to the Default SLA Configuration.
Edit to assign a Group or Tags to the Default SLA Configuration.
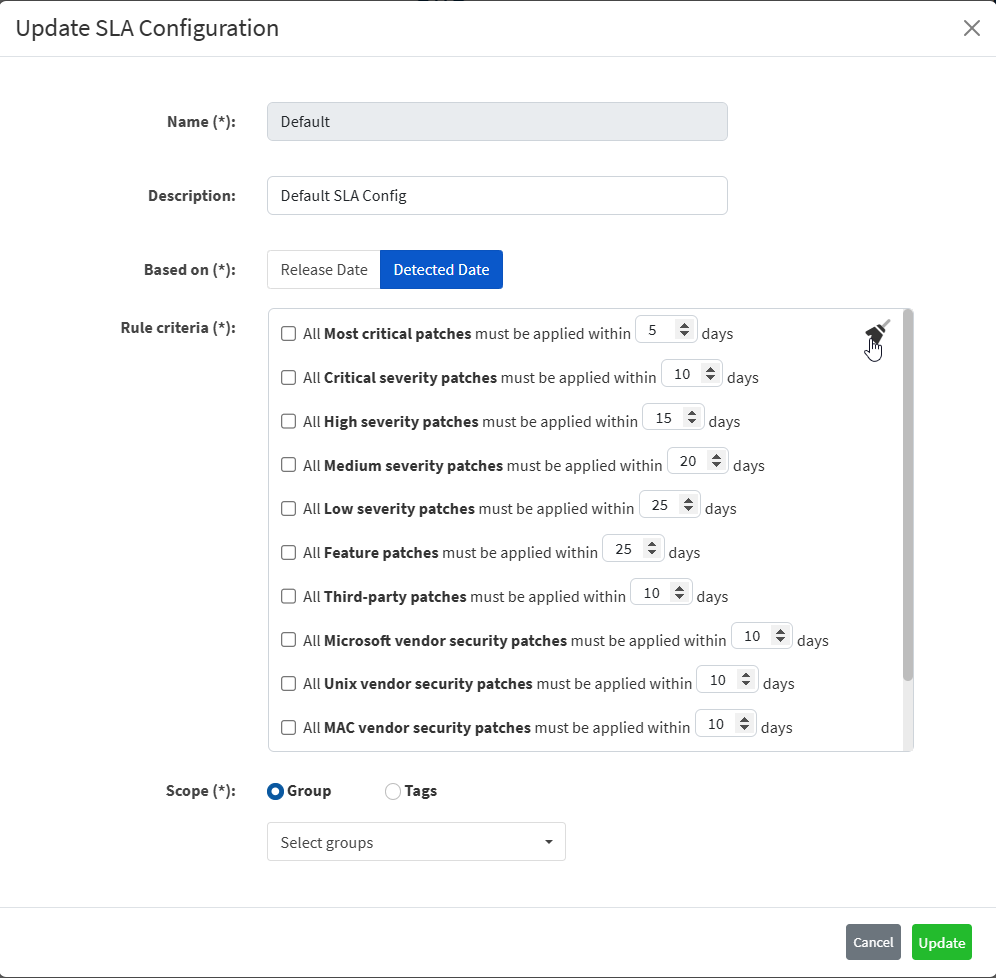
The Update SLA Configuration page appears.

| Note You can’t delete the Default SLA configuration; you can only modify it. |
5. [Mandatory] In the Based on section, choose between Release Date and Detected Date.
6. [Mandatory] In the Rule criteria box, check the boxes next to the rules you want to be part of the newly created SLA configuration. You can modify these values to align with your organization’s SLA.
7. [Mandatory] In the Scope section, choose between Group or Tags. If you select the Group option, you can select the groups from the Groups drop-down box. Similarly, if you choose the Tags option, you must specify the tag criteria using the Add Criteria button and Apply the criteria.
8. Click Update to save the changes to the Default SLA Configuration.


