Follow the below steps to generate Client ID and Client Secret for Gmail email accounts.
1: Sign in to the Google Developers Console. Click the Terms of Service checkbox and then click the AGREE AND CONTINUE button.
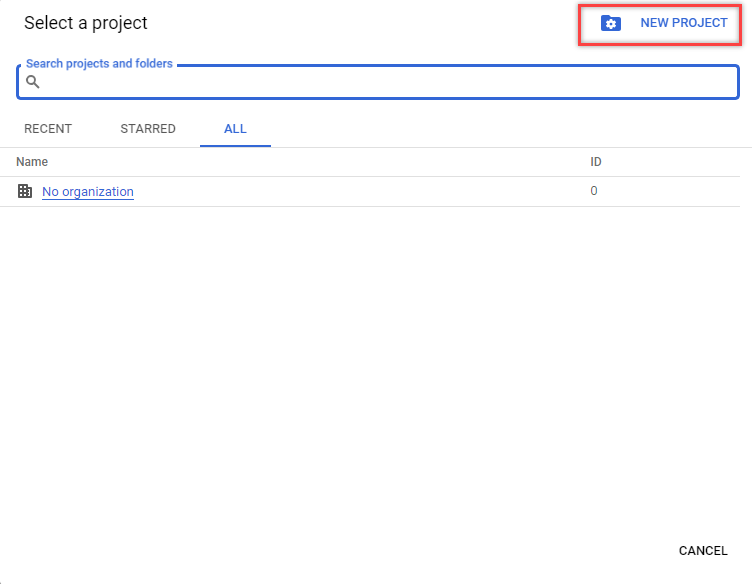
2: Click the Select a project drop-down menu on the left side of the page. A pop-up window appears on the screen.

3: Click New Project on the right side of the pop-up window.
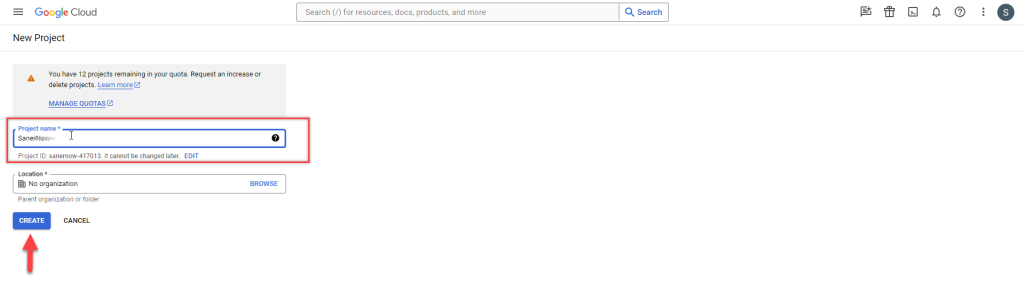
4: Fill in the Project name and click the Create button.
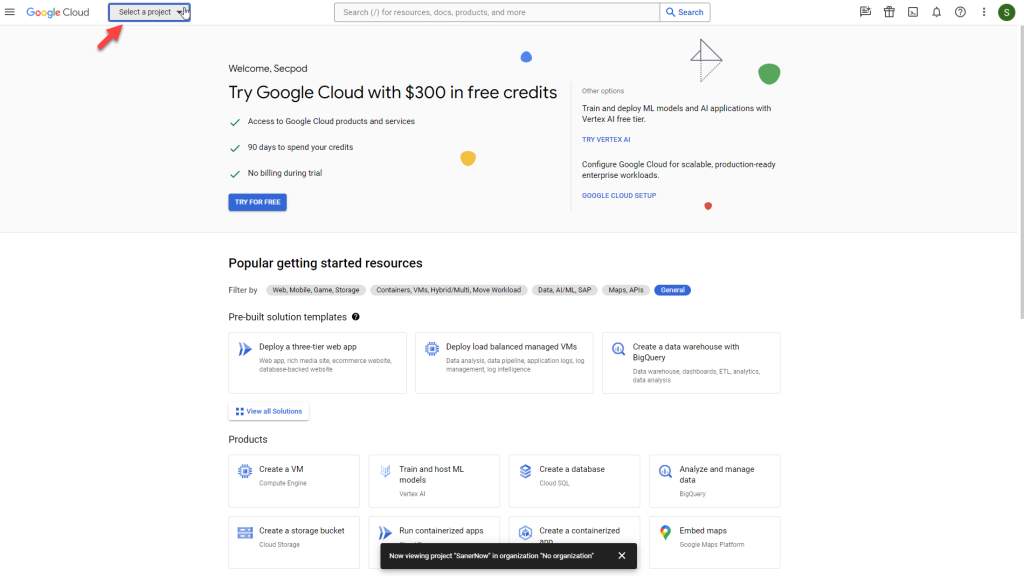
5: Once the project is created, click the menu icon on the left side of the page. Select the project you created.
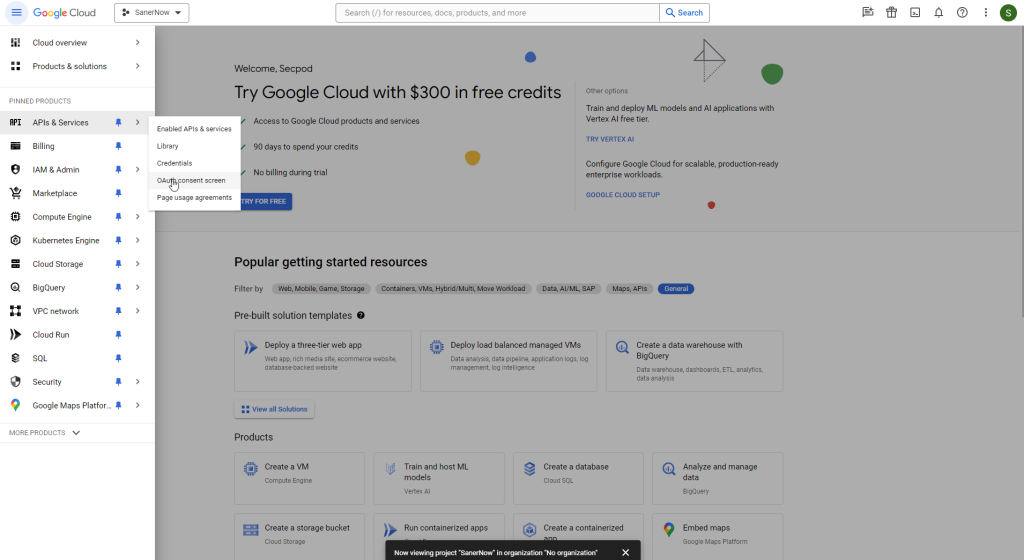
6: Click the ![]() icon on the left side of the page. Select APIs & Services à OAuth consent screen.
icon on the left side of the page. Select APIs & Services à OAuth consent screen.
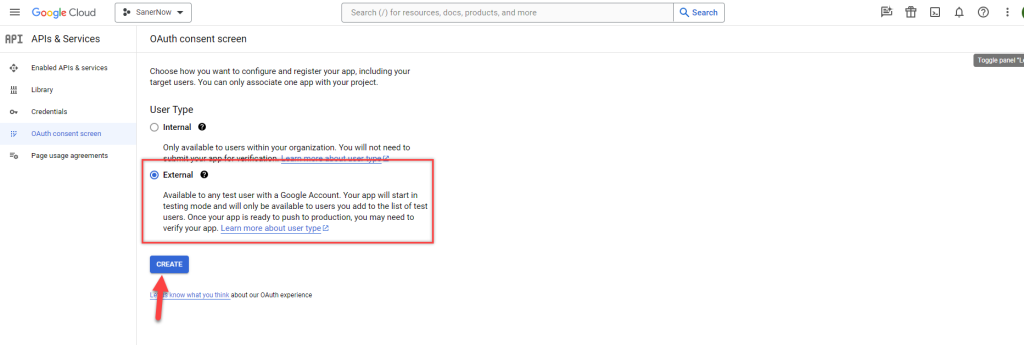
7: Select the User Type as External. Click the Create button.
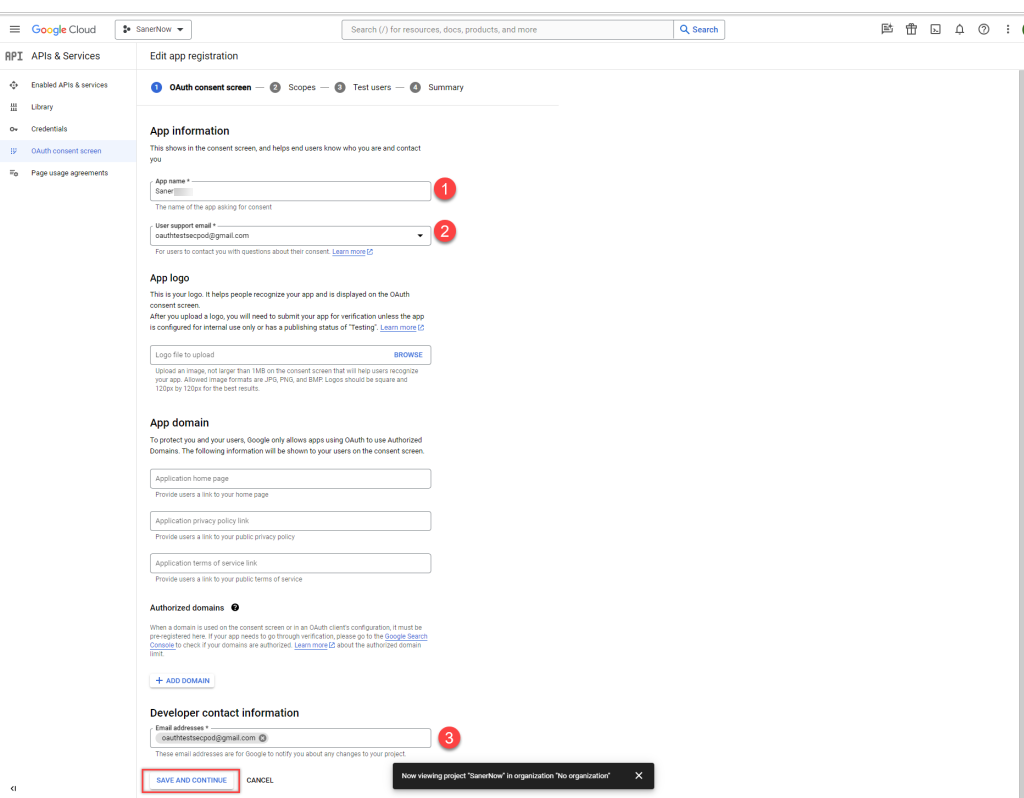
8: On the OAuth consent screen, provide the below inputs.
- App name – Provide the name of the app for which you are provisioning OAuth authentication.
- User support email — Provide an email where the users can contact you regarding their consent.
- Developer contact information — Provide an email for Google to contact you if there are any changes to the project.
Click the SAVE AND CONTINUE button to proceed to the next screen.
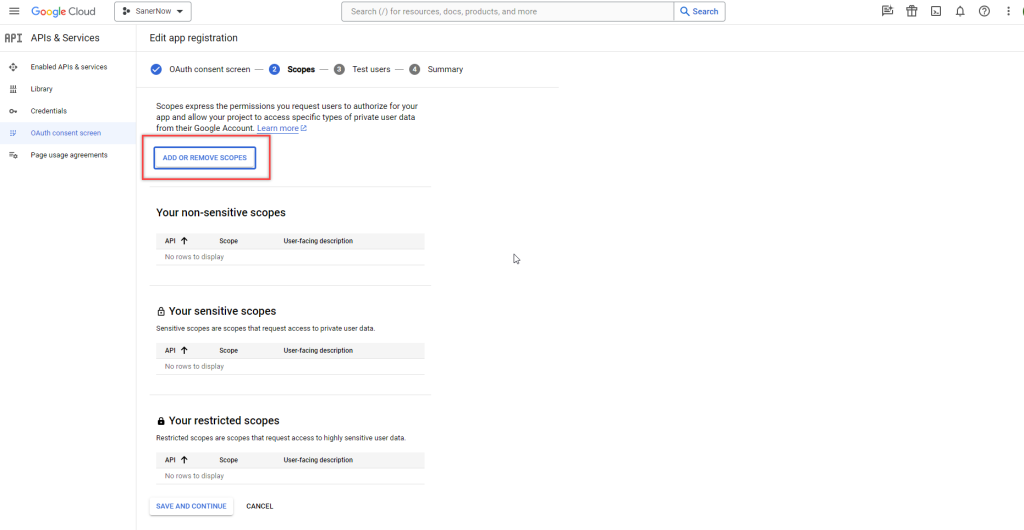
9: Click the ADD OR REMOVE SCOPES button. A new window appears on the right side of the screen.
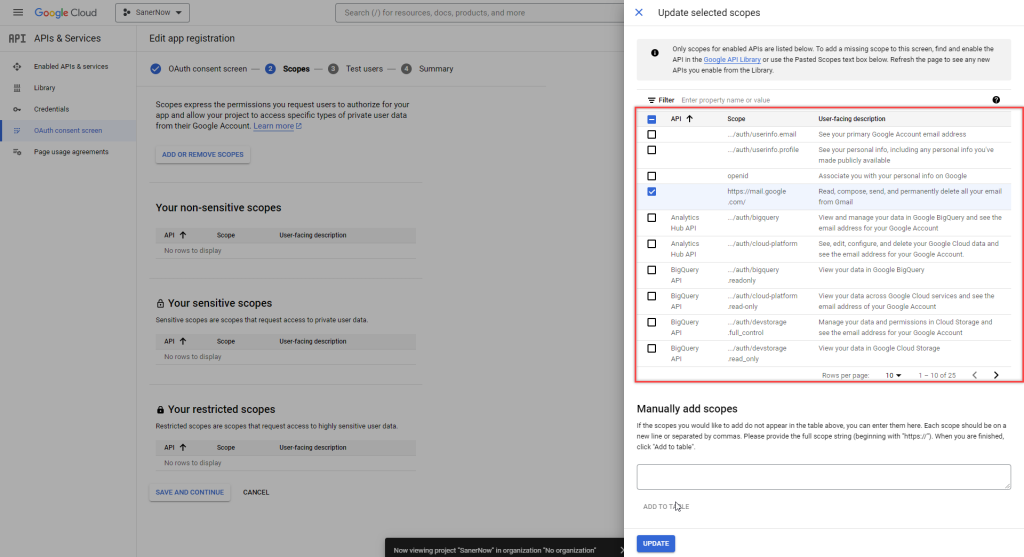
10: Add https://mail.google.com under the Manually add scopes section. Click the ADD TO TABLE button.

11: The newly added entry is displayed on the Filter table. Click the Update button.
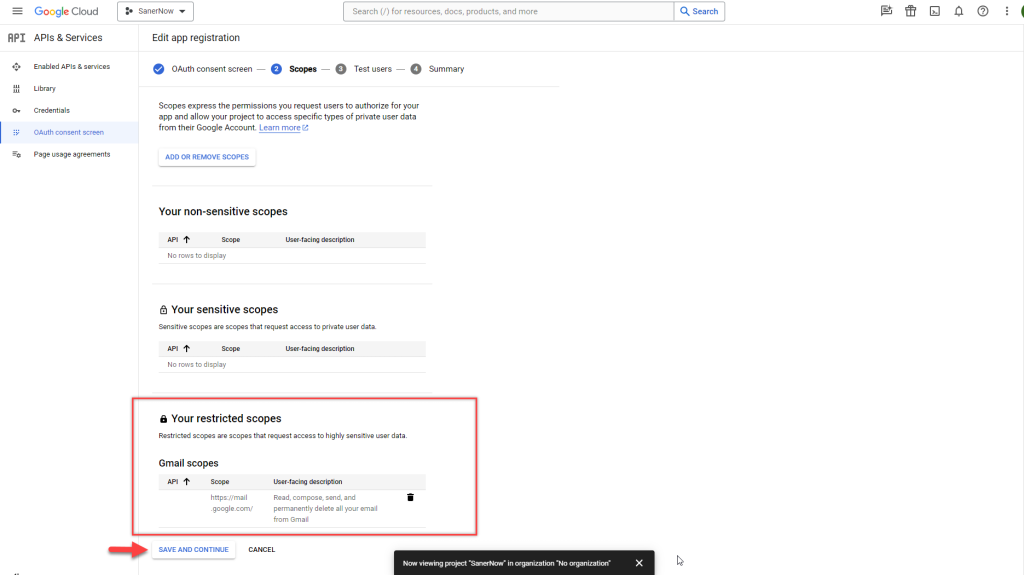
12: The newly added entry is under Your restricted scopes section. Click the SAVE AND CONTINUE button to proceed to the next screen.
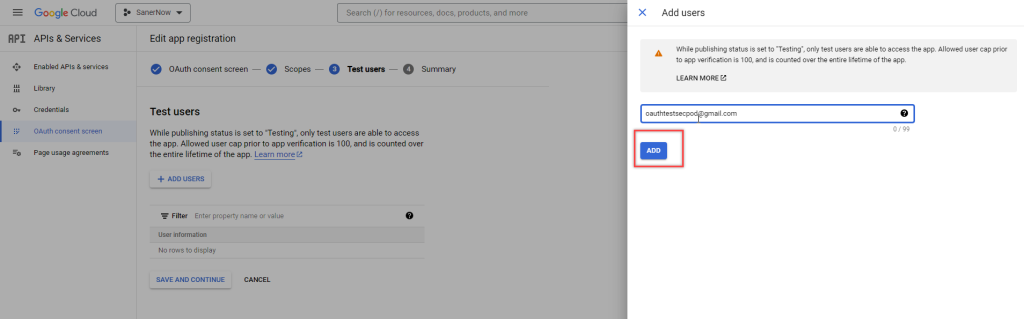
13: Click the ADD USERS button on the Test users screen. A pop-up window appears on the screen. Enter the email address you want to use to authenticate using the OAuth authentication. Click the ADD button.
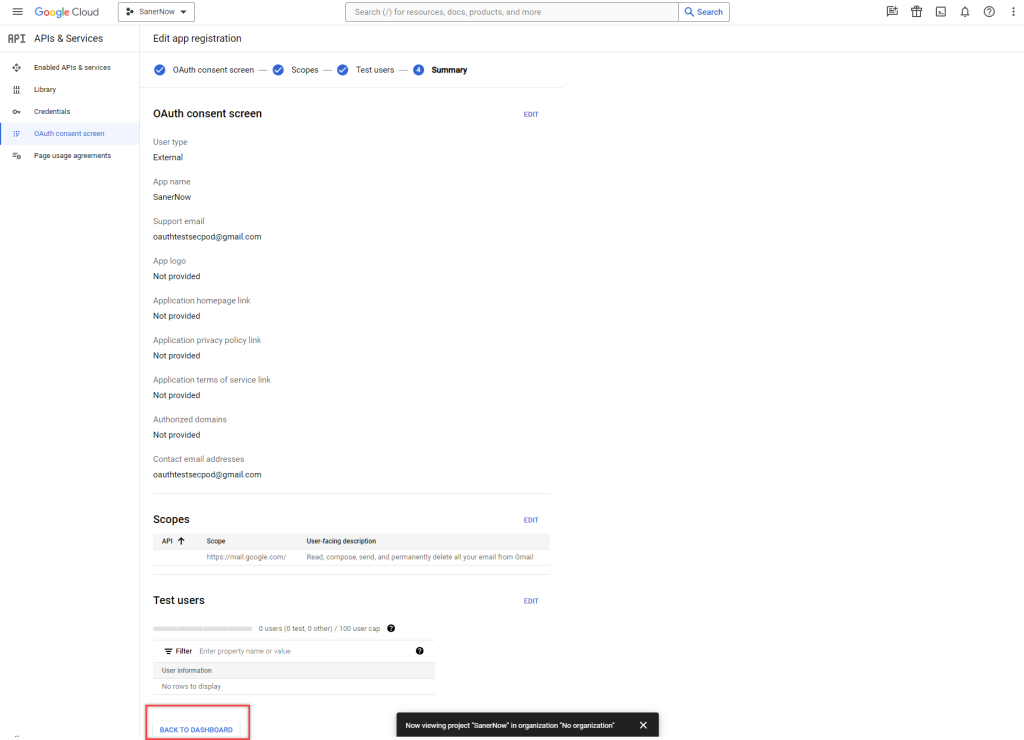
14: Click the BACK TO DASHBOARD button on the Summary page.
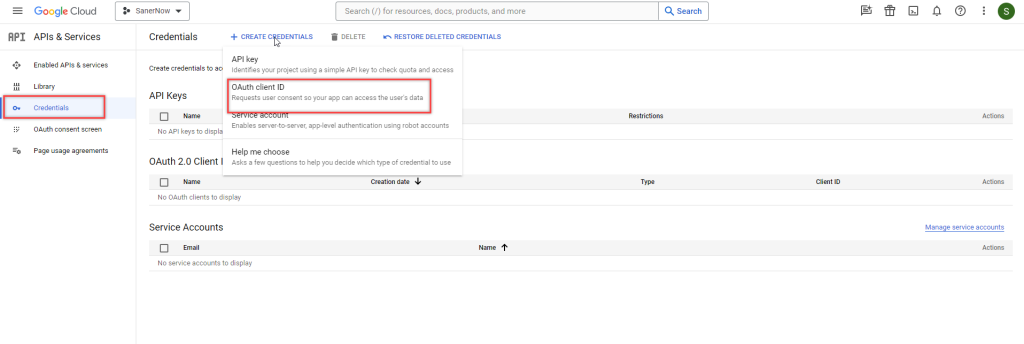
15: Click Credentials under the APIs & Services menu. Click the Create Credentials menu on the right side of the page and select OAuth client ID.
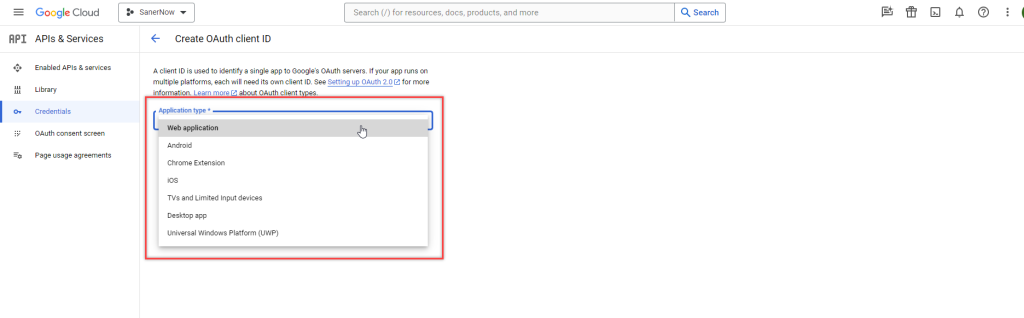
16: On the Create OAuth client ID, select Web application in the Application type drop-down box.
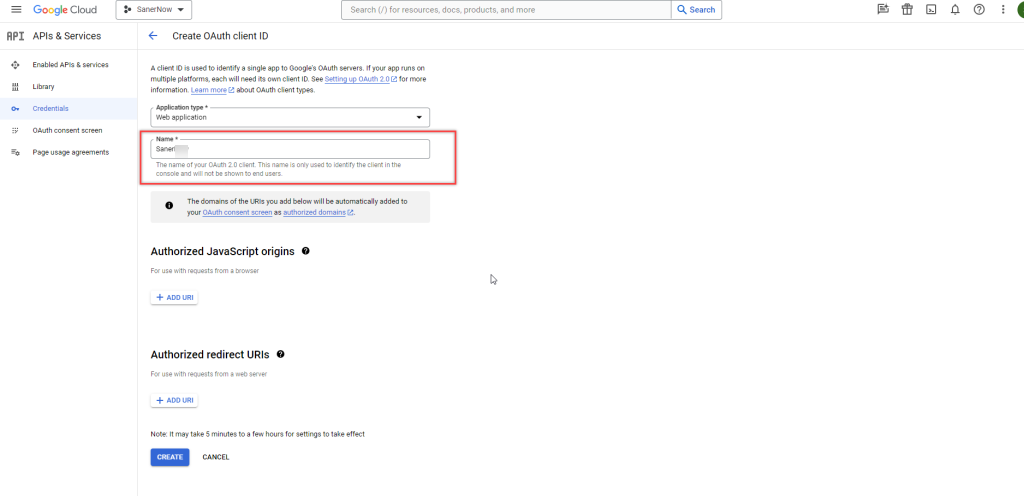
17: In the Name textbox, provide the input as ‘Saner.’
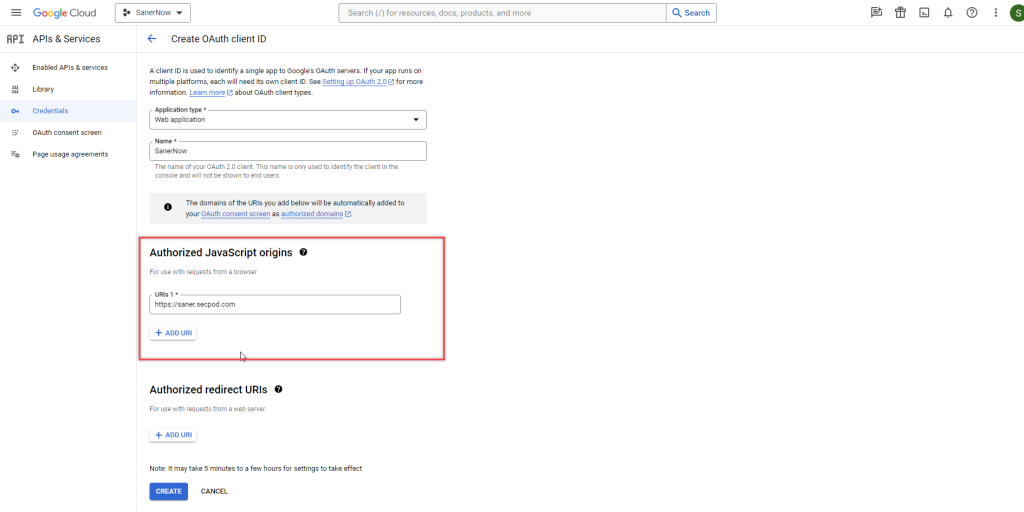
18: Click the ADD URI button under the Authorized Javascript origins section. Provide the input as https://saner.secpod.com
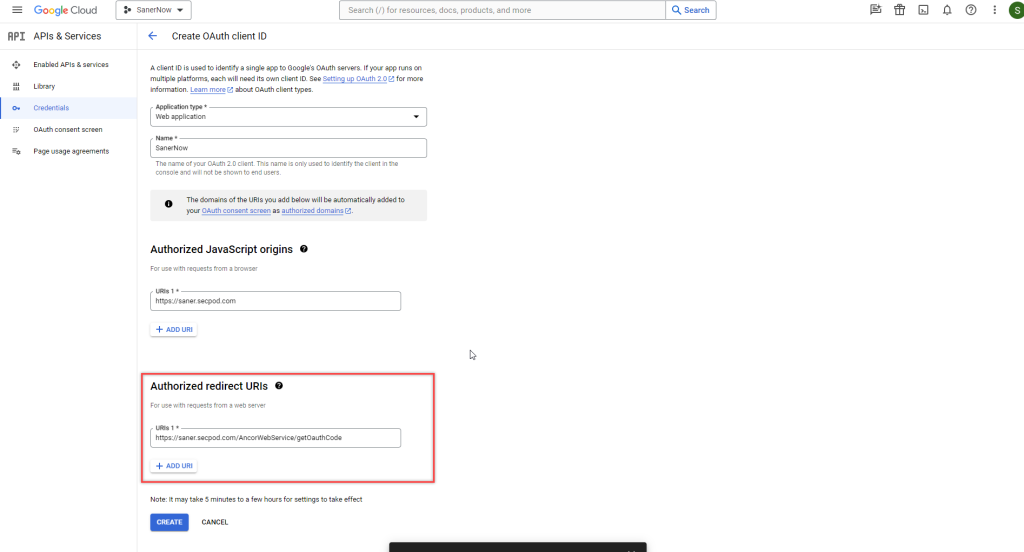
19: Click the ADD URI button under the Authorized Redirect URIs section. Provide the input as “https://saner.secpod.com/AncorWebService/getOauthCode”
20: Click the Create button. A pop-up window appears on the screen displaying the Client ID and Client secret code.
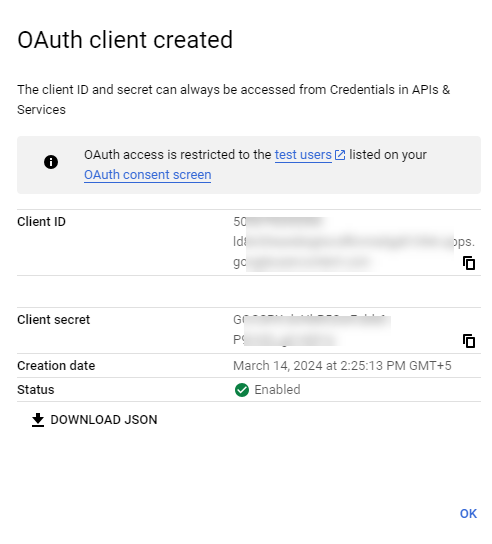
You need the Client ID and Client secret code while configuring Mail settings in Saner. Download the JSON and keep it handy.

