Pre-requisites
Make sure you log in as an administrator with the required Read and Write permissions to create IAM users, roles, and policies.
Create a New Account in Saner Cloud
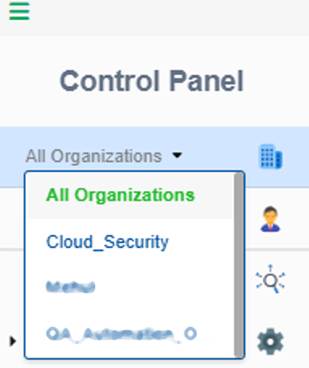
Step1: In the Control Panel, open the All Organizations drop-down menu and select the organization for which you want to create the new account.
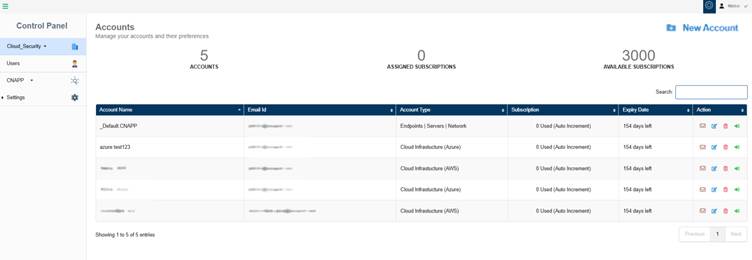
Step2: To create a new account, click the New Account button on the top-right of the page.
Step3: Complete all the details required to create the New Account.
- Provide the name of the cloud account
- Key in a valid email address
- Choose the account type “Cloud infrastructure” from the drop-down list
- Choose the cloud provider as “AWS” from the drop-down list
- Turn on the slider to provision the relevant tool for the account
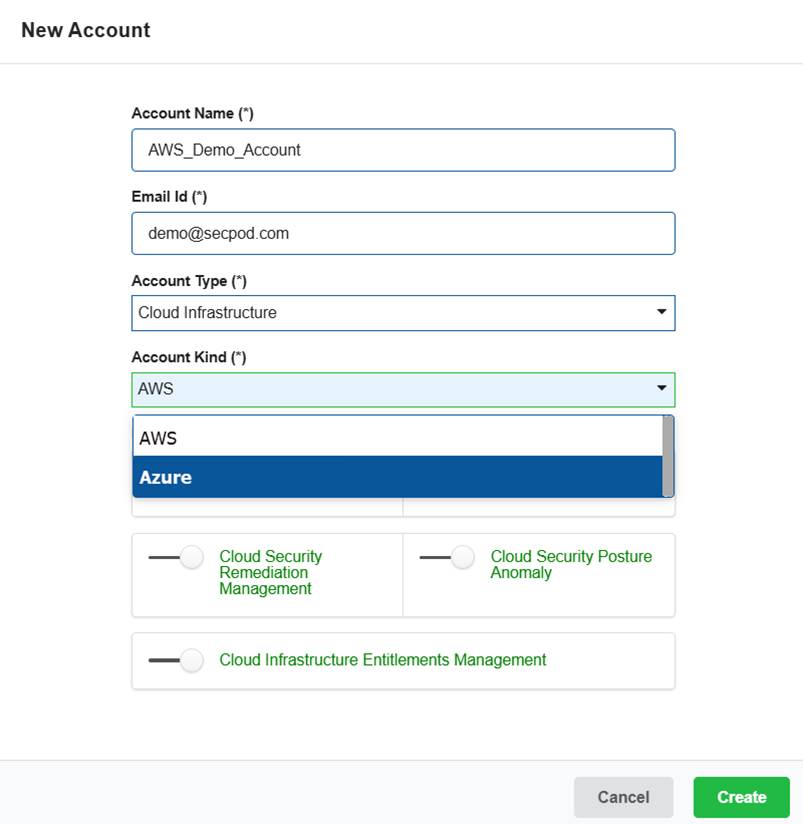
Step4: Click the Create button.
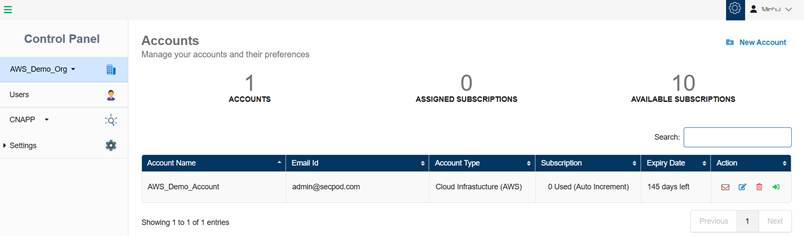
The newly created account displays in the Accounts page within a tabular format with the following details:
- Account Name
- Email ID
- Account Type
- Subscription
- Expiry Date
- Action
Note: In the Action column, you have the facility to set up the mail settings for the corresponding account, edit the current account details, delete the account, and redirect to the dashboard view of this account.
Setup
Step1: Login to Saner CNAPP platform.
Step2: Click on “Control Panel” and select the account that you have created following the steps in prerequisites.
Available Integration Methods
There are three ways to connect your AWS account with Saner CNAPP, listed in order of recommendation.
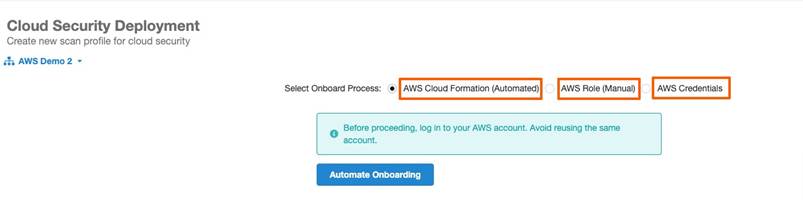
- AWS Role CloudFormation (Automatic)– Recommended
- Fastest and most secure method
- Automatically sets up all required permissions
- Minimal manual configuration needed
- AWS Role (Manual)
- Secure method with more control
- Requires manual setup of permissions
- Good for organizations with strict security policies
- AWS Access Keys– Least Recommended
- Uses access key credentials
- Higher security risk
- Requires manual key management
Method 2: AWS Role (Manual)
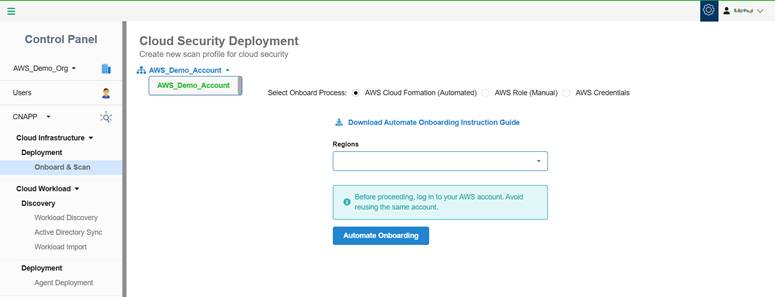
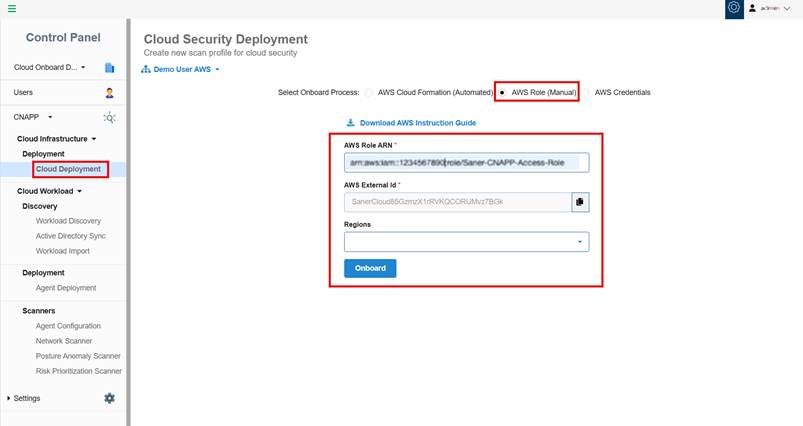
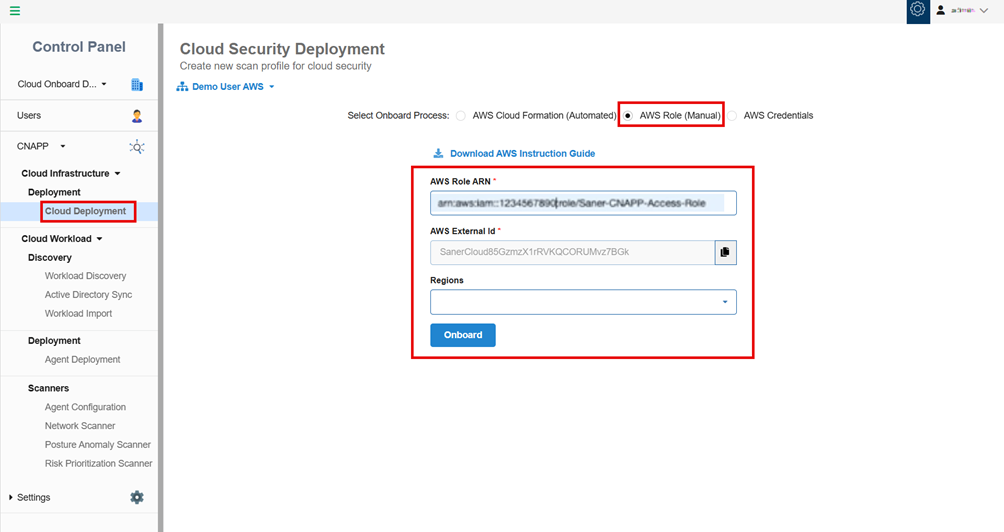
Step1: In Saner CNAPP, click on “Cloud Deployment”.
Step2: Select “AWS Role (Manual)” as shown in the following image and copy the “AWS External ID” that’s required for AWS account onboarding.
Step3: Log into your AWS account.
AWS Remediation Policy Creation
AWS remediation involves the creation of 2 Policies as described in the following steps:
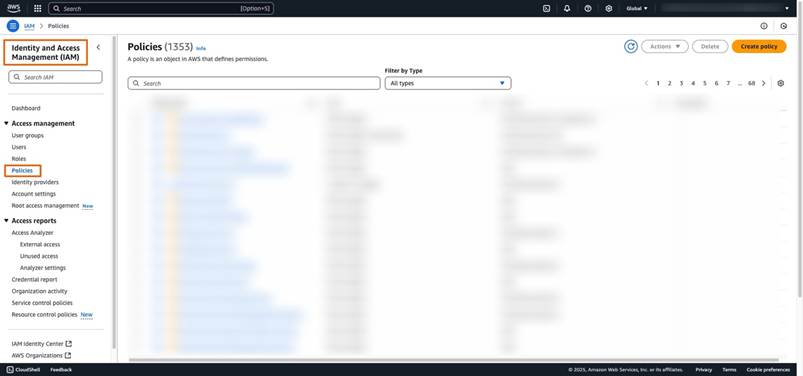
Step4: Navigate to “IAM” and click on “Policies” under “Access Management,” as shown in the following image:
Step5: Click on “Create Policy” and select “JSON,” that opens the “Policy Editor,” as shown in the following image:
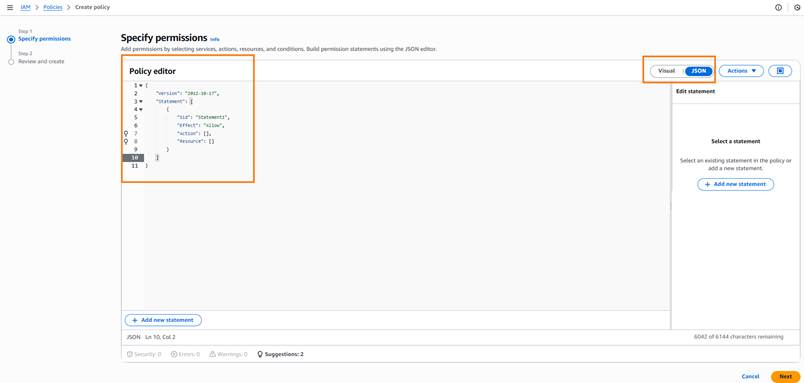
Create Policy 1
Step6: Click here to download the first policy. Open the JSON file, copy its contents, and paste the policy content into the “Policy Editor”. Click “Next”.
Step7: Enter the “Policy Name” as “Saner-CNAPP-Remediation-Policy” and provide the description, as shown in the following image:
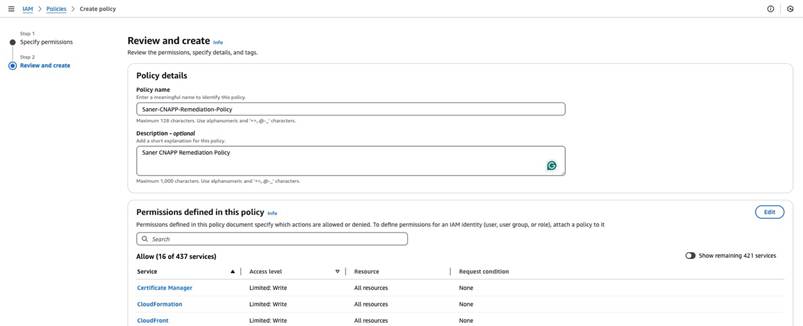
Step8: Add a new tag if necessary and click on “Create Policy.” Once the policy is successfully created, copy the “Policy Name” for future use.
Create Policy 2
Follow step 4 and 5 under AWS Remediation Policy Creation and continue with the steps listed below:
Step9: Click here to download the second policy. Open the JSON file, copy its contents, and paste the policy content into the “Policy Editor”. Click “Next”.
Step10: Enter the “Policy Name” as “Saner-CNAPP-Remediation-Policy-2” and provide the description.
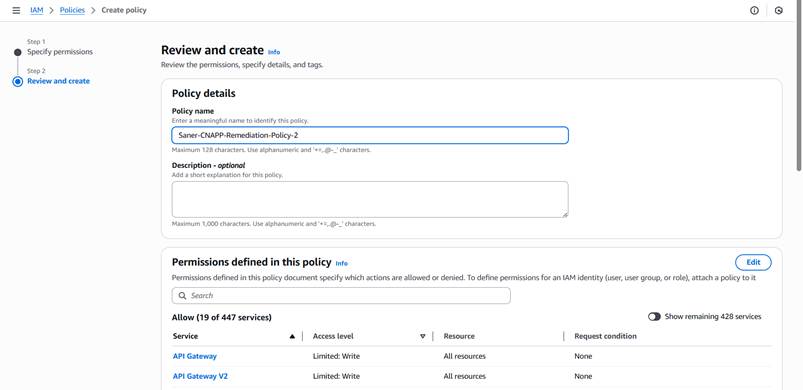
Step11: Add a new tag if necessary and click on “Create Policy.” Once the policy is successfully created, copy the “Policy Name” for future use.
AWS Saner CNAPP Role Creation
Step12: Navigate to “IAM” and click on “Roles” under “Access Management,” as shown in the following image:
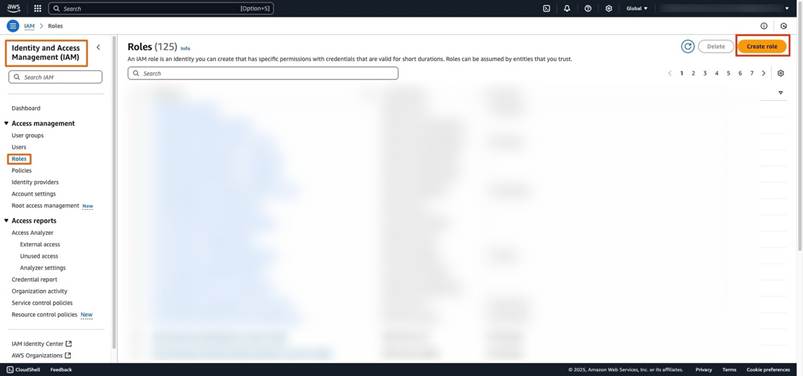
Step13: Click on “Create Role” (refer screenshot in step 12).
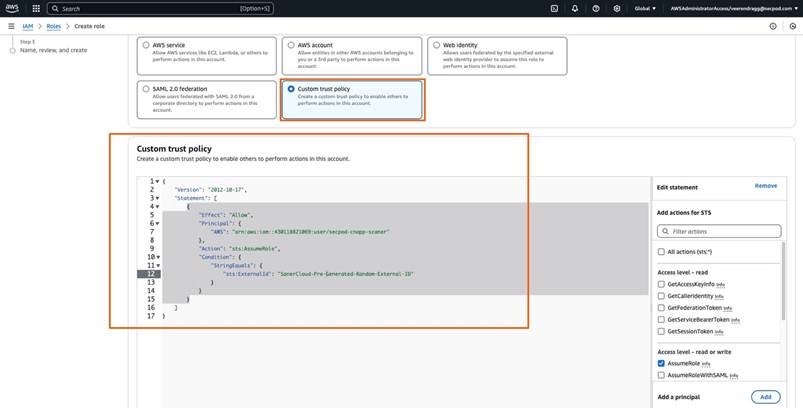
Step14: Select the “Custom trust policy” option, then copy and paste the trust policy from the following link: Click here. Replace the copied external ID(Refer Step 2) from Saner with “SanerCloud-Pre-Generated-Random-External-ID,” as shown in the following image, and click “Next”.
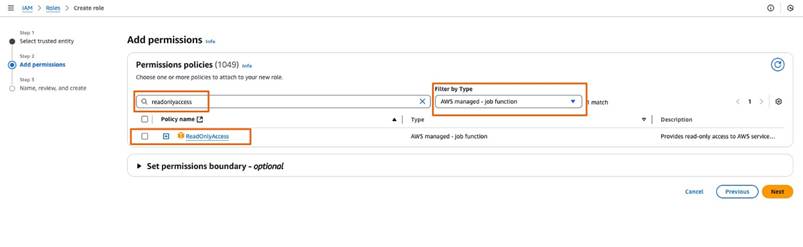
Step15: Search for and select the “ReadOnlyAccess” AWS managed policy, as shown in the following image:
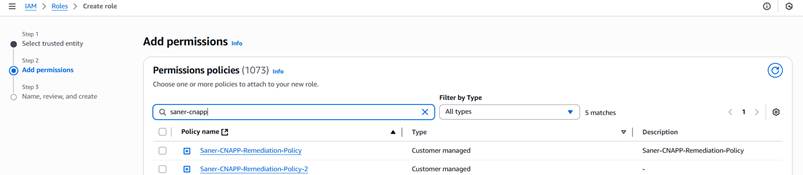
Step16: Search for and select the remediation policies Saner-CNAPP-Remediation-Policy and Saner-CNAPP-Remediation-Policy-2 that were created in the previous steps, as shown in the following image and click “Next”.
Step17: Enter the “Role Name” as “Saner-CNAPP-Access-Role” and provide an appropriate description, as shown in the following image:
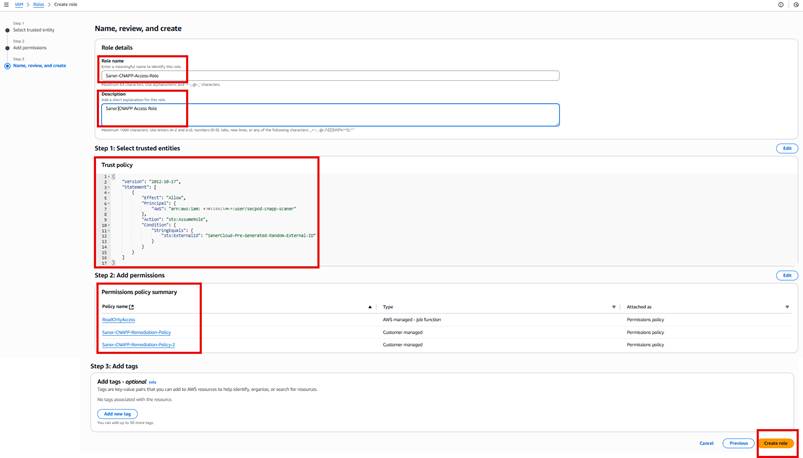
Step18: Review all the entered details and click “Create Role”(refer image in step 17) to create the role.
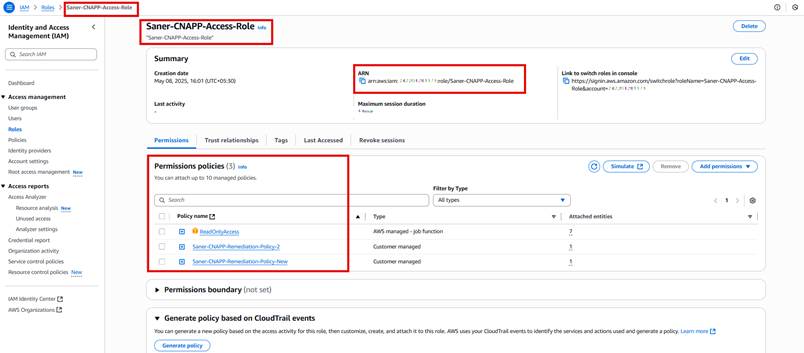
Step19: After the role is successfully created, search for the newly created role, “Saner-CNAPP-Access-Role,” as shown in the following image:

Step20: Click on the “Saner-CNAPP-Access-Role” and copy the role ARN, example: “arn:aws:iam::xxxxxxxx:role/Saner-CNAPP-Access-Role”, as shown in the following image:
Step21: Go to the Saner Cloud Deployment page, paste the copied ARN into the “AWS Role ARN” field, choose a Region as preferred(drop-down list) and click the “Onboard” button. This onboards the AWS account into Saner, as shown in the following image:
Step22: You have now completed the AWS Role Manual Onboarding.
The Scan Configuration page opens automatically for you to make the necessary settings to initiate the scan. You have an option to:
- Update one or more regions by selecting from the drop-down list. Note that if you do not choose any region, then the system considers all the regions automatically for scanning.
- Validate credentials(Test Credentials button) to prevent scan failures due to authentication issues
- Setup the Scan Schedule run as needed
- Start the scan or Pause the scan and then resume it from the point where it was paused
Best Practices
- Regularly review and audit access permissions
- Keep access keys secure and rotate them regularly
- Document any custom configurations
- Regularly verify integration status
Troubleshooting Guide
If you encounter any issues during the onboarding or deployment process, follow these steps to diagnose and resolve them efficiently.
Step1: Verify All Permissions Are Correctly Set
Ensure that the necessary IAM permissions are granted for the user or role performing the deployment. Missing or insufficient permissions may cause failures during onboarding.
- Check IAM role and policy assignments
- Ensure the user has administrative privileges or the required set of permissions
- Confirm that AWS services involved in the deployment have the necessary permissions
Step2: Clean Up Previous Failed Onboarding Attempts
If you are retrying the onboarding process due to a previous failure, make sure all remnants of the prior attempt are removed before trying again.
- Delete any incomplete AWS CloudFormation stacks
- Remove any IAM roles or policies that may have been created in the failed attempt
- Ensure there are no residual configurations that could cause conflicts in a new attempt
Step3: Verify Deployment in the Correct AWS Region
AWS services are region-specific, and deploying in an incorrect region can lead to failures.
- Double-check that you are operating in the intended AWS region
- Verify the selected region in the AWS Management Console or CLI
- Ensure that all required AWS resources are available in that region
Step4: Confirm Required Policies Are Attached to the User
The onboarding process requires the user executing the deployment to have the correct IAM policies assigned. The required privileges include:
- AWS CloudFormation Execution – Ability to create, update, and delete CloudFormation stacks
- IAM Role and Policy Creation – Permissions to create and manage IAM roles and policies
- Lambda Execution – Permissions to deploy and execute AWS Lambda functions and reach to our server to acknowledge successful onboarding.
- Service-Specific Permissions – Depending on the services being configured, additional permissions may be needed for scan for which policy is automatically created in cloud formation, manually with role and policy creation steps (e.g., read S3 configuration, EC2, Security Groups, etc. or patching permissions such as create, update or delete.)
Use the AWS IAM Console or AWS CLI to confirm that the logged-in user has the required permissions before proceeding.
Step5: Contact Support if Issues Persist
If you have verified the above steps and are still facing issues, reach out to the support team for assistance.
- Provide detailed logs and error messages
- Mention the AWS services and region you are working with
- Describe the steps already taken for troubleshooting

