Saner PM tool will detect and identify both security and non-security patches for the devices that exist in your account. However, there might be scenarios in which you want PM tool to exclude certain patches from being applied to devices.
PM tool allows you to exclude patches. And you can do this namely at – Account, Group(s), and Device(s) level.
Follow the below mentioned steps to exclude patches at Account, Group(s), and Device(s) levels.
Step 1: On the PM Dashboard, click on Missing Patches which is located on the top section of the page.
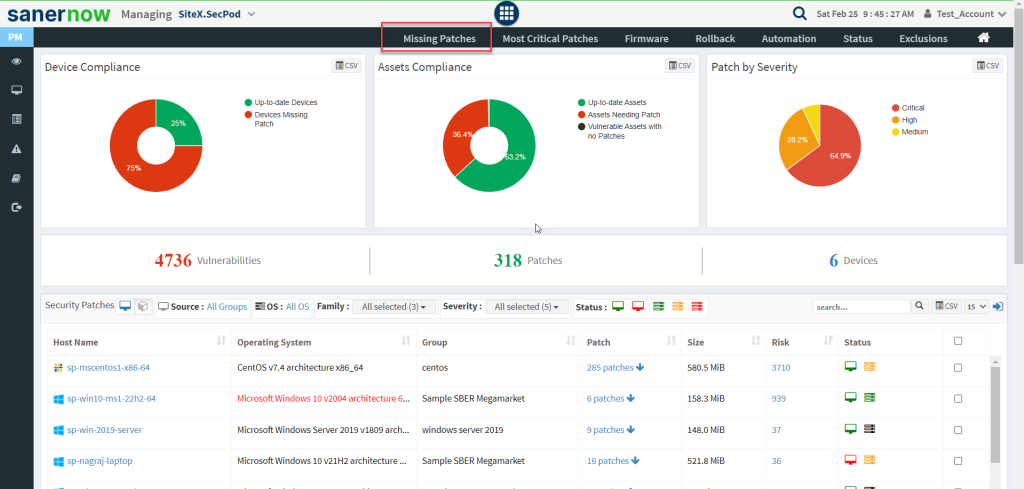
Step 2: You will be redirected to the Missing Patches page. Here, you can see all the missing patches that include both security and non-security ones.
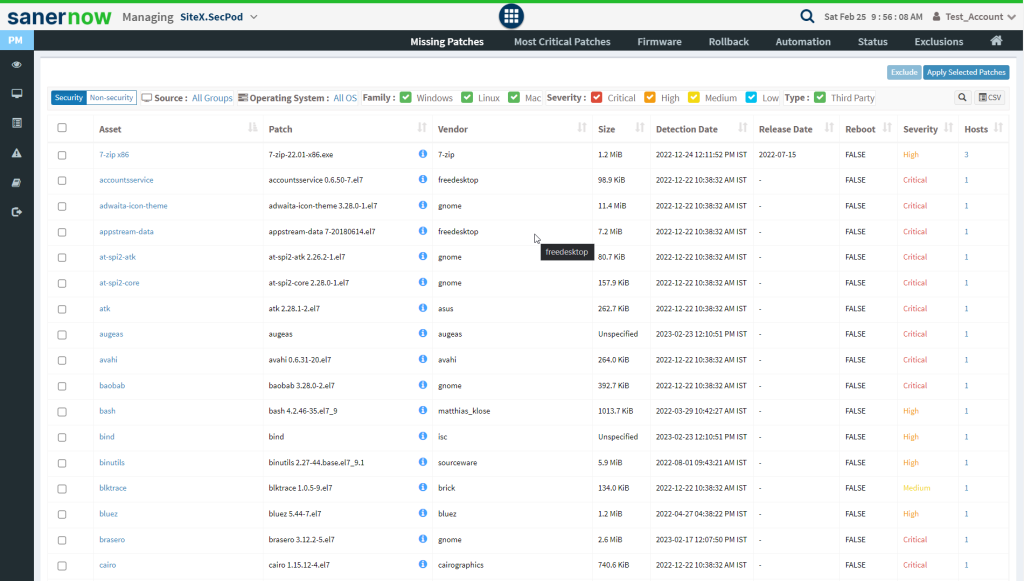
Step 3: Select the patches you want to exclude from being applied and then click on the Exclude button located at the top right corner.

Step 4: You will be presented with a new pop-up window once you click on Exclude button.
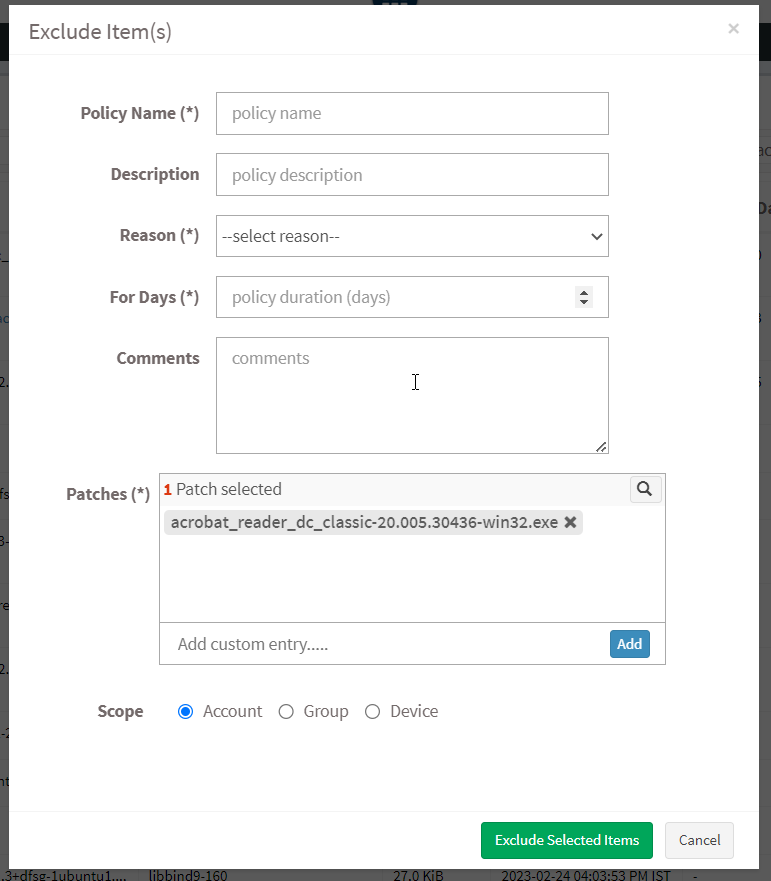
Step 5: You need to fill in information in all the textboxes marked with an asterisk (*). Fill in the required info in the below text boxes.
- Policy Name – Provide a name for the policy you are creating.
- Reason – You need to select the reason you want to exclude the selected patches. Select one of the reasons presented by the drop-down box. The following reasons are available for you to choose.
- Not Applicable
- Risk Accepted
- For Days – Enter the number of days you want PM tool to exclude the patches.
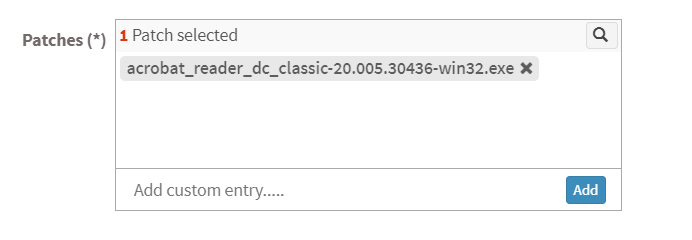
- (You can exclude the vulnerability for minimum 1 day and a maximum for 999 days.) Patches – Here, you will see all the patches you selected to be excluded. At the same time, you can manually specify the name of the patch you want to be excluded using the Add button. If the patch you specified exists with the same name, it will be excluded.
- Scope – You need to select the scope. You can choose between Account, Group, and Device.

- Account – When you select Account, the selected patches will be excluded from all the devices that are part of the Account till the date specified by you.
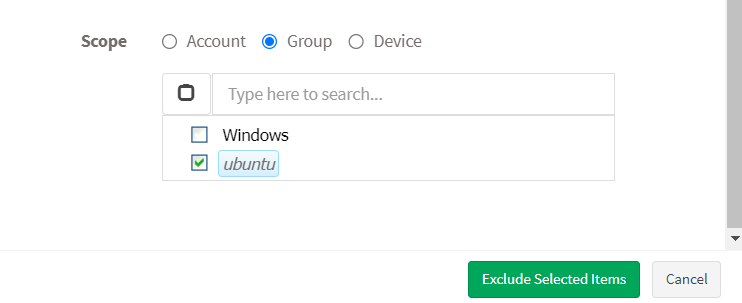
- Group – When you select Group, the selected patches will be excluded for all the devices that belong to the selected Group(s) till the date specified by you. (You can select multiple groups).
- Device – You can select individual devices belonging to various groups to exclude the selected patches till the time specified by you. You can also select multiple devices belonging to various groups to exclude selected patches from them.
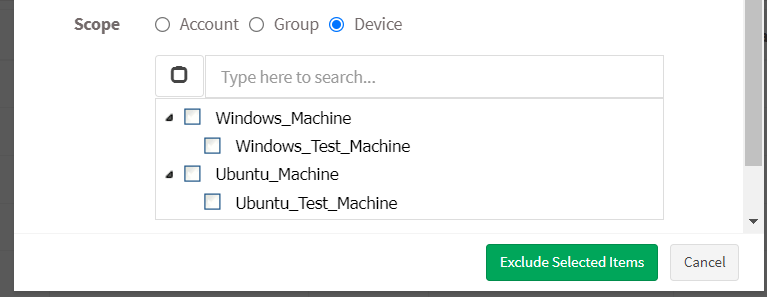
Step 7: Once you have selected the Scope, click on Exclude Selected Items button. PM tool will run a scan and exclude the selected patches from applicable devices.
Note: In PM tool, there are multiple ways to exclude patches. For instance, you can exclude patches from Missing Critical Patches page and from the PM Dashboard. However, you need to follow the same steps mentioned in this guide irrespective of which page you use to exclude patches.
How to Enable/Disable, Edit and Delete an existing Exclude Policy in PM tool
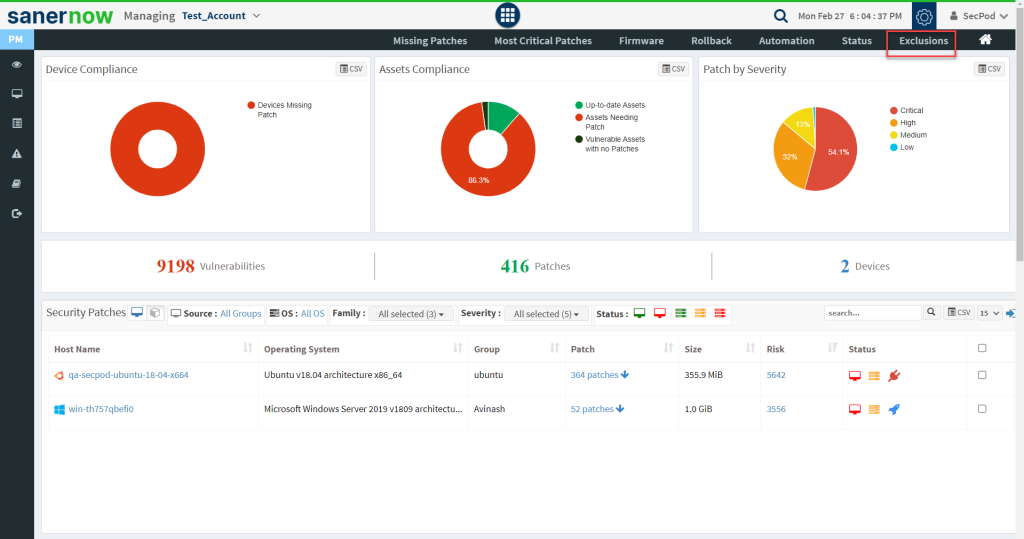
Step 1: On the PM Dashboard, click on Exclusions located at the top right corner of the page.
Step 2: You will be presented with a new screen. You can see all the Exclude Policies that exist in the account.
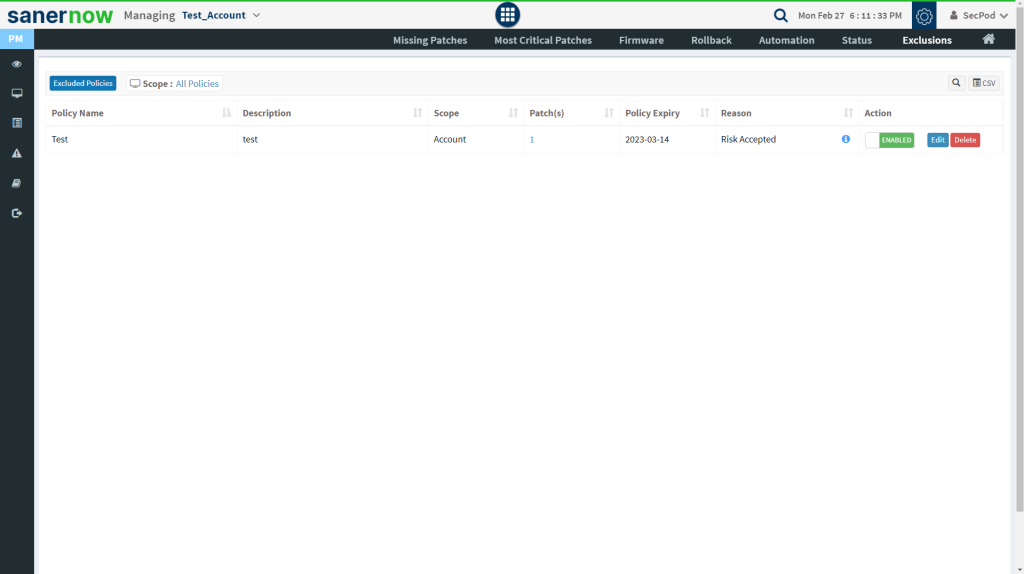
The last column on this page – Action presents you with three buttons namely – a toggle button -Enable /Disable, Edit, and Delete buttons that can be used to control Exclude policies.
| Button | Usage |
 | Using this button, you can enable the Exclude policy. |
 | Using this button, you can disable the Exclude policy. |
 | Using this button, you can edit the Exclude policy. |
| Using this button, you can delete the Exclude policy. |


