Saner Cloud offers built-in rules that assist in fixing misconfigurations promptly after they are detected. When the system is set up for automated remediation, the rule engine activates and manages the entire patch remediation process, from scanning to deployment, automatically.
The ability to schedule patches on a daily, weekly, or monthly basis eliminates the need for manual intervention, allowing for effortless completion of patch remediation tasks.
Additionally, you can modify the automation rules at any time, pause or resume them as needed, or remove the existing rule and create a new configuration from scratch.
Step1: Specify the Tool for Which You Want to Setup the Automation
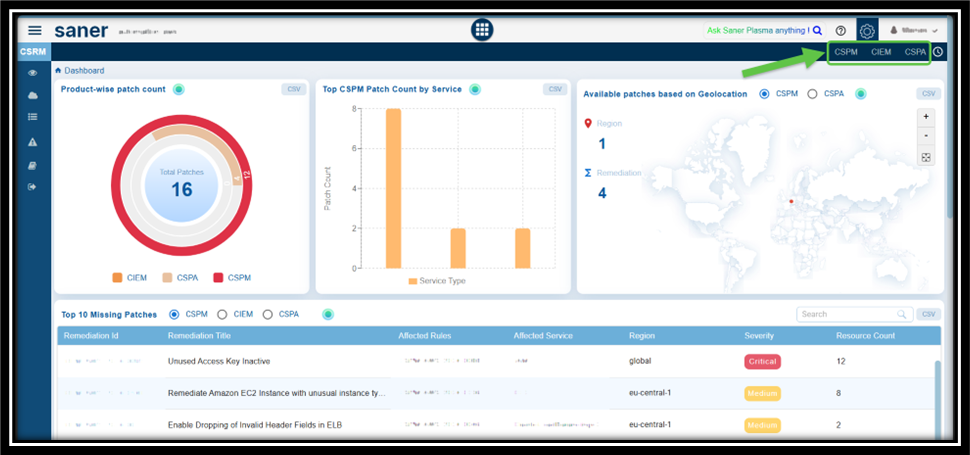
From the top-right of Saner CSRM Dashboard page, choose the relevant tool — CSRM, CSPM, CIEM for which you to configure the automation remediation.
For explanation purpose, CSPM is taken as an example.
Step2: Select the Remediation ID(s) that You Want to Create the Automation Task For
Click the Automation link on the top-right of the page.
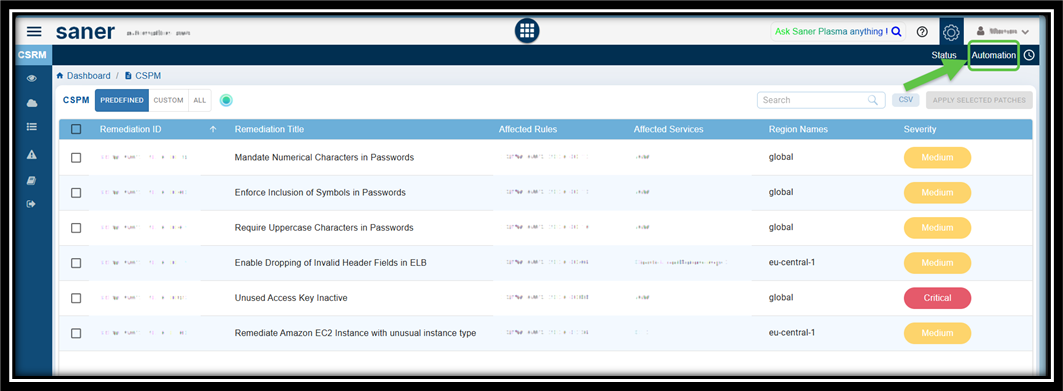
Select the Remediation ID from the CSPM Automation page and click the Create Automation Rule button. The Create Automation Task window opens.

Step3: Choose the Rem Template to Apply
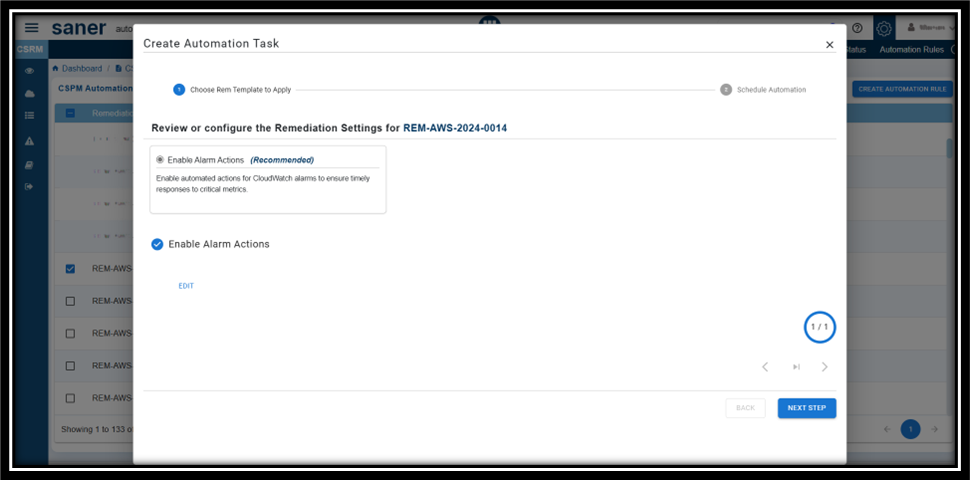
Within the Create Automation Task window, review the remediation settings for the id you selected. Make changes if any and proceed to the next step.
Step4: Provide the Name and Description to Your Automation Task
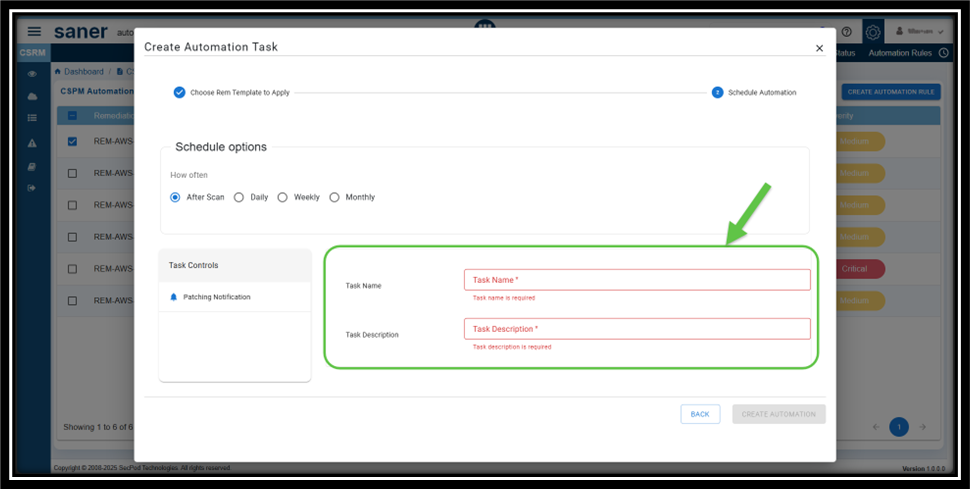
From the Create Automation Task window, click Next Step and proceed to provide the Name and Description for your automation task.
Step5: Setup the Schedule Options for Patching Process
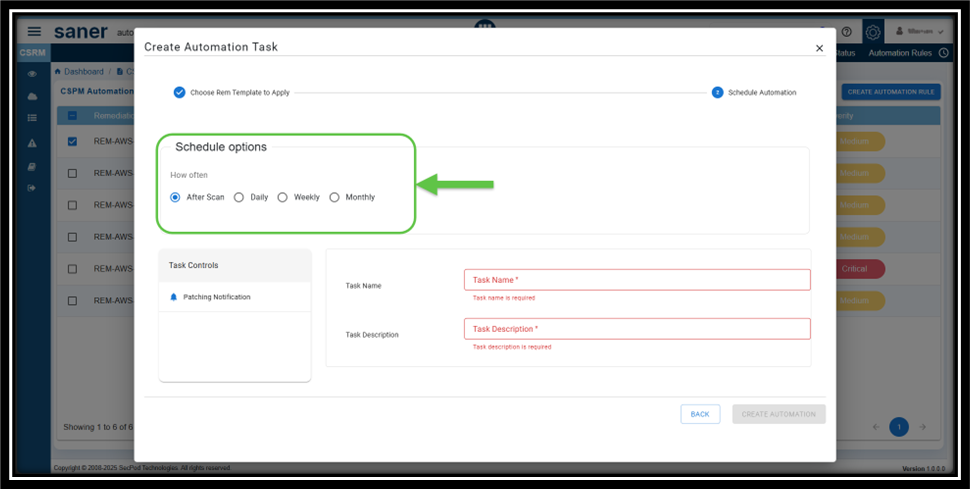
Setting up the automated patching, ensures that the remediation takes at scheduled intervals.
You can set up the scan to run on a daily or recurring basis and also alternate between weekly or monthly intervals.
Here’s a breakdown of how often the remediation takes place:
- After Scan: Determines that the remediation takes place after every scan
- Daily: The remediation takes place every day at the same time you specify
- Weekly: The sync runs for the specified week, day(s) at the same time
- Monthly: The sync takes place once a month, on the specified week(s), day(s), and time
Step6: Configure to Receive Alerts on Patching Progress
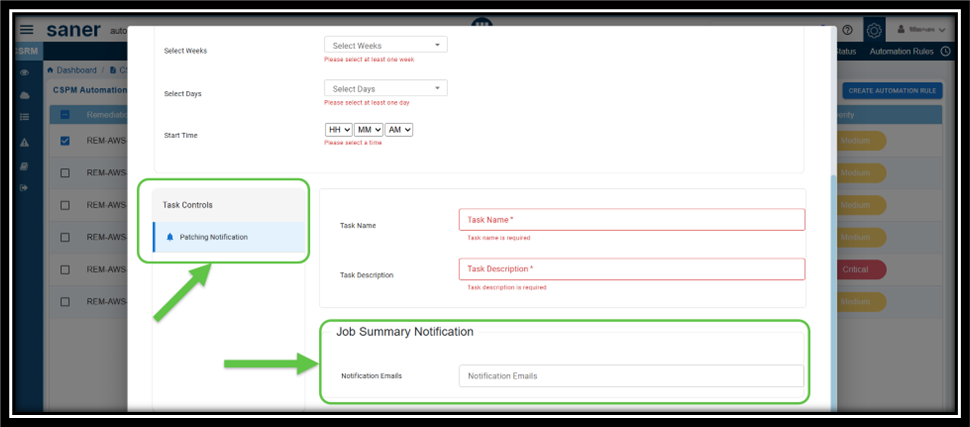
From the Task Controls panel, click the Patching Notification button. The Job Summary Notification panel gets enabled for you to provide the recipient email ids.
Step7: Complete Automation Configuration
After providing all the configuration details to setup the remediation automation, go ahead and click the Create Automation button.
Perform Additional Operations
You have an extended capability to view, update, pause or resume, delete automation tasks as needed.
View the Newly Created Automation Configuration for Your Rem ID
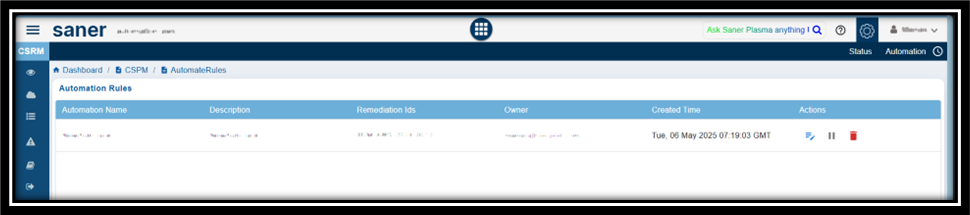
The newly created automation task displays in the Details view. From this view, you have an option to update, pause/resume, or delete the automation task for the relevant Remediation ID(s).
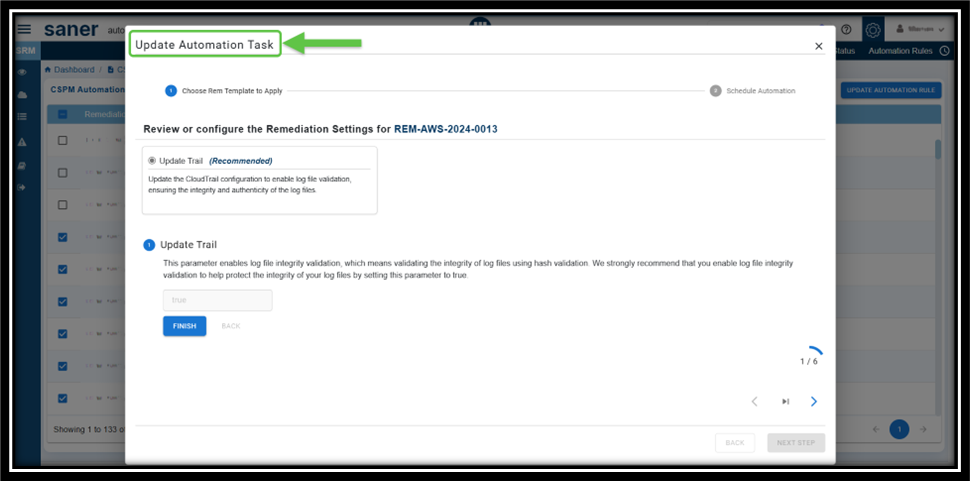
Update Automation
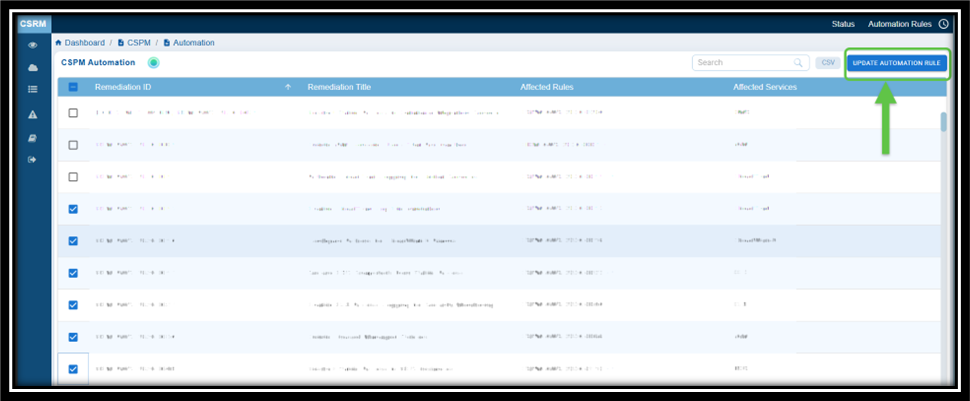
Step1: From the Automation Rules list, just click the Update button under the Actions column. The Update Automation Task window opens for you to make the changes.

Step2: The page containing all the Remediation IDS display with the button to update automation rule enabled. Select the needed remediation ids(enable checkbox) and click the Update Automation Rule button.
Step3: The Update Automation Task window opens for you to make the changes.
Pause or Resume Automation
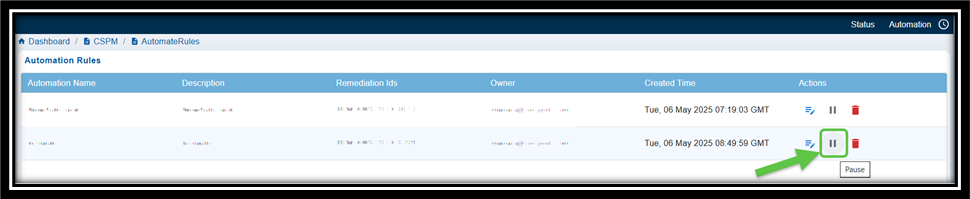
Click the button to pause or resume the automation task for a remediation from the Automation Rules page.
Remove(Delete) the Automation

You have the facility to remove the automation rule for any remediation and create one all over again.

