Overview
Remote Scripting in Saner Endpoint Management (EM) allows you to securely run and manage custom scripts across Windows, Linux, macOS, and AIX endpoints from a central location.
Remote Scripting enables you to automate tasks, troubleshoot issues, and manage endpoints at scale. It supports multiple scripting languages and includes a built-in editor, version control, and role-based approvals.
Remote Scripting capabilities:
- Run scripts on Windows, Linux, macOS, and AIX endpoints.
- Use the built-in script editor with support for multiple scripting languages.
- Track and manage changes with version control.
- Enforce secure execution with role-based approvals.
- Schedule scripts to run on demand, at a set time, or on a recurring basis.
- View detailed audit logs for every script execution.
- Use the central script library to access predefined scripts.
Remote Scripting gives you the control and flexibility to automate operations and keep endpoints up to date, all from a centralized interface.
Prerequisites
- Saner Agent version 6.5 or later is required to use the Remote Scripting feature.
- Active subscription to Saner EM (Endpoint Management) tool.
Accessing Remote Scripting
Follow the steps below to access Saner Remote Scripting tool.
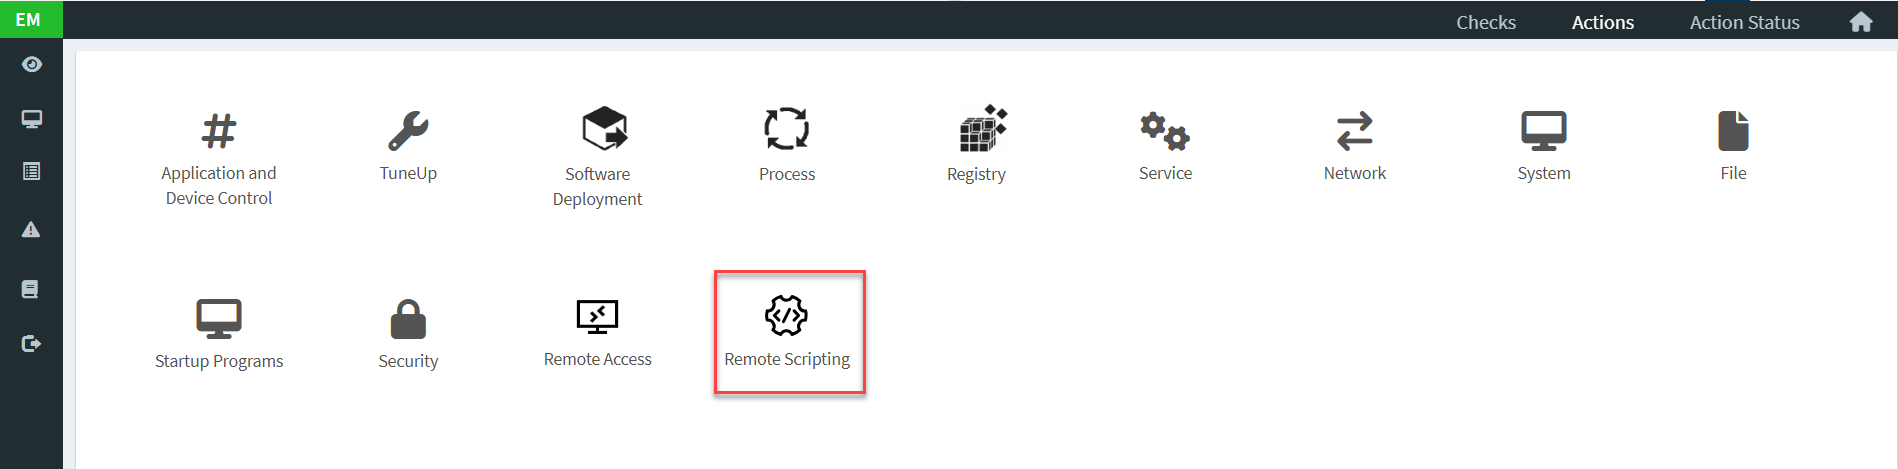
1: Launch the Saner EM (Endpoint Management) tool. On the Saner EM dashboard, click the Actions button on the top right side of the page.
2: Click the Remote Scripting icon  to launch the Remote Scripting tool dashboard.
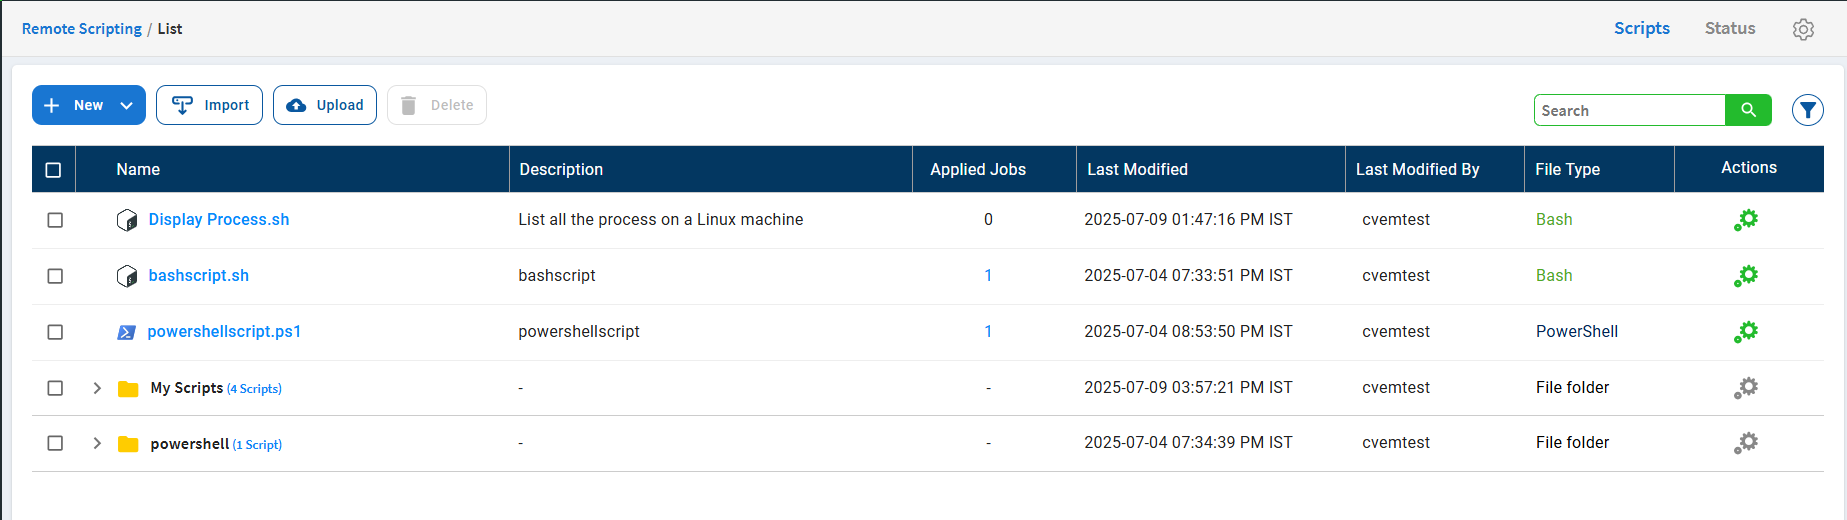
You are presented with the Remote Scripting tool dashboard.
Explore Saner Remote Script Editor Features
The Saner Remote Script Editor offers an integrated interface to create, edit, and manage scripts that run on remote endpoints. It supports multiple scripting languages and is tightly integrated with the Saner platform to simplify deployment and execution.
You can write scripts in the following languages:
- Batch (.bat)
- PowerShell (.ps1)
- Bash (.sh)
- Registry (.reg)
- Python (.py)
- VBScript (.vbs)
- JavaScript (.js)
Saner Remote Scripting Editor provides additional features that help you manage the appearance of the editor and provide AI assistance to assist you with the scripts.
Font Size
You can adjust the font size in the editor by clicking the font size ![]() icon in the top-left corner of the scripting editor.
icon in the top-left corner of the scripting editor.
Themes
Saner Remote Script Editor supports multiple themes, including Light, Dark, and High Contrast. To change the theme, click the ![]() theme icon in the top-left corner of the editor.
theme icon in the top-left corner of the editor.
Saner AI Assistant
The Saner Remote Script Editor includes a built-in AI Assistant that provides insights into your scripts. To use it, click the AI Assistant ![]() icon in the top-left corner of the editor.
icon in the top-left corner of the editor.
Create a new script using Saner Remote Scripting
Follow the steps below to create a new script using Saner Remote Scripting.
1. On the Remote Scripting Dashboard, click the New button.
A drop-down list appears.
2. Click ![]() New Script.
New Script.
The Script Editor page opens.
3. In the Language drop-down list, select the language you want to write the script in.
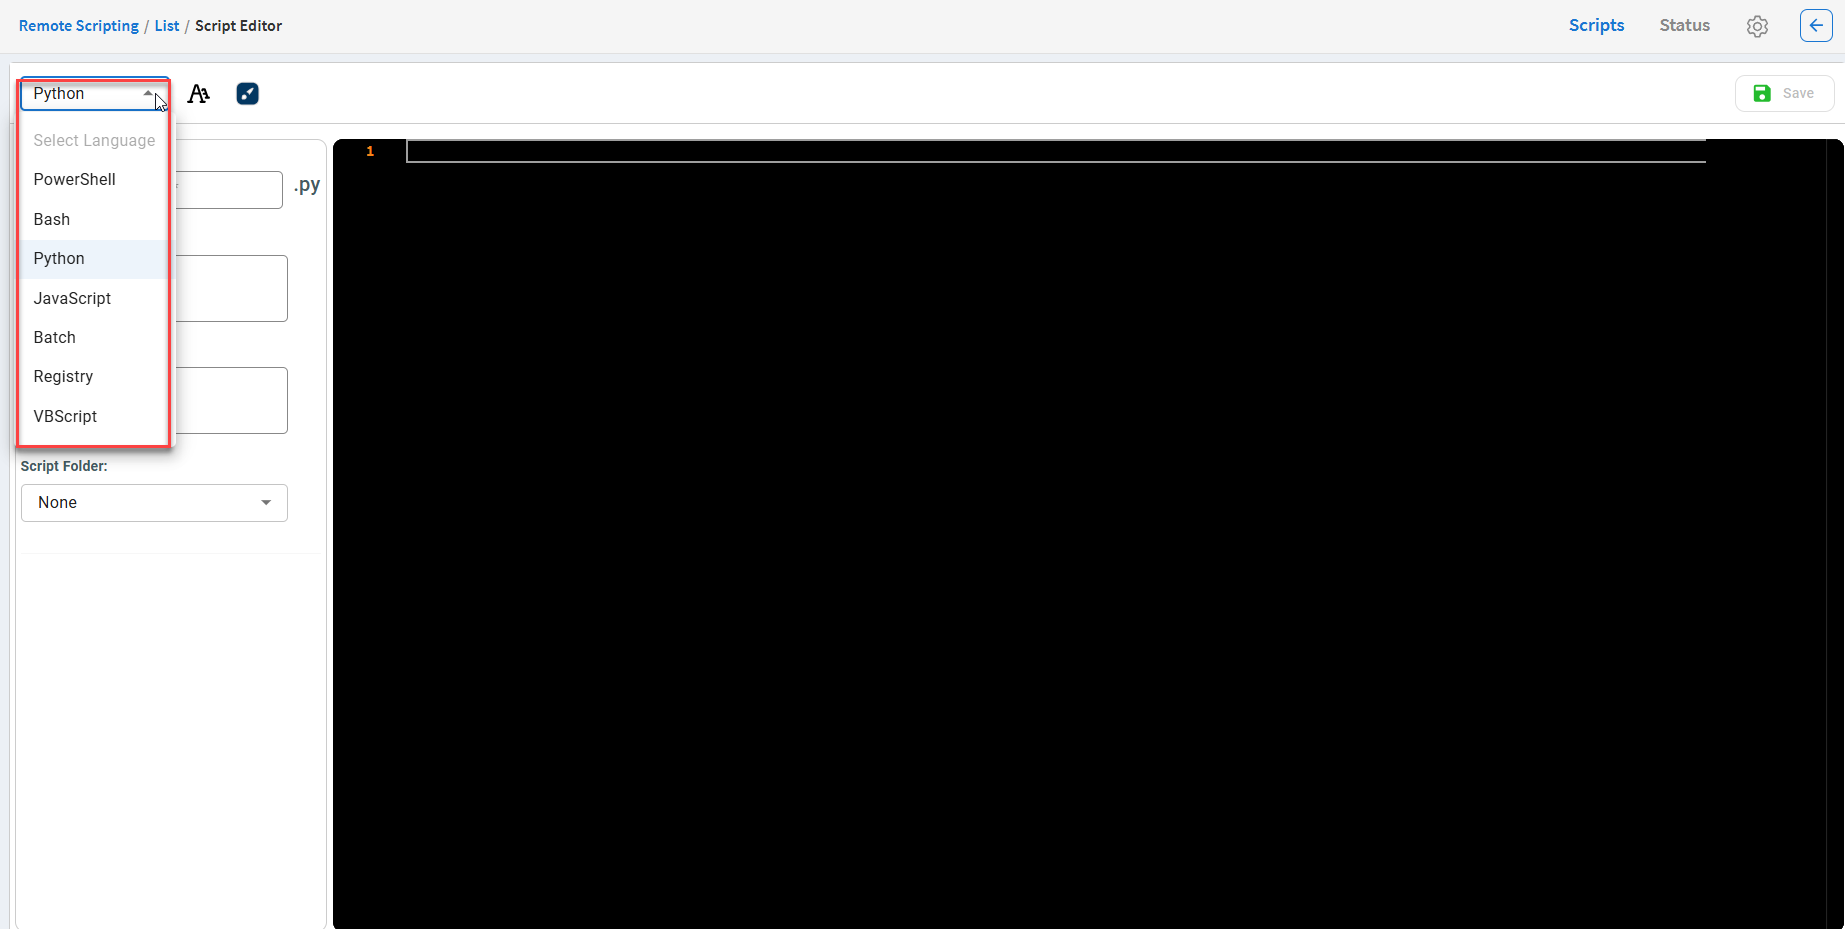
4. In the Script Name box, enter a name for the script. Depending on the language you chose to write the script, the extension appears next to the script name input box. (Required)
5. In the Script Description box, enter a description of the script. (Optional)
6. In the Script Arguments box, specify any arguments you want to pass to the script. (Optional)
7. In the Script Folder drop-down list, select the folder where the script should be saved.
8. Click Save to save the script.
The script is saved at the location you specified.
You can choose to save the newly created script in the following locations.
- None — If you select None, the script is saved in the root directory.
- Existing Folders — You can choose to save the script in one of the existing folders.
- +New Folder — If you select +New Folder, you can create a new folder to save the script.
View script version
You can view the script version by hovering over the script name in the Remote Scripting dashboard.
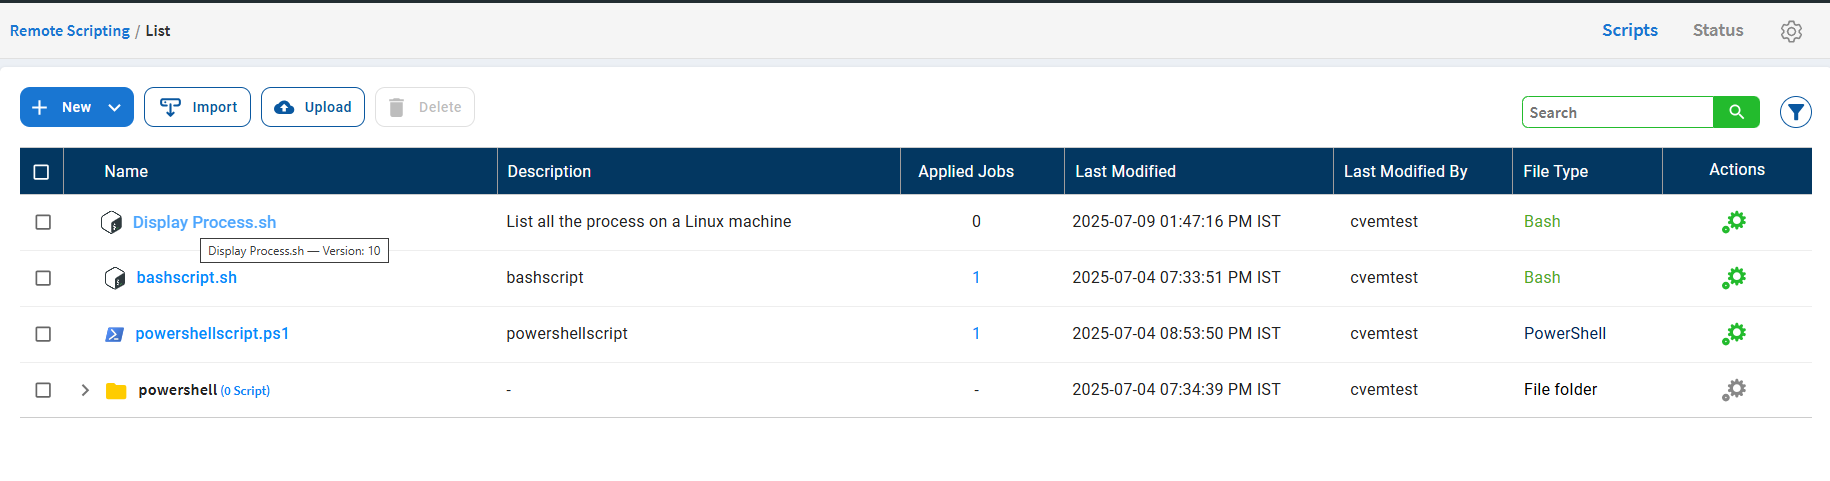
Alternatively, open the script and check the version listed in the Version drop-down box on the Script Editor page.
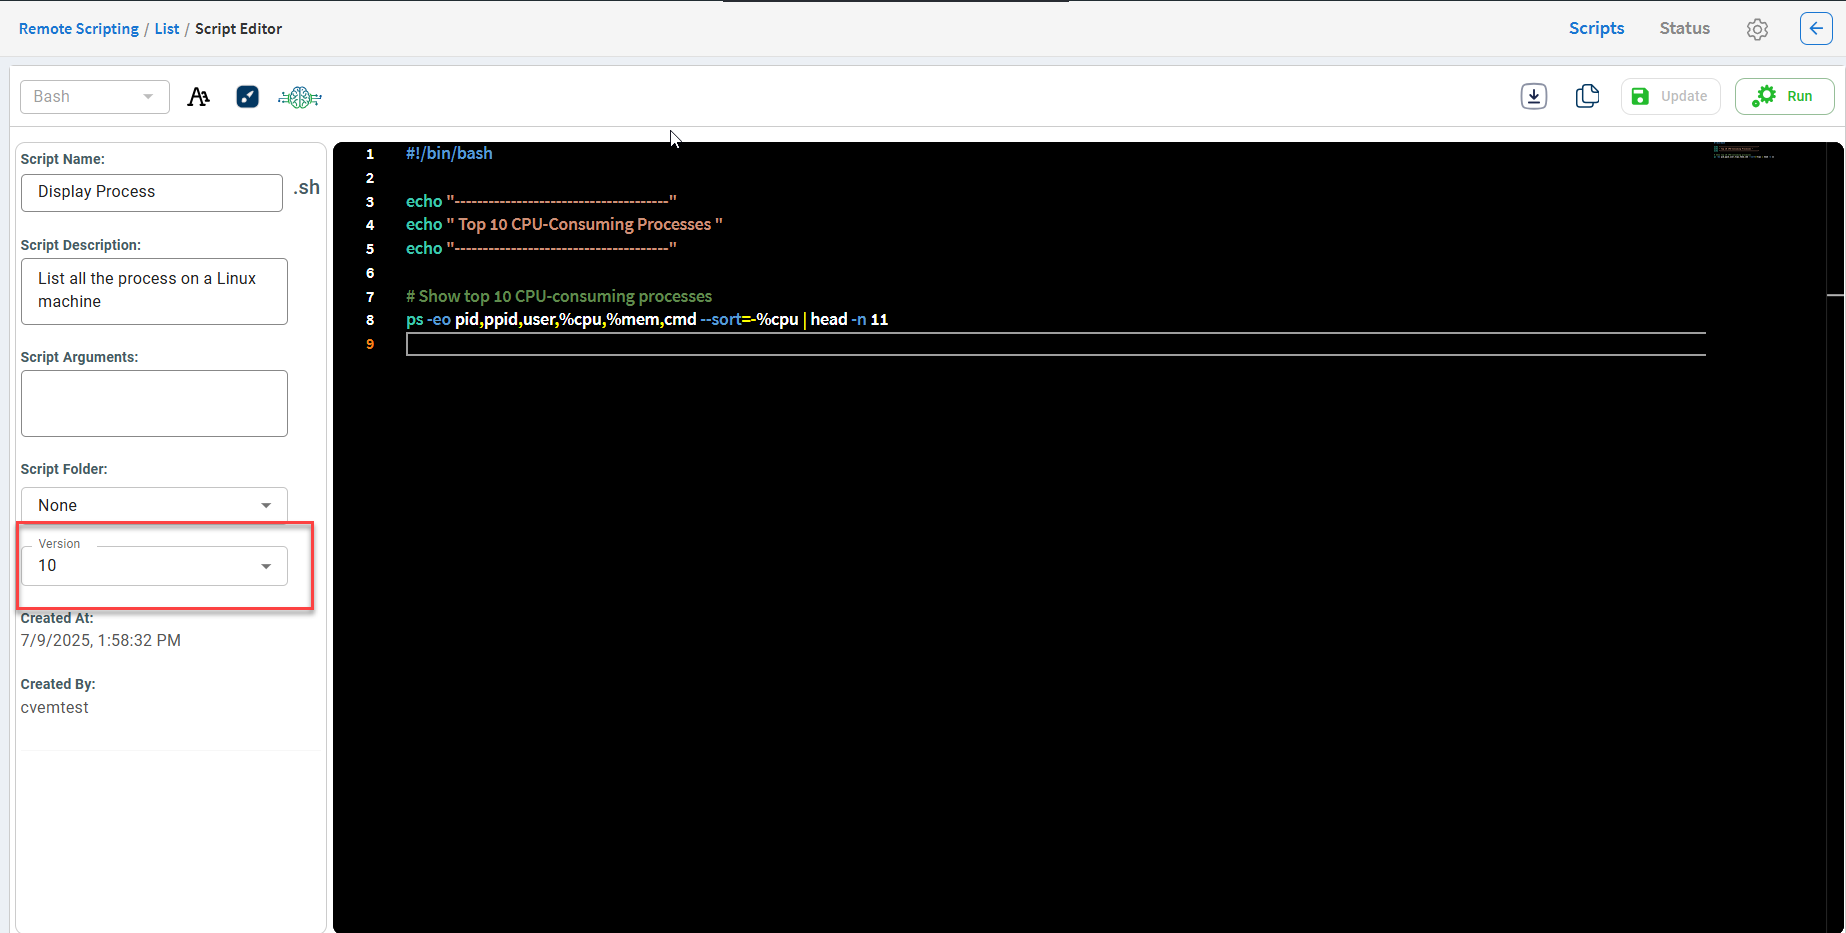
| Note: You can save up to 20 versions of a script. When this limit is exceeded, the oldest version is automatically deleted. |
Create a new folder in Remote scripting
Follow the steps below to create a new folder on the Remote Scripting dashboard.
1. On the Remote Scripting Dashboard, click the New button.
A drop-down list appears.
2. Click ![]() New Folder.
New Folder.
The New Folder pop-up appears.
3. In the Folder Name box, enter a name that contains more than five characters. (Required)
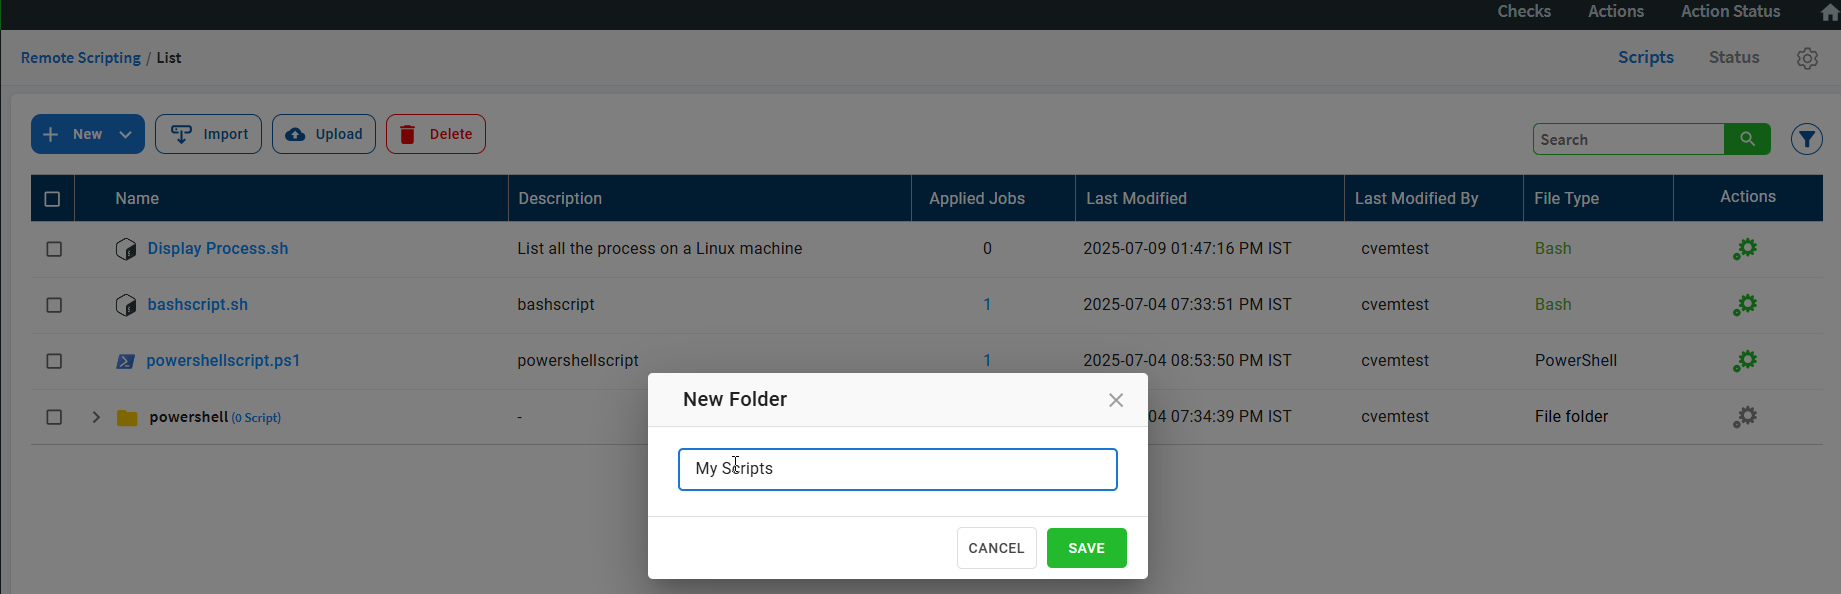
4. Click Save.
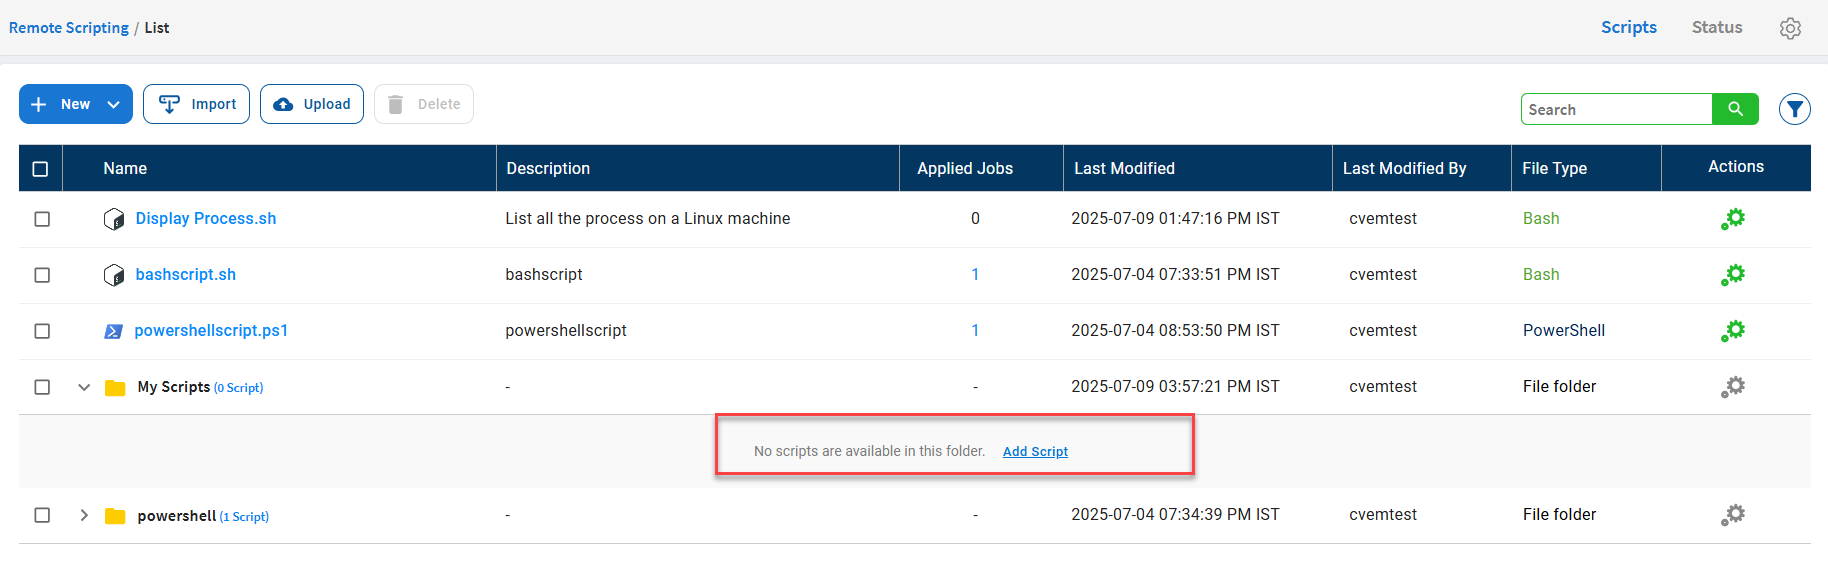
The folder with the name you provided is created.
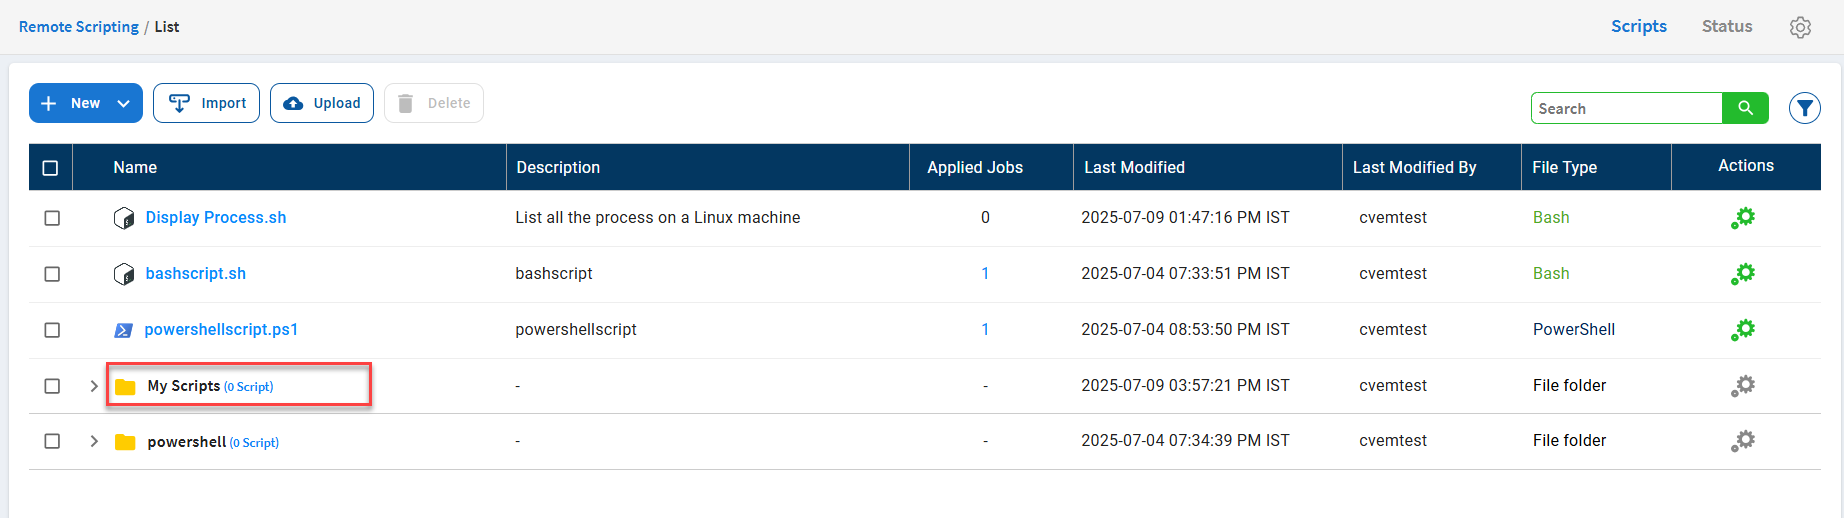
The number of scripts in a folder appears next to the folder name. If the folder is empty, click Add a Script to create a new script. The script is automatically saved in that folder.
Import scripts
Saner Remote Scripting lets you import scripts from one account to another, or within the same account.
Import scripts within the account
1. On the Remote Scripting dashboard, click ![]() Import.
Import.
The Import Script window appears.
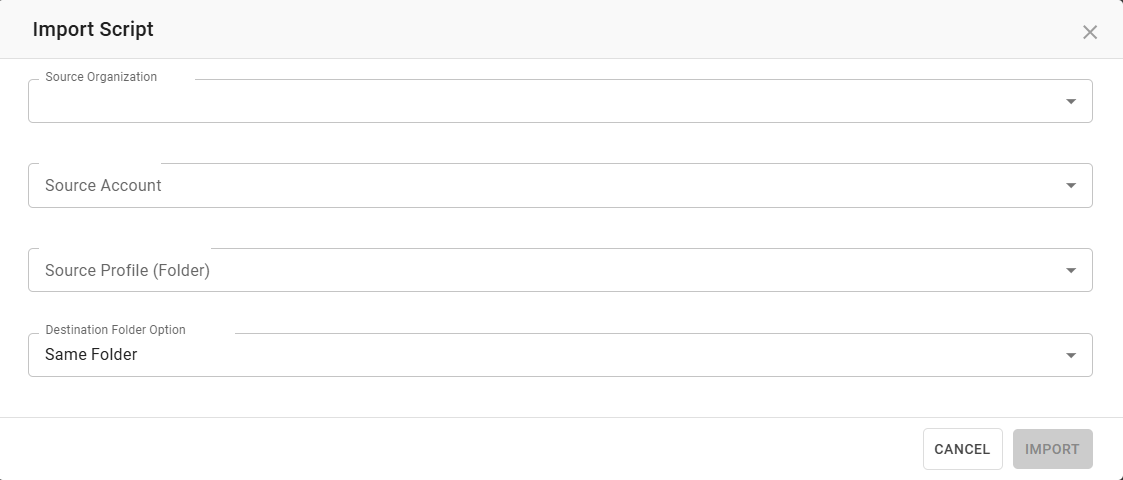
2. In the Source Organization drop-down list, select the organization that the source account belongs to. (Required)
3. In the Source Account drop-down list, select the account you want to import the scripts from. (Required)
4. Select the folders that contain the scripts you want to import.
All the scripts present in the folder are listed.
5. Select the script you want to import. Only one script can be imported at a time.
6. In the Destination Folder drop-down list, select the location where you want the selected script to be imported to.
- None — Saves the script in the root directory.
- Same Folder— Creates a folder with the same name as the source folder in the destination account.
- +New Folder — Creates a new folder to store the script. You must enter a name for the folder.
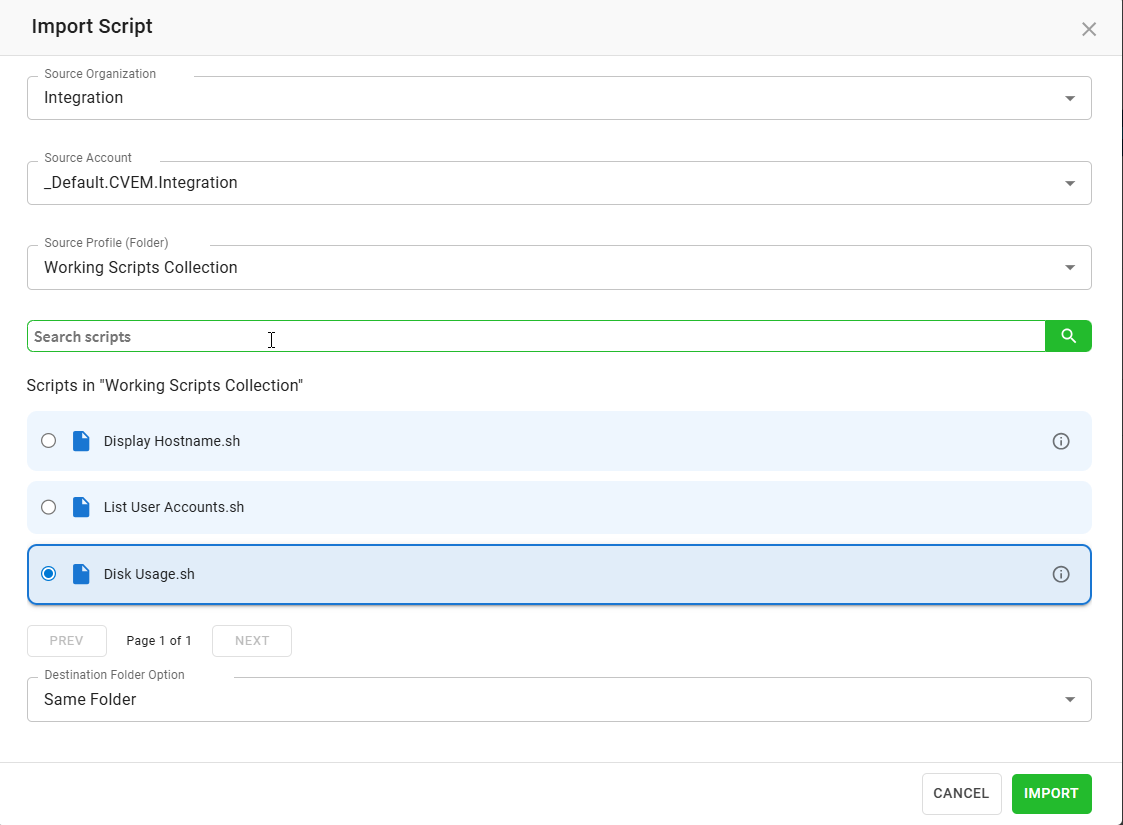
7. Click Import.
The script is imported to the destination specified in the Destination Folder Option.
Import scripts within the account
1. On the Remote Scripting dashboard, click ![]() Import.
Import.
The Import Script window appears.
2. In the Source Organization drop-down list, select the organization the account belongs to.
3. In the Source Account drop-down list, select the account you want to import the scripts from.
4. Select the folders that contain the scripts you want to import.
All the scripts present in the folder are listed.
5. Select the script you want to import. Only one script can be imported at a time.
6. In the Destination Folder drop-down list, select the location within the account where you want the selected script to be imported to.
- None — Saves the script in the root directory.
- +New Folder — If you select +New Folder, a new folder is created to save the script. You must provide a name for the newly created folder.
| Note: Selecting the Same Folder option in the Destination Folder drop-down list is not allowed because scripts already exist in that location. |
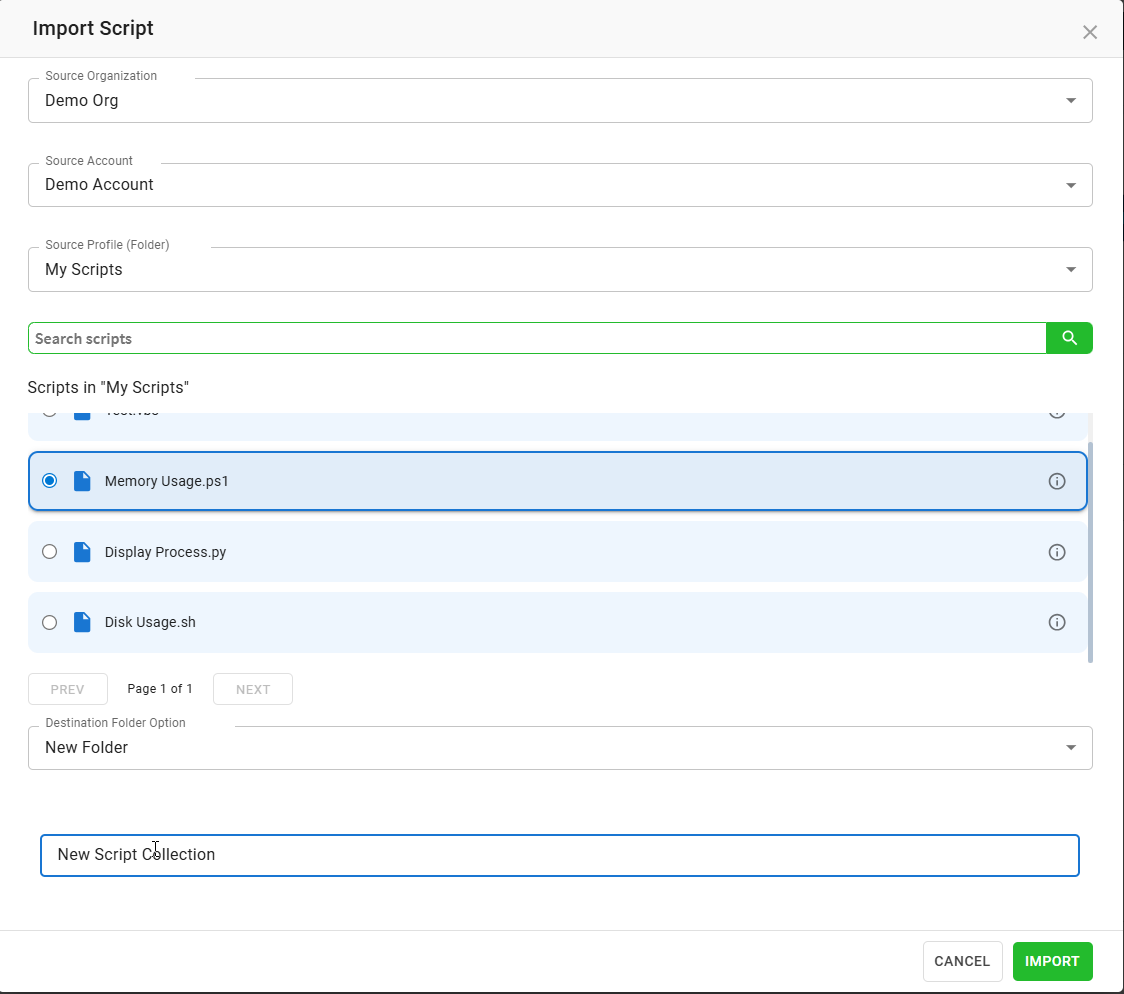
7. Click Import.
The script is imported to the destination specified in the Destination Folder Option.
Upload scripts
Saner Remote Scripting allows you to upload scripts; however, you can import only five scripts at a time.
You can upload the following script file types:
- PowerShell(.ps1)
- Bash(.sh)
- Registry(.reg)
- Python(.py)
- VBScript(.vbs)
- JavaScript(.js)
- Batch(.bat)
1. On the Remote Scripting Dashboard, click the  Upload button.
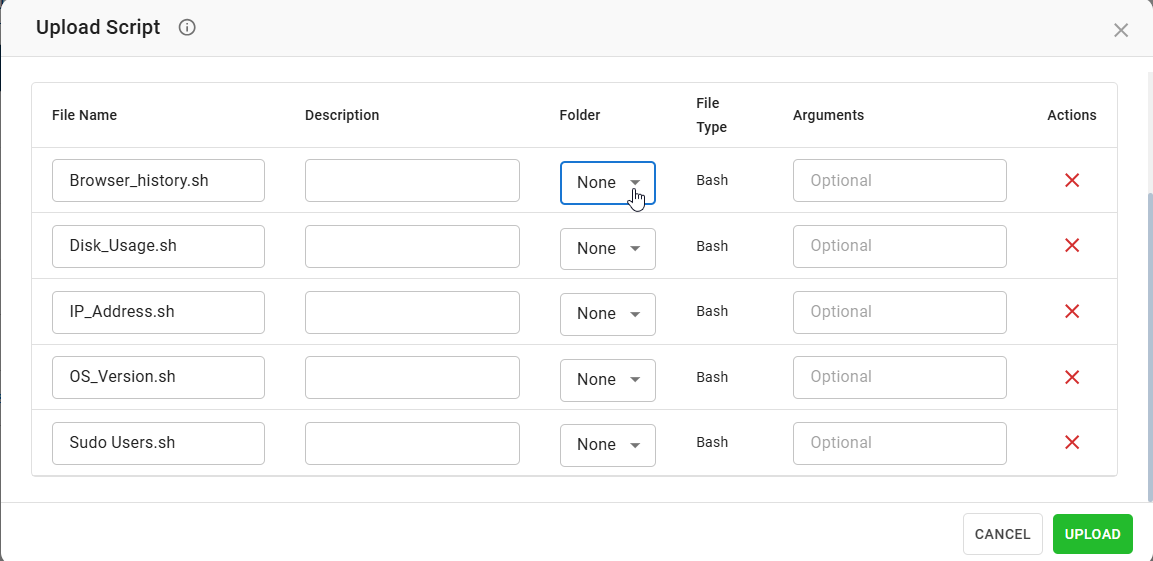
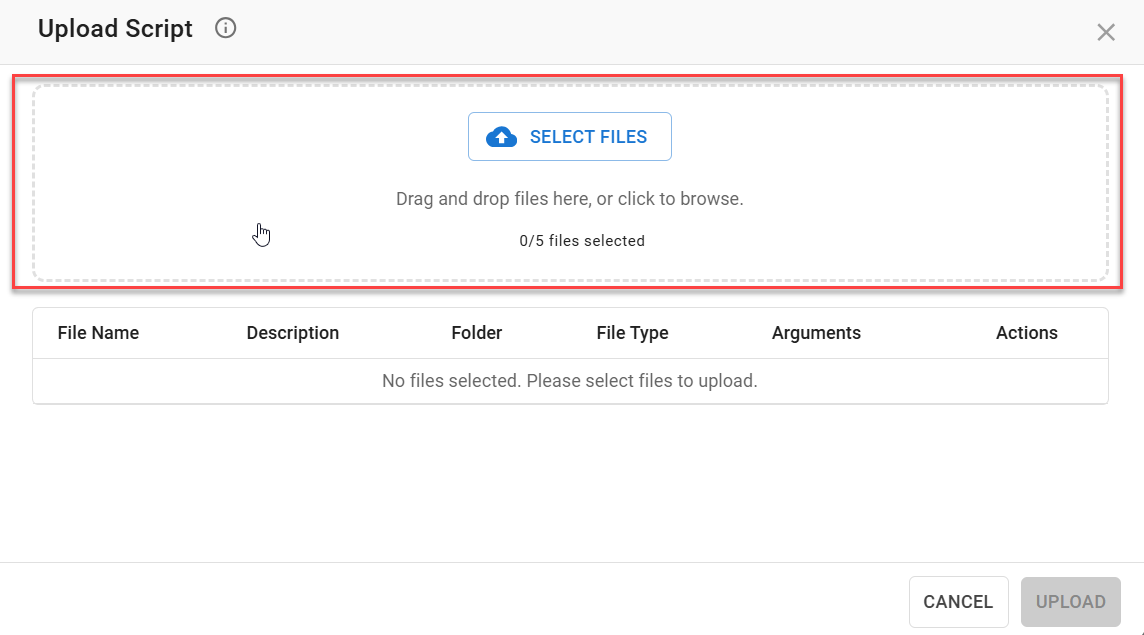
The Upload Script page appears.
2. Click Select FILES button.
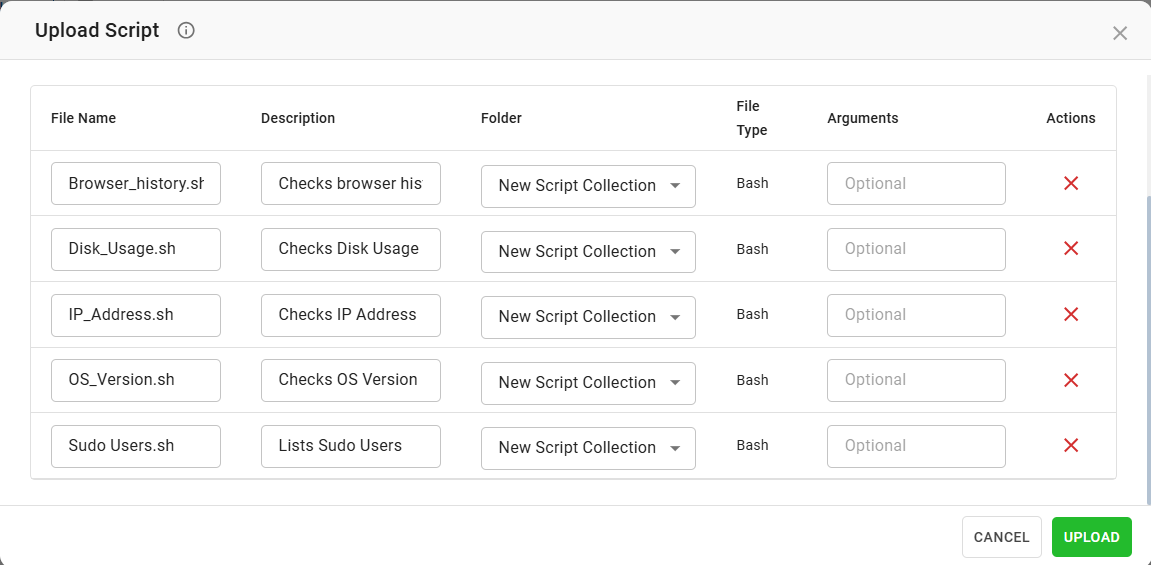
A dialog box opens. Choose the scripts you want to be upload.
The Upload Script page displays the file name and file type of the selected scripts. You can optionally update the description and arguments for each script.
Click ![]() to cancel the script upload.
to cancel the script upload.
3. Click the Folder drop-down list to specify the path where the script will be uploaded. By default, None is selected.
4. Click Upload.
The scripts are uploaded to the folder selected.
Alternatively, drag up to five script files into the SELECT FILES area to upload them.
Delete scripts
Saner Remote Scripting allows you to delete one or more scripts from the dashboard.
1. Select the checkbox next to the script to delete it.
2. Click ![]() Delete.
Delete.
A confirmation message appears.
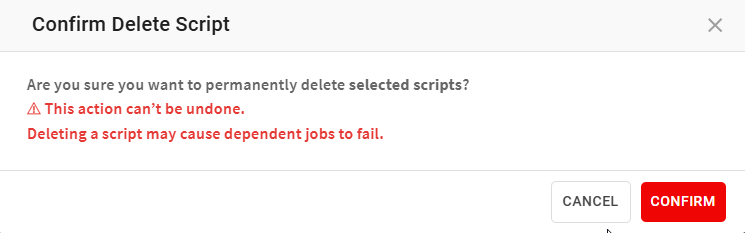
3. Click Confirm.
All the selected scripts are deleted.
Provide access control for script execution
Saner Remote Scripting allows you to control which users can execute scripts on devices in Saner. By default, organization administrators have permission to execute scripts, and this permission cannot be revoked. You can manage script execution access for all other users.
Provide script execution access
1. On the Remote Scripting dashboard, click the Access Control ![]() icon.
icon.
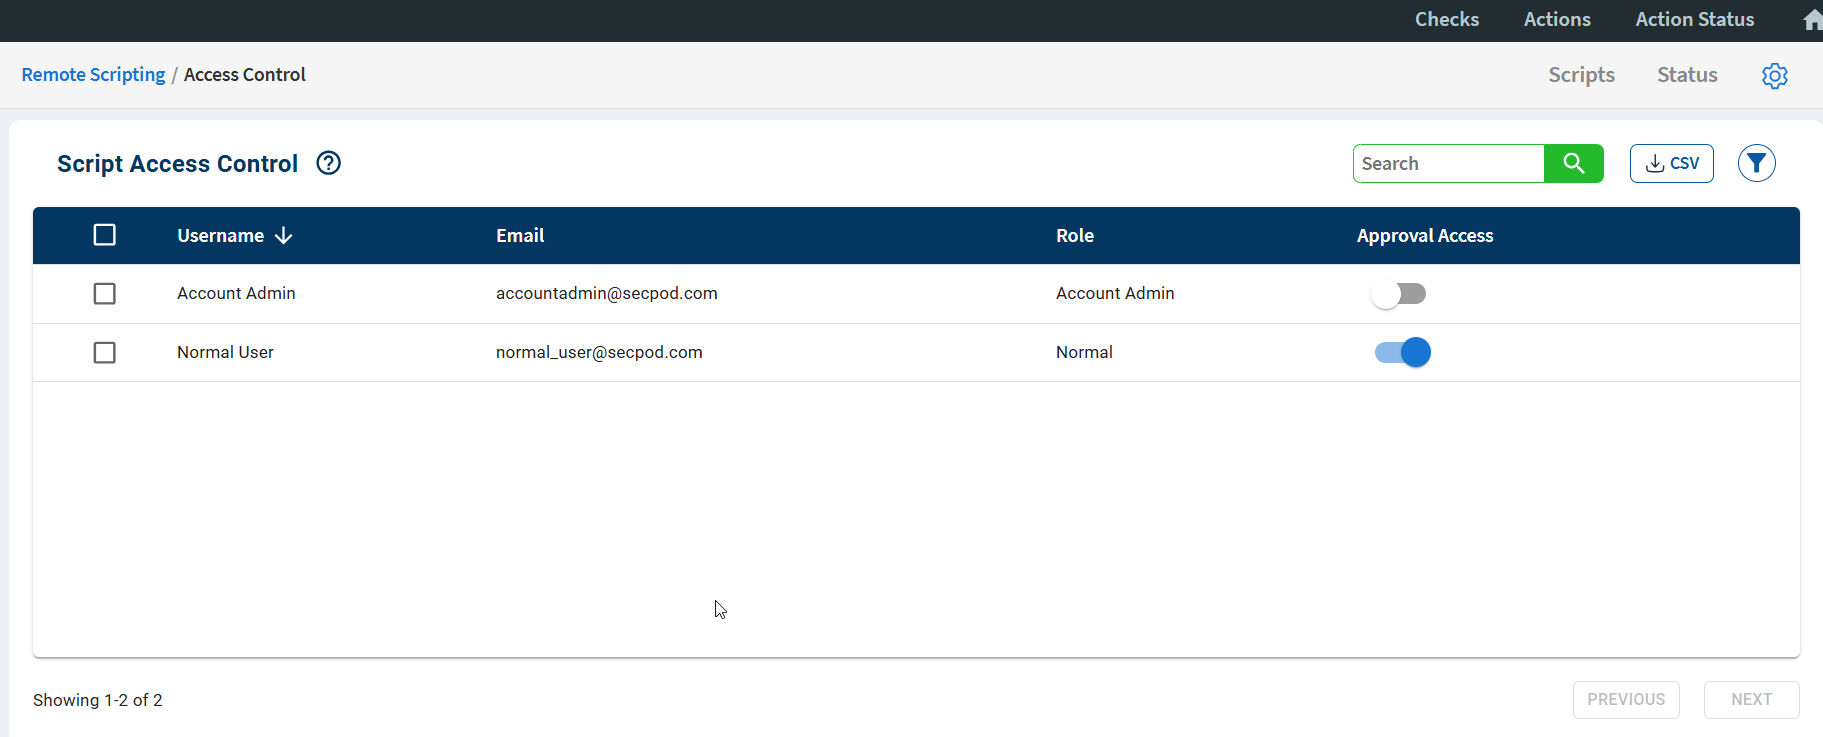
The Script Access Control page appears, showing all users with access to the account and their configured script execution permissions.
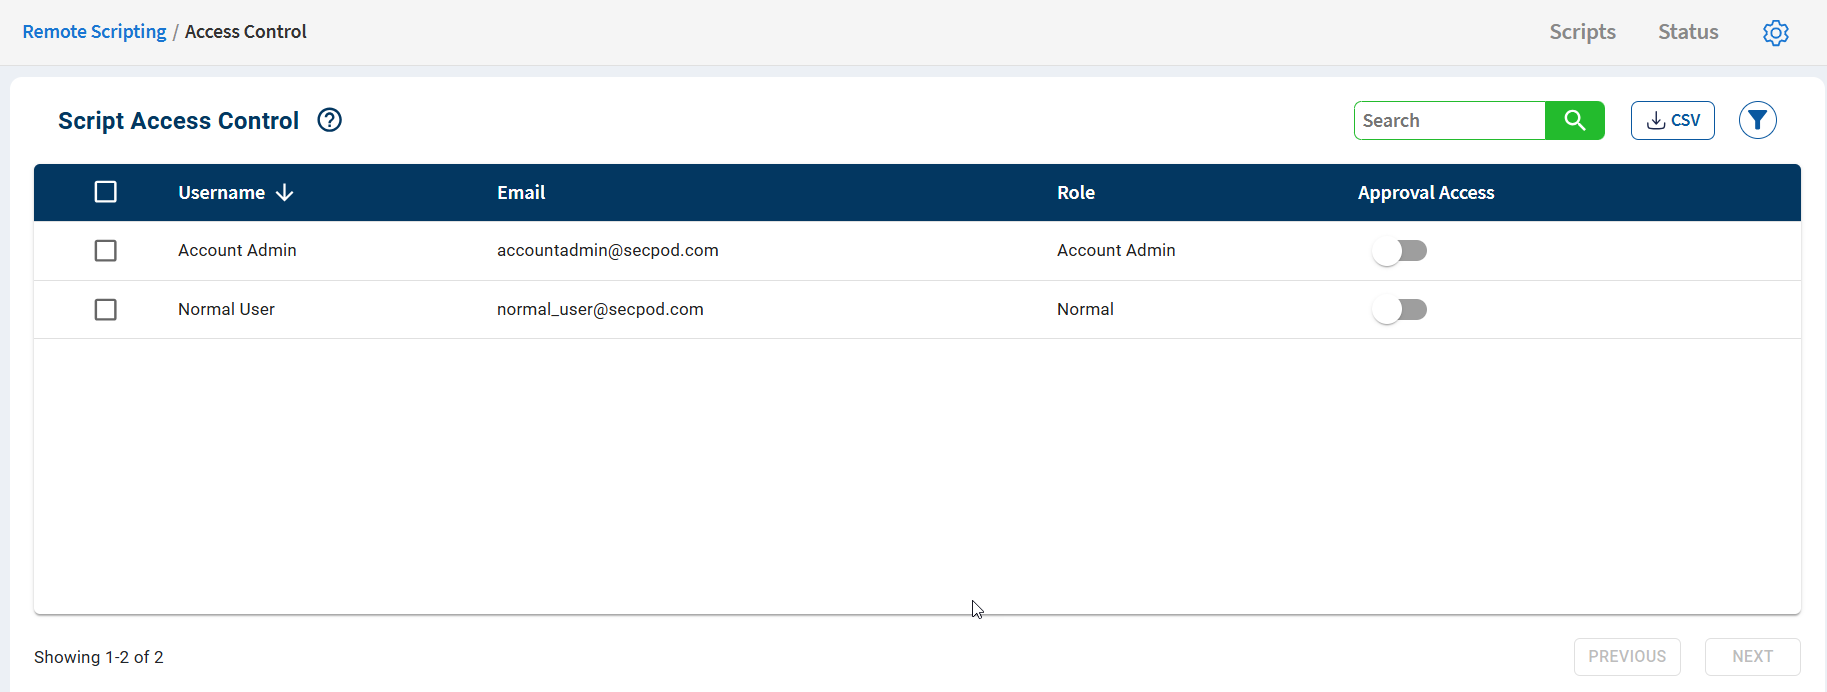
2. Under the Approvals column, turn on the toggle switch for the account you want to grant script execution access.
A confirmation message appears.
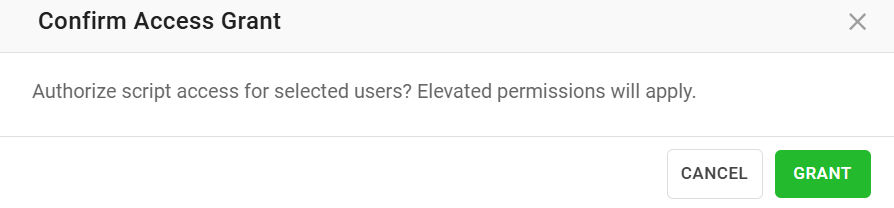
3. Click Grant.
The user now has script execution access.
Automate script deployment on devices
You can run scripts on devices using Saner Remote Scripting in two ways.
Apply script from the Remote Scripting dashboard
1. On the Remote Scripting dashboard, click the gear icon under Actions column.
The Apply Script page appears.
2. In the Task Name box, enter the Task Name (Required)
The task name should be at least 4 characters and more.
3. In the Task Description box, enter a brief description for the task. (Required)
The task name should be at least 4 characters and more.
4. In the Select Devices pane, select the devices on which you want to run the script.
5. Click Next.
6. You can choose to specify a job summary notification for the task. The notification schedule can be set at the beginning of the Task Creation or Task End or both. (Optional)
7. You can choose to specify the Schedule from the following options:
- Once
- Daily
- Weekly
- Monthly
8. Click Apply. (Required).
Saner creates the remote scripting task. You can view the status of the task on the Status page.
Apply script from the Remote Scripting Editor
1. On the Remote Scripting dashboard, click the script you want to execute.
The Script Editor page appears.
2. Click Run.
The Apply Script page appears.
3. In the Task Name box, enter the Task Name (Required)
The task name should be at least 4 characters and more.
4. In the Task Description box, enter a brief description for the task. (Required)
The task name should be at least 4 characters and more.
5. In the Select Devices pane, select the devices on which you want to run the script.
6. Click Next.
7. You can choose to specify a job summary notification for the task. The notification schedule can be set at the beginning of the Task Creation or Task End or both. (Optional)
8. You can choose to specify the Schedule from the following options:
- Once.
- Daily.
- Weekly.
- Monthly.
9. Click Apply. (Required).
Saner creates the remote scripting task. You can view the status of the task on the Status page.
View the status of a Remote Scripting task
On the Status page, you can view the status of the Remote Scripting task.
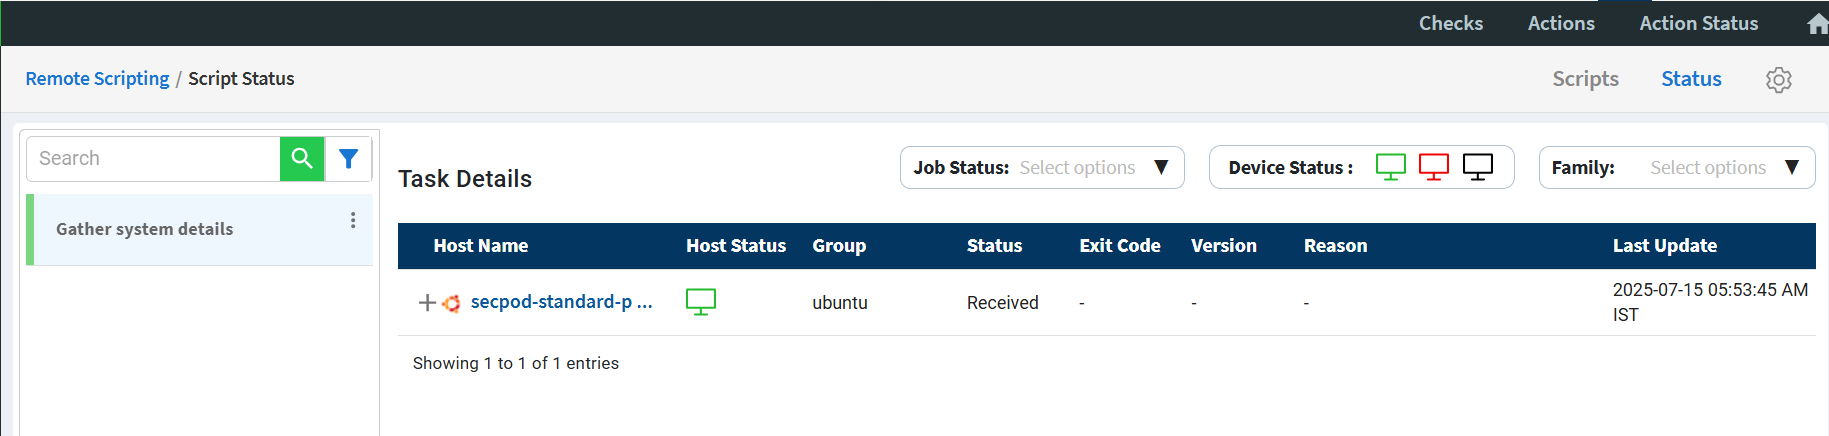
The Task Details page provides the following information about the Remote Scripting task.
| Column | Description |
| Host Name | The name of the device on which the script is executed. |
| Host Status | Indicates whether the device is online or offline. |
| Group | The group to which the device belongs, shown in the Group column. |
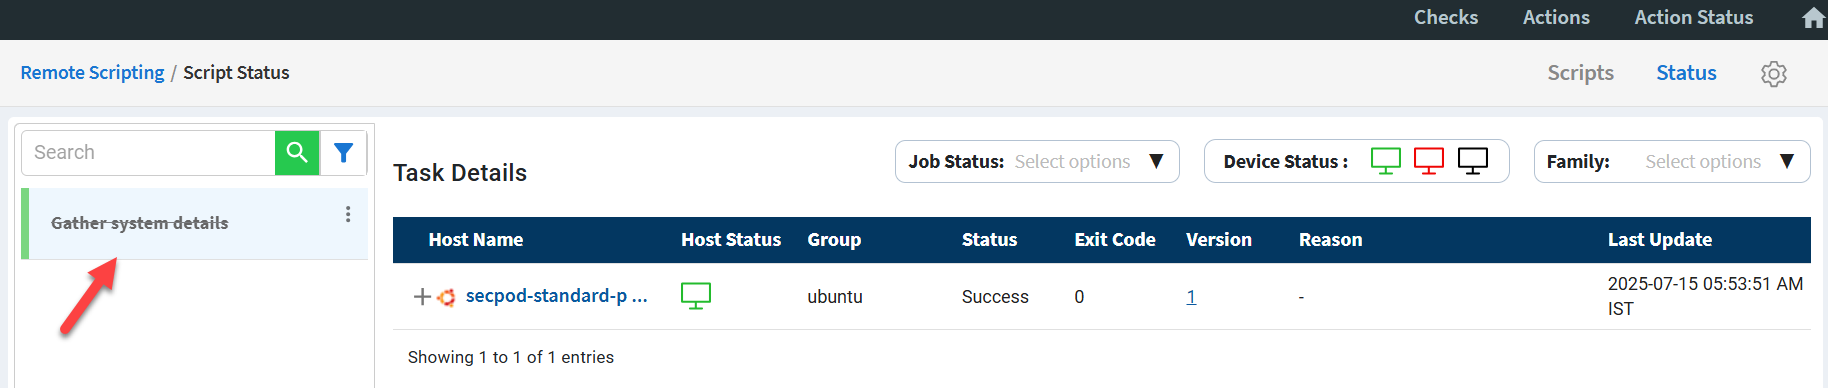
| Status | Displays the status of the Remote Scripting task. Possible values include: Received – The device has received the remote scripting task. Initiated – The scripting task has started on the device. Success – The remote scripting task executed successfully. Failed – The remote scripting task failed on the device. |
| Exit Code | The exit code returned by the system on which the script was executed. Common status codes are 0 — Script executed successfully. 1 — Script execution failed. 124— Script execution timed out. |
| Version | Displays the script version used during the Remote Scripting task. |
| Reason | Displays the reason for a failed script execution, including any relevant exit codes. |
| Last Update | The date and time of the last action performed on the device. |
To view the latest status of the Remote Scripting task, click the task name on the left side of the page.
View the output of the Remote Scripting task
1. Click the ![]() icon in the Host Name column to expand and view the Remote Scripting task results.
icon in the Host Name column to expand and view the Remote Scripting task results.

The Remote Scripting task results are displayed. You can copy, download, and use Saner AI to analyze the Remote Scripting task output.

Copy, download, or use Saner AI to analyze the Remote Scripting task output.
Click the ![]() icon to copy the Remote Script task output to notepad or any word processor.
icon to copy the Remote Script task output to notepad or any word processor.
Click the ![]() icon to download the Remote Script task output in a text format on to the local machine.
icon to download the Remote Script task output in a text format on to the local machine.
Click the ![]() icon to use Saner AI to analyze the Remote Script output to gain deeper insights.
icon to use Saner AI to analyze the Remote Script output to gain deeper insights.
Approve Saner Remote Scripting tasks
A user with approval privileges must approve the Remote Scripting task if it was created by someone without script execution rights. The Remote Scripting task is created but requires approval from a script approver before it can be executed.
On the Status page, the Remote Scripting task awaits approval if it was created by a user without approval rights.

Approve a Remote Scripting job
You must be signed in to the Saner platform with an account that has approval rights for remote script execution.
1. On the Status page, click the three dots ![]() next to the remote scripting task.
next to the remote scripting task.
A pop-up window appears.
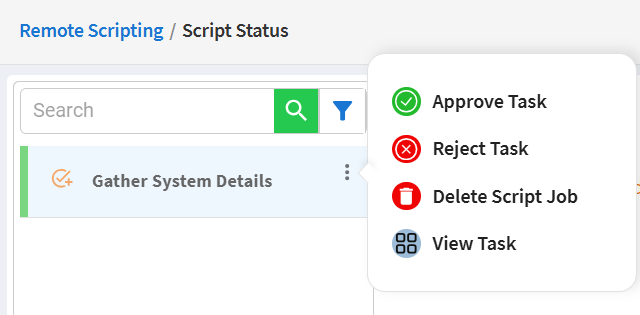
2. Click Approve Task.
A confirmation message box appears.
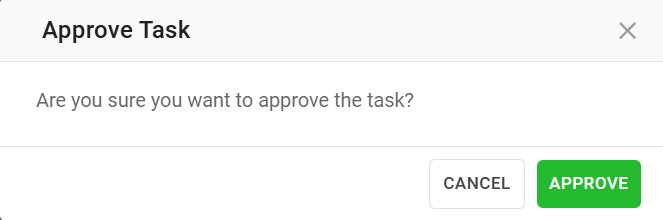
3. Click Approve.
The task is approved and the remote script is executed on the device.
Saner Remote Scripting audit logs
Saner stores a log of the activities performed using Saner Remote Scripting. You can view the logs by visiting Audit Logs page.
| Audit Code | Description |
| 1014 | Granted Script access to the user. |
| 1015 | Failed to grant access to the user. |
| 1016 | Revoked script access from the user. |
| 1017 | Failed to revoke script access from the user. |
| 8023 | New script created successfully. |
| 8024 | New script creation failed. |
| 8025 | Script updated successfully. |
| 8026 | Script updation failed. |
| 8027 | Script delete successfully. |
| 8028 | Script deletion failed. |
| 8029 | Script execution task created successfully. |
| 8030 | Script execution task creation failed. |
| 8031 | Script execution task deleted successfully |
| 8032 | Script execution task deletion failed |
| 8033 | Script execution task updated successfully |
| 8034 | Script execution task updation failed. |

