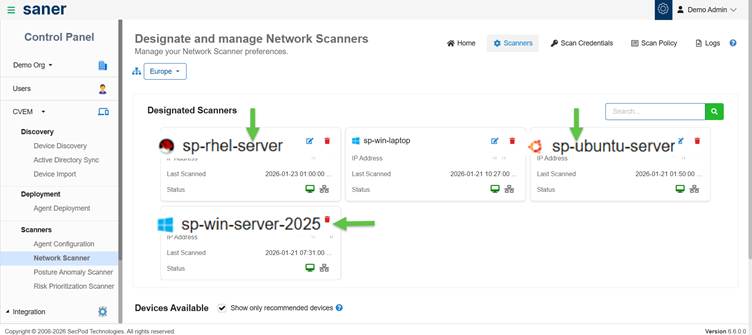
Network scanners are designated devices that execute scan tasks across your network.
(Optional) Use Recommended Devices
You can filter and select devices recommended by Saner for better scan performance.
The Show only recommended devices is enabled by default. This allow Saner’s recommendation engine to display the suggested devices that you can designate as Network Scanners.
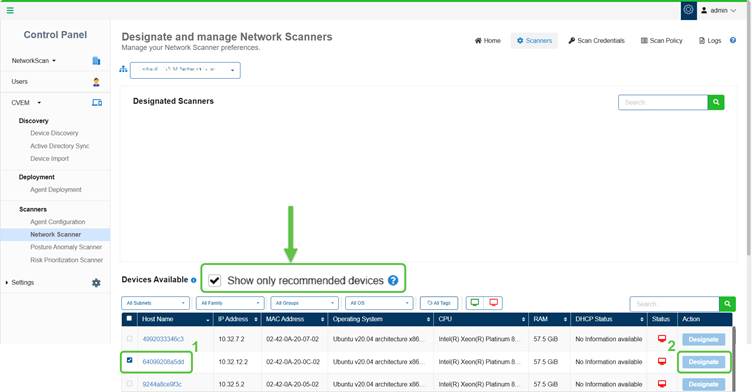
Select a Device and Click Designate
Step1: In the Devices Available section, select one or more devices that you want to designate as a network scanner by clicking the checkbox.
Step2: Click Designate under the Action column. The selected device moves to the Designated Scanners section displaying a success message.
Configure Global Scanners
You can designate scanners as Global Scanners to make them available across multiple accounts or an entire organization.
To configure a Global Scanner:
- Go to Network Scanner → Scanners
- In the Designated Scanners section, click the Edit Configuration icon
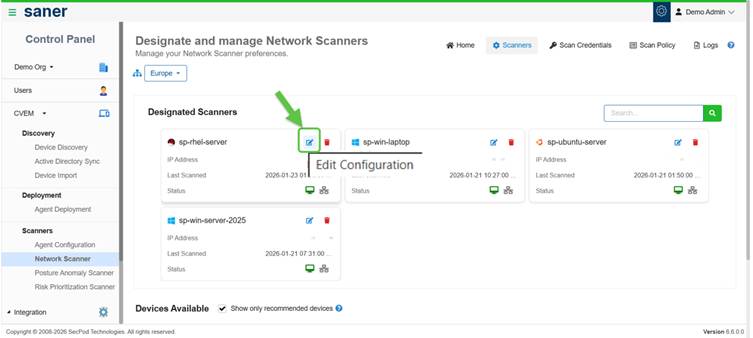
- Enable Global Scanner by selecting:
- A specific account or
- An entire organization

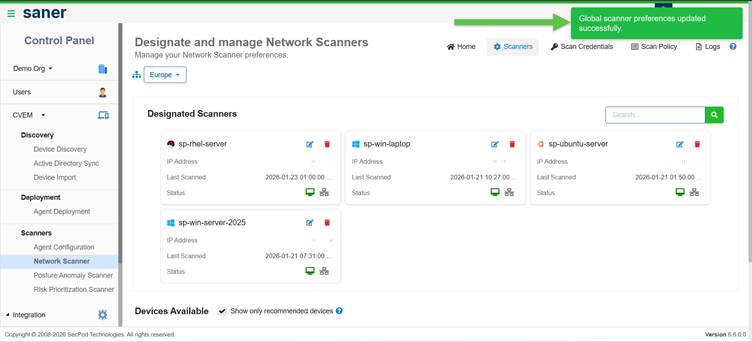
Once configured:
- The scanner becomes available across selected scopes
- Accounts without dedicated scanners can reuse these scanners