Pre-requisites
Make sure you have logged into the application as a Global Administrator with appropriate privileges. You must also be the Owner or User Access Administrator for the subscription(s) that you want to onboard.
Create a New Account in Saner Cloud
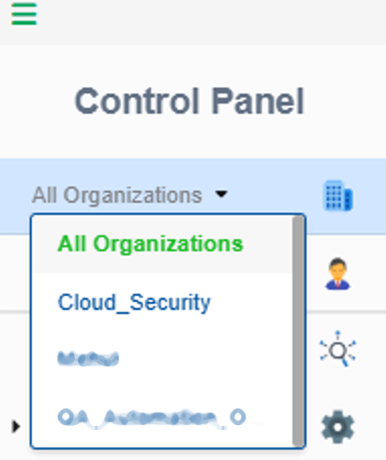
Step1: In the Control Panel, open the All Organizations drop-down menu and select the organization for which you want to create the new account.
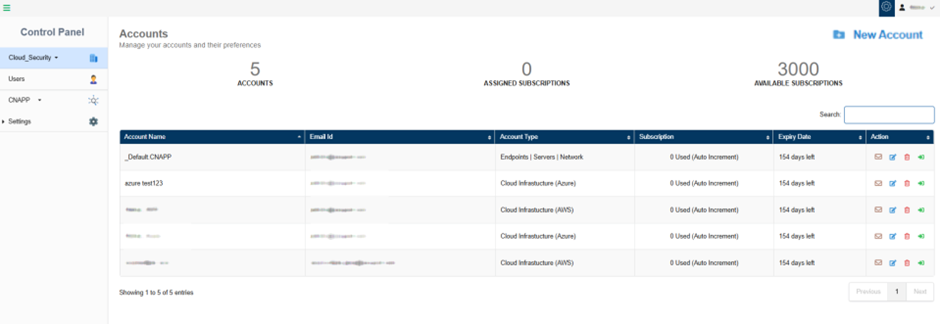
Step2: To create a new account, click the New Account button on the top-right of the page.
Step3: Complete all the details required to create the New Account.
- Provide the name of the cloud account
- Key in a valid email address
- Choose the account type “Cloud infrastructure” from the drop-down list
- Choose the cloud provider as “Azure” from the drop-down list
- Turn on the slider to provision the relevant tool for the account
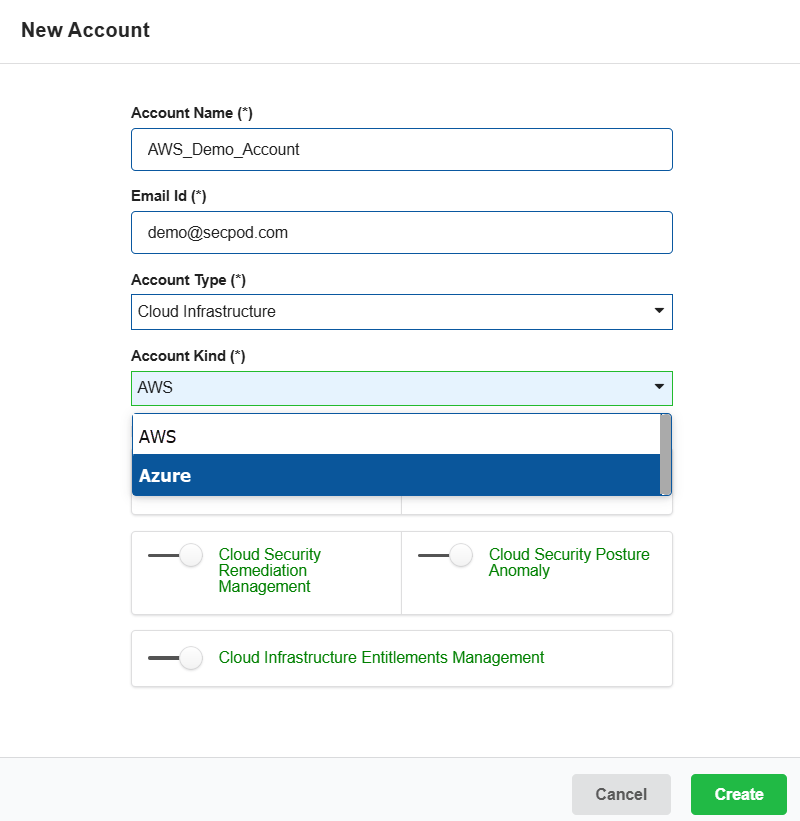
Step4: Click the Create button.
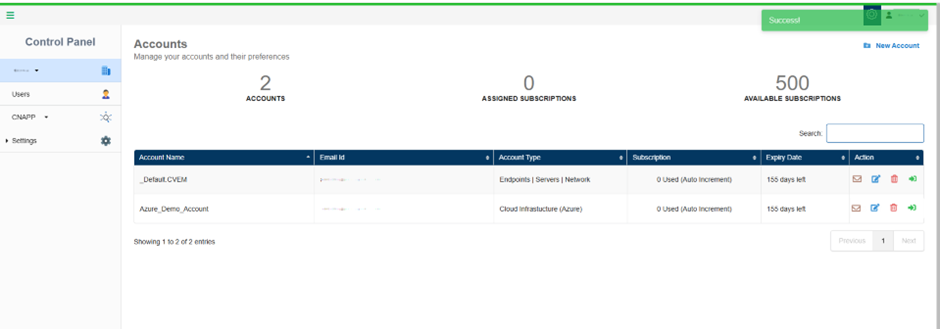
The newly created account displays in the Accounts page within a tabular format with the following details:
- Account Name
- Email ID
- Account Type
- Subscription
- Expiry Date
- Action
In the Action column, you have the facility to set up the mail settings for the corresponding account, edit the current account details, delete the account, and redirect to the dashboard view of this account.
Download the Onboarding Script “.py” OR “.sh”
Just make sure to have logged into the application with administrator privileges. You can download the .py or .sh files from the Azure Onboarding page in Saner Cloud Security Deployment.
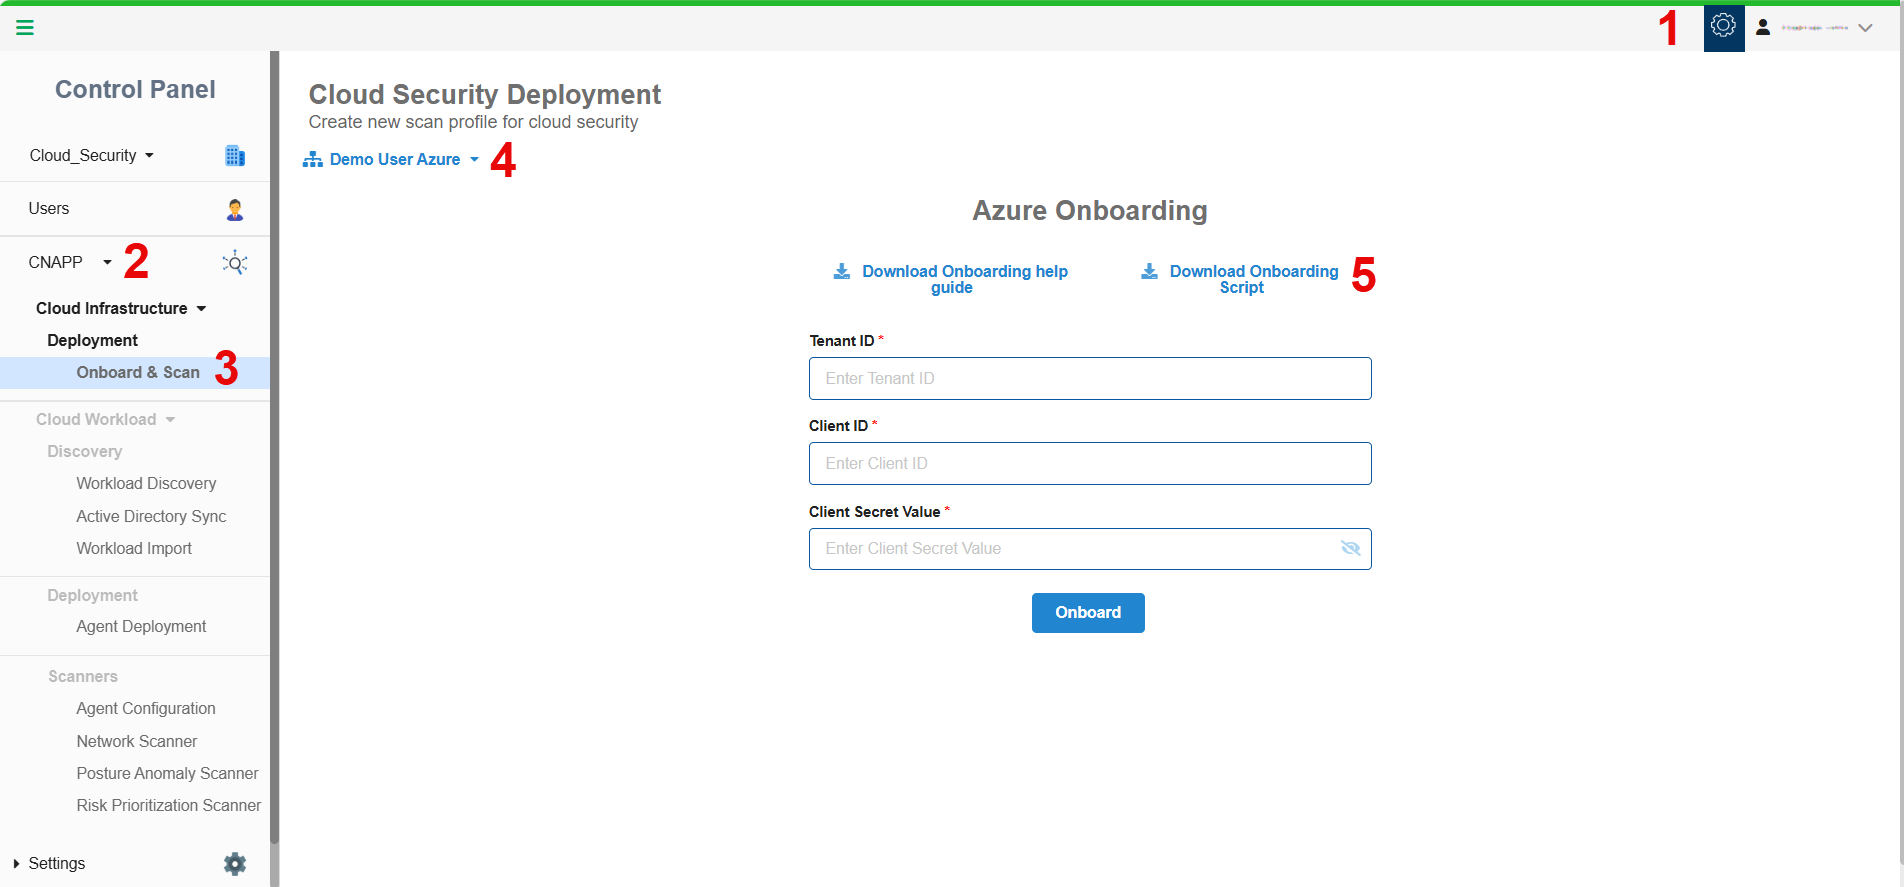
- Access the Control Panel and choose the relevant organization.
- Click on the CNAPP menu from the sidebar.
- Choose Onboard and Scan under Cloud Infrastructure Deployment.
- Choose the Account Name that you want to onboard. The Azure Onboarding page opens.
- Click the link “Download Onboarding Script” and click the script you choose to download.
Make sure you extract the script files from the compressed (.zip) folder.
Access Cloud Shell
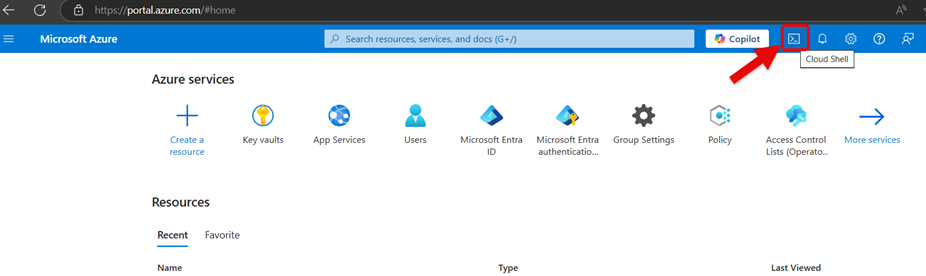
Step 1: Go to the Azure portal: https://portal.azure.com.
Step 2: Click the Cloud Shell icon (top-right corner in the portal’s menu bar).
[Optional] Fetch the Subscription ID
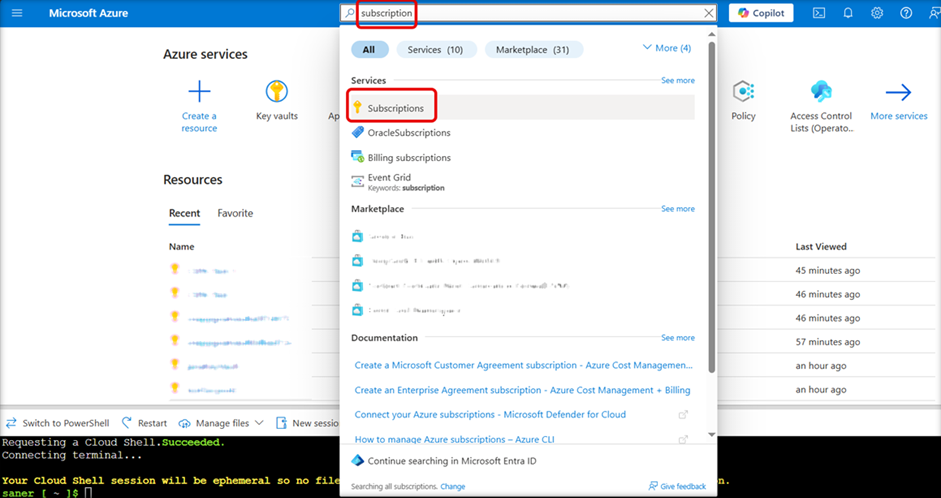
Step 1: In the Azure portal search bar, type “subscription”.
Step 2: Click on Subscriptions from the search results.
Copy the Subscription ID(s) to Use in Script Execution
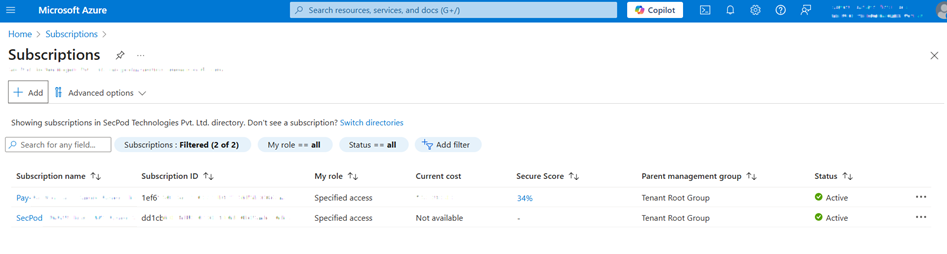
Step 1: You’ll see a list of subscriptions associated with your Azure account.
Step 2: Identify the relevant Subscription ID(s).
Copy the Subscription ID and pass it as an input parameter when executing your custom script.
Download Policy Files(.json) and Upload Scripts(“.sh” or “.py”) to Azure CLI
Pre-requisite: Make sure you have the appropriate permissions(preferably, global administrator) to execute the bash script.
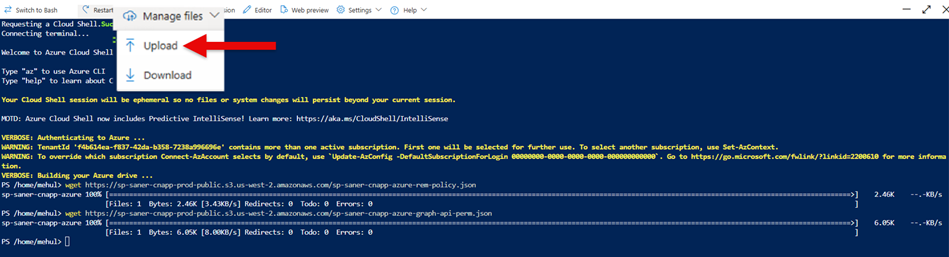
Use “wget” Command to Download the JSON Policy Files

Its mandatory that you execute both the commands in Azure CLI in-order to download the JSON policy files:
wget https://sp-saner-cnapp-prod-public.s3.us-west-2.amazonaws.com/sp-saner-cnapp-azure-rem-policy.jsonwget https://sp-saner-cnapp-prod-public.s3.us-west-2.amazonaws.com/sp-saner-cnapp-azure-graph-api-perm.jsonUpload Script to Azure CLI
- sp-saner-cnapp-azure-onboarding.py
OR - sp-saner-cnapp-azure-onboarding.sh
Step1: Open Azure CLI.
Step2: Click Manage files from the Azure CLI menu bar and select “Upload”.
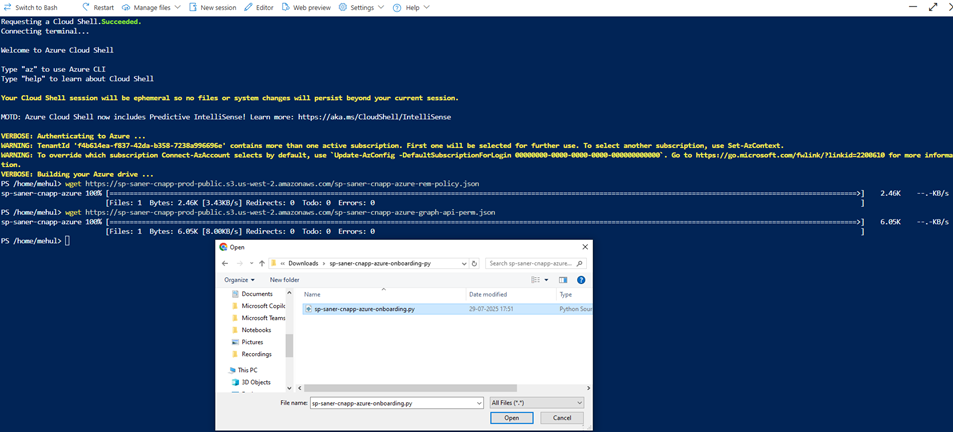
Step3: Next, browse and select the .py OR .sh script that you want to upload.
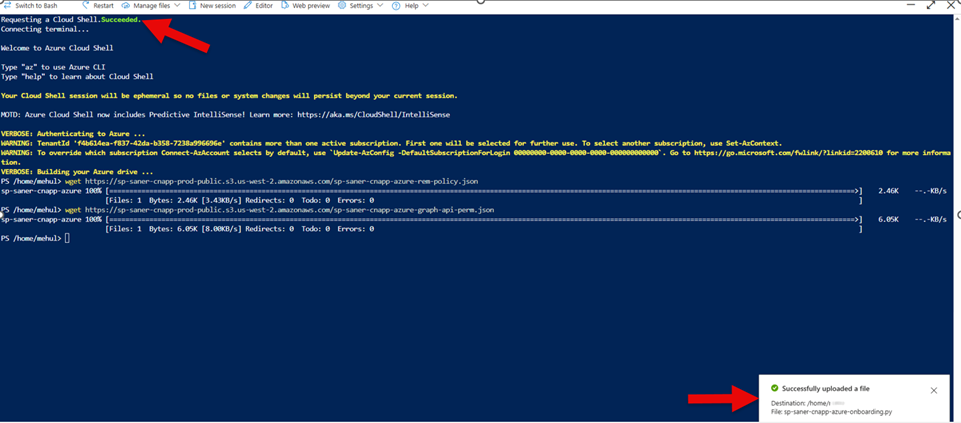
Step4: Check for the file upload message as shown in the screenshot.
Onboard by Executing “.sh” OR “.py” Scripts
After transferring the JSON files and script(.py or .sh) into Azure CLI, you can start with script execution with help of examples provided below.
You can either execute the “.sh” OR “.py” script as per your preference.
REMEMBER: In-order to run the “.sh” script, it is mandatory that you provide the execute permission using the following command:
chmod +x sp-saner-cnapp-azure-onboarding.sh
Onboard a Specific Azure Subscription
Execute “.sh” Script
./sp-saner-cnapp-azure-onboarding.sh --subscription-id "xxxxxxxx-xxxx-xxxx-xxxx-xxxxxxxxxxxx"Execute “.py” Script
python3 sp-saner-cnapp-azure-onboarding.py --subscription-id "xxxxxxxx-xxxx-xxxx-xxxx-xxxxxxxxxxxx"Onboard Multiple Azure Subscriptions Simultaneously
Onboard multiple Azure subscriptions at the same time by separating subscription IDs with only commas.
Execute “.sh” Script
./sp-saner-cnapp-azure-onboarding.sh --subscription-id "sub-id-1, sub-id-2, sub-id-3"Execute “.py” Script
python3 sp-saner-cnapp-azure-onboarding.py --subscription-id "sub-id-1,sub-id-2,sub-id-3"Onboard All Subscriptions Accessible Within Your Tenant
Execute “.sh” Script
./sp-saner-cnapp-azure-onboarding.sh --subscription-id "all"Execute “.py” Script
python3 sp-saner-cnapp-azure-onboarding.py --subscription-id "all"Get Onboarding Details After Script Execution Completes
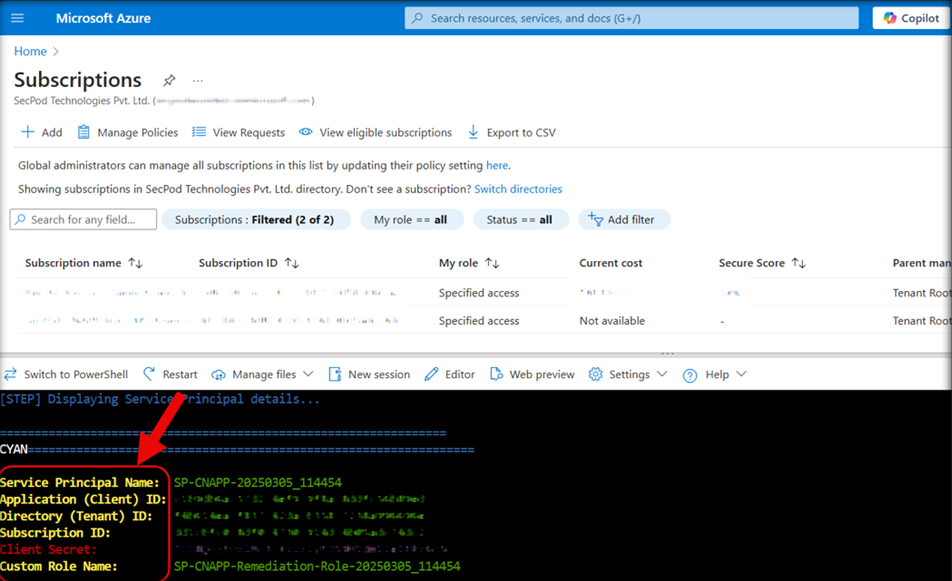
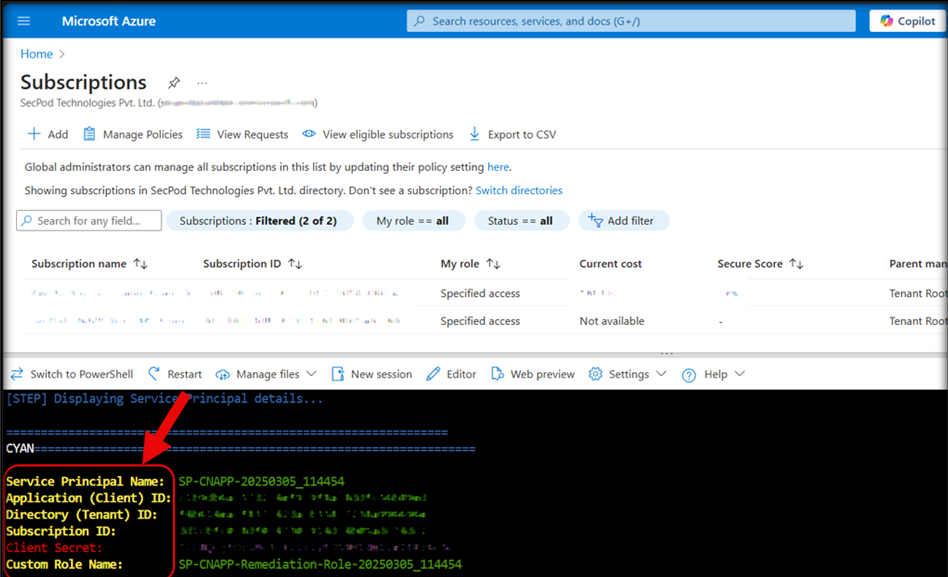
Once the script execution completes, the output provides the information needed for Azure onboarding in Saner Cloud.
Recommendation: Record the values of the output, as you need to provide these values as input when you complete the onboarding for your account subscription in Saner Cloud.
The output displays the following details:
- Service Principal Name
- Application (Client ID)
- Directory (Tenant ID)
- Client Secret (Secret Key)
- Custom Role Name
IMPORTANT: The Client Secret (Secret Key) is generated only once. Make sure to secure this key to retrieve when needed.
Carry out the next few required steps, and finally, copy the required values to enter them into the Saner Cloud Azure Onboarding Page.
Carryout the Next Few Required Steps
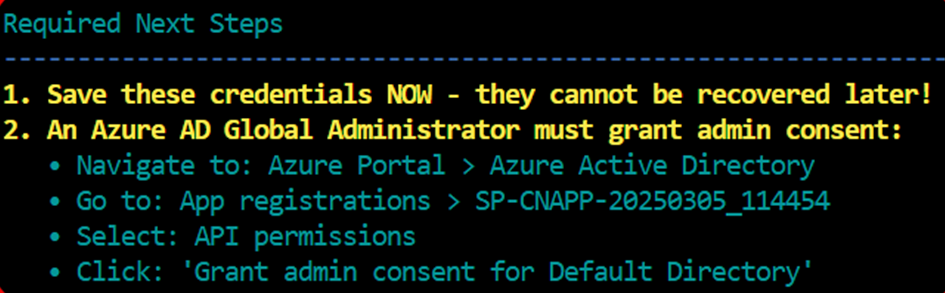
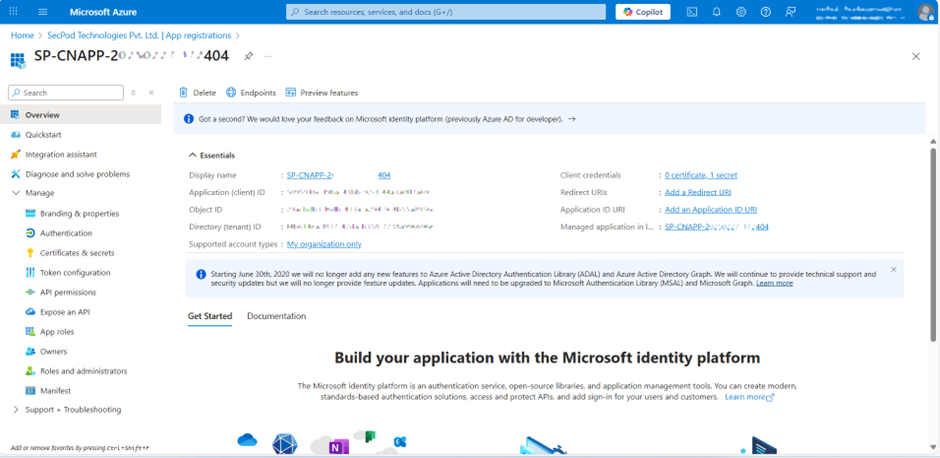
Navigate to Azure Portal > Microsoft Entra ID
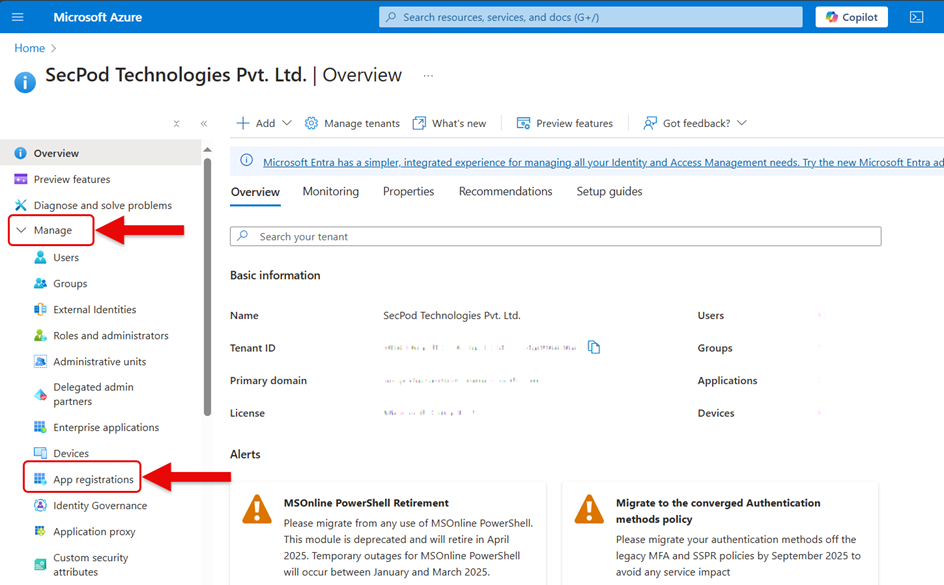
Access App Registrations and Search by the Service Principal Name
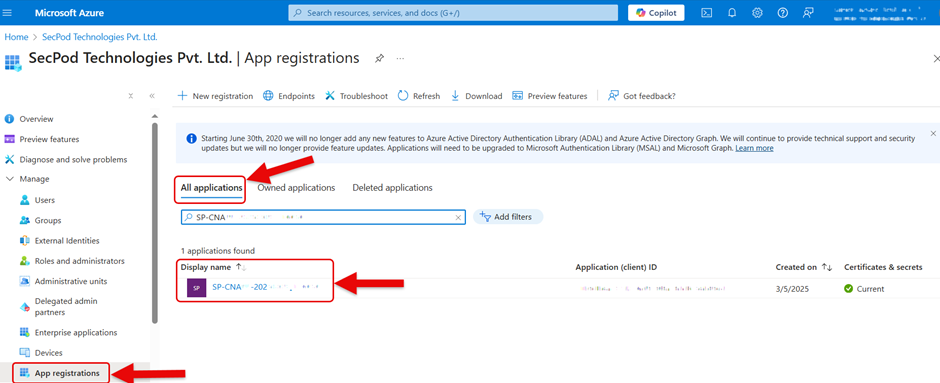
Copy the service principal name from the executed script and paste in the search box under All applications.
Once the search results are retrieved, click the application name(link) under Display name column to open the application details page.
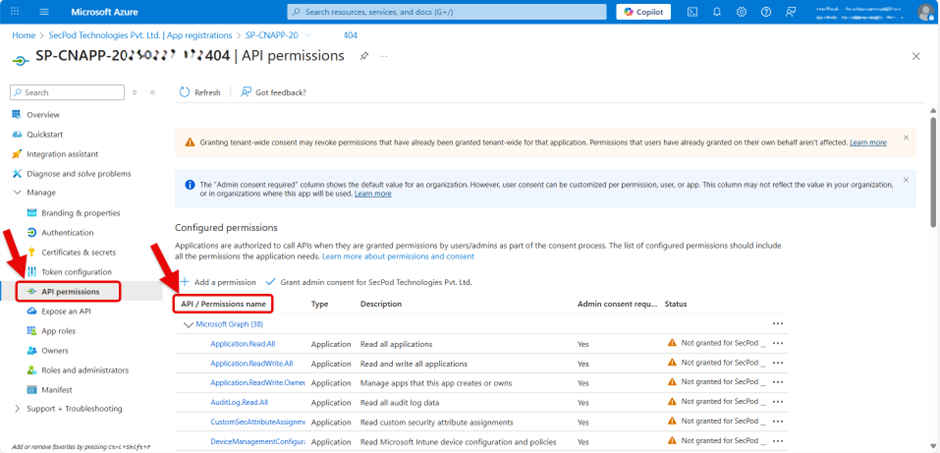
Select API permissions
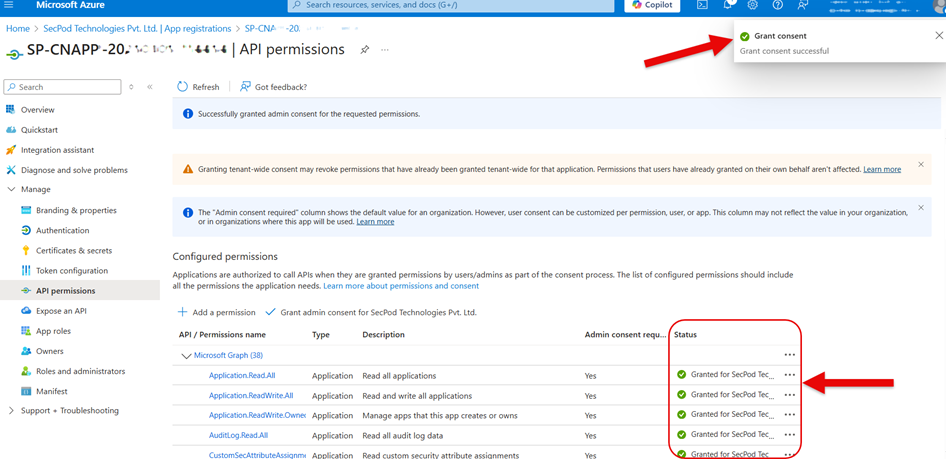
Grant Admin Consent for Default Directory
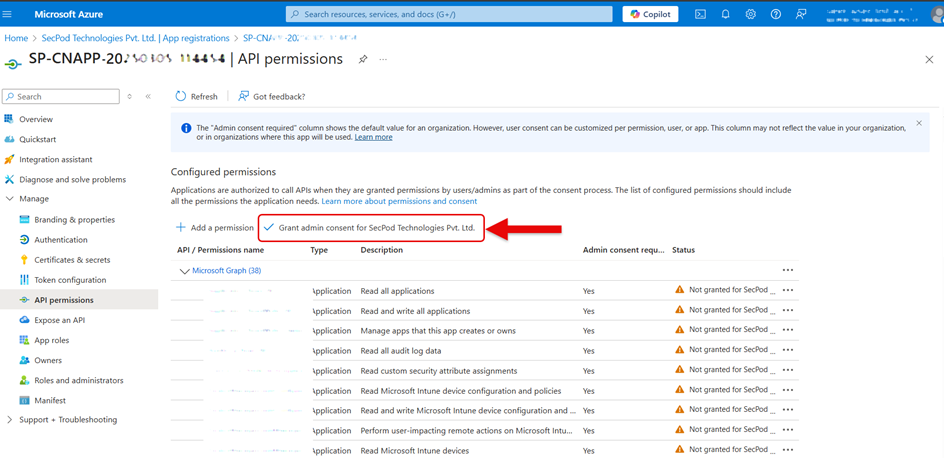

Click Yes and proceed with your consent.
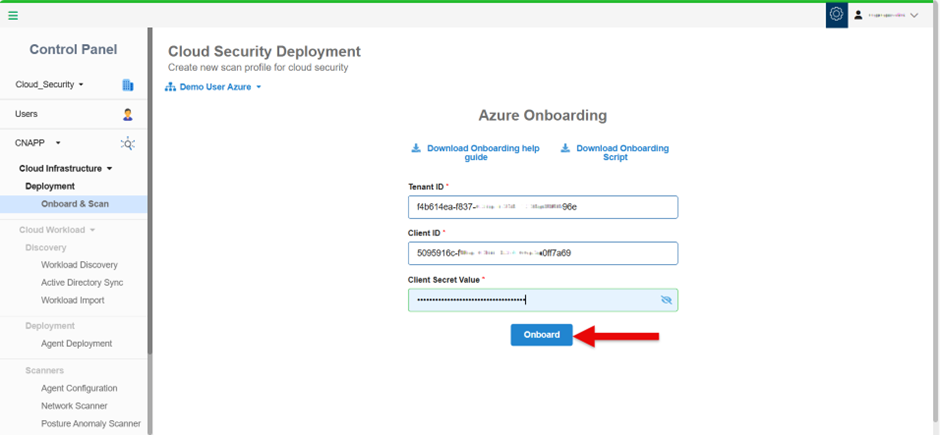
Complete the Onboarding for Your Cloud Account Subscription
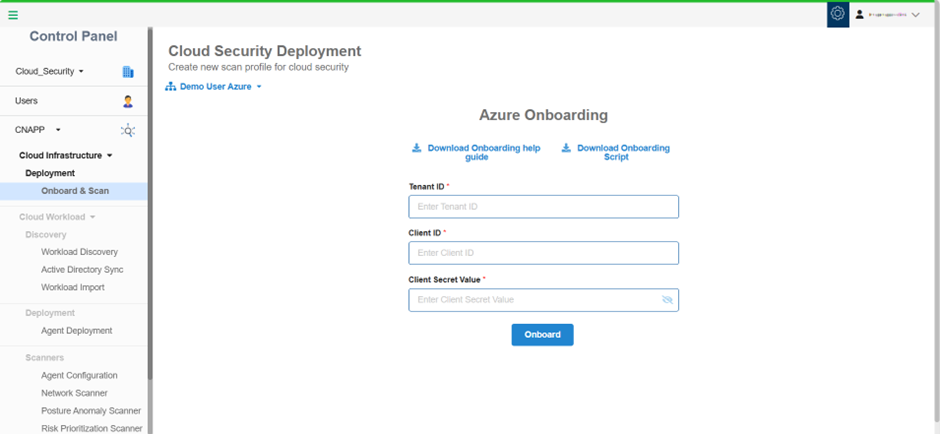
Step 1: Open the account for which you want to onboard the subscription and feed in the values obtained from the script execution.
- Tenant ID(Directory(Tenant)ID)
- Client ID(Application(Client) ID)
- Client Secret Value(Client Secret)
Step2: Click Onboard. Now you’re ready to initiate the scanning process.