Sign up for Saner CVEM Trial Account
You can sign up for a 30-day free trial account for Saner CVEM that gives you full access to Saner tools. You can evaluate the Saner tools on up to 10 endpoints.
| Note The 30-day free trial account is applicable for Saner CVEM, Saner Platform, and Saner Cloud. For a trial of the Saner On-premises version, please get in touch with us at [email protected] or [email protected]. |
Follow the below steps to create a 30-day free trial account for Saner CVEM.
Step 1: Visit https://www.secpod.com/free-trial/
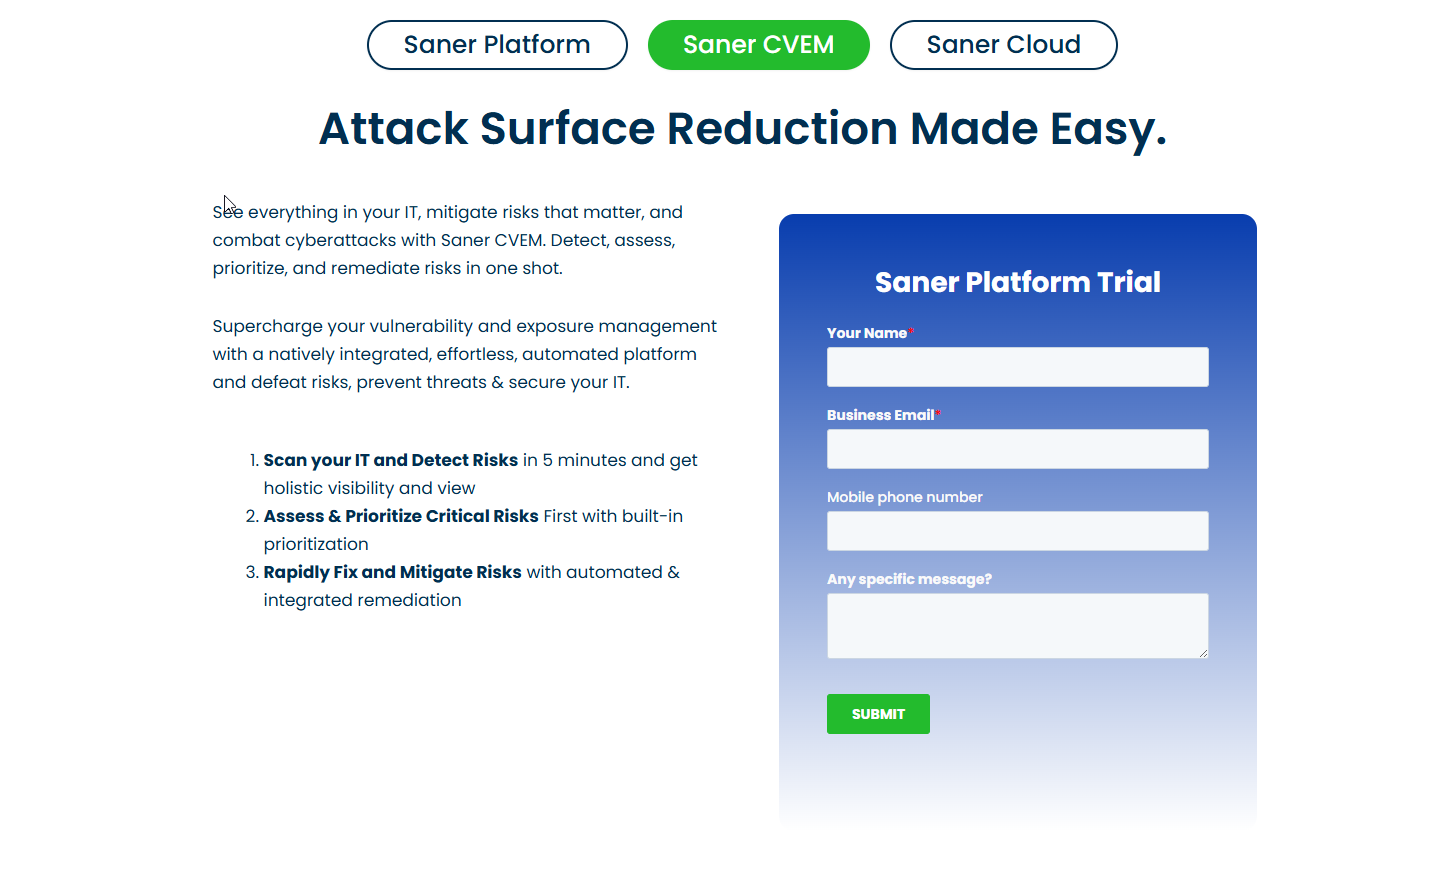
Step 2: [Mandatory]In the Your Name text box, provide your name.
Step 3: [Mandatory]In the Business Email text box, provide a valid business email address.
Step 4: [Optional]In the Mobile phone number text box, provide the phone number on which SecPod sales team can reach you to help set up a trial account.
Step 5: [Optional]In the Any specific message text box, you can provide any additional information related to your trial account request.
Step 6: Click the Submit button. A sales representative from the SecPod Sales team will reach out to you to help you set up a trial account.
Set Up Saner Account
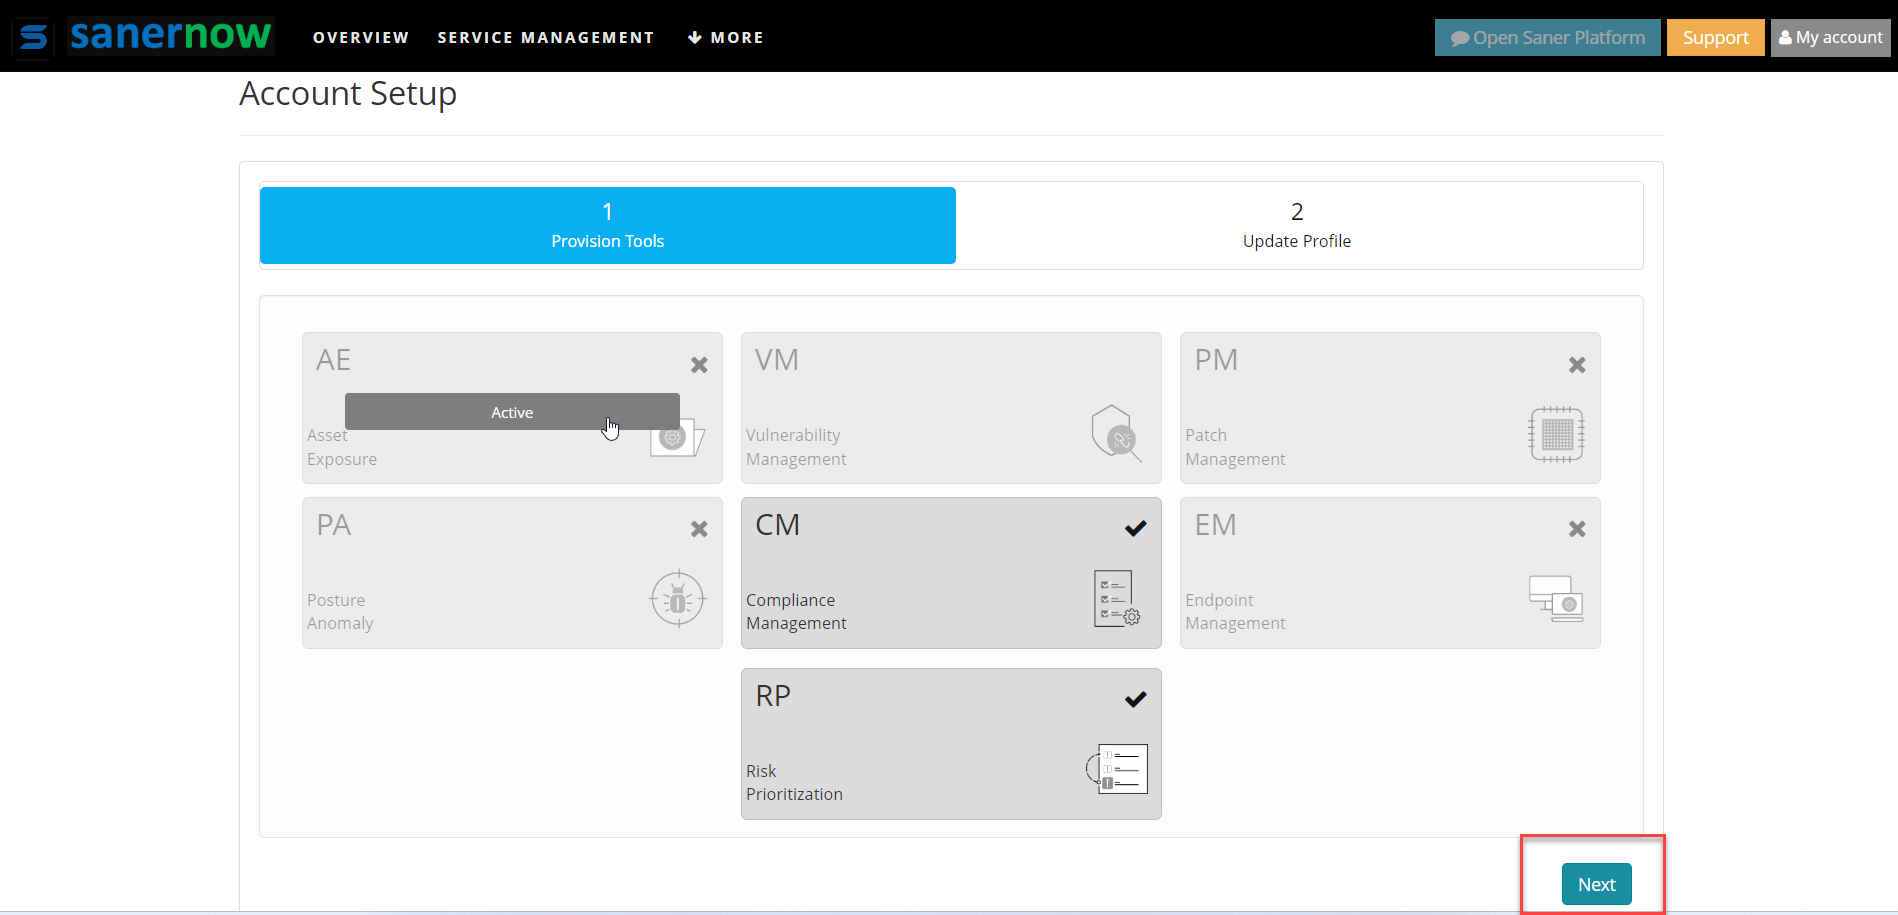
Once signed in to the Saner account, you will see a screen like the one mentioned below. Follow the below steps to setup the Saner account.
Step 1: Once logged into the Saner Account, access the Provision Tools tab to select the Saner tools you want to evaluate. Hover your mouse pointer over the Saner tool you want to evaluate. Click the Active button to enable the tool for evaluation. Once you have selected all the required Saner tools for your evaluation, click the Next button.
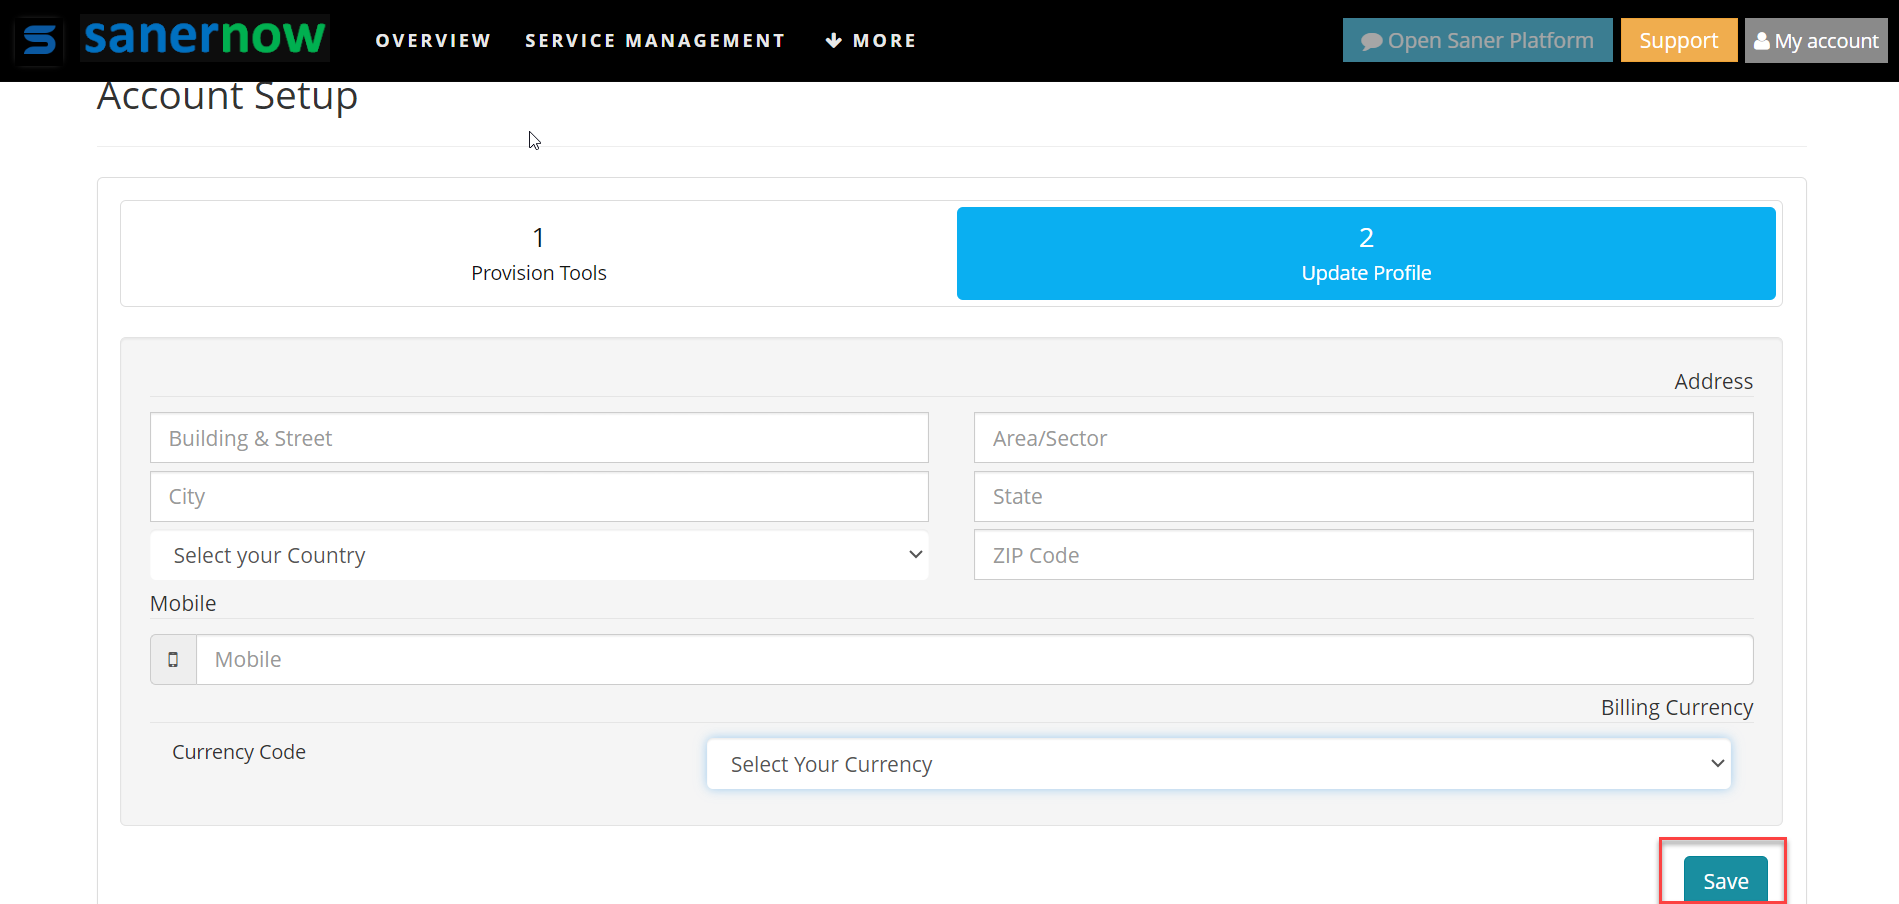
Step 2: Provide the billing details on the Update Profile tab and specify the currency code. This information you provided on the Update Profile tab will be used during invoice generation during the purchase of Saner subscription. Click the Save button to save the profile details.
Step 3: Once you see the confirmation message stating that the account is set up, click the Open Saner Platform button located on the top right of the page to proceed further with deploying Saner.

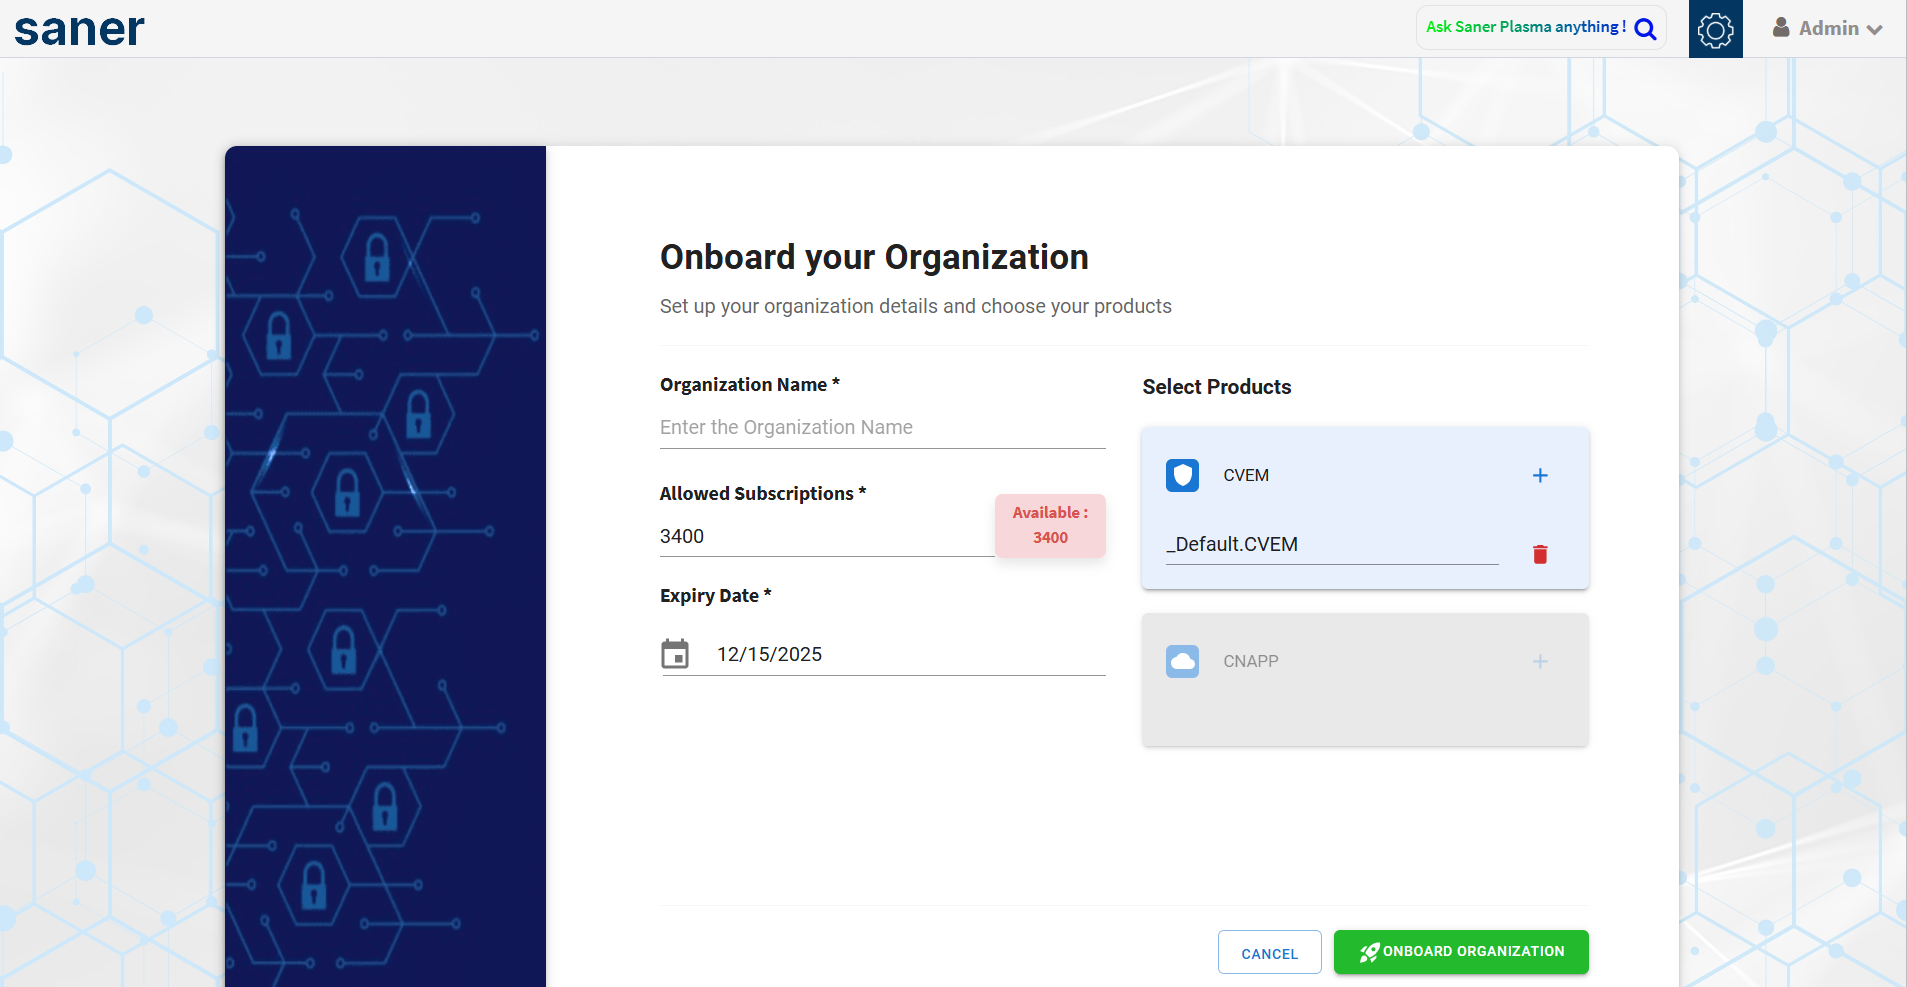
Onboard your Organization
After successfully creating a Saner account, you must onboard your Organization and select the Saner tools you want to evaluate during the 30-day free trial period.
Follow the steps below to onboard your Organization.
Step 1: Provide a name for your Organization in the Organization Name input box.
Step 2: Under Allowed Subscriptions, specify the number of subscriptions you want during the trial period. Subscriptions allow you to install Saner Agent onto a device. You are allowed a maximum of 10 subscriptions during the free trial period.
Step 3: In the Tools Provision box, drag the slider to the right to enable a tool during the free trial period.
Step 4: Click the Onboard button.
Step 5: Click the Go to Dashboard button on the Onboard Saner Agents screen.
Deploy Saner Agents
You have successfully onboarded your Organization. However, you need to deploy Saner Agents on your devices to evaluate Saner tools. You can deploy the Saner Agent graphically or using a command line. At the same time, you can also opt to deploy Saner Agents using an offline deployer tool.
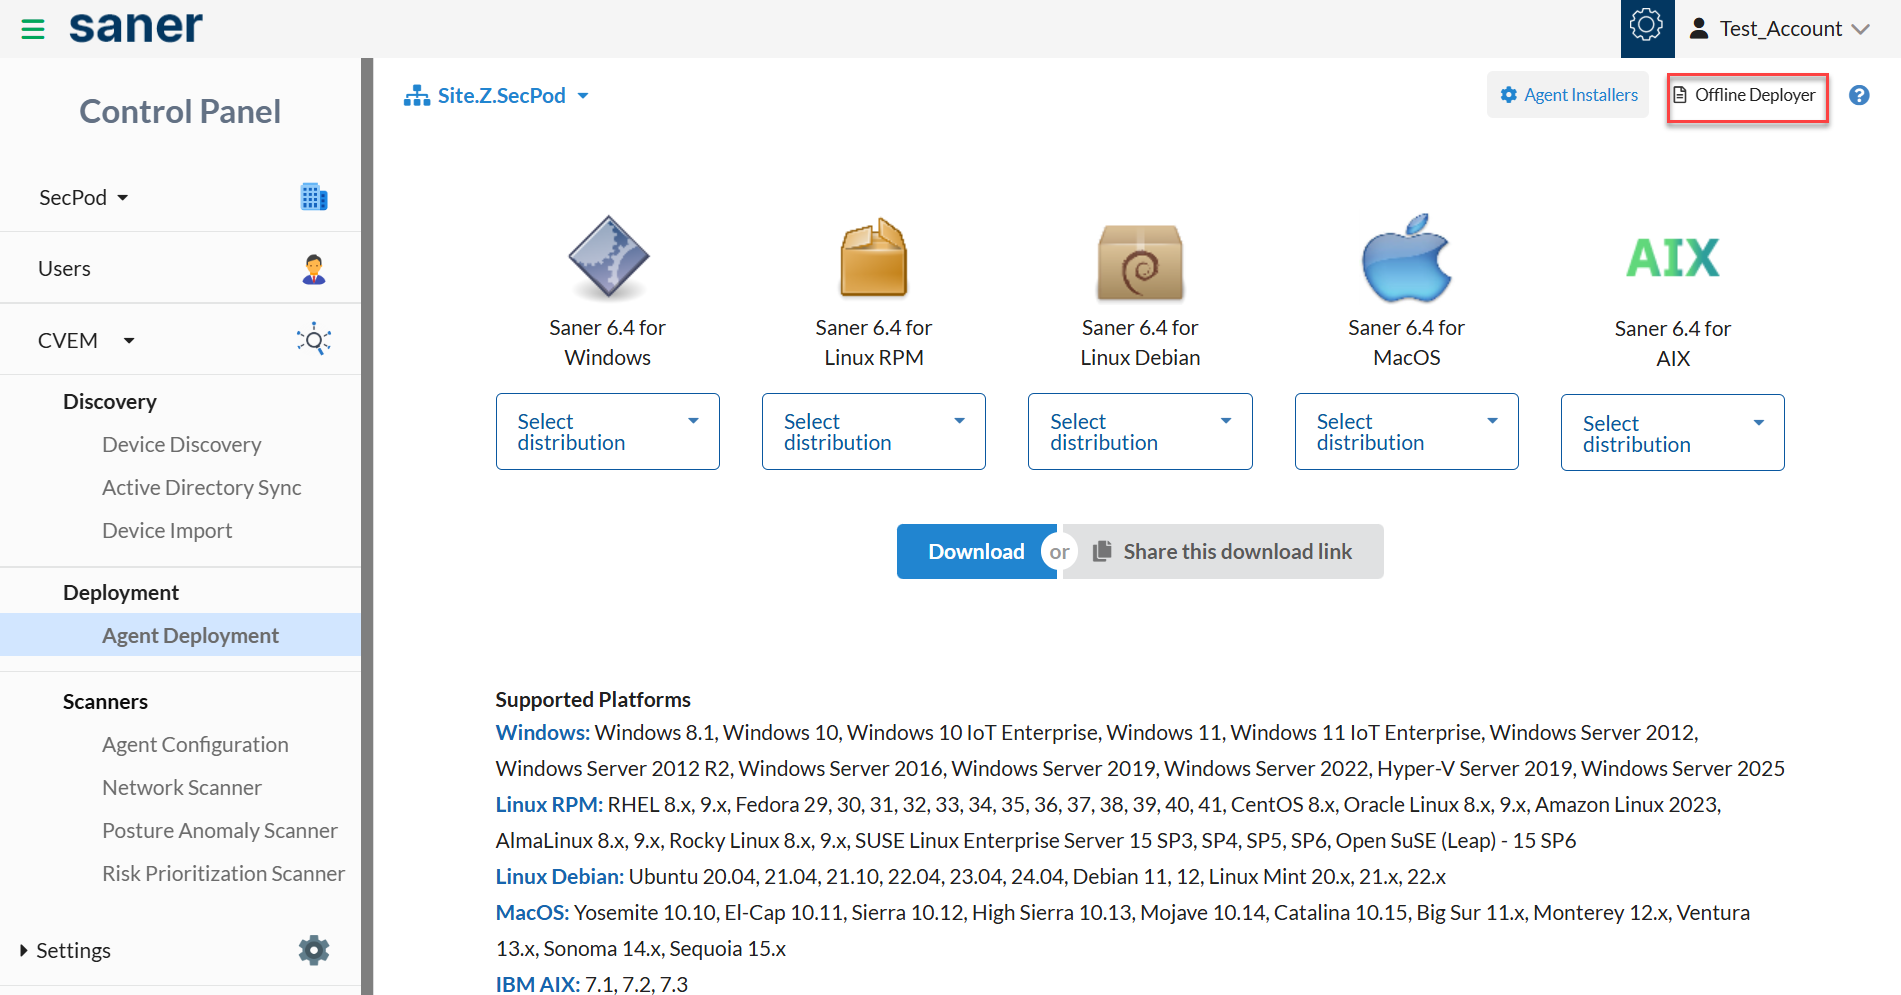
Follow the steps below to deploy Saner Agents on your devices graphically.
Step 1: Go to the Control Panel by clicking the gear ![]() icon on the top right side of the Unified Dashboard page.
icon on the top right side of the Unified Dashboard page.
Step 2: Select Agent Deployment from the Agents menu on the left side of the page.
Step 3: Depending on the operating system on your device, select the relevant Saner Agent installer package listed on the right side of the page.
Step 4: Click the Download button. The selected Saner Agent installer gets downloaded.
Alternatively, you can click the Share this download link button to generate a hyperlink that requires authentication. It can be opened using a web browser on the device where you want to deploy Saner Agents.
Click the link below to learn how to deploy Saner Agents using a command line.
https://saner.secpod.com/docs/Agent-Installation-Help-Guide.html?activeTab=Agent%20Installers
You can deploy Saner Agents using an Offline Deployer tool. The Offline Deployer tool is situated on the right side of the Deploy Agent page.
Click the link below to learn how to deploy Saner Agents using Offline Deployer tool.
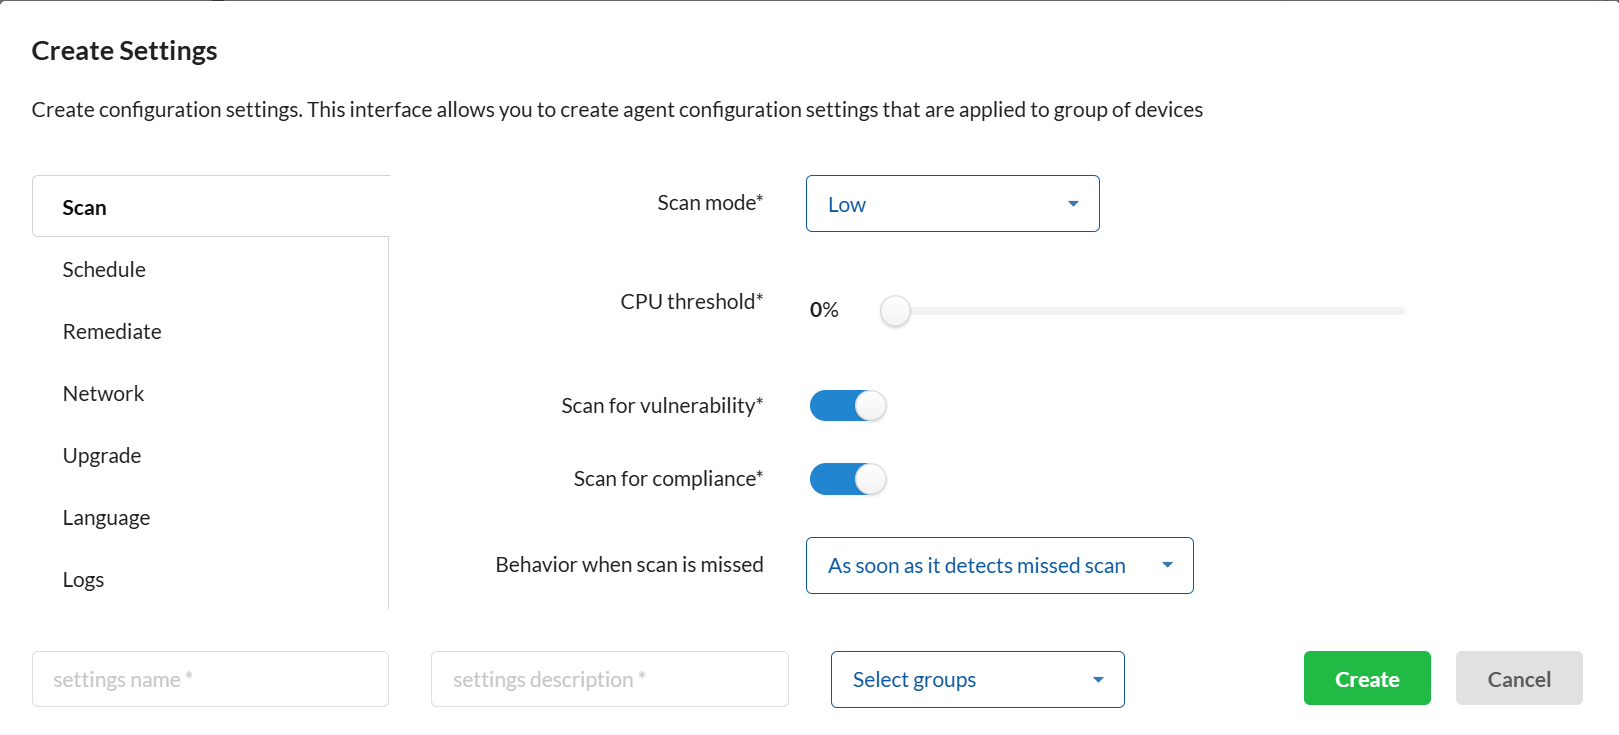
Configure Saner Agents
By default, Saner Agents configuration settings are configured during installation. However, you can modify these settings as per your requirements. To modify the Saner Agent configuration settings, click the Agent Configuration under the Scanners menu on the Control Panel page. Control Panel > Agents > Agent Configuration > Create Settings
Manage Saner Features
Saner offers multiple features that help you manage the devices in your Organization and prevent any cyberattacks on your IT infrastructure. These features are located in the Control Panel.
Click the gear icon on the top right of the Unified Dashboard page to access the Control Panel.
Saner Control Panel provides you with the below options.
- Organization Management.
- User Management.
- Deployment
- Settings.
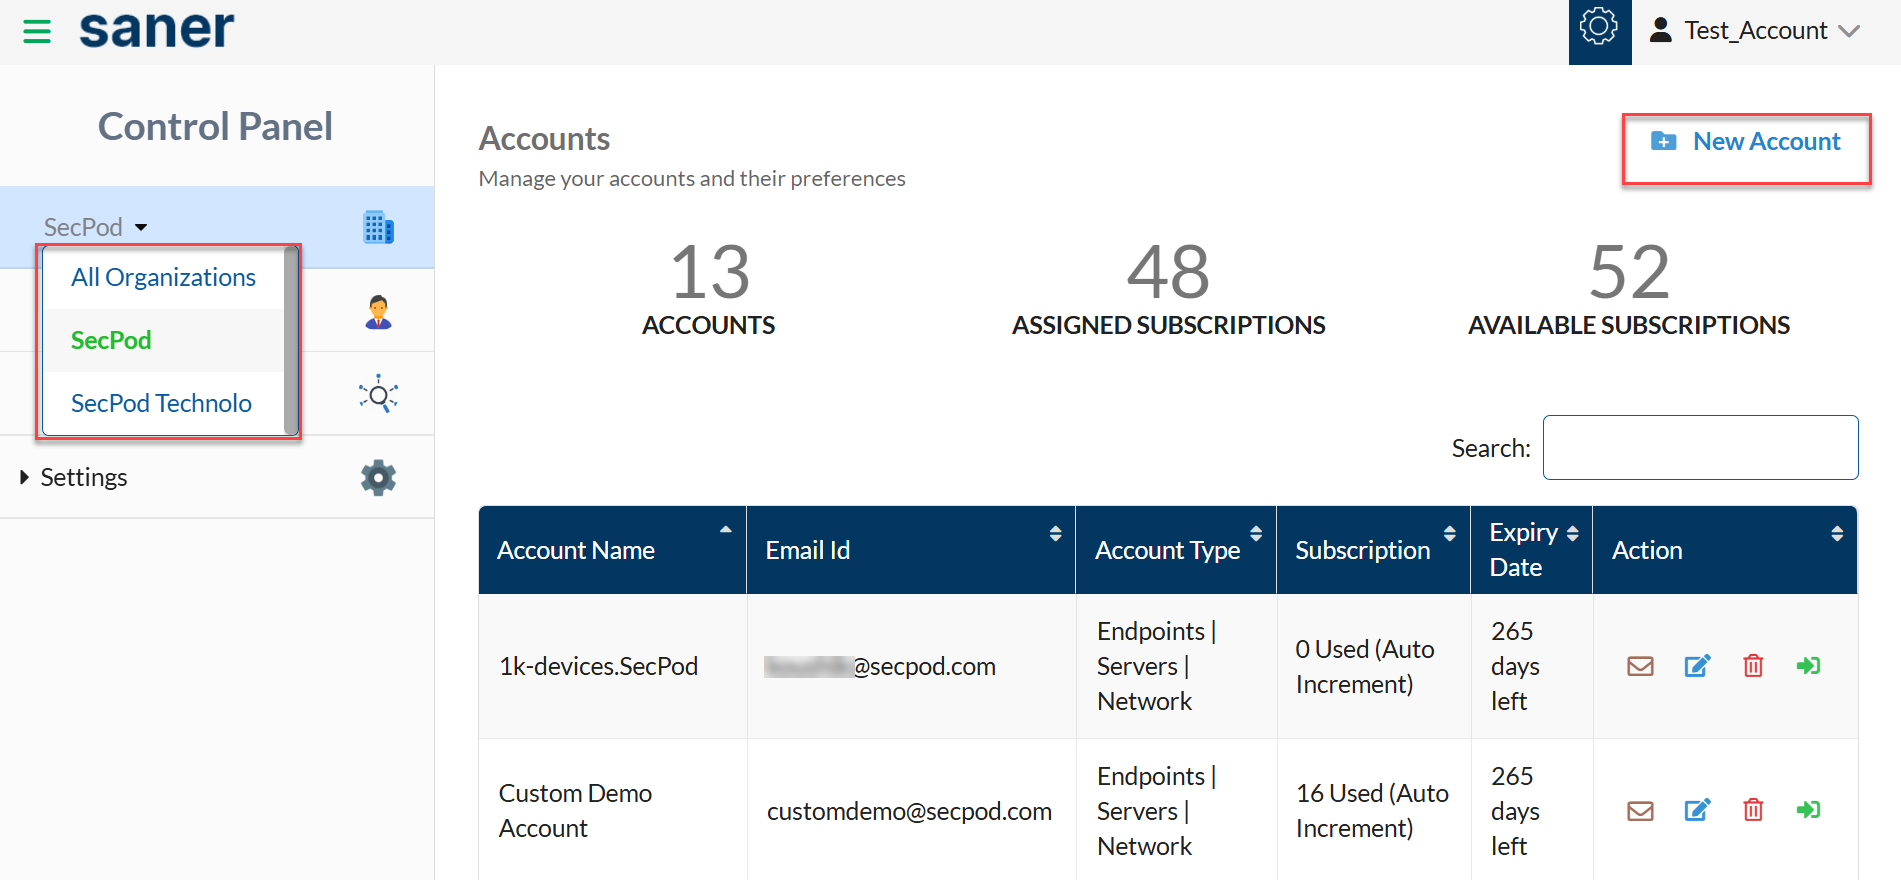
Organization Management
Saner creates an Organization during the Organization onboarding process. By default, every Organization has an Account within it. You can create multiple Accounts within an Organization. However, you must be an Org Admin to create Organizations in Saner.
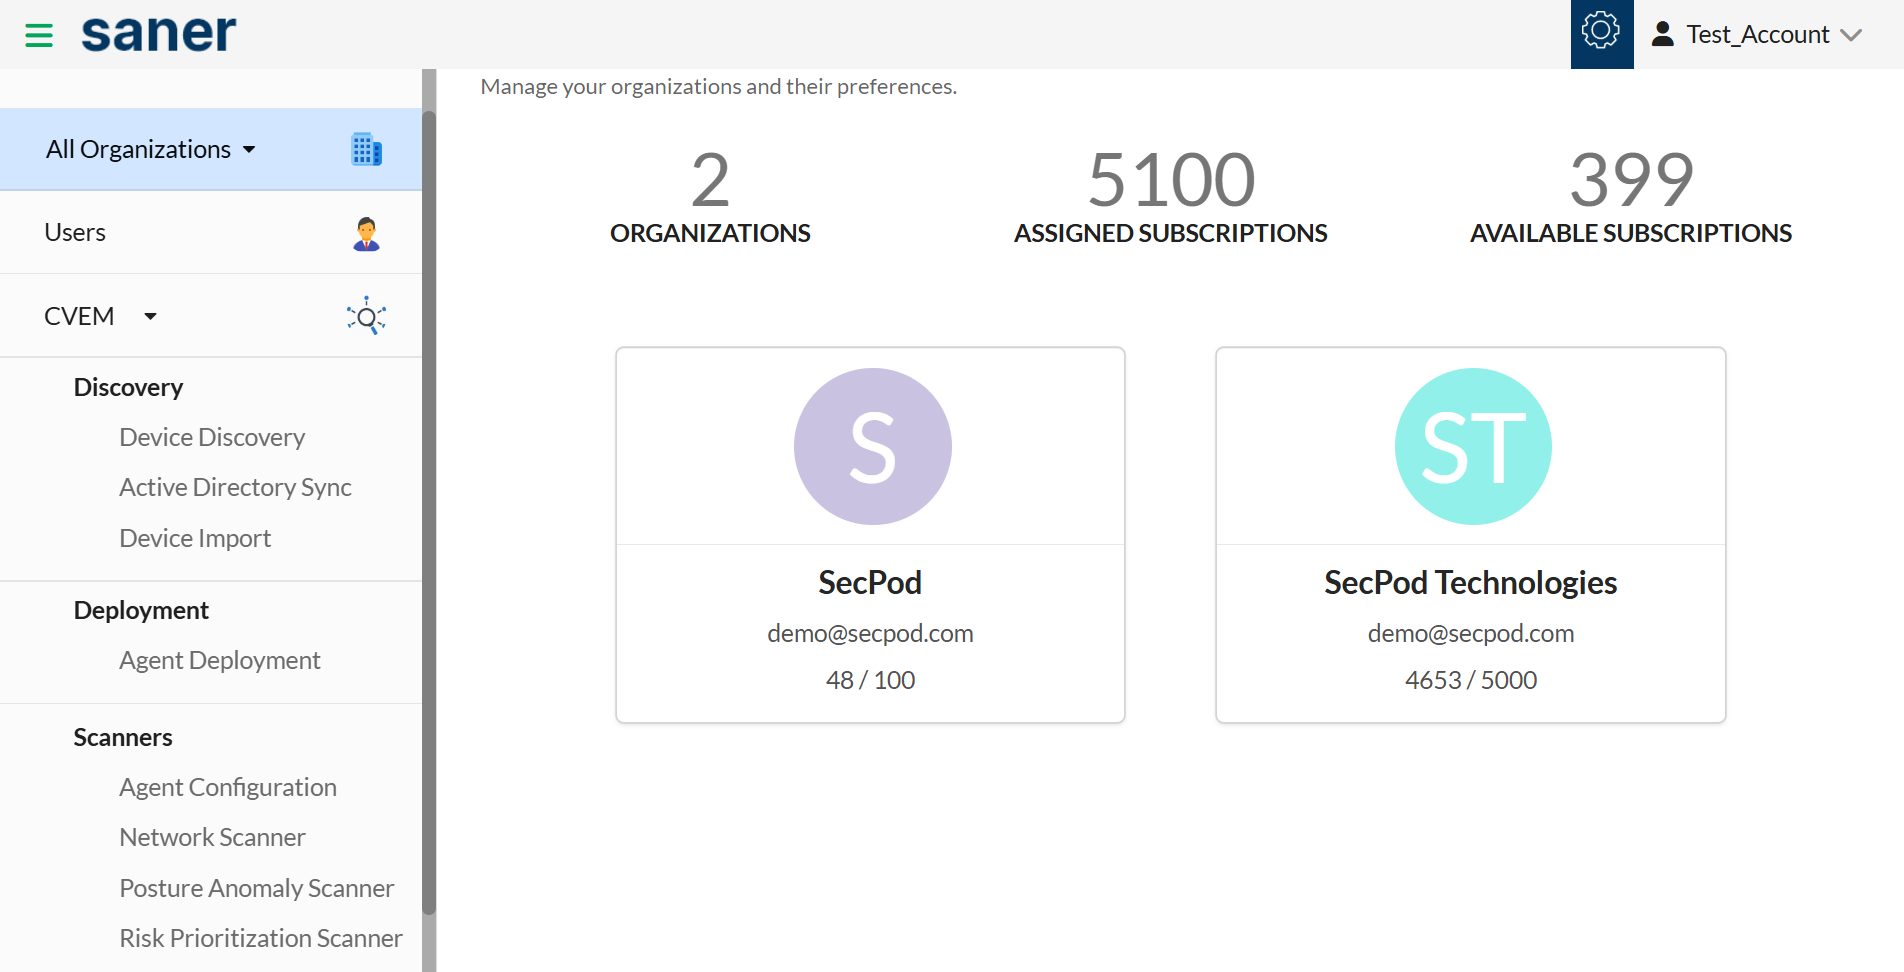
To create an Account within an Organization, select the Organization under which you want the Account to belong and click the New Account button on the right side of the page.
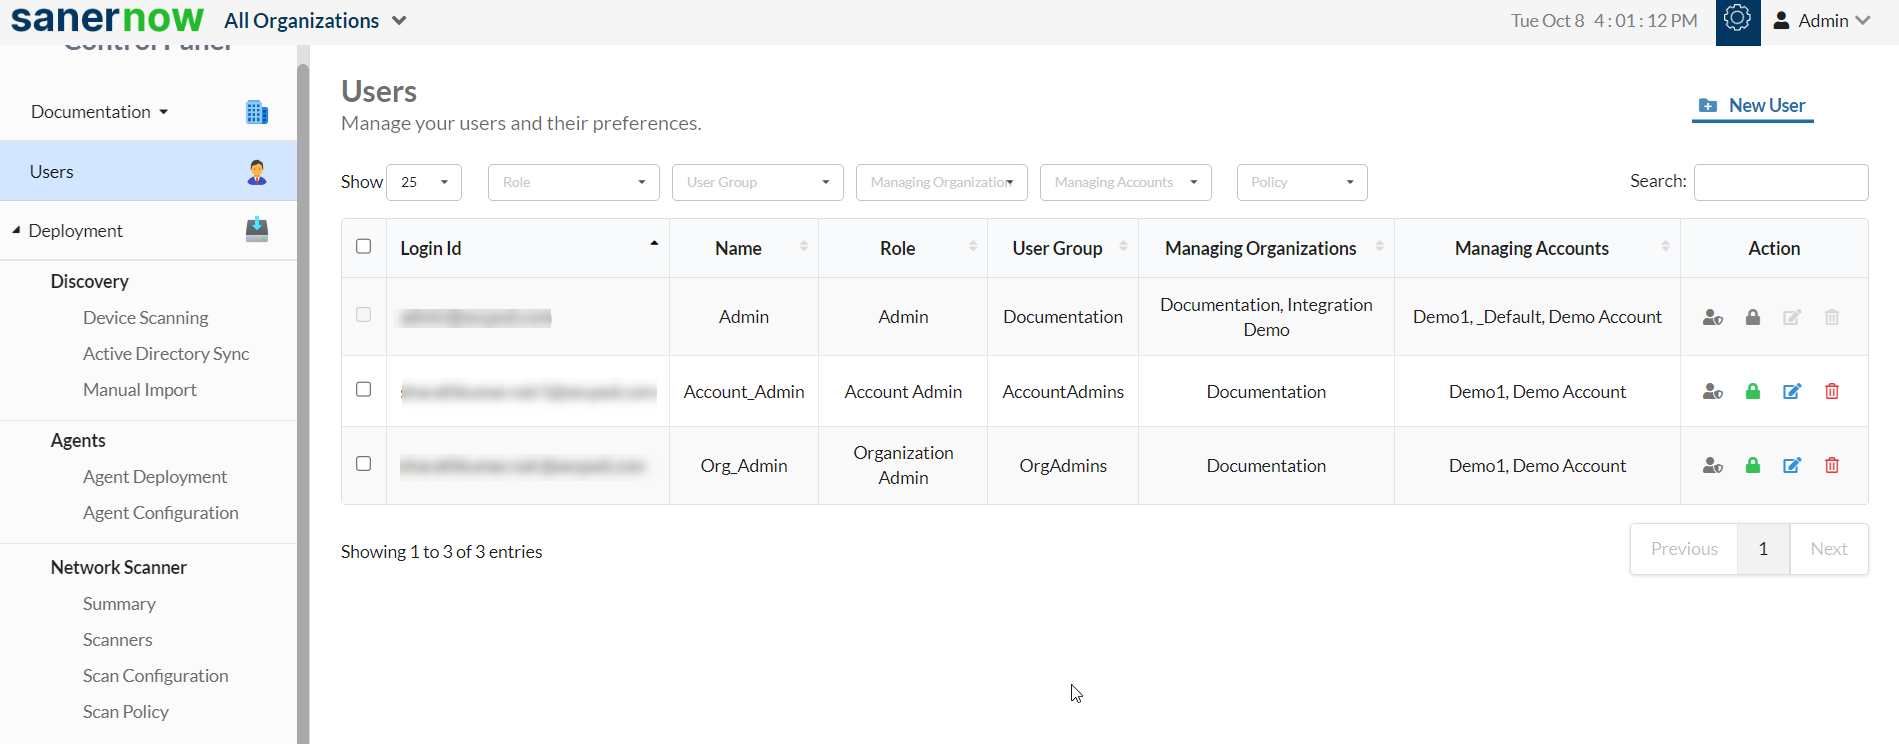
User Management
Saner supports role-based access control to define actions a user can perform using Saner tools. There exist three different roles. They are as follows:
- Organization Admin
- Account Admin
- Normal User.
Apart from the three roles mentioned above, an admin user during the onboarding of an Organization.
On the Control Panel page, click the Users button to access the user management page. On this page, you can create new users and assign various permissions to the newly created user. At the same time, you can enable Single Sign On and Multi-Factor Authentication login for users while logging into the Saner web console.
Authentication
You can add additional layer of security to your Saner accounts by enabling Single Sign-On and Multi-Factor Authentication.
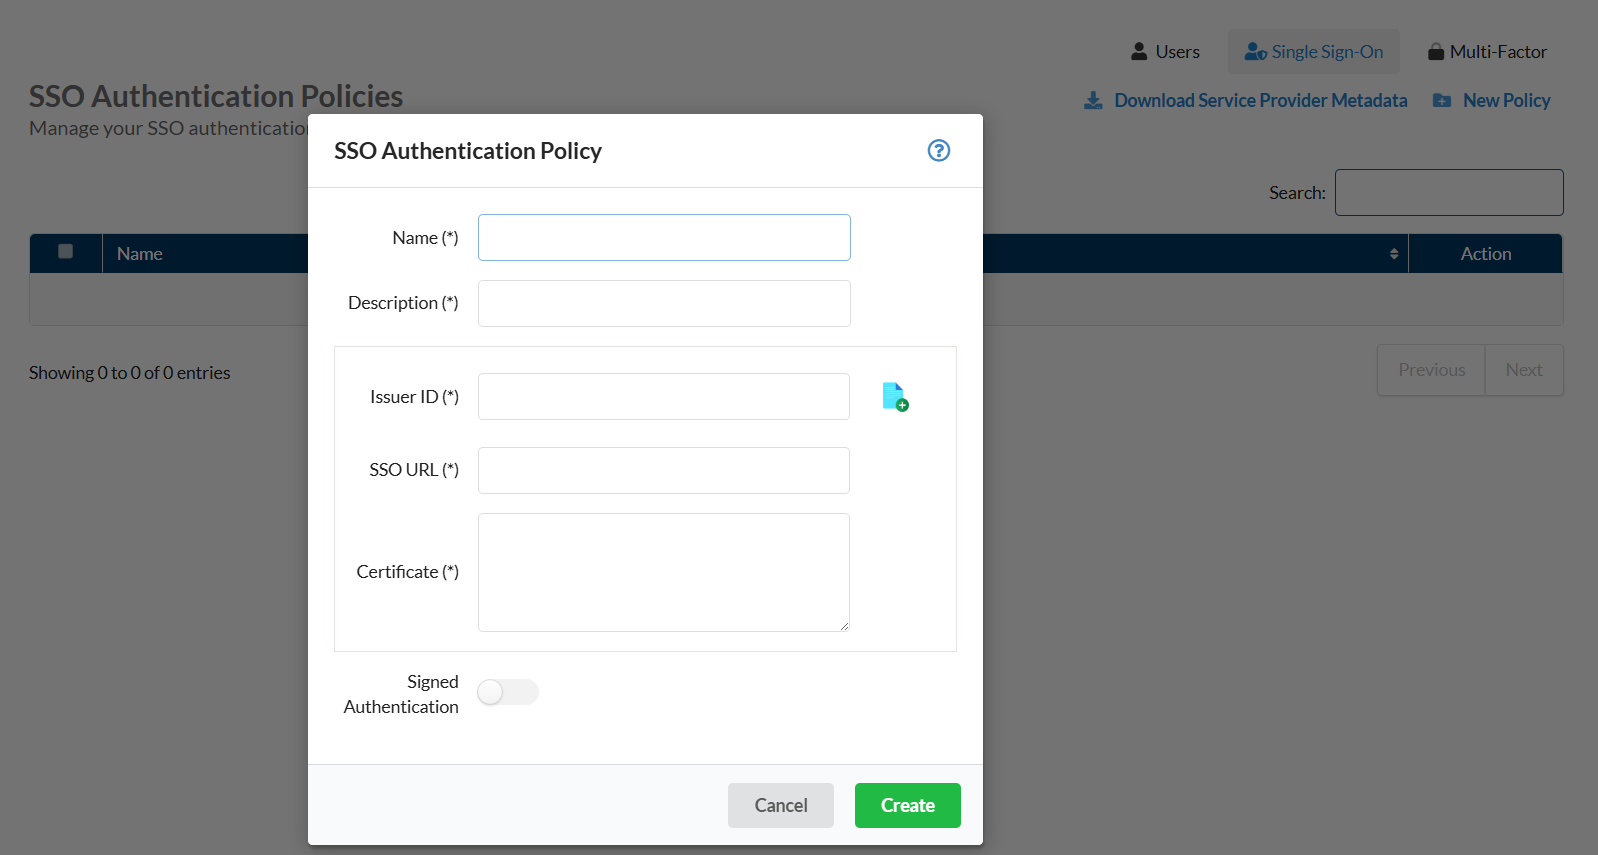
Single Sign-On
The Single Sign-On feature, located under the Users menu allows you to enable Single Sign-On for your Saner account during login. Below is the list of SSO vendors Saner supports.
- PingID
- PingFederate
- AWS
- Azure AD
- Auth0
- Okta
Multi-Factor
The Multi-Factor feature, located under the Authentication menu, allows you to protect your Saner accounts from unauthorized access by enabling Multi-factor authentication. By default, you can configure any authenticator app that supports the OAuth 2.0 authentication protocol with the Saner account.
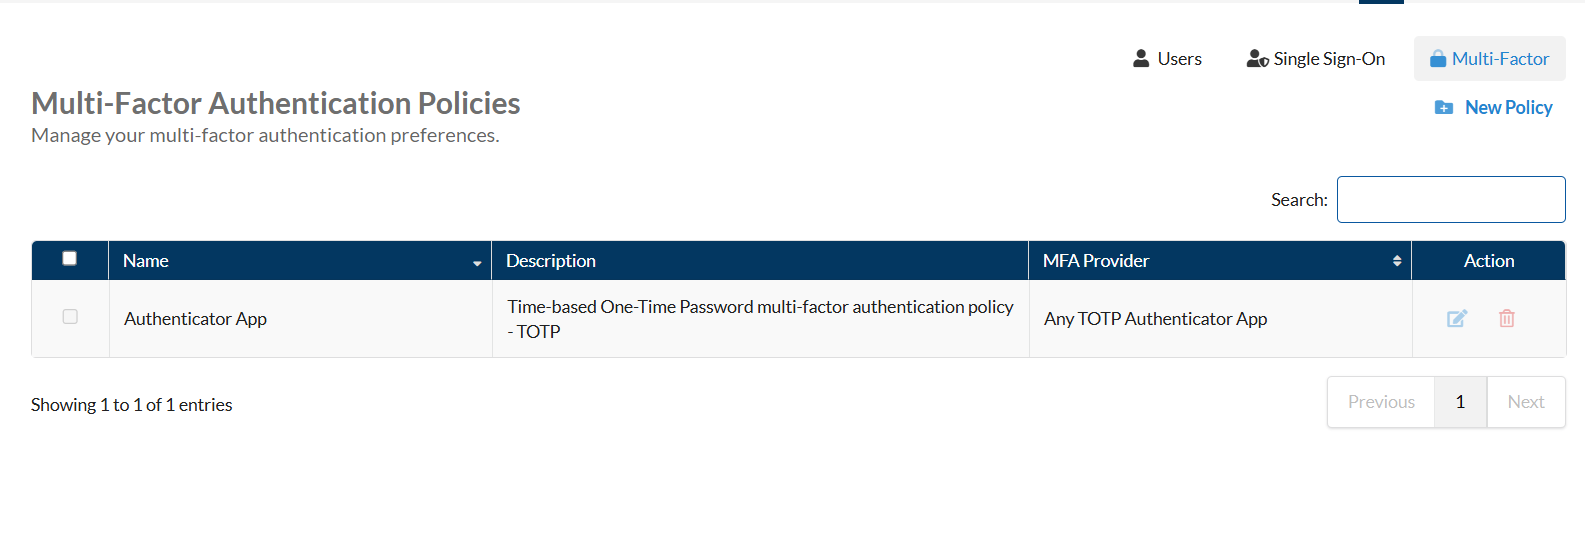
Additionally, you can use MFA providers such as PingOne, PingID, and Okta to secure Saner accounts.
Discovery
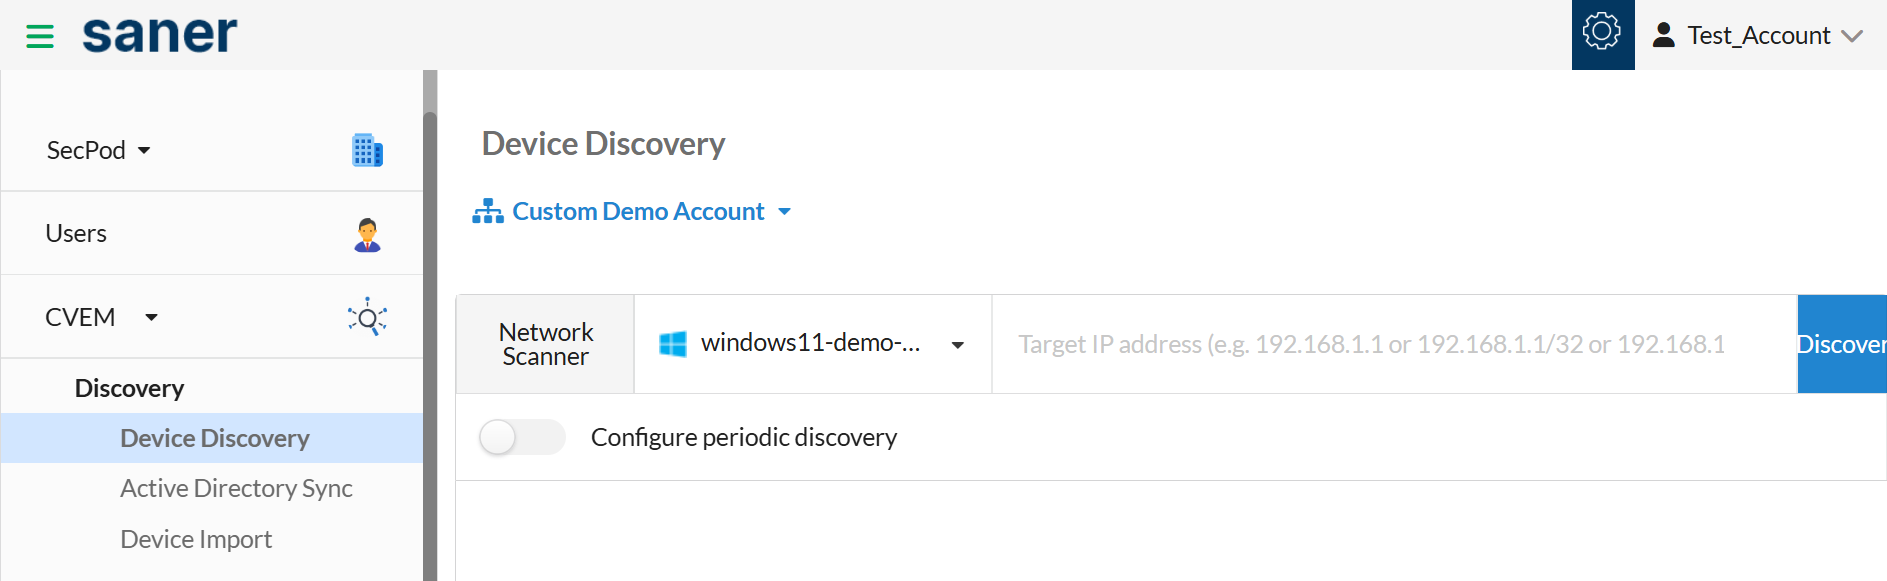
Device Discovery
Saner provides you with tools to discover devices within your network and deploy Agents onto them. You can scan for devices in your network by providing an IP address or specifying a range of IP addresses to look for devices. You can install Saner Agents on the discovered devices.
The Device Discovery feature under the Deployment menu allows you to discover devices within your network. You must provide an IP address for the device or specify an entire IP range to search for devices. You can also choose to run the discovery scan daily, weekly, or monthly.
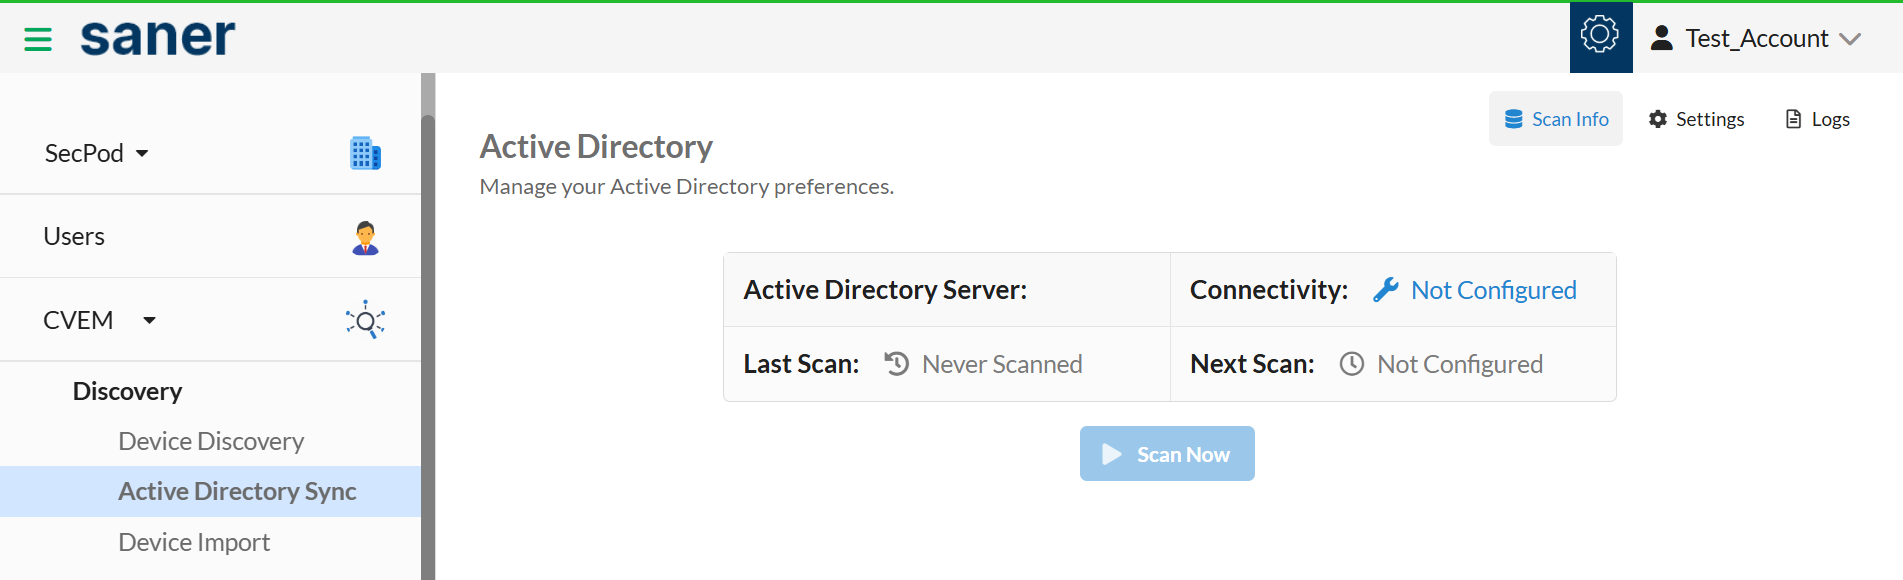
Active Directory Sync
The Active Directory Sync, under the Discovery menu, allows you to connect your Active Directory and import devices from multiple Organizational Units(OUs) and Groups. You can automatically deploy Saner Agents onto the imported devices, avoiding the manual effort and time needed to install Saner Agents on each device.
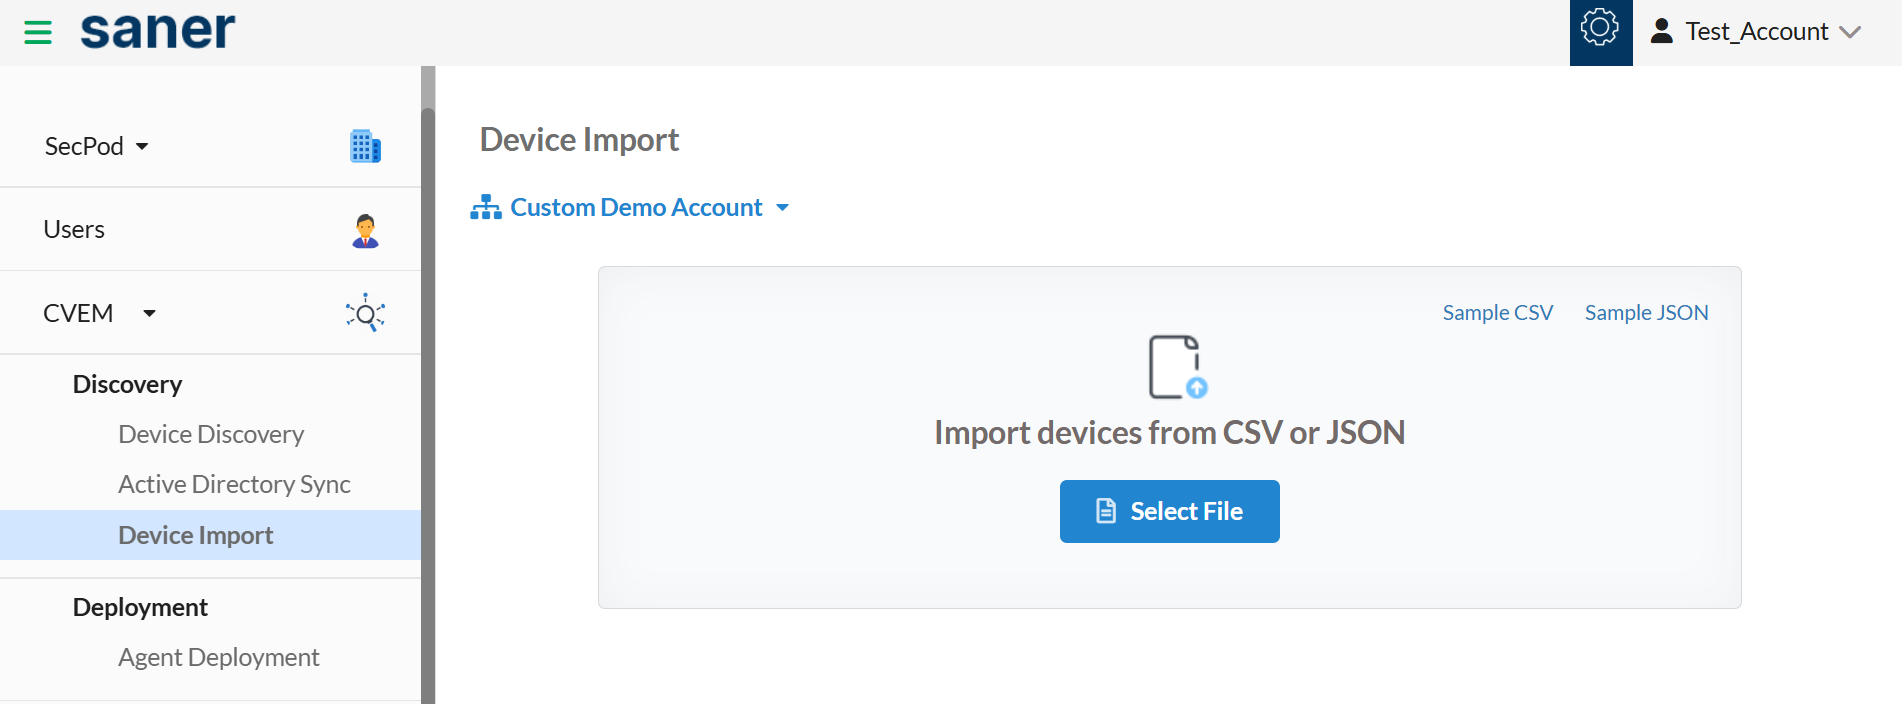
Device Import
The Device Import feature under the Discovery menu lets you import information about devices and their assigned tags from CMDB into Saner. You can provide device information in a CSV or JSON format.
Deployment
Agent Deployment
The Agent Deployment feature under the Deployment menu lets you deploy Saner Agents on devices graphically and using a command line. You can also deploy Saner Agents using the Offline Deployer tool onto devices present in your network.
Scanners
Agent Configuration
The Agent Configuration feature under the Scanners menu lets you configure Saner Agent settings.
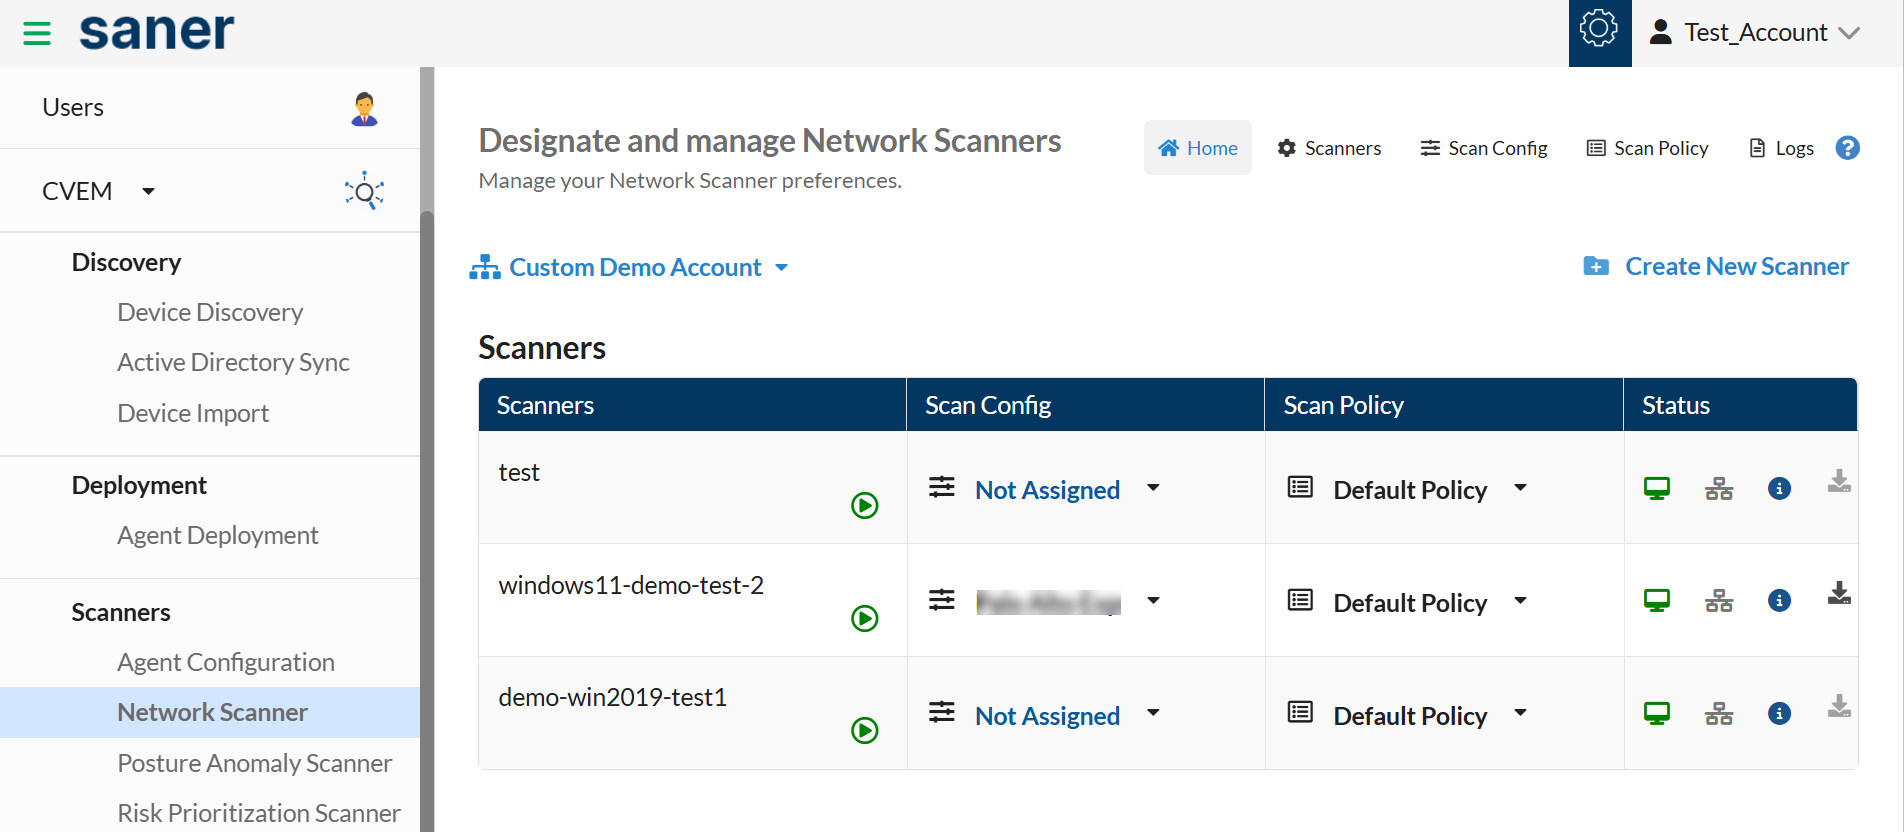
Network Scanner
The Network Scanner feature under the Scanners menu can help you find vulnerabilities and misconfigurations across all IP-enabled devices in your network by leveraging the endpoints within the network. You can automate daily scans and also perform authenticated network scans using the Saner Network Scanner.
Click here to learn more about Saner Network Scanner.
Posture Anomaly Scanner
The Posture Anomaly Scanner located under the Scanners menu ,is part of the Saner Continuous Posture Anomaly (CPAM) tool that helps you identify misconfigured devices with unique security postures that are configured completely differently when compared to other devices. When launched, the Posture Anomaly Scanner scans devices in your Account and reveals all the persisting posture anomalies in your IT environment. You can also choose to run the Posture Anomaly scan daily, weekly, or monthly.
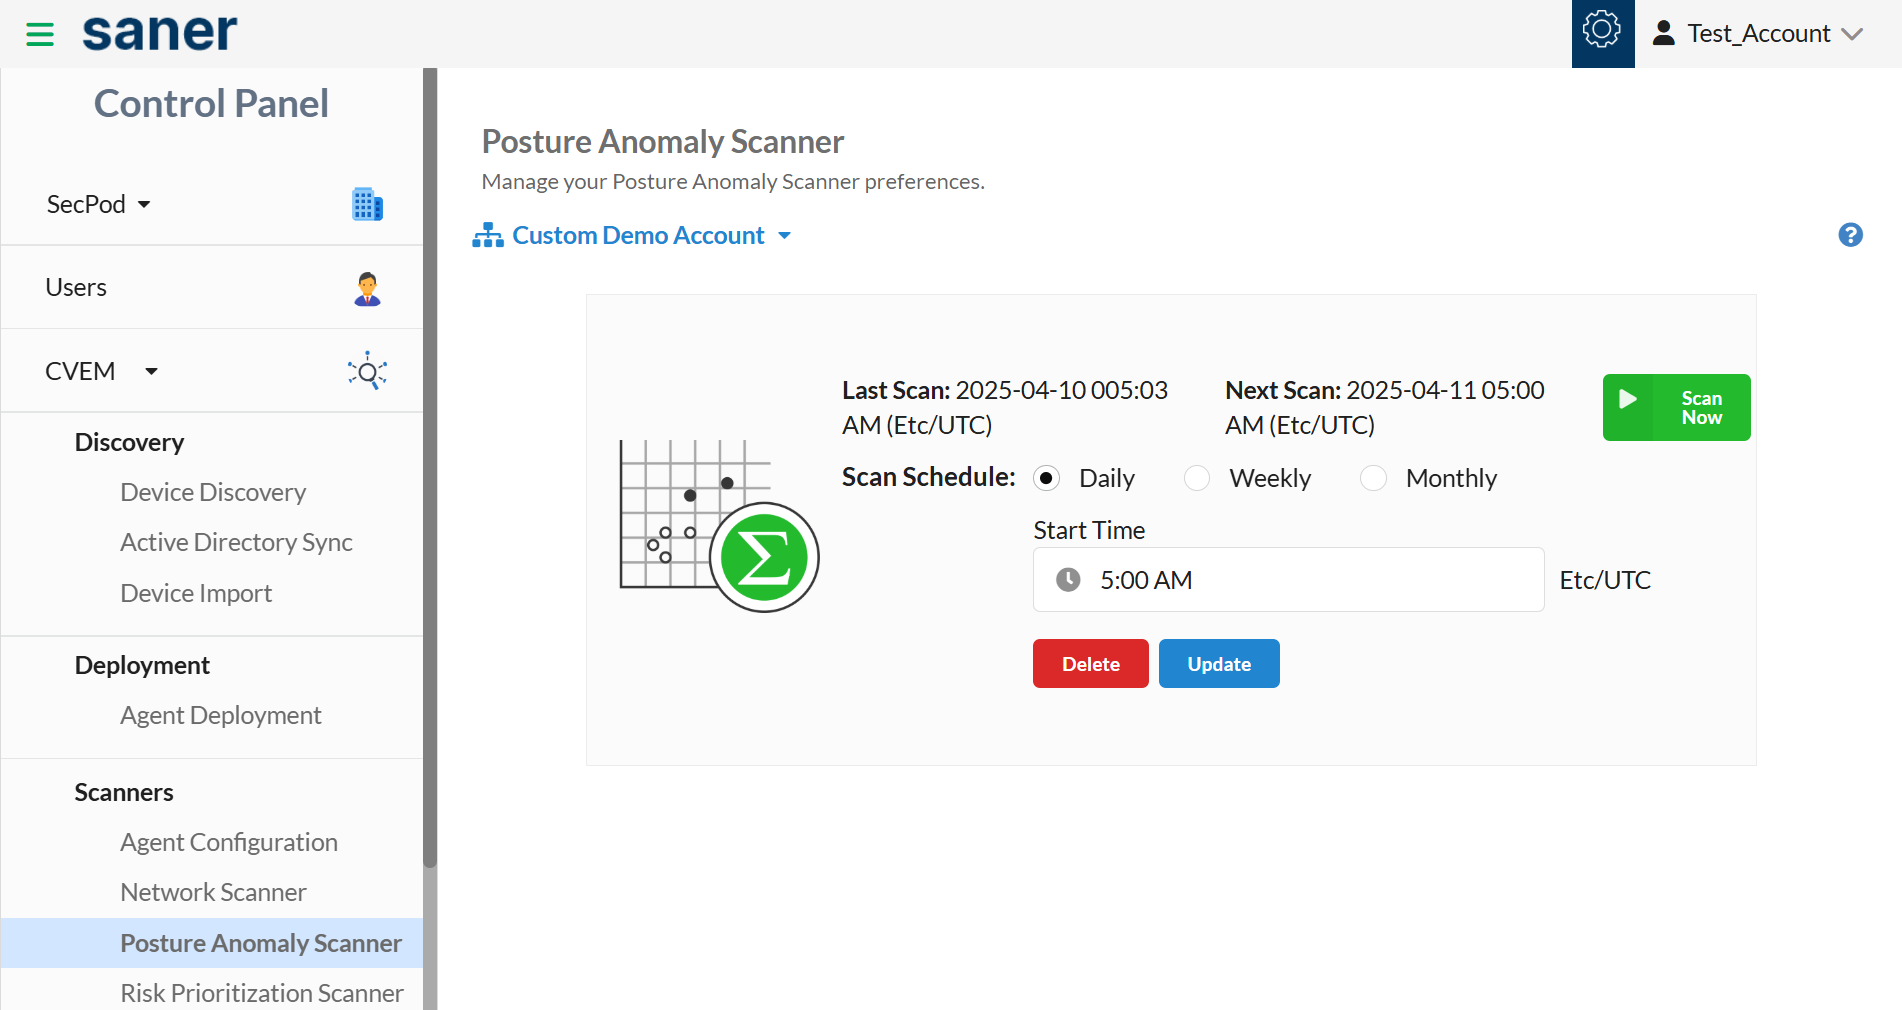
Click here to learn more about Saner CPAM tool.
Risk Prioritization Scanner
The Risk Prioritization Scanner, located under the Scanners menu, is part of the Saner Risk Prioritization (RP) tool. It helps you identify and prioritize the most severe vulnerabilities that need immediate remediation amongst the myriad of vulnerabilities in your IT infrastructure. When launched, the Risk Prioritization tool identifies the critical vulnerabilities that should be patched on a priority using the Stakeholder-Specific Vulnerability Framework (SSVC) and performs a deeper exploitation analysis of the risks by leveraging SecPod’s proprietary machine-learning algorithm.
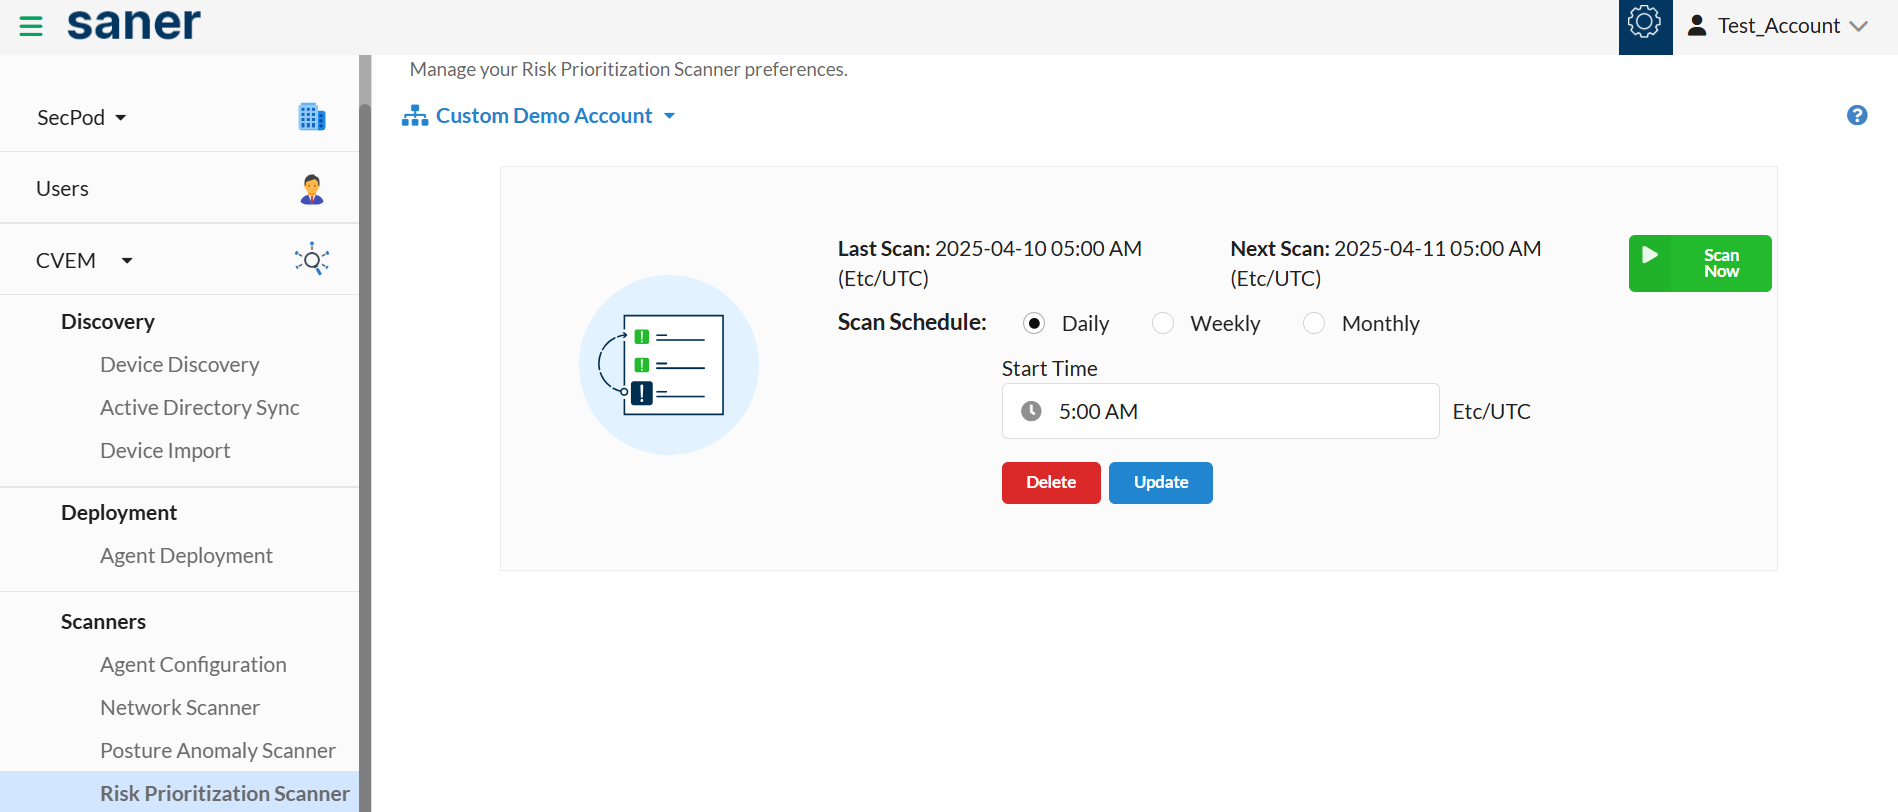
Click here to learn more about Saner Risk Prioritization tool.
use MFA providers such as PingOne, PingID, and Okta to secure Saner accounts.
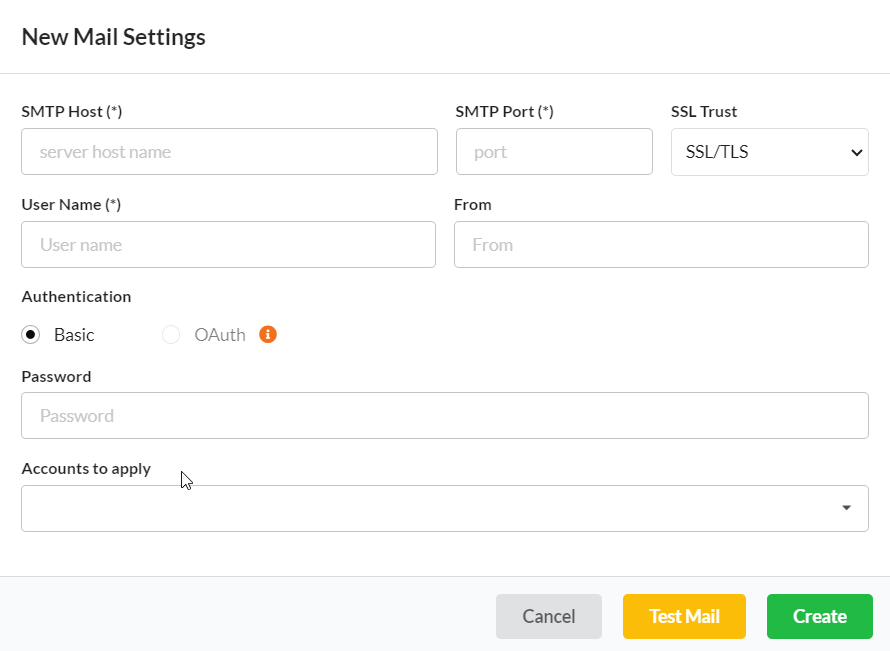
Settings
The Mail feature under the Settings menu allows you to configure mail settings to receive alerts from Saner. You can configure Saner to send alerts about vulnerabilities, non-compliance, threats and malware, critical patches and updates, and remediation job status. You can configure the mail setting to authenticate using a username and password or to use OAuth authentication.
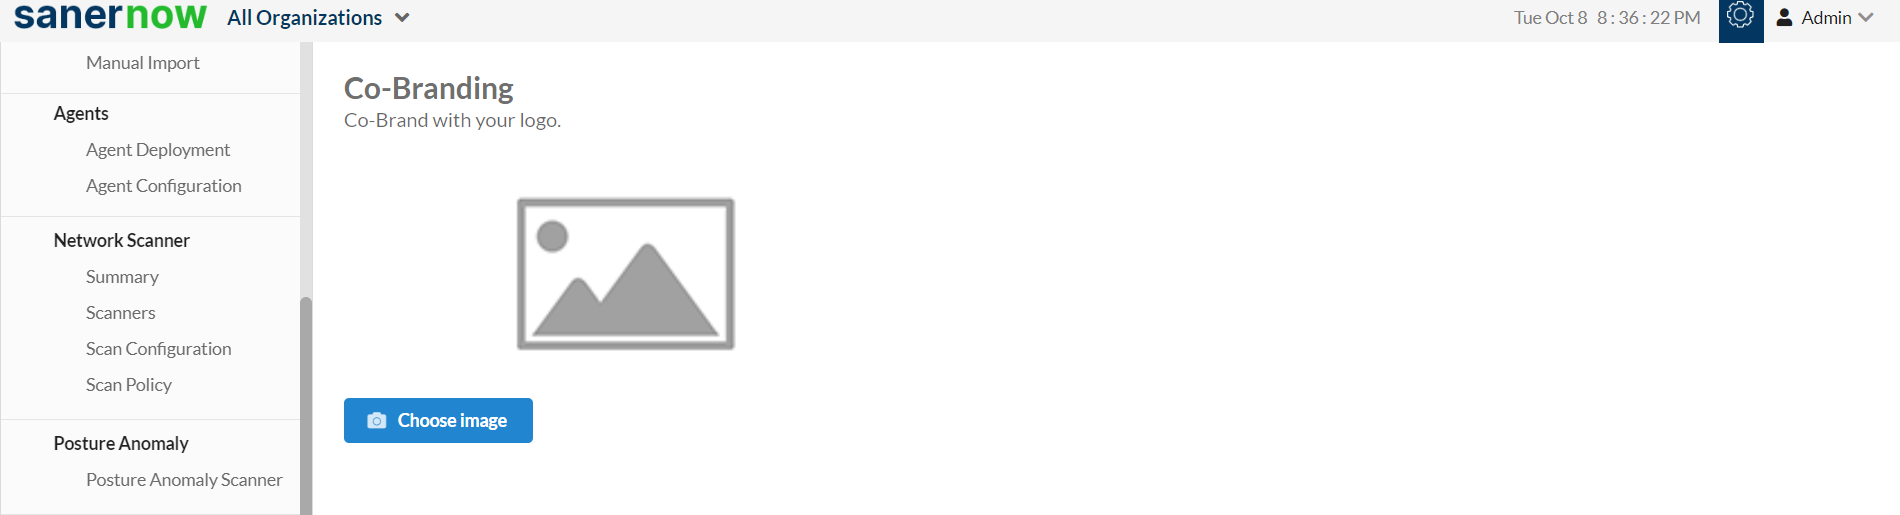
Co-Branding
The Co-Branding feature under the Settings menu allows you to upload a jpeg/png file of less than 200KB in Saner. This uploaded image will be visible on the Saner web console and Saner reports.