You can manage devices in Saner Platform effectively using groups. Using groups, you can sort devices in your account for effective patch management and deploy software using the Saner EM tool. Similarly, you can create custom Saner Agent settings for each Sanrgroup. By default, Saner Platform creates default groups based on the operating system. At the same time, Saner Platform allows you to create custom groups based on your needs.
Follow the below steps to create a group.
1: Log in to the Saner web console. Click the gear icon ![]() located on the top right of the Unified Dashboard page to access the Control Panel page.
located on the top right of the Unified Dashboard page to access the Control Panel page.
2: Click the ![]() button on the top right to create a group.
button on the top right to create a group.
The Create Group window appears on the screen.
3: (Required)In the Group Name text box, provide a name for the group.
4: (Required)In the Group Description text box, provide a brief description for the newly created group.
You need to specify whether you want to specify a OR or AND boolean operator to the various criteria applied to the group. You can define multiple criteria while creating the group.
5: Click the + button in the group criteria section to add additional criteria and the – button to delete the criteria.
6: Apply the chosen group criteria to All Devices or Unassigned Devices.
All Devices – These are the devices on which Saner Agent is installed and active.
Unassigned Devices – These devices don’t have Saner Agent installed on them.
7: Click the Show Devices button.
All the devices matching the specified criteria are listed.
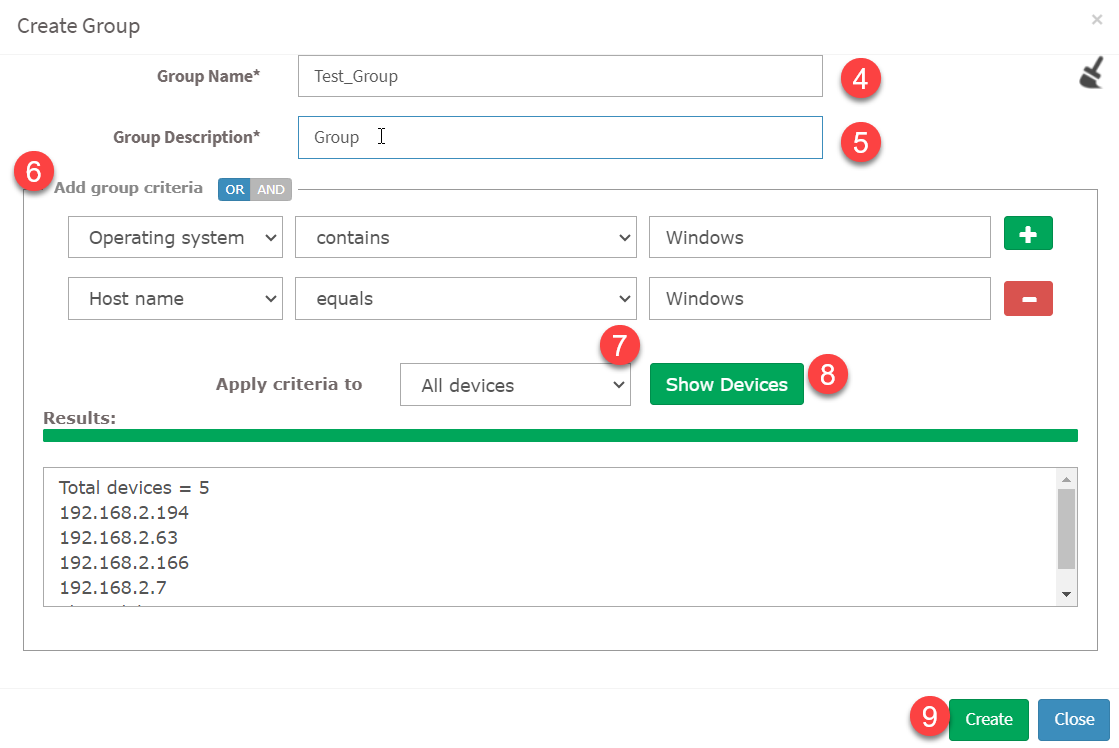
8: Click the Create Group button.
The group is created and appears on the left side of the page. The number of devices in the group is displayed right next to the group
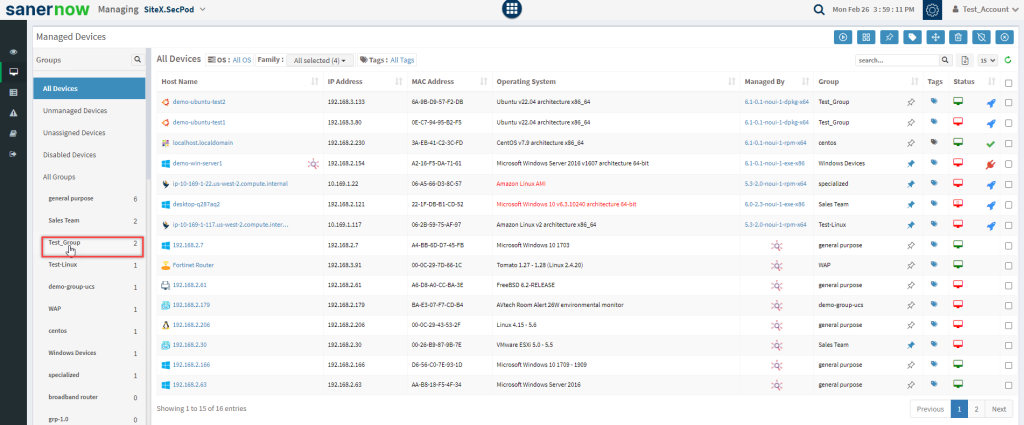
Saner Platform maps the devices to the group as per the criteria. However, the mapping is not permanent, and the devices may move to another group with the same matching criteria. To avoid this situation, you must pin the device to the group.
Follow the below steps to pin the device to a group.
1: On the Managed Device page, select the group where you want to pin a device.
The devices in the group will be listed and have a white pin icon ![]() next to the Group column.
next to the Group column.
2: Click the ![]() icon.
icon.
A confirmation message appears on the screen.
3: Click the Add button to confirm pinning the device.
The device is pinned and won’t move to other groups unless you unpin it from the group. You can click the same icon to unpin the device from the group.
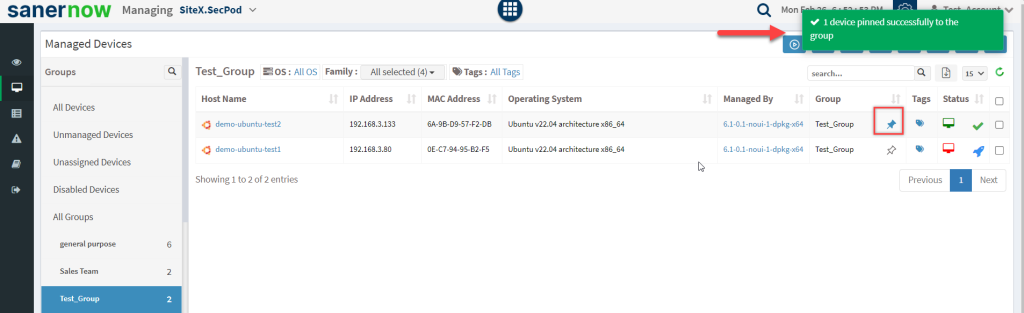
A blue pin icon ![]() displayed next to the device indicates that it is pinned to the group and can’t be moved to other groups.
displayed next to the device indicates that it is pinned to the group and can’t be moved to other groups.

