Follow the below steps to create mail settings at an Account level.
1: Log in to the Saner web console as an Account Admin. Click the Control panel icon ![]() located on the right side of the Unified Dashboard page.
located on the right side of the Unified Dashboard page.
2: Go to Control Panel —> Settings —> Mail.
3: Click the New Mail Settings button on the top right of the Mail Settings page.
The New Mail Settings window appears.
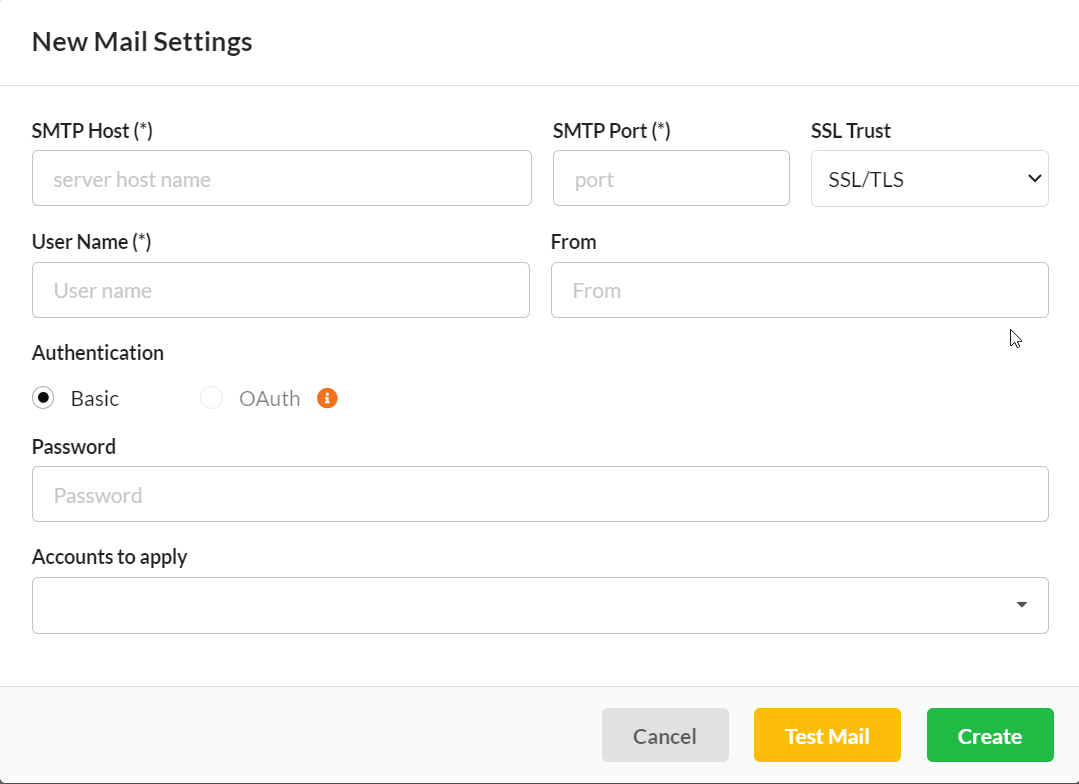
4: In the SMTP Host box, type the host or IP of the SMTP Server. (e.g., smtp.example.com).
5: In the SMTP Port box, type the port of the SMTP Server.
6: In the SSL Trust drop-down box, select the SSL Trust your email server supports.
7: In the User Name box, type the email address you want to authenticate used to authenticate to the SMTP server you mentioned in Step 3.
8: In the Authentication option box, select the authentication as Basic.
9: In the Password box, type the password associated with the email address you provided in Step 6.
10: In the From box, type the sender’s name, which should appear in Saner’s email.
11: In the Accounts to apply drop-down box, select the Accounts you want the mail settings to be applied.
12: Click the Test Mail button to trigger a test mail.
If you receive the test mail, proceed to the next step. If you didn’t get a test mail, verify the information you provided from Step 4 to Step 9.
13: Click the Create button.
Saner creates the mail settings and displays it on the Mail Settings page.
| Note You can configure Mail Settings at an Organization level as well. You must be logged in as an Admin / Organization Admin to configure mail settings at an Organization level. |

