Follow the below steps to generate a Client ID and Client Secret for Microsoft 365 email accounts.
1: Sign in to the Azure portal and access the Home screen.
2: Click on App registrations.
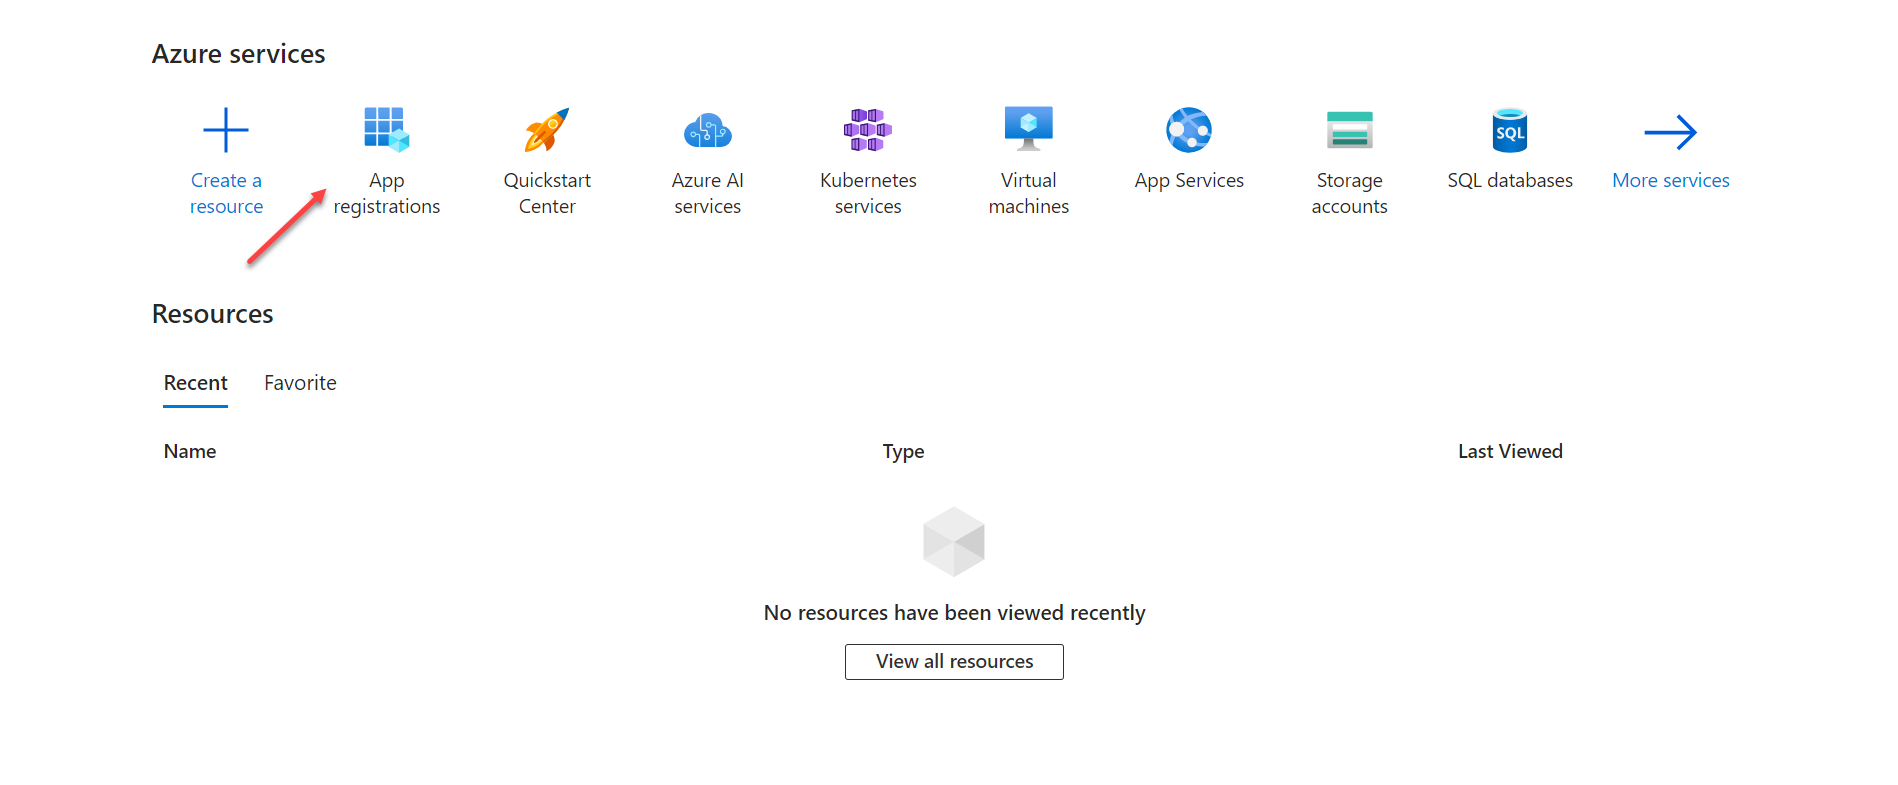
3: Click the + symbol next to New Registration to register the Saner application on the App registration screen.

4: On the Register an application screen, in the Name textbox, enter the value ‘Saner.’
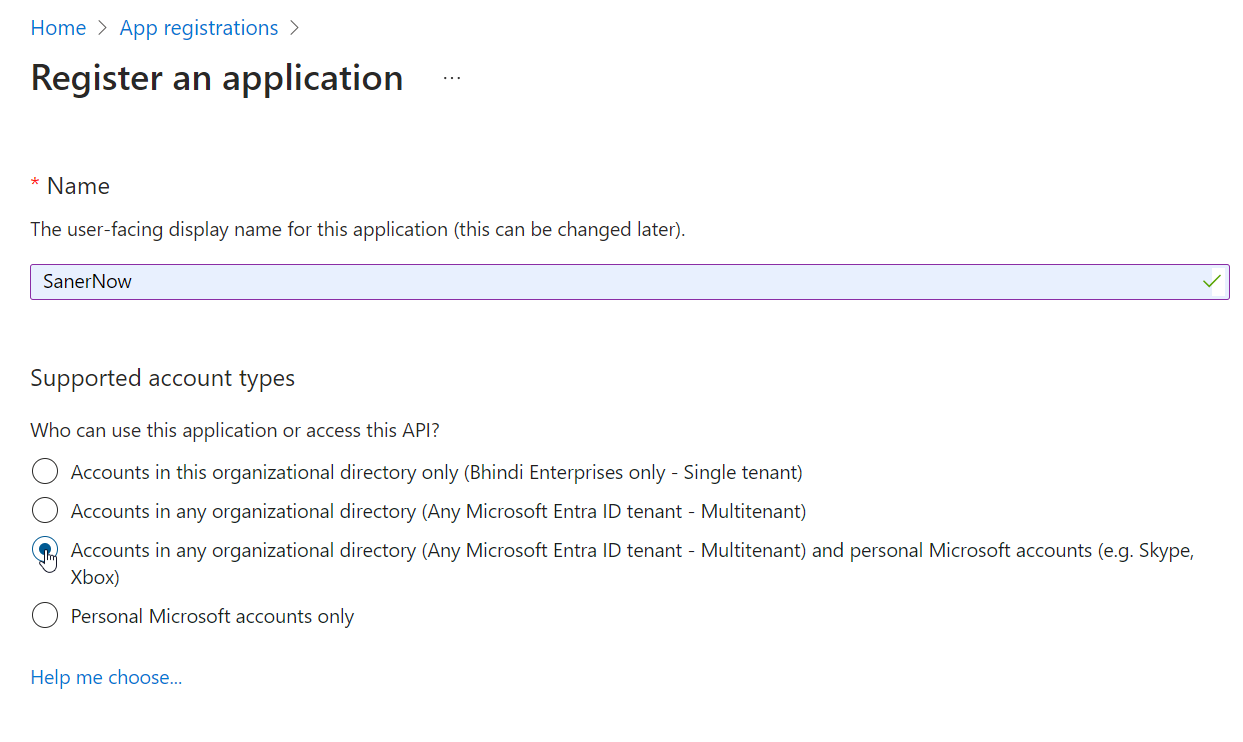
5: Under Supported account types, select the Accounts in any organizational directory (Any Microsoft Entra ID tenant – Multitenant) and personal Microsoft accounts (e.g. Skype, Xbox) option.
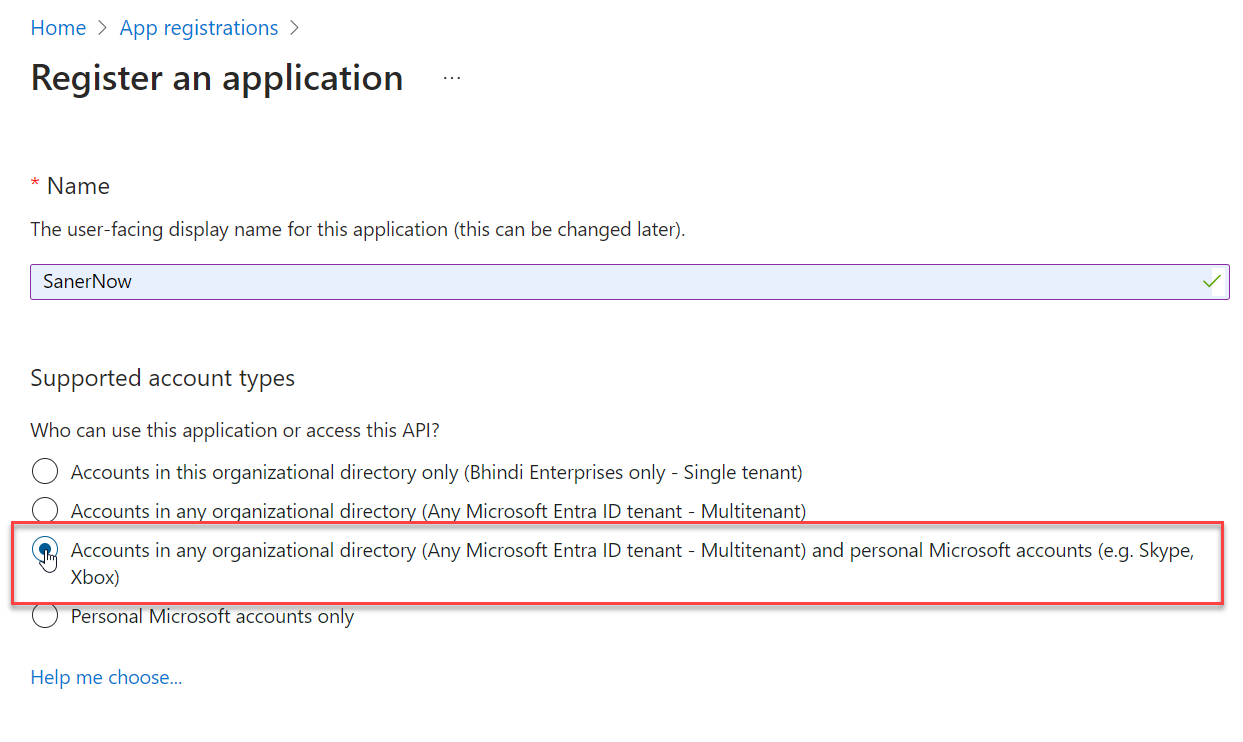
6: Click the Register button to save the changes. You will be redirected to the screen where you can access the Application (client) ID. Note the Application (client) ID as it will be needed while setting up OAuth.

7: Navigate to Manage > Certificates & secrets. Click on the + symbol located next to the New client secret.
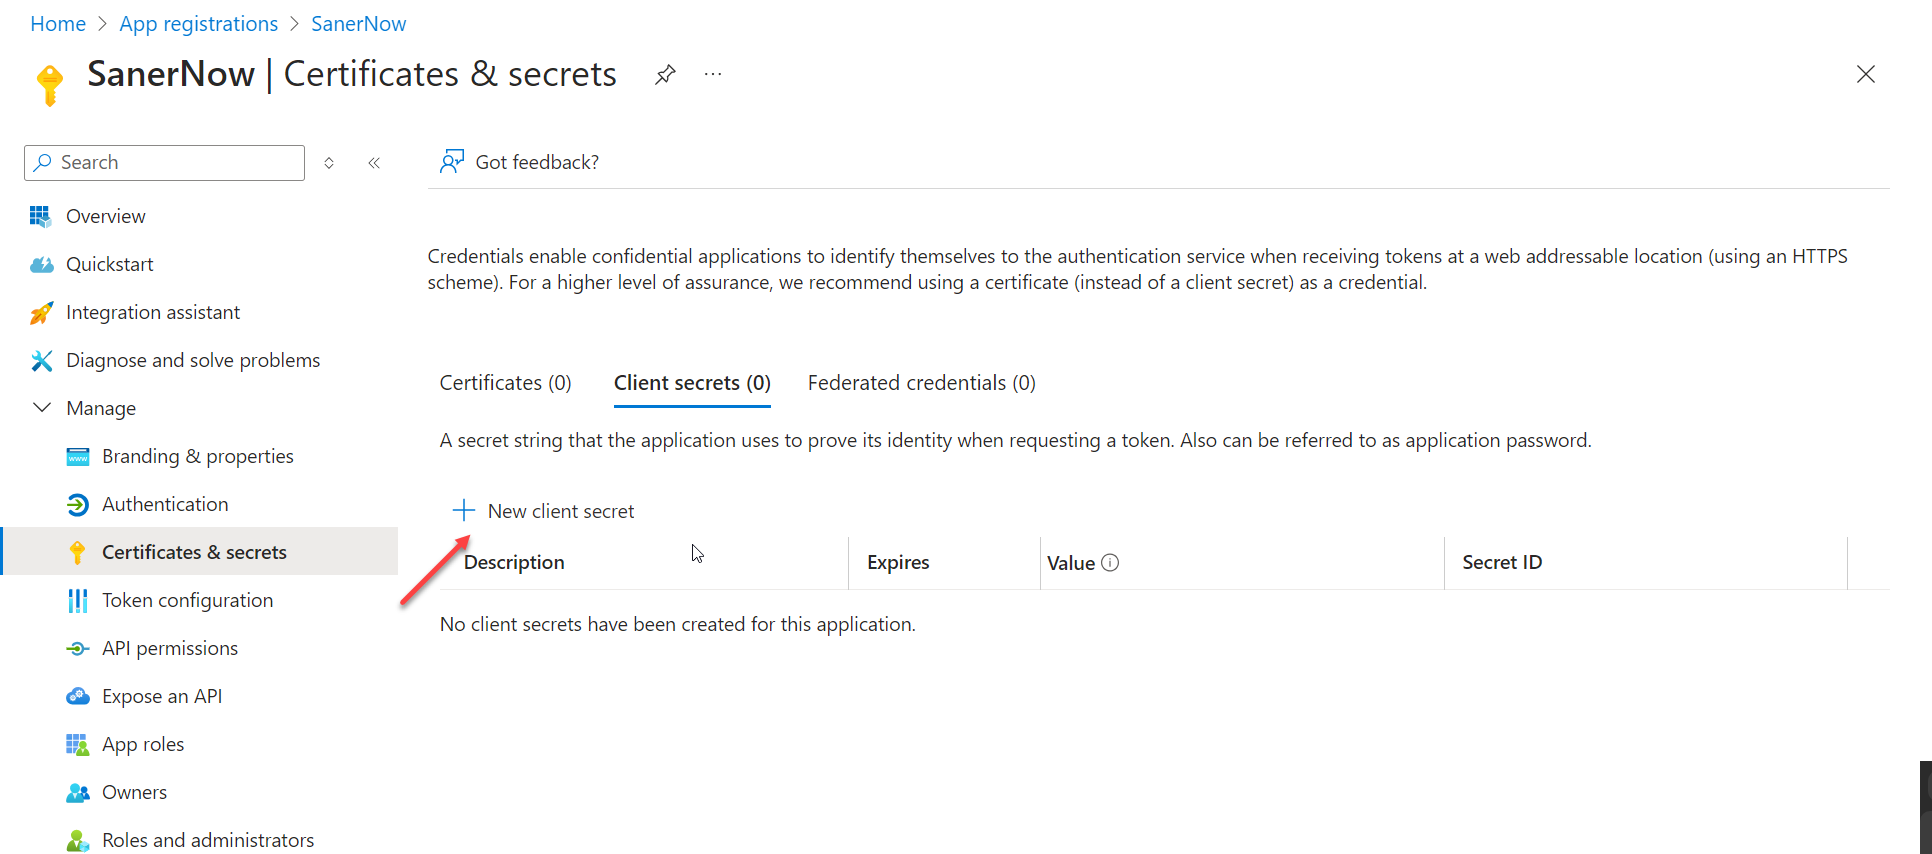
8: In the Add a client secret window, enter the description per your requirements. Then, specify the client’s secret expiration date according to your organization’s standards.
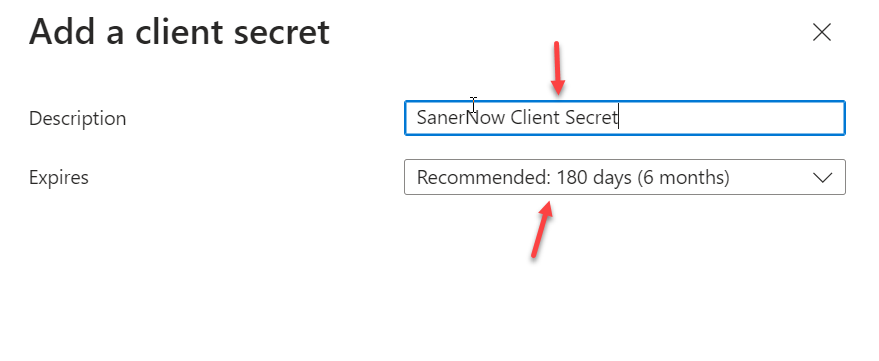
9: Click the Add button to save the changes.
10: Note the value associated with the Secret Value.
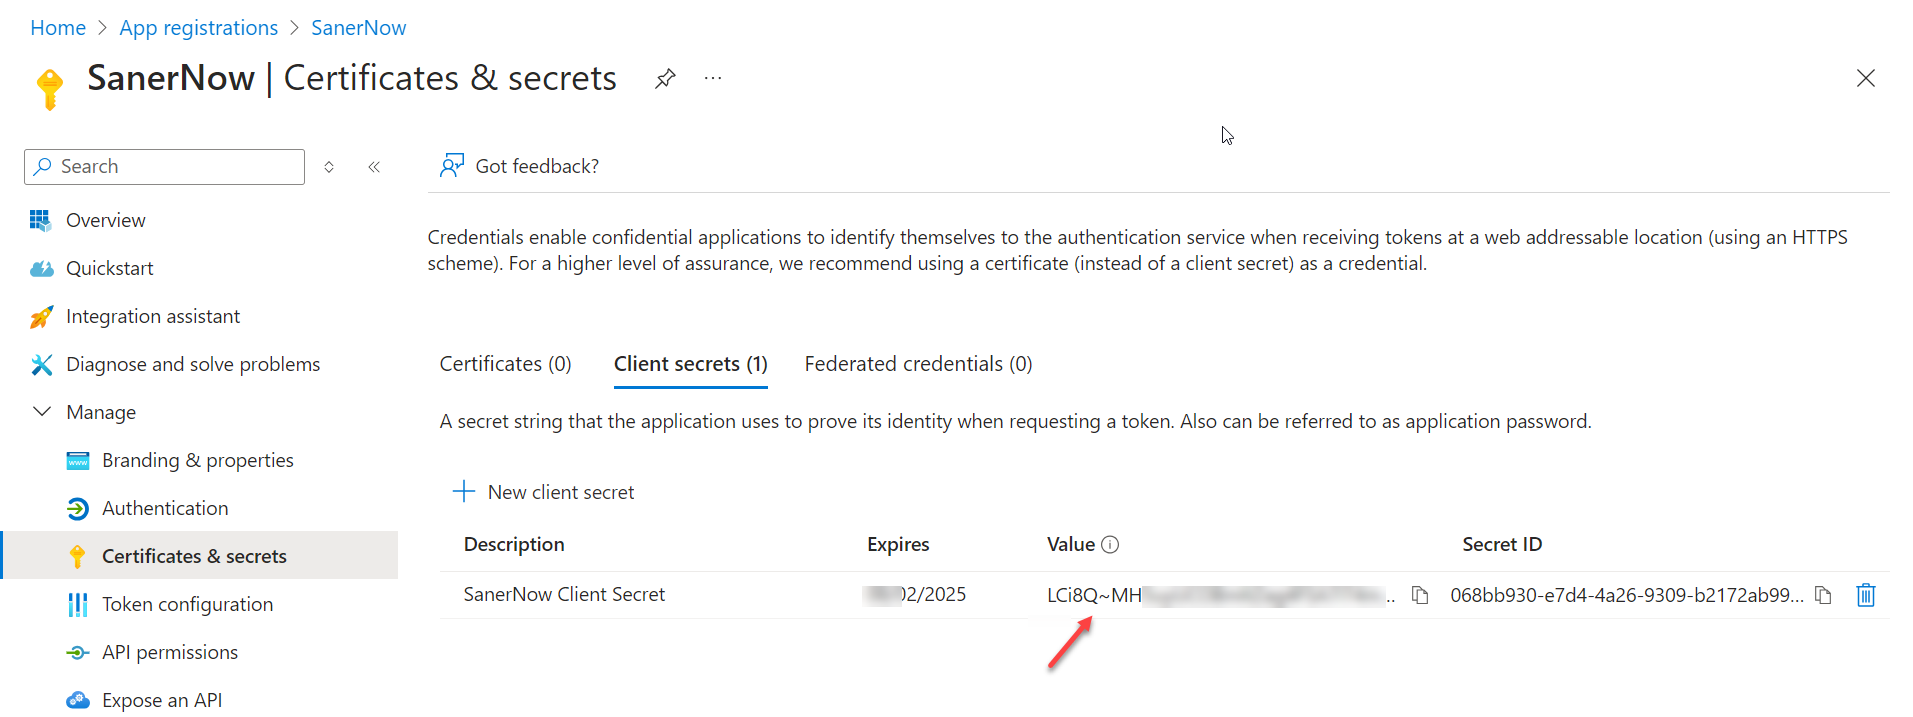
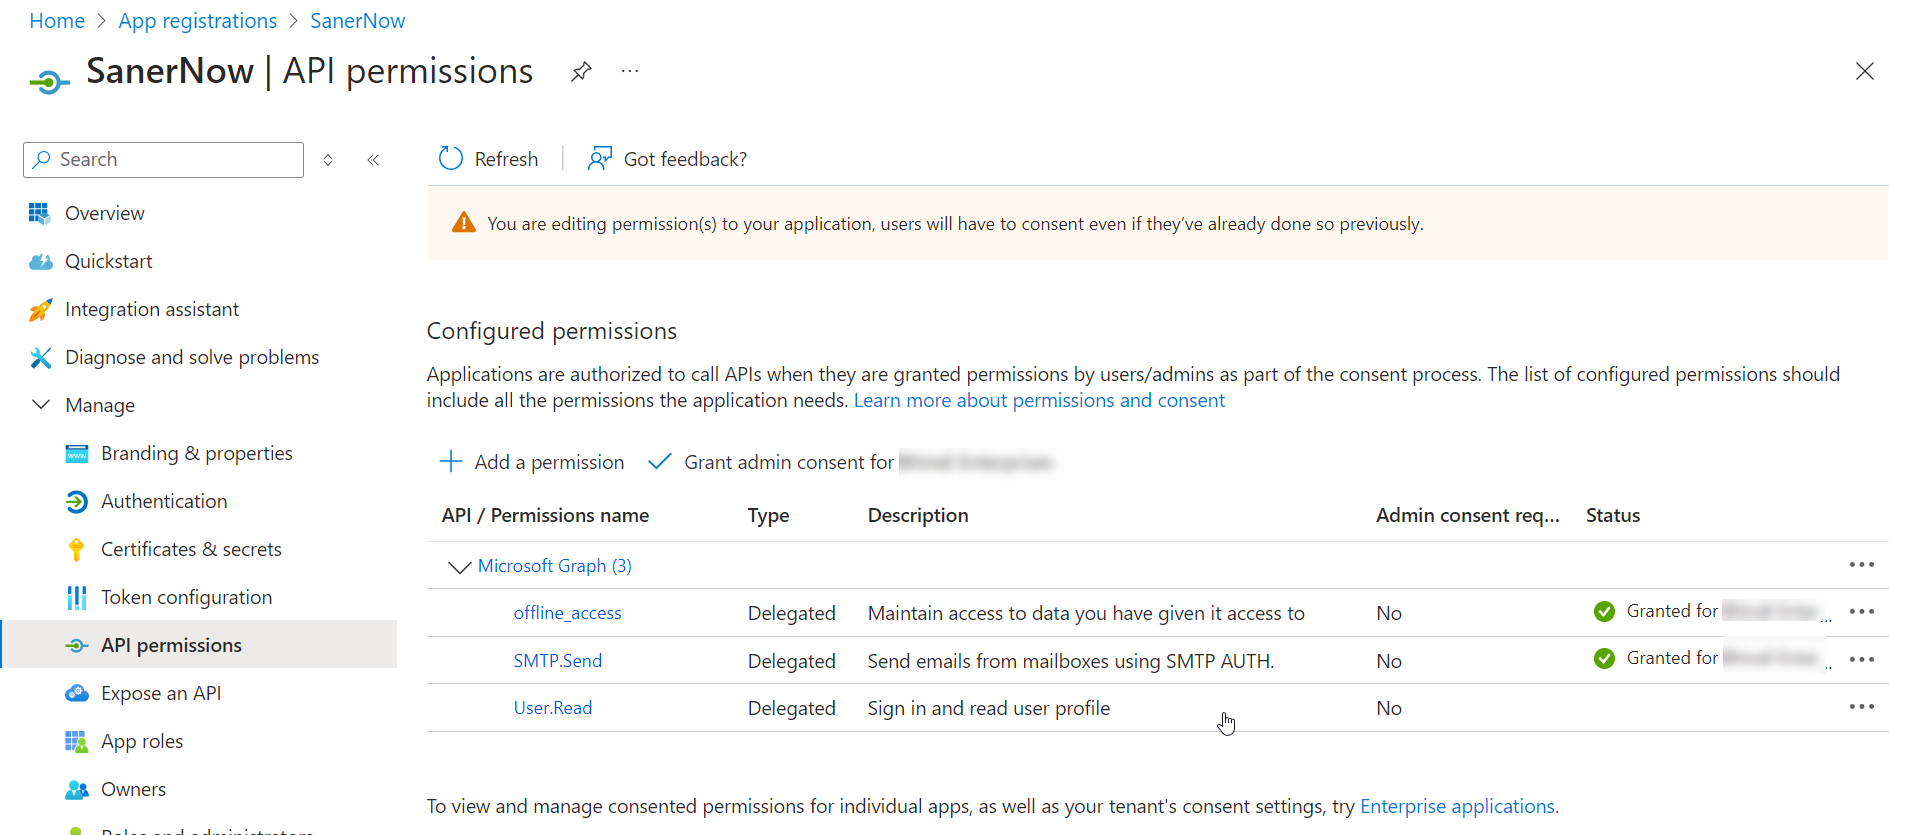
11: Navigate to Manage > API permissions. Click on the + symbol next to Add a permission.

12: On the Request API permissions screen, select the Microsoft Graph API.
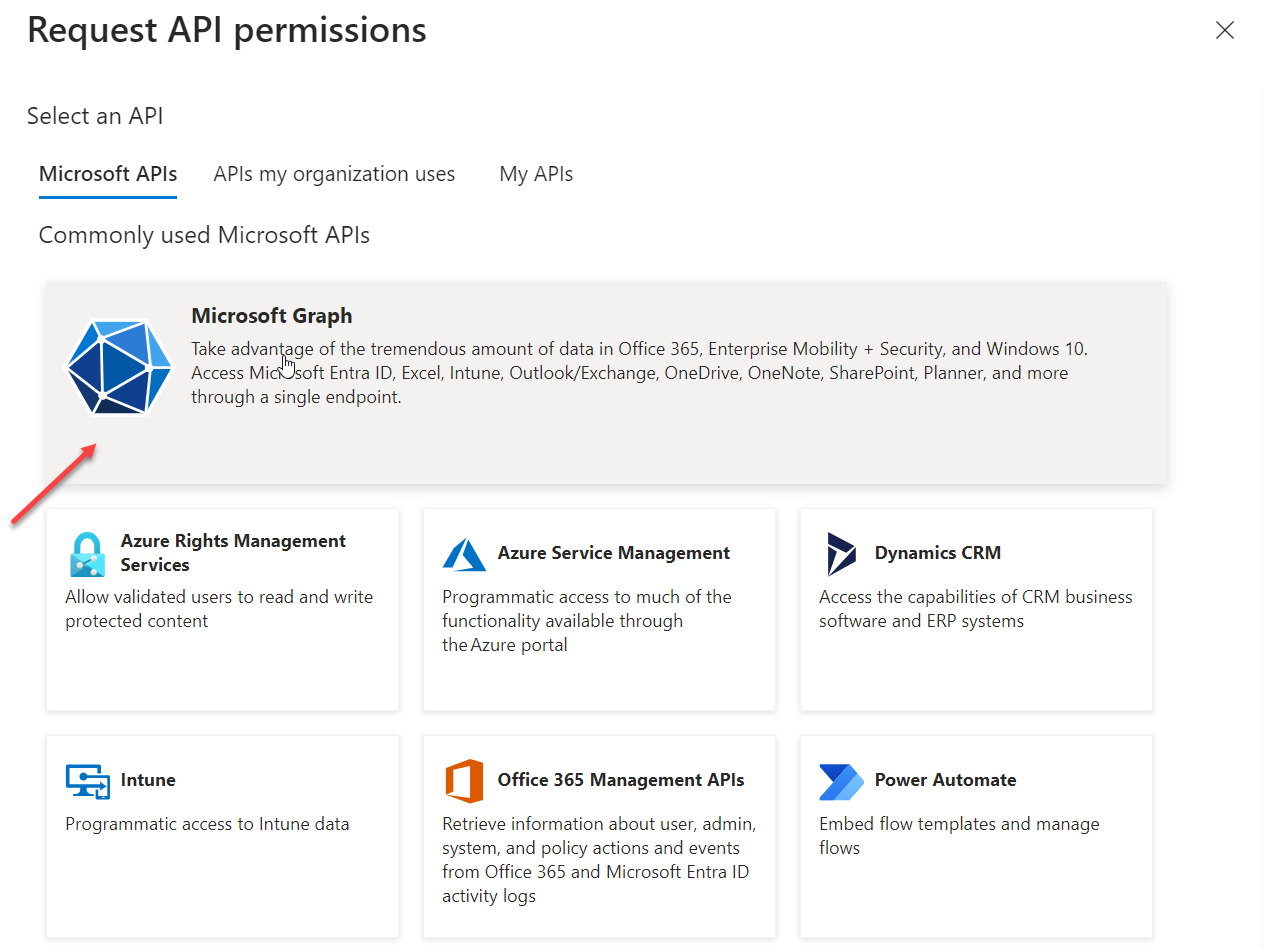
13: Click on Delegated permissions.
14: On the Request API permissions, under Select permissions, search for ‘offline_access.’ Click the checkbox next to offline_access.
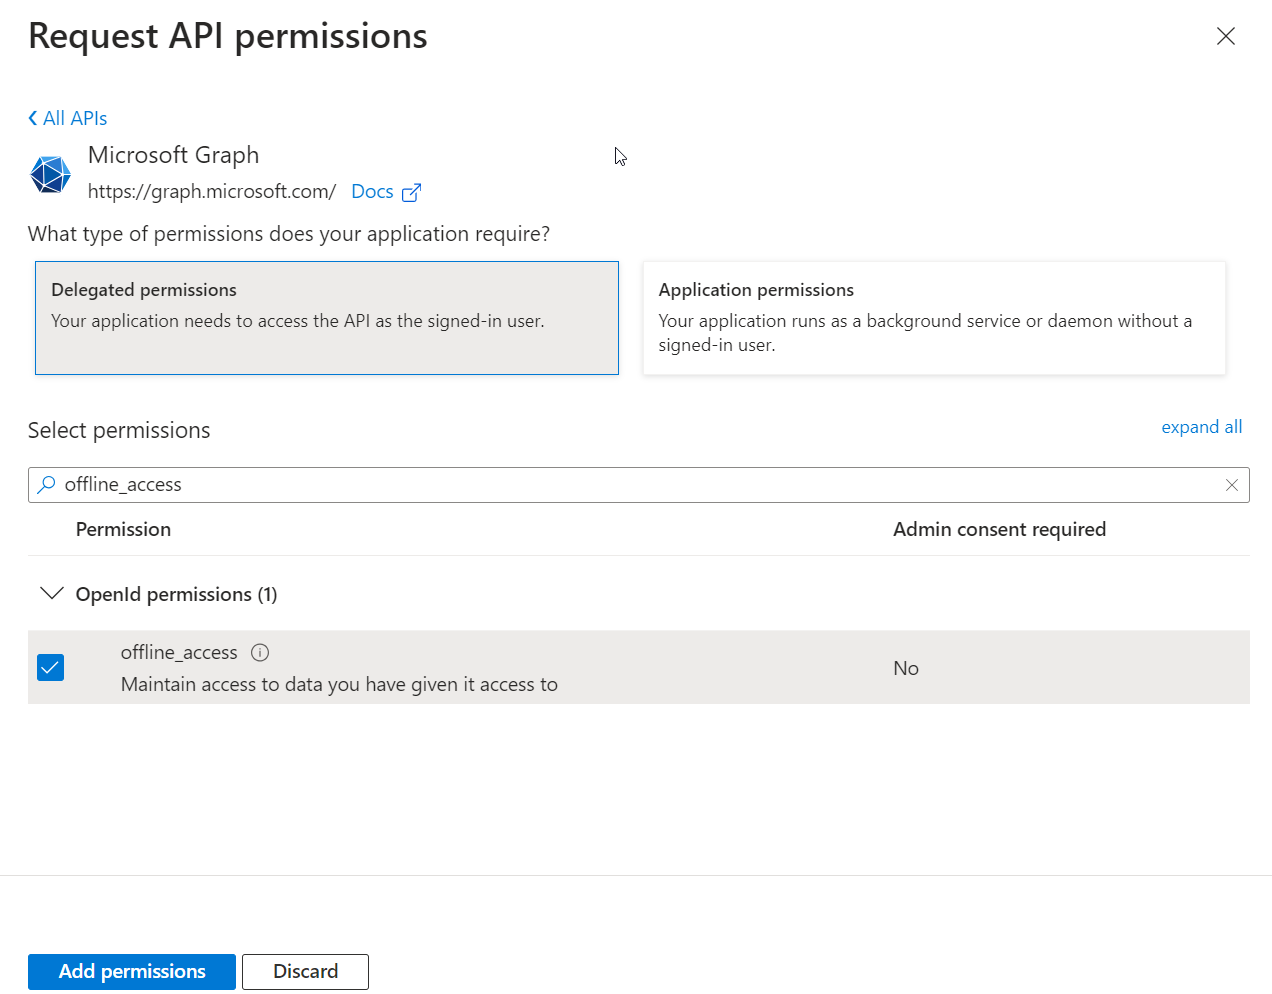
15: On the Request API permissions, under Select permissions, search for ‘SMTP.’ Click the checkbox next to SMTP.Send.
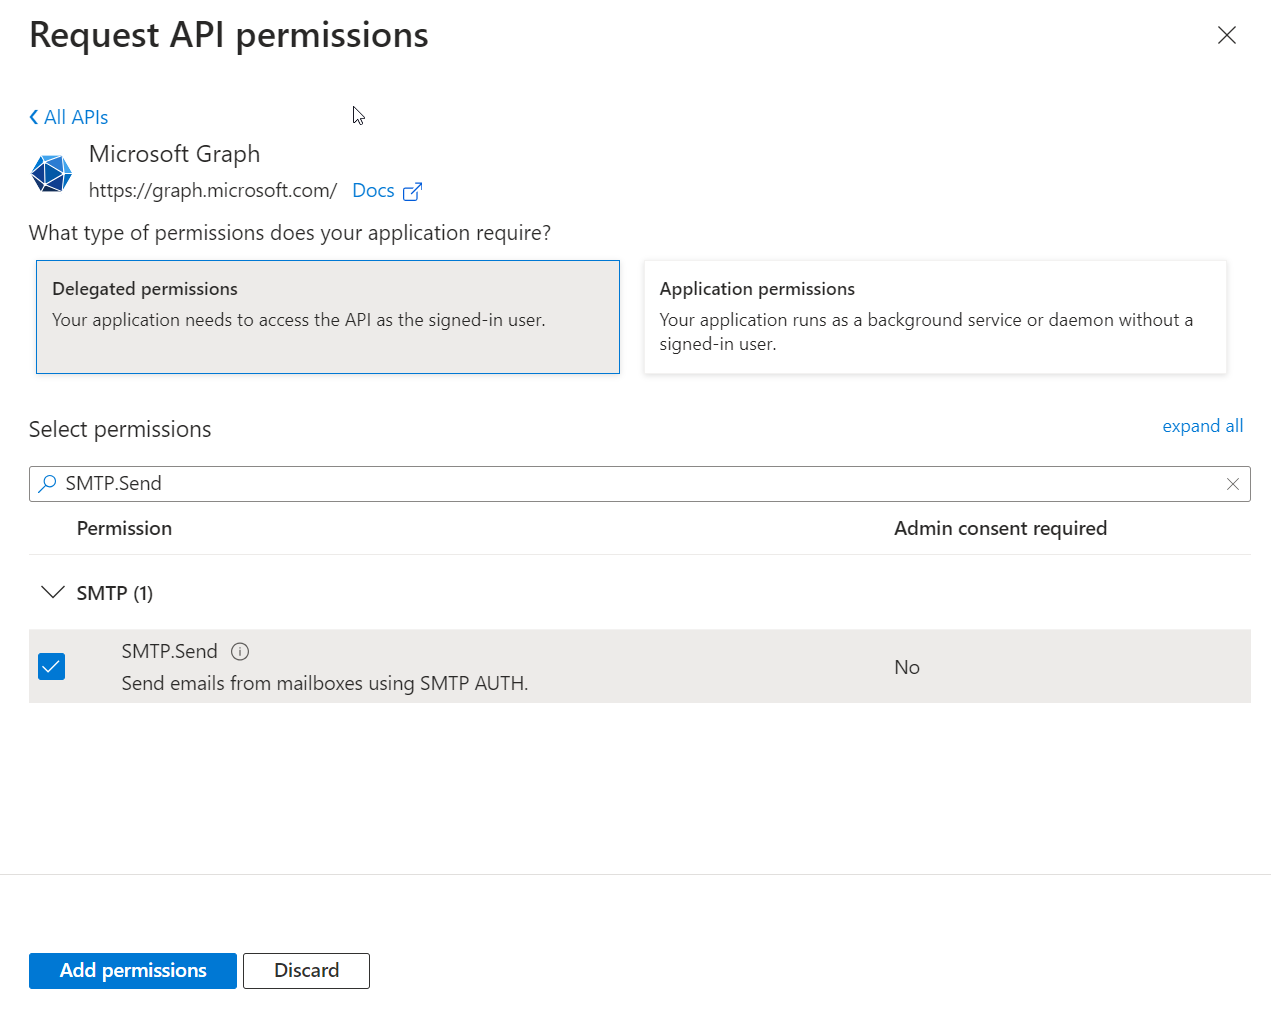
16: Click the Add permissions button to save the changes. All the permissions you selected are displayed on the screen.
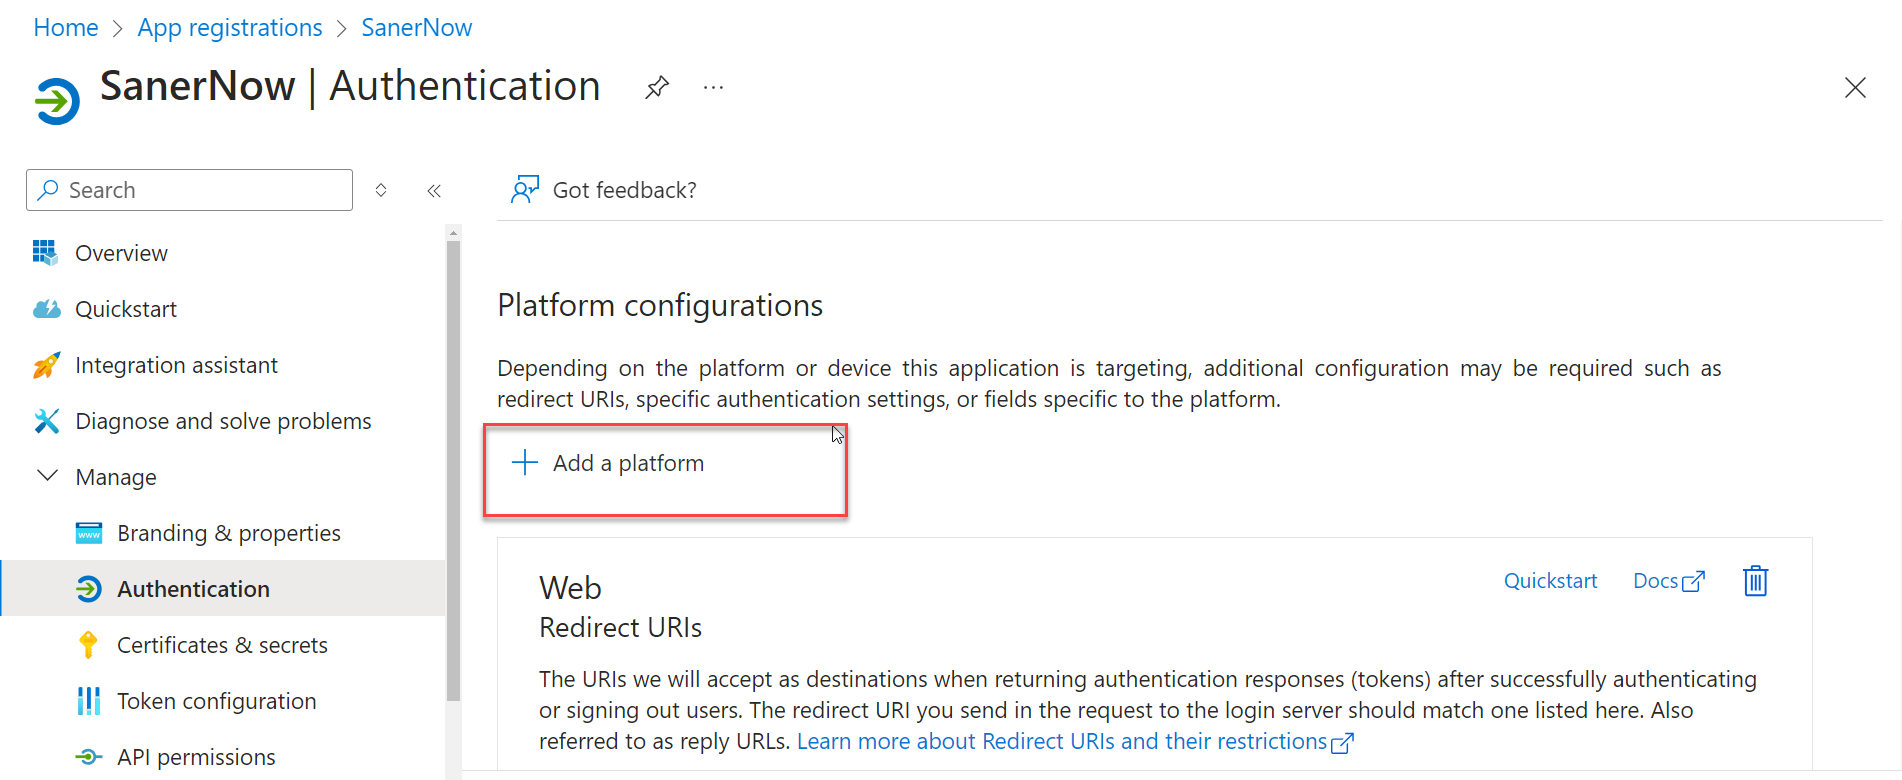
17: Navigate to Manage > Authentication.
18: Click on the + symbol next to Add a platform.
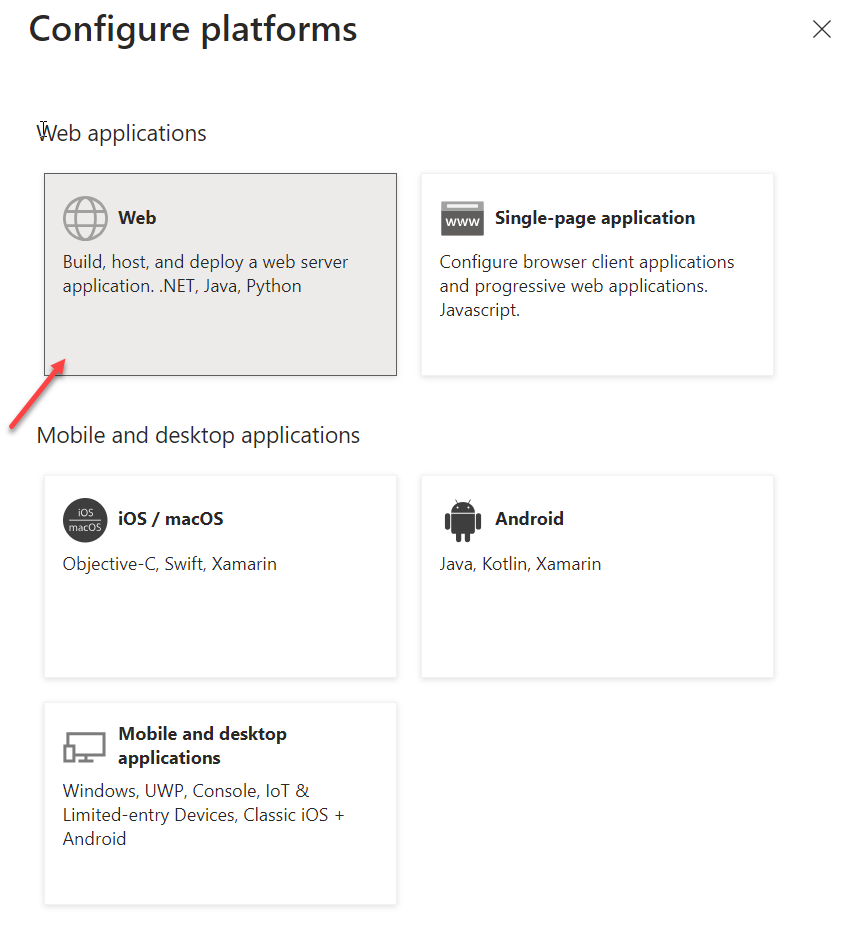
19: On the Configure platforms screen, choose Web.
20: In the Redirect URIs textbox, input the redirect URI as https://saner.secpod.com/AncorWebService/getOauthCode
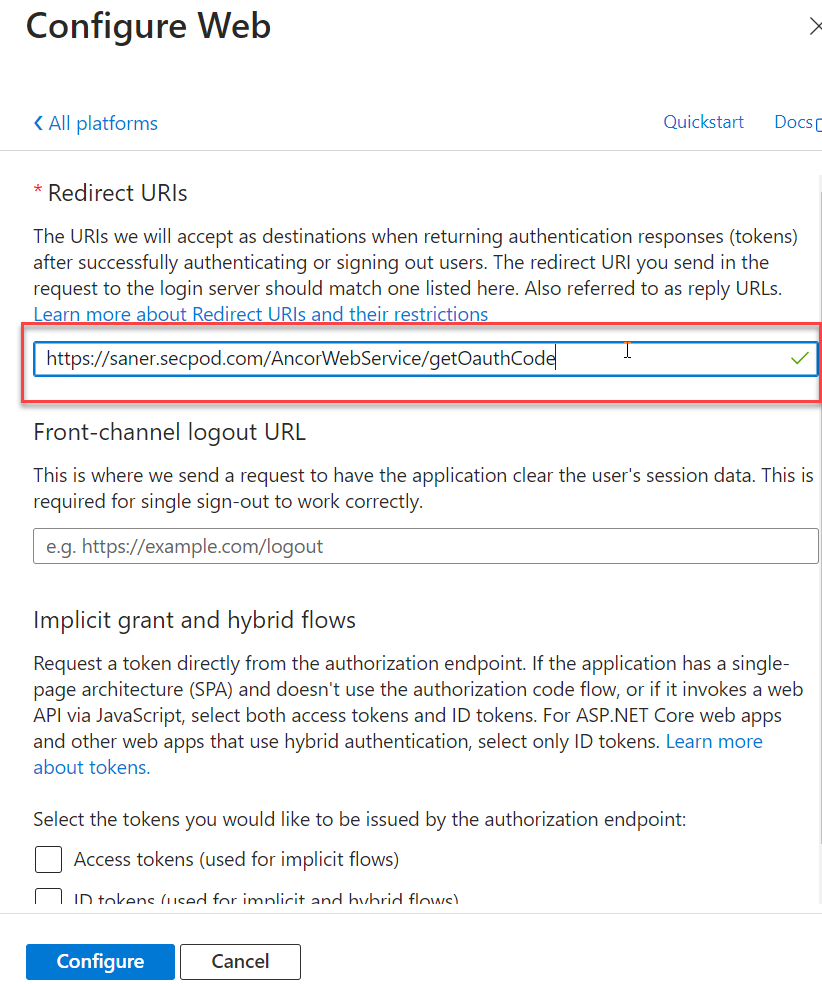
21: Click the Configure button to save the changes.
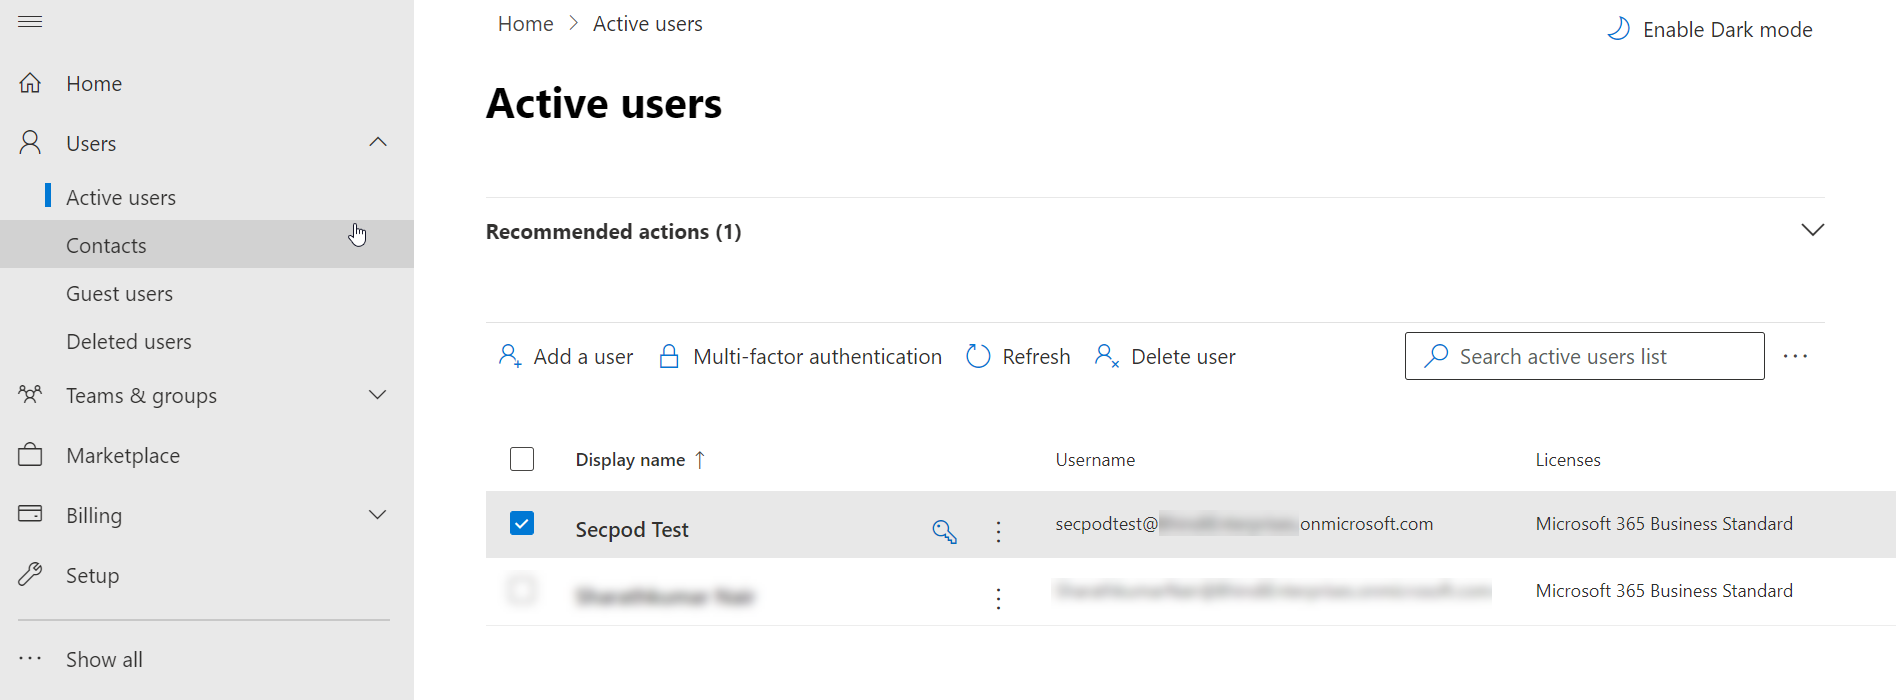
22: Log in to the Microsoft 365 admin center. Navigate to Users > Active Users.
23: Select the mailbox from the list for which you have configured the Client ID and Client Secret.
24: Select Mail from the flyout menu. Click on Manage email apps.
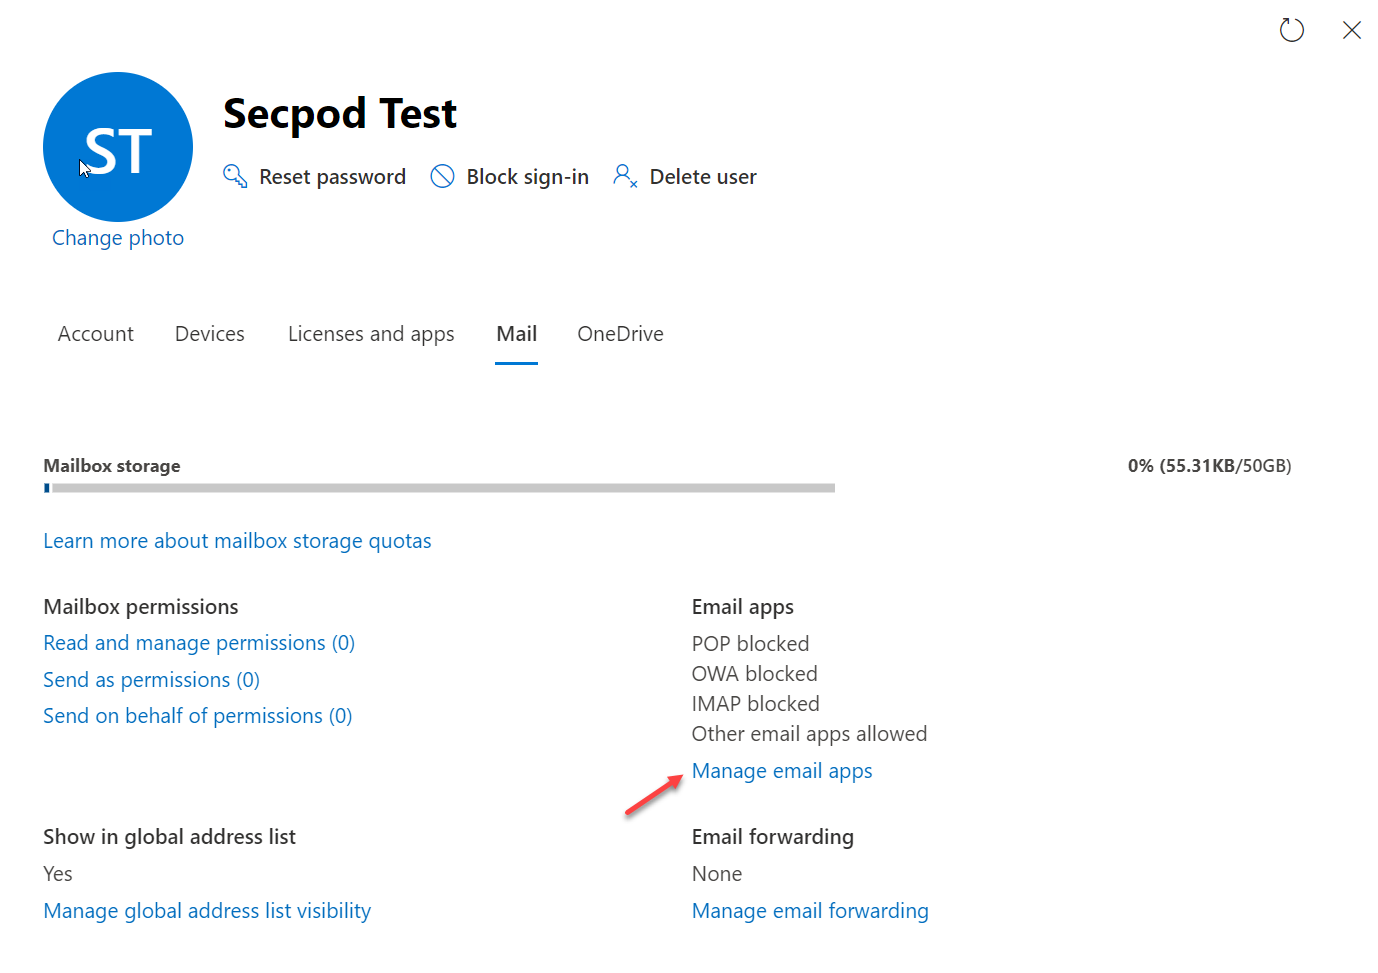
25: Select Manage email apps. Ensure the Authenticated SMTP setting is enabled.
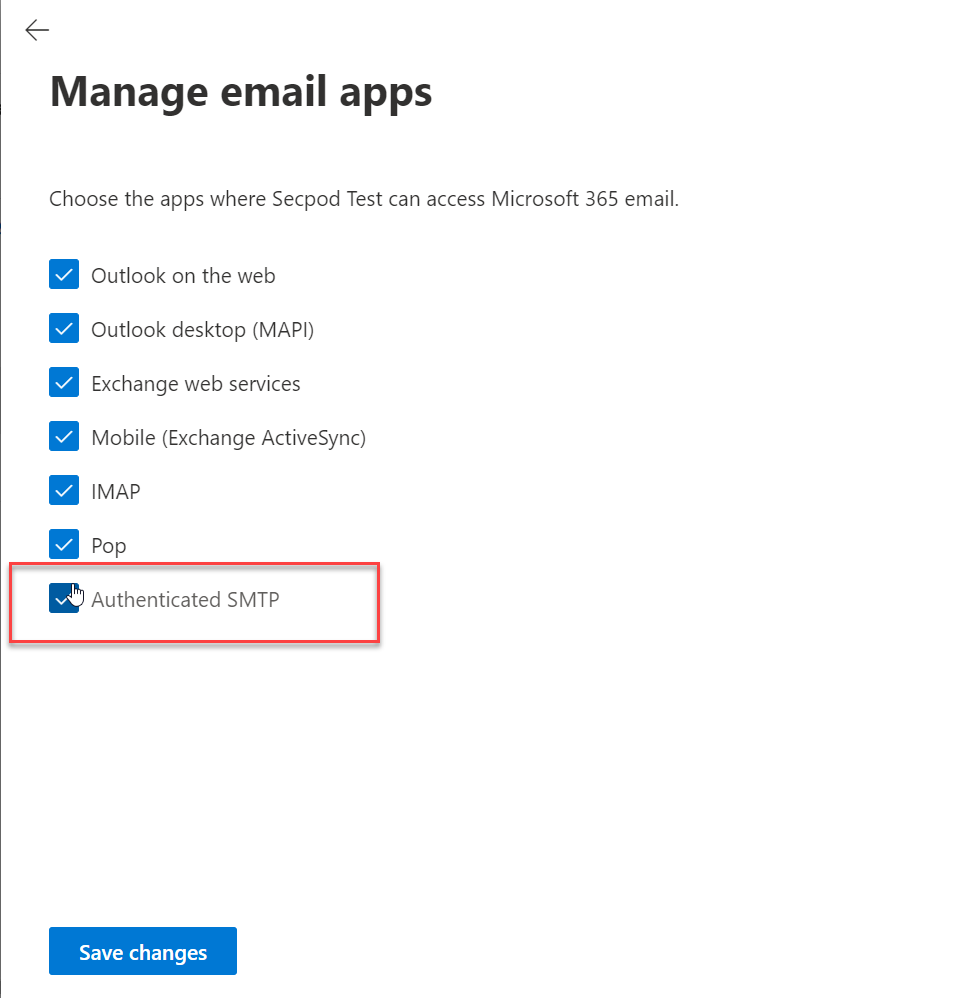
26: Click the Save changes button.


