- Go to the Endpoint management dashboard and click on Actions.

2. In Actions, select Software Deployment.

3. Choose the software family.

4. Select software source:
- Default software
- User-uploaded Now, select desired software category

5. Choose the software you want to install.
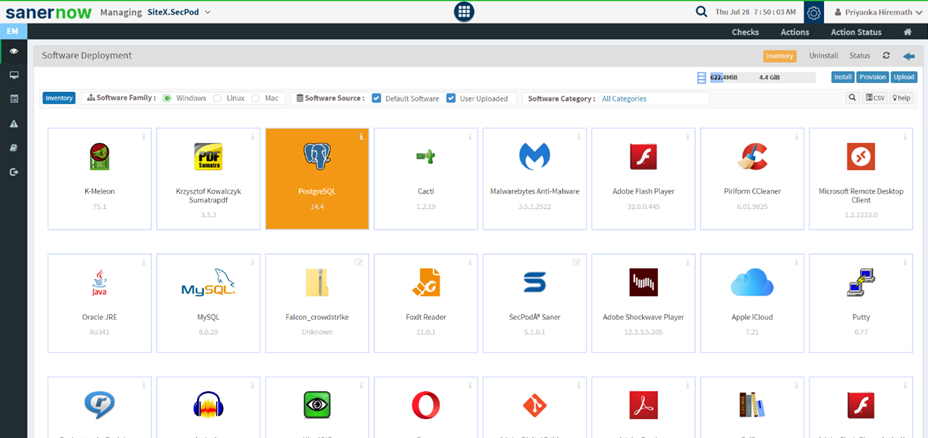
6. Click on Install.
7. Choose the devices to install the software and click on Next.

8. Assign the task name.

9. Schedule the time to deploy:
- Immediate schedule
- After scheduled scan
- Custom date schedule
10. Specify the Installation time frame.

11. Now, schedule the reboot time and click on Create Installation Task.

You have learnt how to deploy a software in Saner.

