Follow the below steps to perform custom remediation for applications needing paid patches using Saner PM.
Step 1: Log in to the Saner web console. Select the Account you want to work with. Click the Saner tools icon and select the PM (Patch Management) tool.
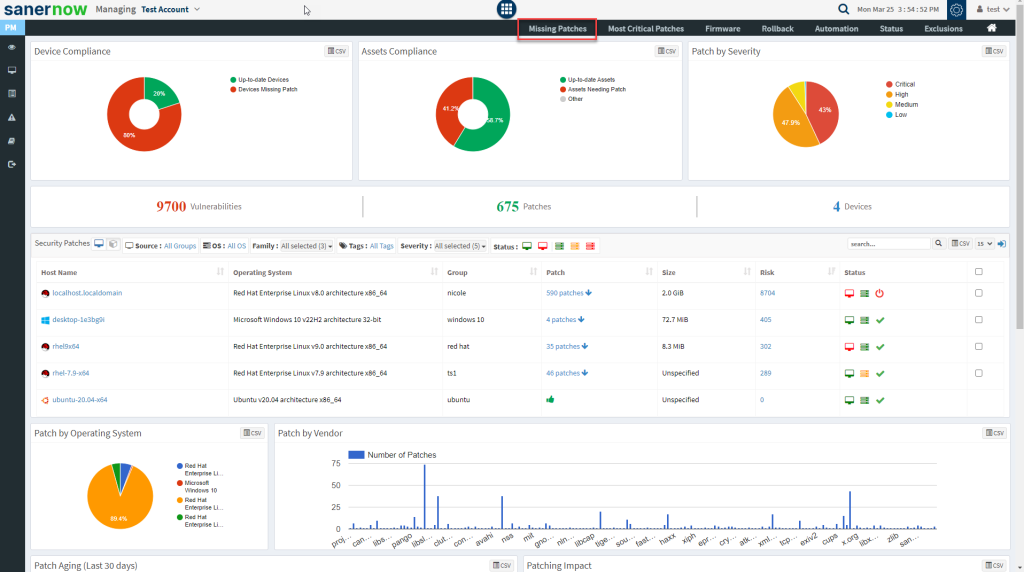
Step 2: Once in the PM dashboard, click the Missing Patches tab on the navigation bar.
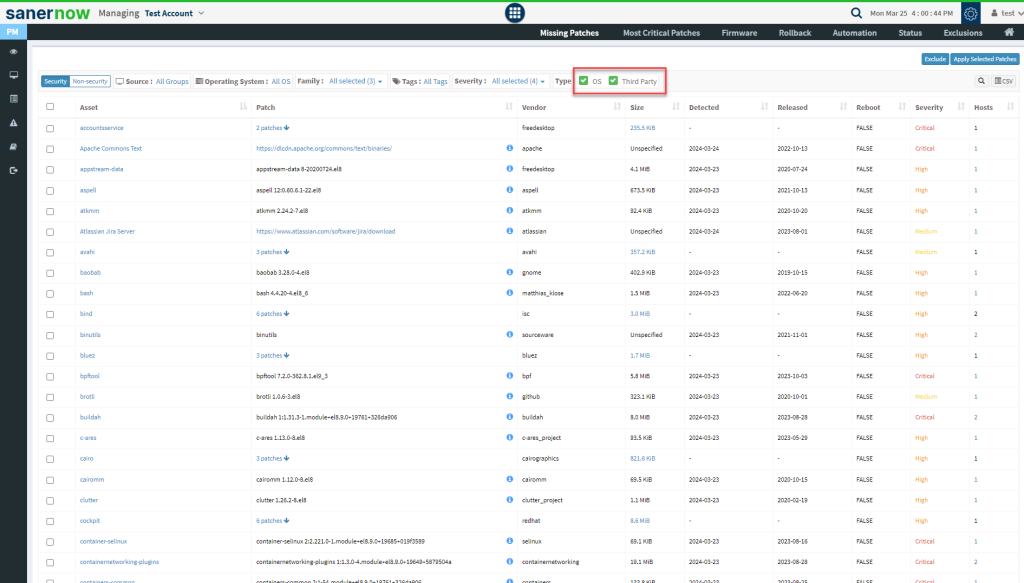
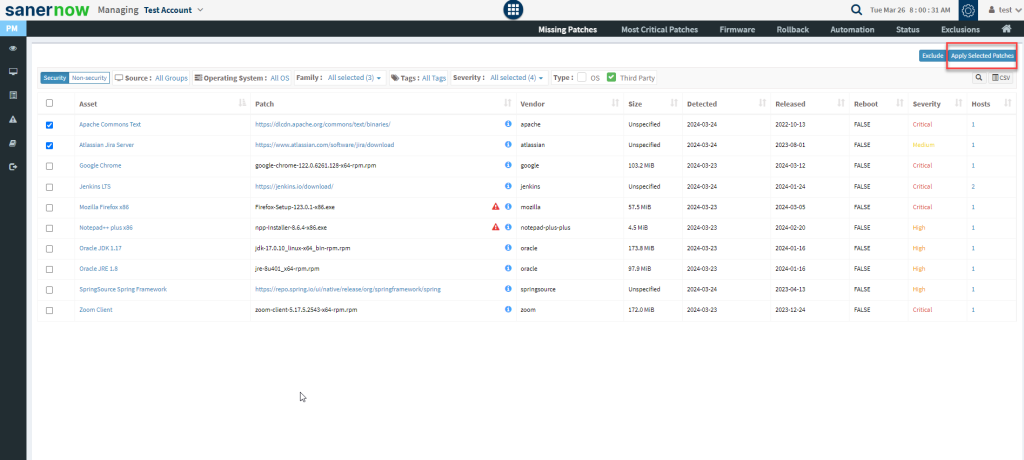
Step 3: The Missing Patches screen lists both OS and third-party patches. Uncheck OS to view only Third Party patches.
The screen with Third Party patches screen looks like the one below.
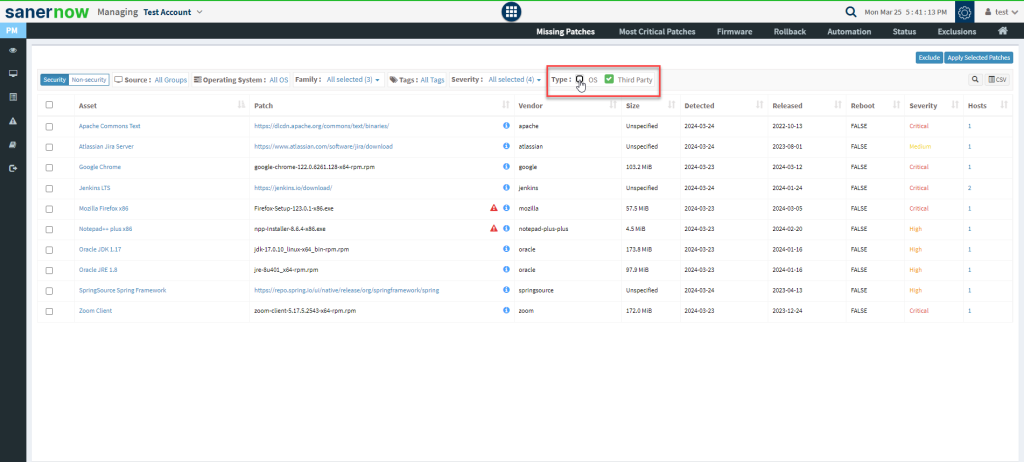
The Asset column displays the application name, while the Patch column lists the patch details. Saner PM lists the path to the vendor site where the patch is available for vendor applications.
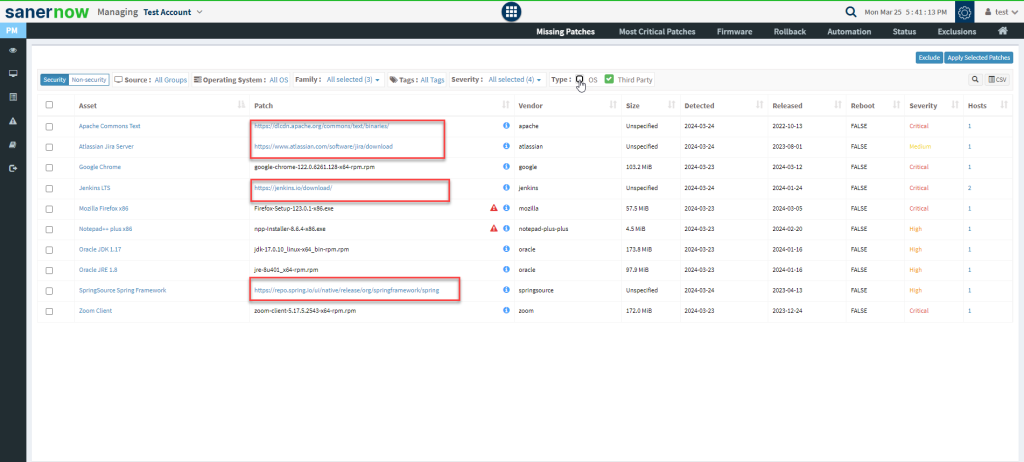
Step 4: Select the applications you want to patch by clicking the checkbox present to the left of the application name. You can select one or more applications to patch. Then click the Apply Selected Patches button
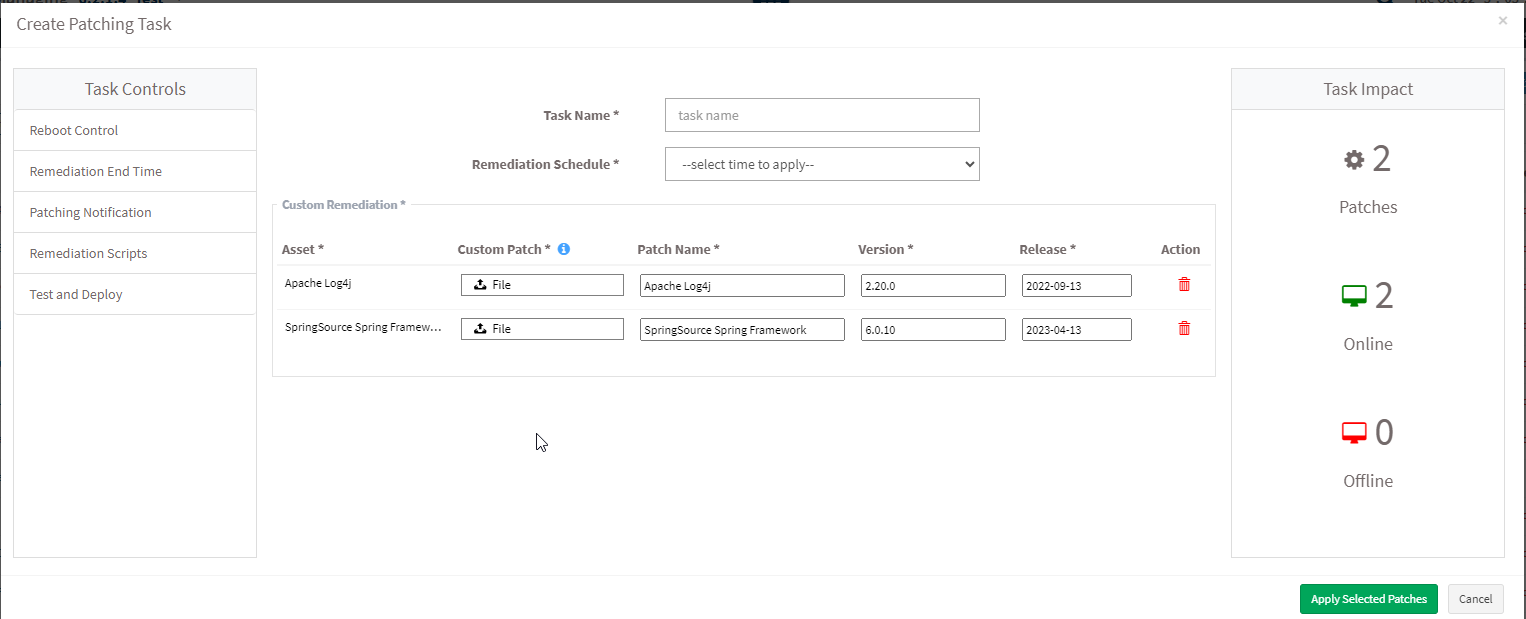
The Create Patching Task window pops up on the screen.
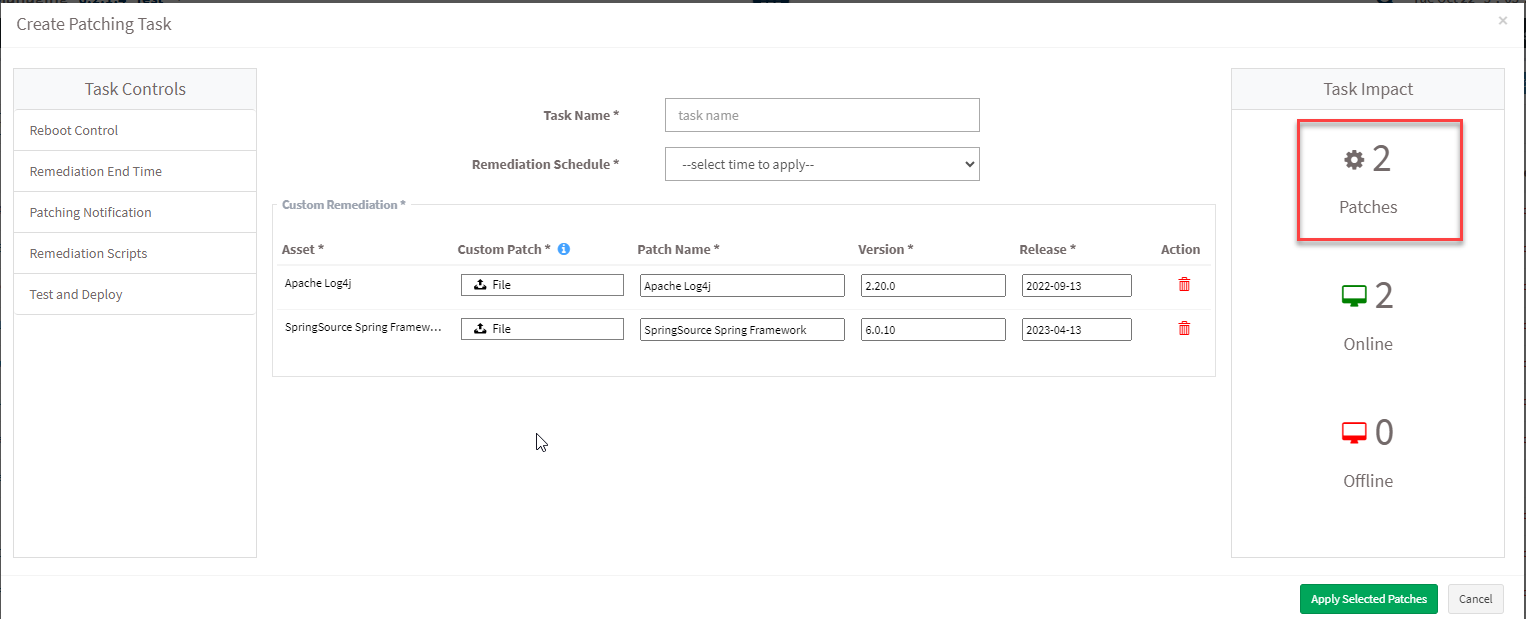
The Create Patching Task window displays the total number of patches applied under the Task Impact box.
Step 5: Provide the following mandatory inputs to create a patching task. They are as follows:
- Task Name — You must give a name for the selected patching task.
- Remediation Schedule –- You can choose when you want Saner PM to apply the patches. Saner PM supports the below remediation schedule.
- Immediate — When you select the remediation schedule as Immediate, Saner PM will apply the patches immediately.
- After scheduled scan — When you select the remediation schedule as After scheduled scan, Saner PM will apply the patches once the Saner Agent completes the scheduled scan.
- Custom date — When you select the remediation schedule as Custom date, you must choose the date and the time frame during which you want Saner PMto apply the patches.
Step 6: You must upload a Custom Patch file for each application selected for patching. This file should contain the required information for Saner PM to fetch the patch file and instructions to install it.
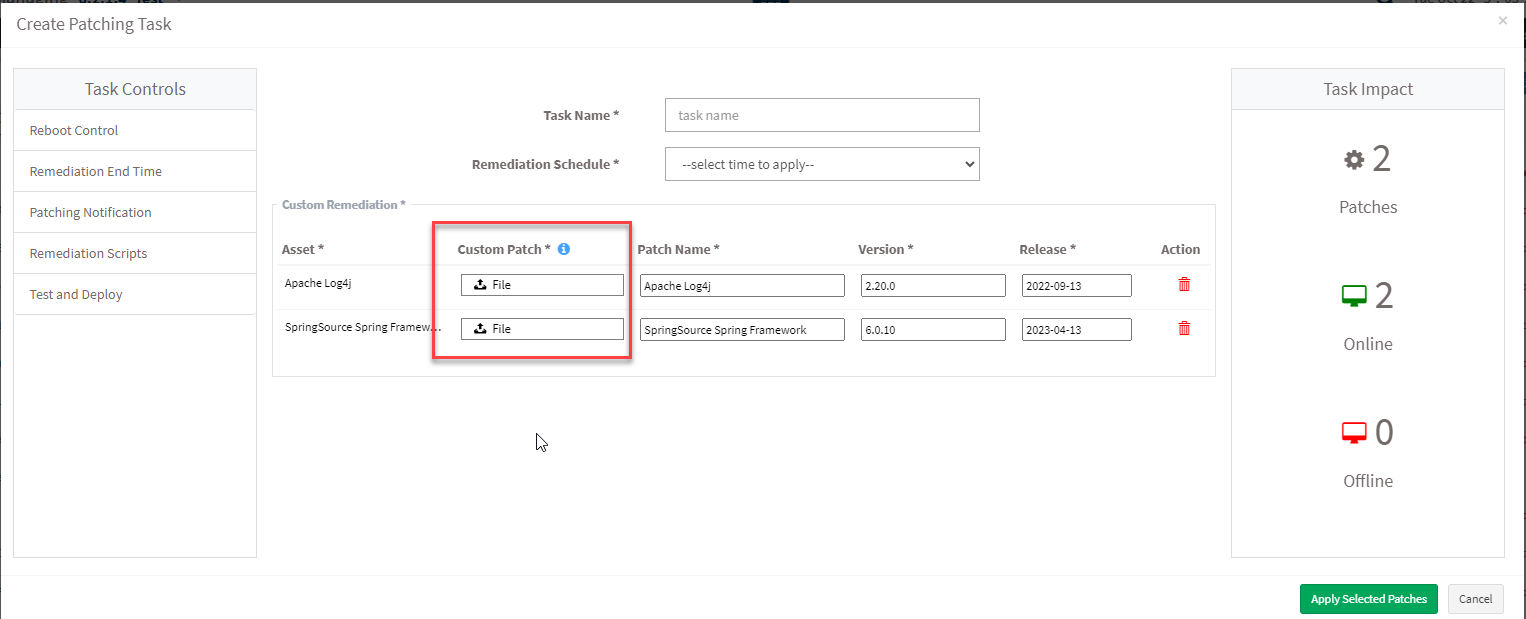
| Note The supported file formats for the Custom Patch file for different operating systems are listed below. For Windows systems: – inf, reg, ps1, bat, exe, msi, and msp. For Unix systems:- sh, deb, and rpm. For macOS systems:- sh, pkg, and dmg (pkg,app). |
Step 7: Verify the Patch Name, Version, and Release Date information. You can change the information in the Patch Name, Version, and Release Date boxes.
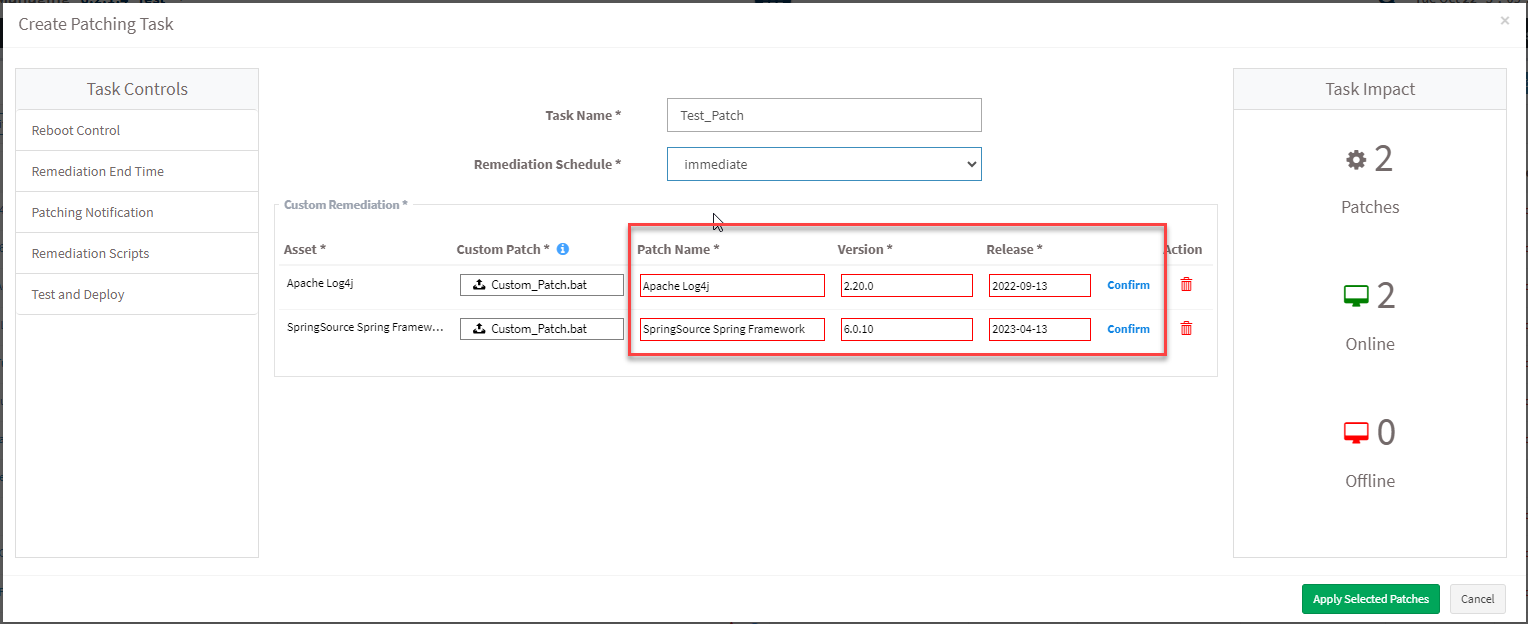
Step 8: Click Confirm displayed next to the Release Date box for each asset chosen for remediation. A green tick appears next to the Release Date box.
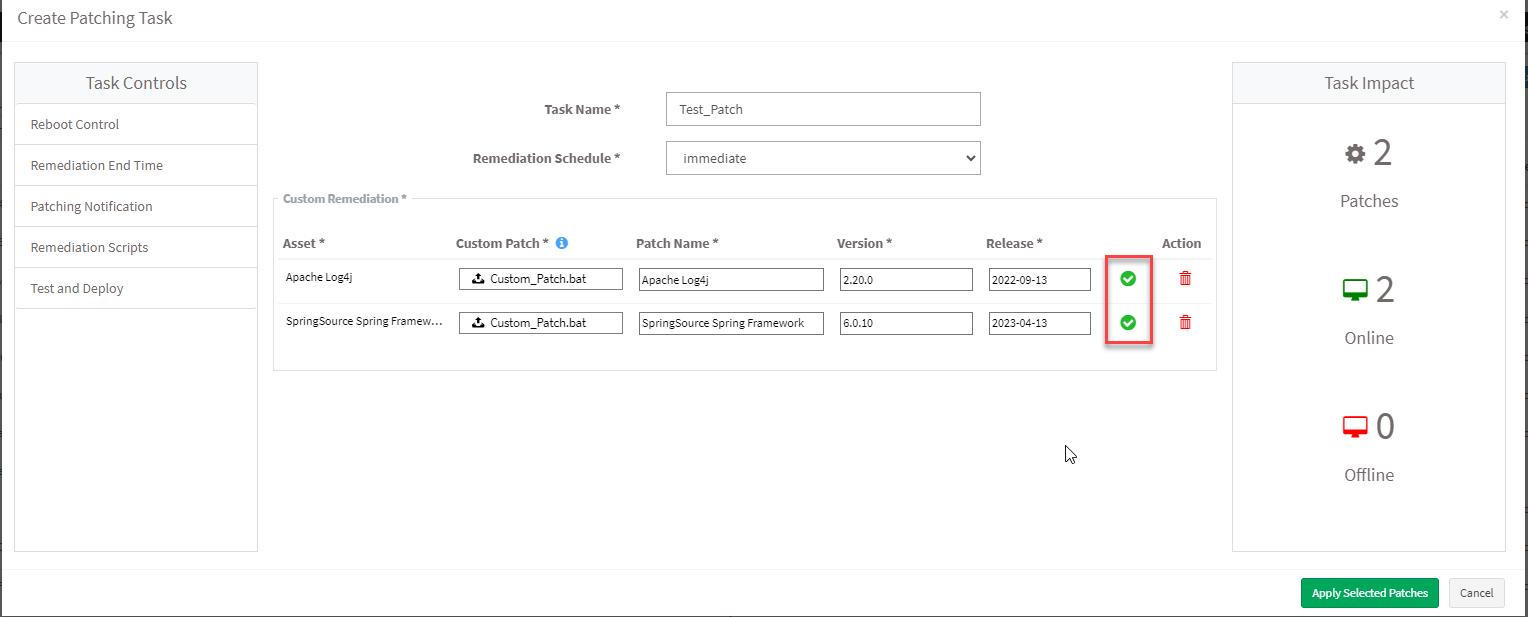
Step 9: Click the Apply Selected Patches button to create the patching task. Saner PM will execute the patching task as per the schedule specified during the task creation and remediate the vulnerabilities present in the selected applications.
Watch the video tutorial


