To set alerts, choose the organization with respective account. You can set alerts for individual modules: vulnerability management, patch management, asset exposure, compliance management, endpoint point management, and device management.
Note: Configure your mail settings before you enable the alerts.
- Once you choose organization account, click on ‘Alerts‘ on left panel.
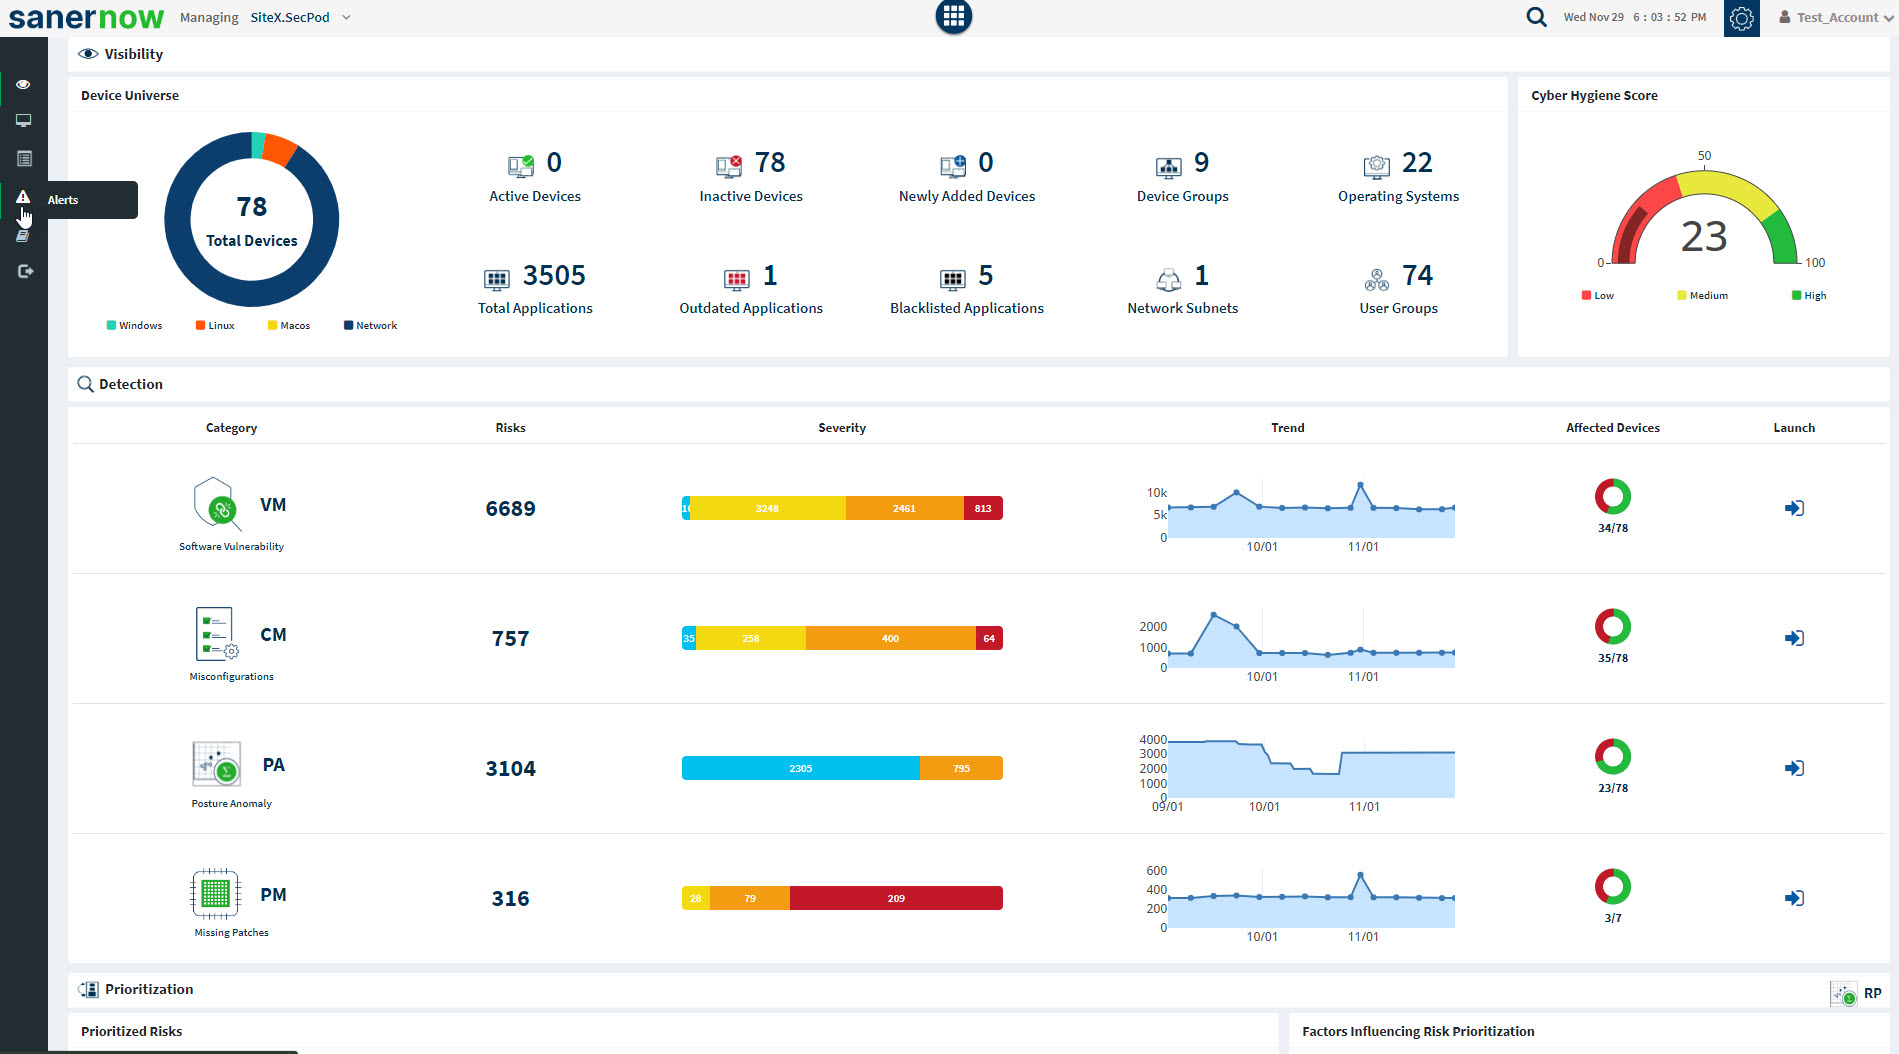
2. Choose the module you have subscribed to.
Asset Exposure:
- Enable the Subscription Status
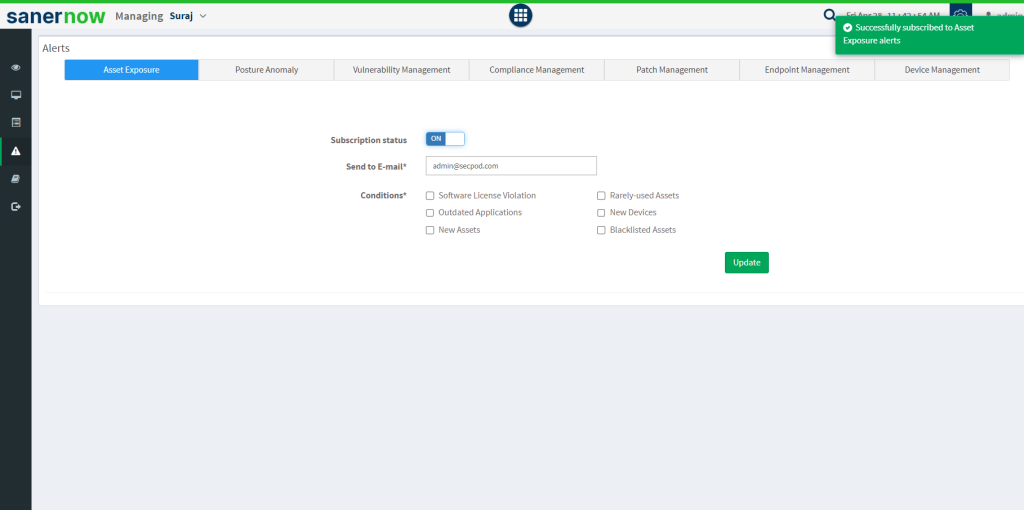
2. Assign the ‘Send to E-mail.’
3. Select the Conditions. Conditions refers to when an alert must pop up to the given email. Conditions include:
- Software License Violation
- Rarely-used Assets
- Outdated Applications
- New Devices
- New Assets
- Blacklisted Assets
4. Click on Update.
Continuous Posture Anomaly Management:
- Enable the Subscription Status
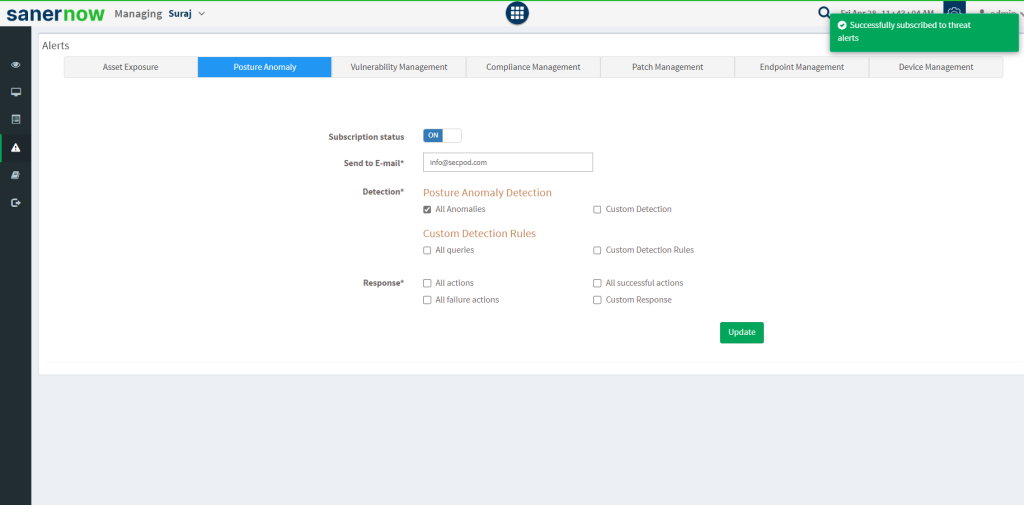
2. Assign the ‘Send to E-mail.’
3. Enable All Anomalies detection, if you want to get notified each time whenever a new anomaly is detected. Or you can assign custom detects by entering PA-IDs.
4. Under Custom Detection Rules, you can get notified by all queries of custom detects or you can enter name of the detection rule with comma separation.
5. You get notified if the response of the detects are, All actions, All successful actions, All failure actions, and Custom Response. In Custom Response, add comma separated custom values to get custom alerts.
6. Click on Update.
Vulnerability Management:
- Enable the Subscription Status
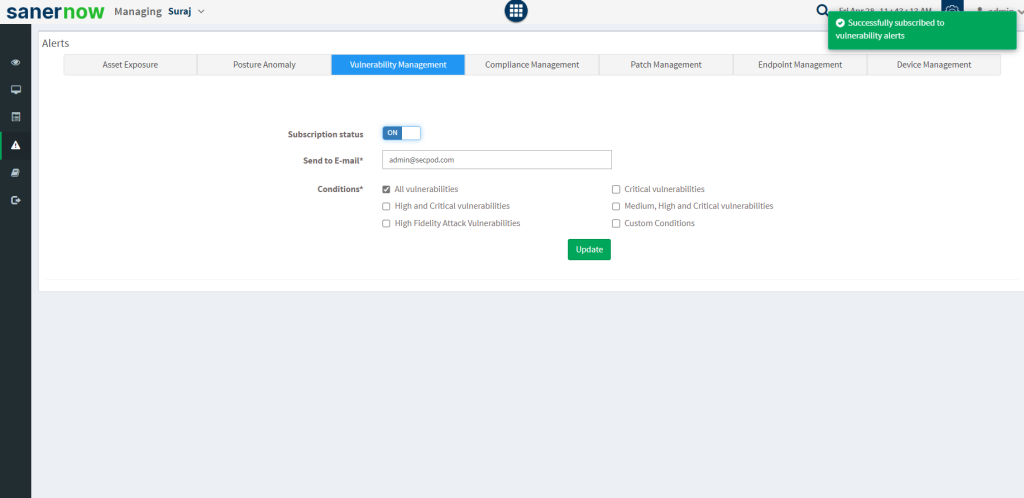
2. Assign the ‘Send to E-mail.’
3. Select the Conditions. Conditions refers to when an alert must pop up to the given email. Conditions include:
- All vulnerabilities
- Critical vulnerabilities
- High and Critical vulnerabilities
- Medium, High and Critical vulnerabilities
- High Fidelity Attack Vulnerabilities
- Custom Conditions: Add comma separated custom CVEs.
4. Click on Update.
Compliance Management:
- Enable the Subscription Status
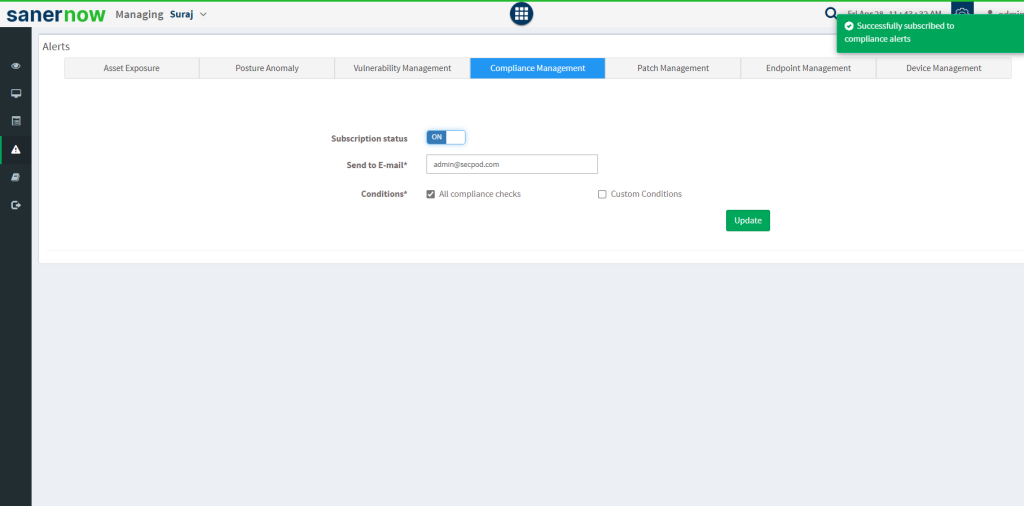
2. Assign the ‘Send to E-mail.’
3. Select the Conditions. Conditions refers to when an alert must pop up to the given email. Conditions include:
- All compliance checks
- Custom Condition: Add comma separated custom CCEs to get notification.
4. Click on Update.
Patch Management:
- Enable the Subscription Status
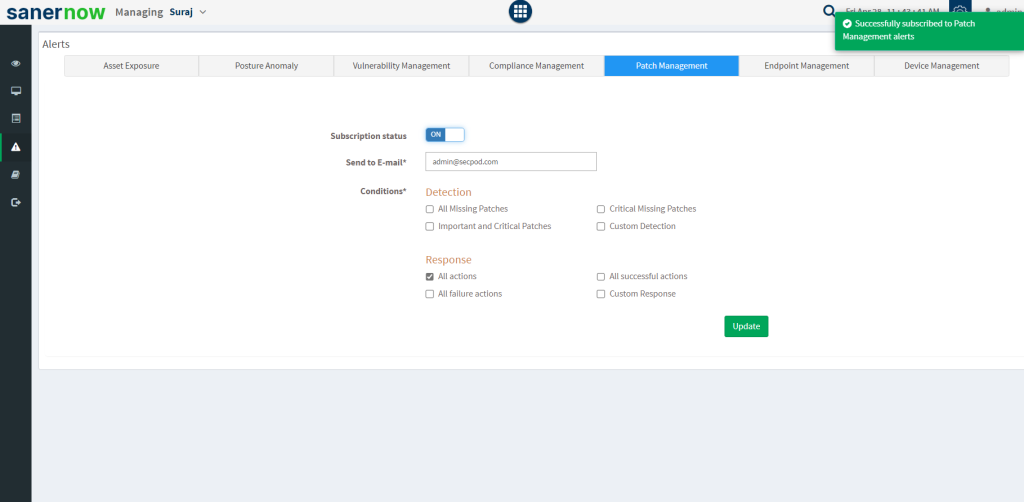
2. Assign the ‘Send to E-mail.’
3. Enable detection checkbox, get notified when there is detection of Missing Patches, Critical Missing Patches, Important and Critical Patches, and Custom Detection.
4. Under Response, you can get notified by all queries of custom detects or you can enter name of the detection rule with comma separation.
5. You get notified if the response of the detects are, All actions, All successful actions, All failure actions, and Custom Response. In Custom Response, add comma separated custom values to get custom alerts.
6. Click on Update.
Endpoint Management:
- Enable the Subscription Status
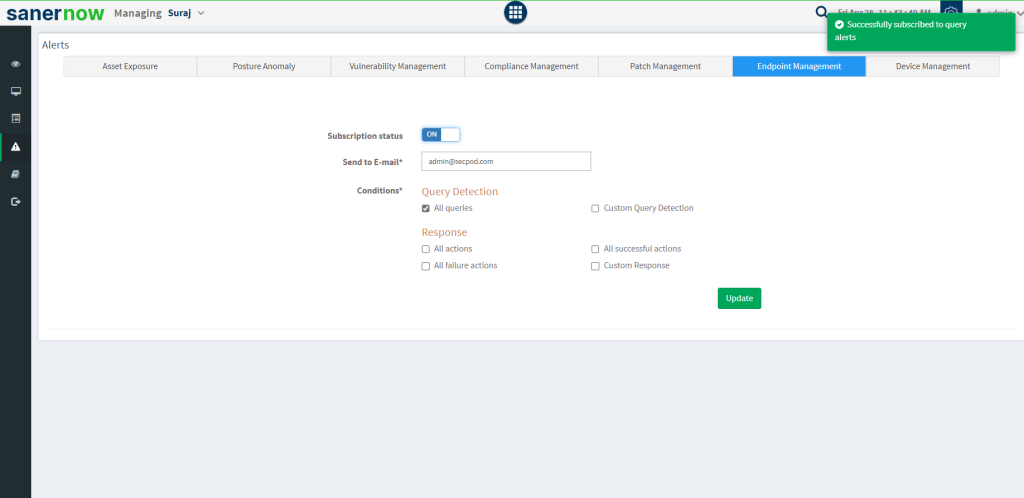
2. Assign the ‘Send to E-mail.’
3. Enable Query detection checkbox, get notified when there is trigger of ‘All queries’ or you can enter comma separated values for Custom Query Detection.
4. In Response, get notified if the response of the detects are, All actions, All successful actions, All failure actions, and Custom Response. In Custom Response, add comma separated custom values to get custom alerts.
5. Click on Update.
Device Management:
- Enable the Subscription Status
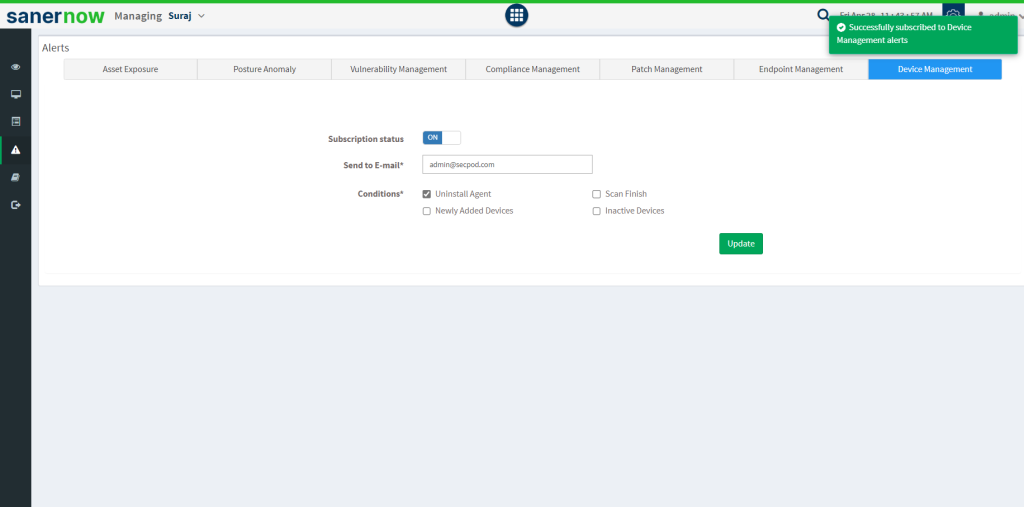
2. Assign the ‘Send to E-mail.’
3. Select the Conditions. Conditions refers to when an alert must pop up to the given email. Conditions include:
- Uninstall Agent
- Scan Finish
- Newly Added Devices
- Inactive Devices
4. Click on Update.
Now you know how to set Alerts in Saner.


