The SecPod Default Benchmark offers a pre-configured, regulatory-compliant assessment framework designed to streamline risk identification and mitigation across cloud environments. Built with industry best practices in mind, this benchmark includes standardized rules that evaluate specific resource configurations, displaying compliance results directly on the dashboard for enhanced visibility and accessibility.
Access Benchmarks from Saner Cloud Security
Step 1: Launch Saner CSPM
After you login, select Cloud Security from the landing page. Next, click the App Launcher( on top of the page) and choose CSPM(Cloud Security Posture Management).
Step 2: Access Benchmarks
Click the Benchmarks link on the top-right of the page. The Configuration details page opens. Go ahead and click the Create New Benchmark button to launch the Wizard-based UI.
Setup a Benchmark Using Wizard-based UI
With the guided User Interface, go ahead and create a custom benchmark if predefined benchmarks don’t fit all your needs.
Step 1: Specify Security Benchmark to Use and Region to Apply
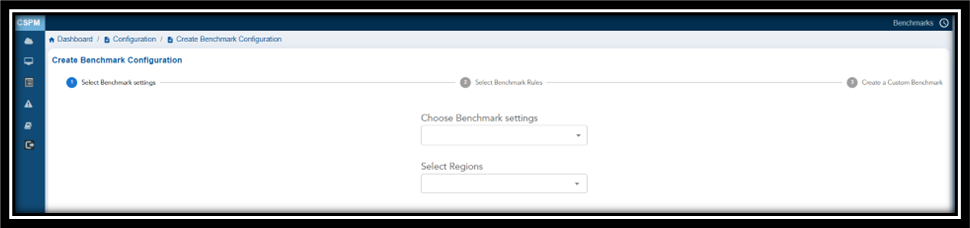
In this step, select the security benchmark that you want to use from the drop-down menu.
Available options:
- CIS Amazon Web Services Foundations Benchmark v3.0.0
- SecPod Default Benchmark
- NIST SP 800-53 Rev. 5
- PCI DSS v3.2.1
- HIPAA
- SOC
Additionally, specify the cloud region for which you want to apply the benchmark to from the drop-down menu.
Note: If you do not select the region, then the benchmark applies to all regions by default.
Define Benchmark Rules for a Compliance Type
| If You Choose… | Then |
|---|---|
| Regional | Region drop-down list appears, allowing you to select specific regions |
| Global | The benchmark is applied to all regions by default |
| Both | You can apply the benchmark to both specific regions and globally |
Additionally, specify the cloud region for which you want to apply the benchmark to from the drop-down menu.
Note: If you do not select the region, then the benchmark applies to all regions by default.
Tabular Listing of Benchmarks and Rules
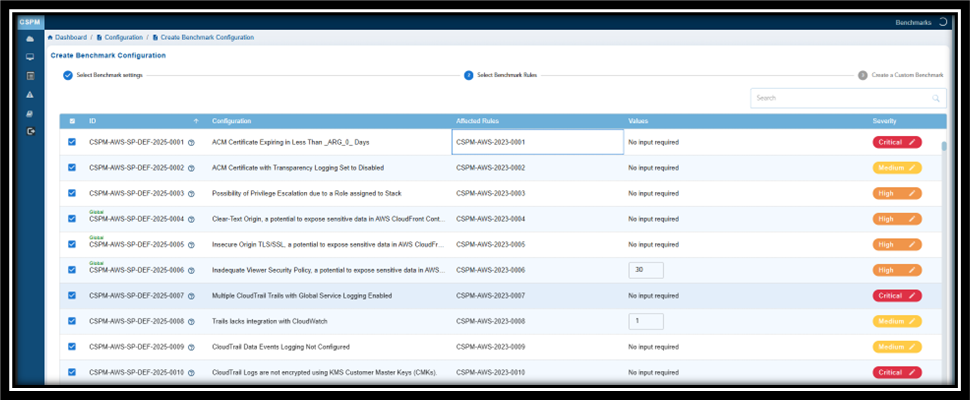
Click Next to see the Tabular listing of the Benchmarks with details on:
- ID
- Compliance Type
- Configuration Benchmark
- Severity
- Compliance Statistics
- Compliance%
- Regions
- Date
- Actions
From the tabular listing, you have an option to:
- Select Benchmarks for which you want create rules. Click Next and begin to select rules that align with the security standard
- See the Rule Type — Manual or Automated — applied to the Benchmark
- Update the Severity of Benchmarks. Click the Edit button under the Severity column and set the severity level.
- Get a quick glance of the benchmark details by clicking the Ask anything icon(displayed as a circled question mark) next to each Benchmark
See the Rule Type Applied to the Benchmark
Manual Rules require human intervention to verify compliance. For example, checking physical security policies or manually reviewing rules.
Automated Rules can be verified programmatically using scripts or security tools. For example, checking if disk encryption is enabled via automated scans.
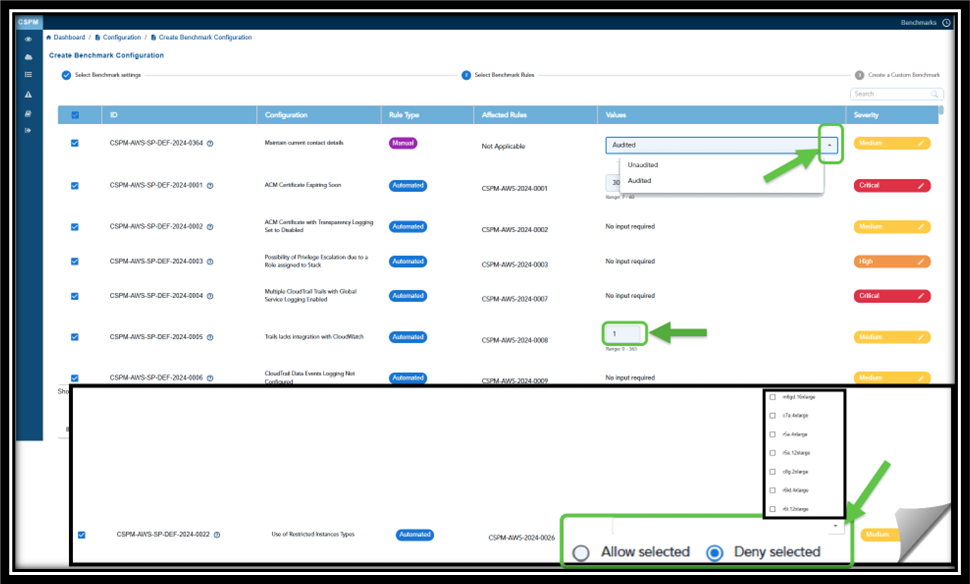
Adjust the Benchmark Values As You Wish
In the context of Saner Cloud Security Posture Management (CSPM), the term “No Input Required” refers to “Automated” security checks that do not require any additional configurations, manual inputs, or user intervention.
Saner CSPM automatically indicates whether a rule necessitates user input for customization or functions with default settings (“No input required”). However, users have an option to modify the entries in the “Values” column as they wish.
Additionally, you can also Allow or Deny the selected instance types. Just click the appropriate option(Allow or Deny) and select the relevant instance type from the dropdown list.
If you wish to increment or decrement values for certain rules, just use the up/down arrows.
Use the Manual Benchmarks for rules that are not automatically identified by the scanner. For Manual Benchmarks, by setting the values to:
- Unaudited — you can indicate the rules that have not been checked, either due to lack of data or because they were skipped in the scan
- Audited — you can ensure that the rule configurations are checked or verified against the benchmark
Prioritize Issues based on Criticality to System Security
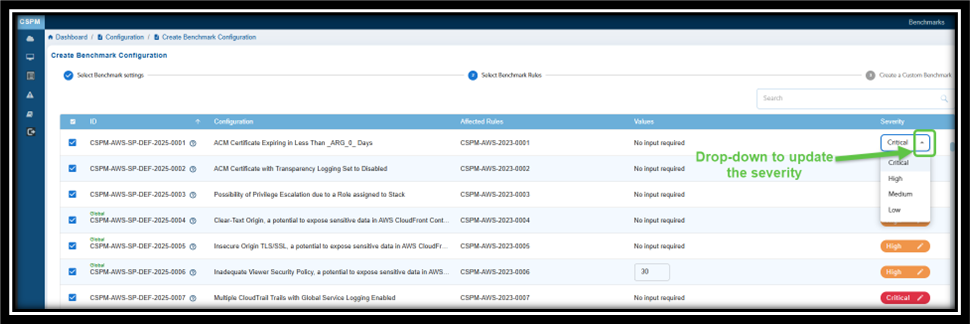
Severity in Benchmark rules indicate the level of risk or potential impact associated with each security configuration issue. It helps prioritize issues based on their criticality to system security. The levels shown in the image include:
- Critical: Indicates issues that pose the highest risk and require immediate attention to prevent severe security breaches.
- High: Represents significant risks that could lead to security vulnerabilities if not addressed promptly.
- Medium: Denotes moderate risks that are less urgent but still important to mitigate to maintain overall security.
- Low: Denotes risk of lesser severity and does not need immediate attention
What Can You Interpret from Global Benchmarks?
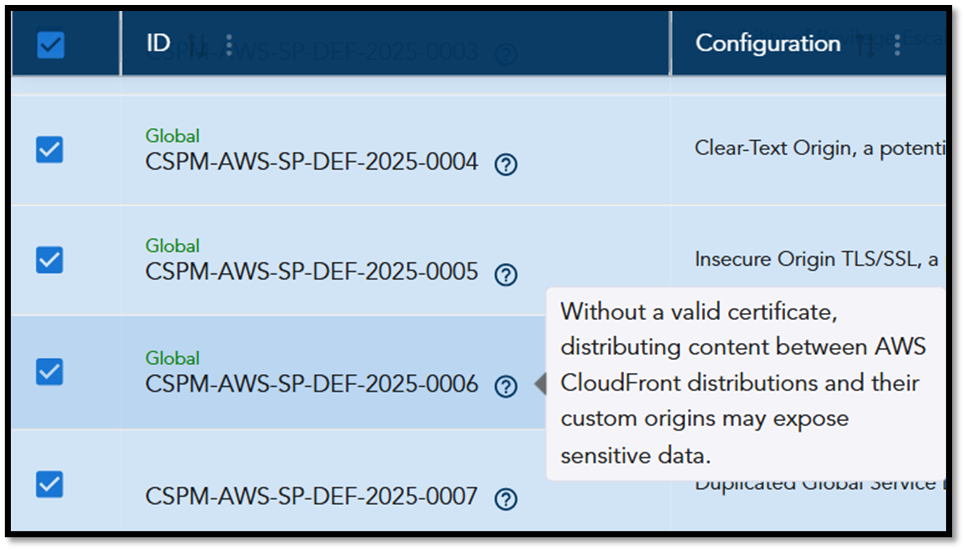
Global benchmarks assess services and configurations that are not region-specific. For example, AWS CloudFront is classified as a global service because it operates across multiple regions.
Saner CSPM offers guidance based on the findings from these global benchmarks by labeling these checks as “Global.” When you hover over the benchmark icon (represented as a “question mark”), it displays key insights explaining the importance of these checks and suggested actions to address any identified issues (see screenshot for an example).
Step 2: Choose Rules that Align with Security Standard
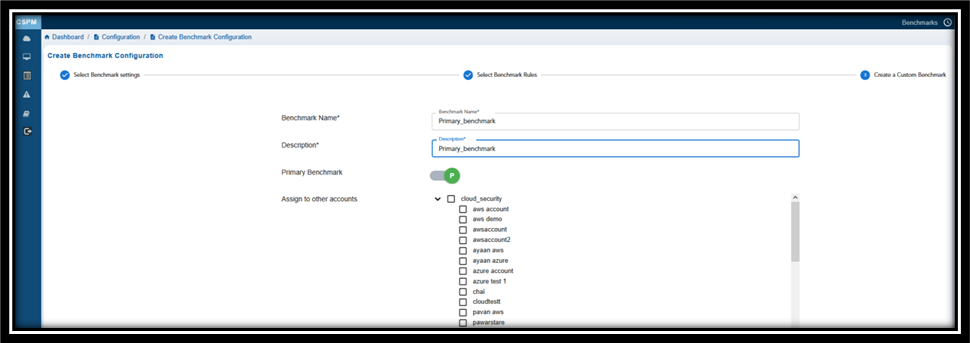
Provide a Name and Description to Your Benchmark.
If you want to specify this benchmark as a Primary one, then turn on the Primary Benchmark slider.
Choose the rules that align with the specified security standard. Click the checkbox(es) to choose one or more rules that you want to map with the security standard.
In the Assign to Other Accounts, observe the current cloud account selected by default. If you’d want to apply this benchmark for any other account, then click the appropriate checkbox(es).
Note that only administrators have the privilege to select one or more accounts to assign the benchmark.
Lastly, click the Create New Benchmark button.
Step 3: Complete Benchmark Creation
On completing all the steps, the system applies the selected benchmark rules to the chosen regions and resources for evaluation.
Click Next to view the list of rule IDs, descriptions, affected Rules, along with the “Values” on the Configuration page.
KEY POINTS TO REMEMBER IN BENCHMARK CONFIGURATION
The system considers the most recently created, edited or updated benchmark as the active one. This means:
| If you want to… | Then you must… | Result |
|---|---|---|
| Replace the Default Benchmark | Create a custom benchmark that has the same configuration as the Default Benchmark | Default Benchmark disappears from the “All Primary Benchmarks” block on the dashboard. Only the newly created custom benchmark displays |
| Replace the Custom Benchmark | Edit or update the custom benchmark and save to make this the active one | The modified custom benchmark displays as the active one in the “All Primary Benchmarks” block on the dashboard |
| Display all the Benchmarks | Slightly adjust the configuration to ensure the system supports displaying multiple benchmarks simultaneously | All the Benchmarks displays in the “All Primary Benchmarks” block on the dashboard |
See Also

