Follow the below steps to use OAuth authentication in Saner mail settings.
1: Log in to the Saner web console as an Org Admin or Account Admin. Click the Control panel icon ![]() located on the right side of the Unified Dashboard page.
located on the right side of the Unified Dashboard page.
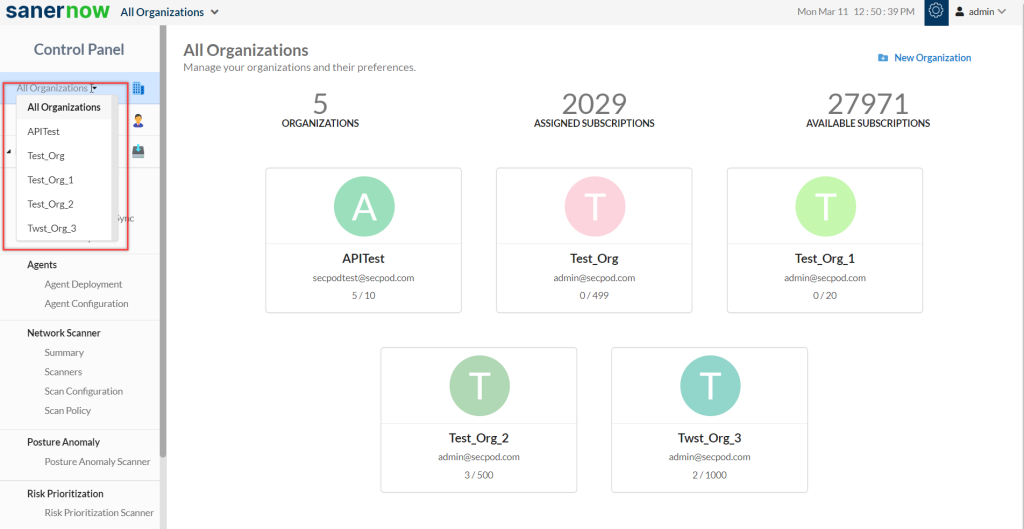
2: Select the organization from the drop-down menu on the left side of the page for which you want to configure mail settings.

3: Navigate to Settings on the left side of the page. Click the ![]() icon.
icon.
4: Click the New Mail Settings button on the right side of the page. A new pop-up window appears on the screen.

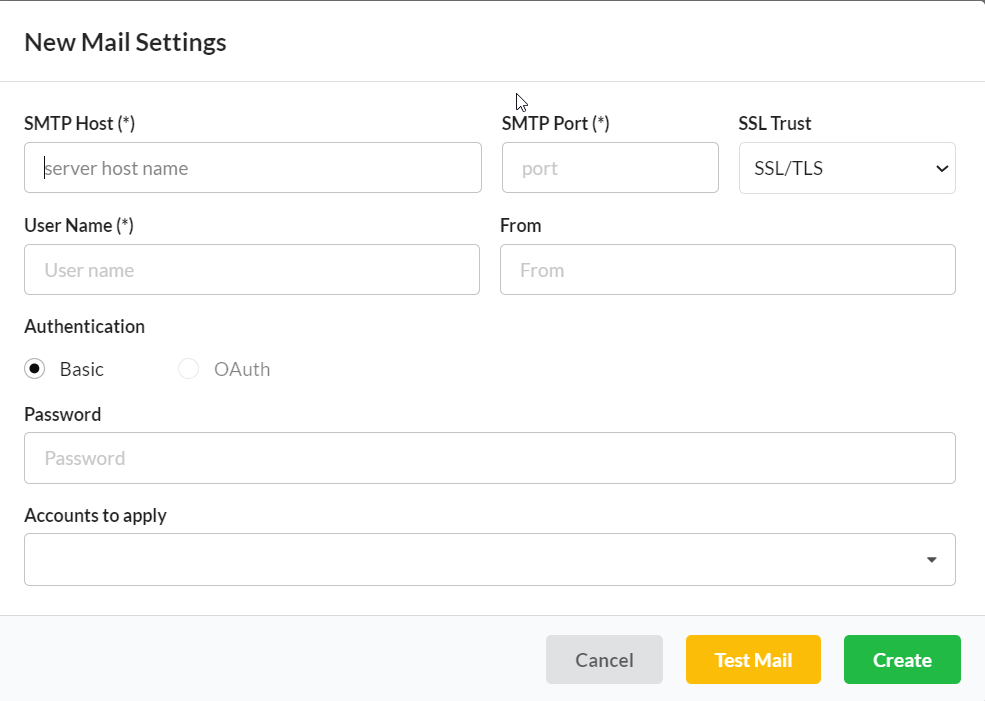
5: Enter the below details on the New Mail Settings screen.
SMTP Host –– Enter the SMTP email address of your mail provider.
SMTP Port — Enter the SMTP Port address of your mail provider.
SSL Trust – Select the SSL Trust supported by your mail provider.
User Name — Enter the email address configured for OAuth authentication.
From — Enter the same email address you entered in the User Name textbox.
Authentication — Selected the Authentication as OAuth.
6: Enter the Client ID and Client Secret. Toggle the Configure OAuth button towards the right. A pop-up message appears on the screen. Click the OK button.
If you are using Gmail, refer the article – How to create OAuth Client ID and Client Secret for Gmail Accounts.
If you are using Microsoft 365, refer the article – How to create OAuth Client ID and Client Secret for Microsoft 365.

| Note Saner supports Gmail and Office365 email addresses for OAuth authentication. Saner will enable the OAuth option if you enter a valid SMTP server address associated with Gmail or Office365. |
| Note If you use an Office 365 email address for OAuth authentication, use the details below. Ensure you whitelist the email address in the Office 365 admin portal so that it works seamlessly with OAuth. SMTP Host: smtp.office365.com SMTP Port: 587 SSL Trust: STARTTLS If you use a Gmail email address for OAuth authentication, use the details below. SMTP Host: smtp.gmail.com SMTP Port: 587 SSL Trust: STARTTLS |
7: You will be re-directed to your mail provider’s website. Follow the on-screen instructions to validate the email address, OAuth Client ID, and Client Secret. You will see a Success notification on the right side of the page.
8: In the Organizations to apply drop-down box, select the Organizations you want to use the mail settings. Click the Test Mail to trigger a test mail. If the OAuth settings are correct, you will see a notification message on the right side of the screen stating that a test mail has been sent successfully. If the settings are incorrect, you will see an error message on the right side of the screen.
9: Click the Create button to save the OAuth mail settings. The OAuth mail settings will now be applicable for all the Accounts in the Organization.


