Introduction
IT administrators often struggle to balance security threats with maintaining smooth service operations. Integrating Freshservice with Saner Platform bridges this gap by combining IT service management with real-time endpoint security. Vulnerabilities detected by Saner CVEM can automatically generate tickets in Freshservice for fast tracking, assignment, and resolution. This improves response time and strengthens your organization’s security posture—without adding complexity to existing workflows.
Key Benefits of Freshservice and Saner CVEM Integration
- Faster response to threats: Automatically create and assign tickets in Freshservice when vulnerabilities are detected—eliminating manual steps and accelerating resolution.
- Unified visibility: View asset and vulnerability data directly in Freshservice to reduce tool switching and streamline workflows.
- Smart prioritization: Focus on high-impact issues by prioritizing remediation based on asset criticality and vulnerability severity.
- Clear ownership and tracking: Assign vulnerabilities to the right team members and monitor progress—all within a single platform.
- Reduced manual effort: Automate ticket creation, assignment, and updates to improve efficiency and reduce repetitive tasks.
- Improved compliance readiness: Access a complete audit trail of actions taken on vulnerabilities to support regulatory requirements.
Integration Prerequisites
- You must have a Saner CVEM user account with Organization Admin privileges.
- You must have a Freshservice admin account with a role that can approve change requests.
- You must have an active subscription to the Saner CVEM Vulnerability Management (VM) and Patch Management (PM) modules.
- The VM module is required to detect vulnerabilities on your devices.
- The PM module is required to remediate those vulnerabilities detected on the devices.
Set Up sync between Freshservice and Saner CVEM
Follow these steps to set up sync between Freshservice and Saner CVEM.
1. Sign in to the Saner CVEM web console and go to the Control Panel.
2. From the organization ![]() drop-down menu, select the organization you want to configure.
drop-down menu, select the organization you want to configure.
3. In the left navigation pane, select Integration, then choose Freshservice.
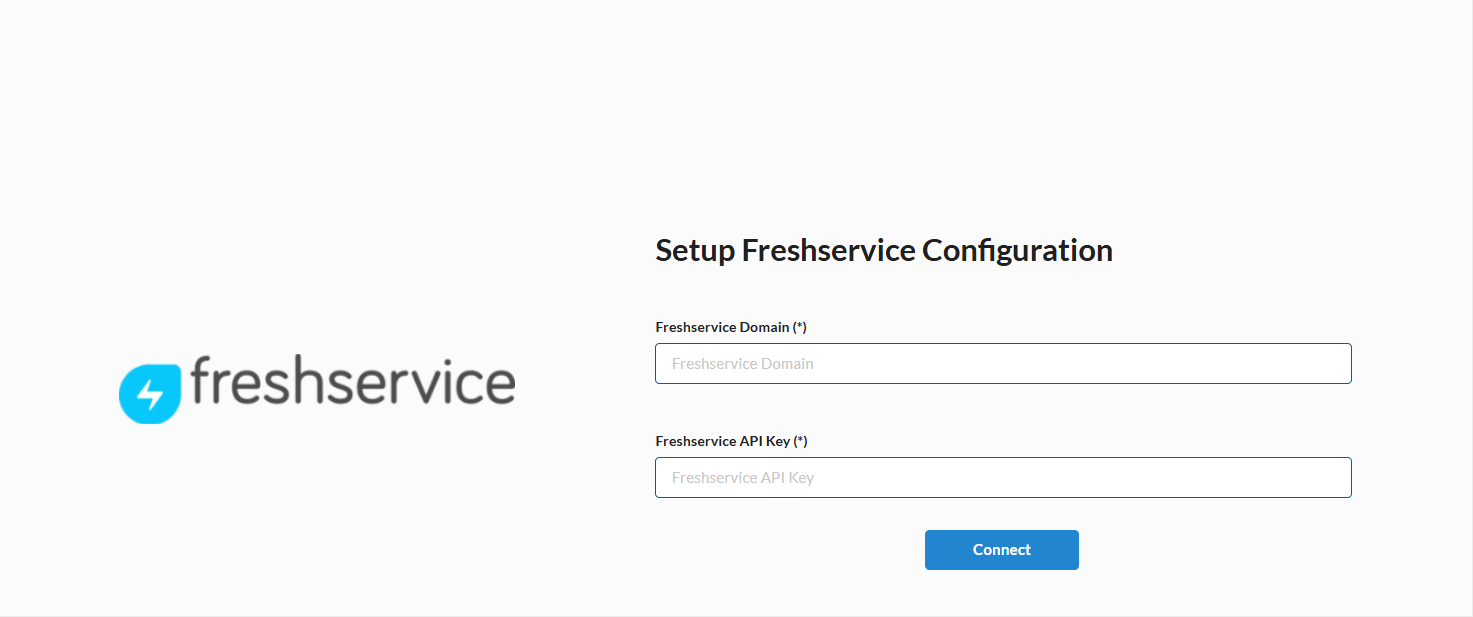
4. In the Freshservice Domain field, enter your Freshservice domain name.
Use the following format: https://<domain name>.freshservice.com
5. In the Freshservice API Key field, enter your Freshservice API key.
Learn how to retrieve your Freshservice API key.
6. Click Connect to establish the integration.
7. From the Account(s) drop-down list, select the accounts you want to configure for the Freshservice integration. By default, Saner CVEM displays all accounts associated with the current organization.
8. From the Asset Sync drop-down list, choose a sync schedule: Daily, Weekly, or Monthly, based on your requirements.
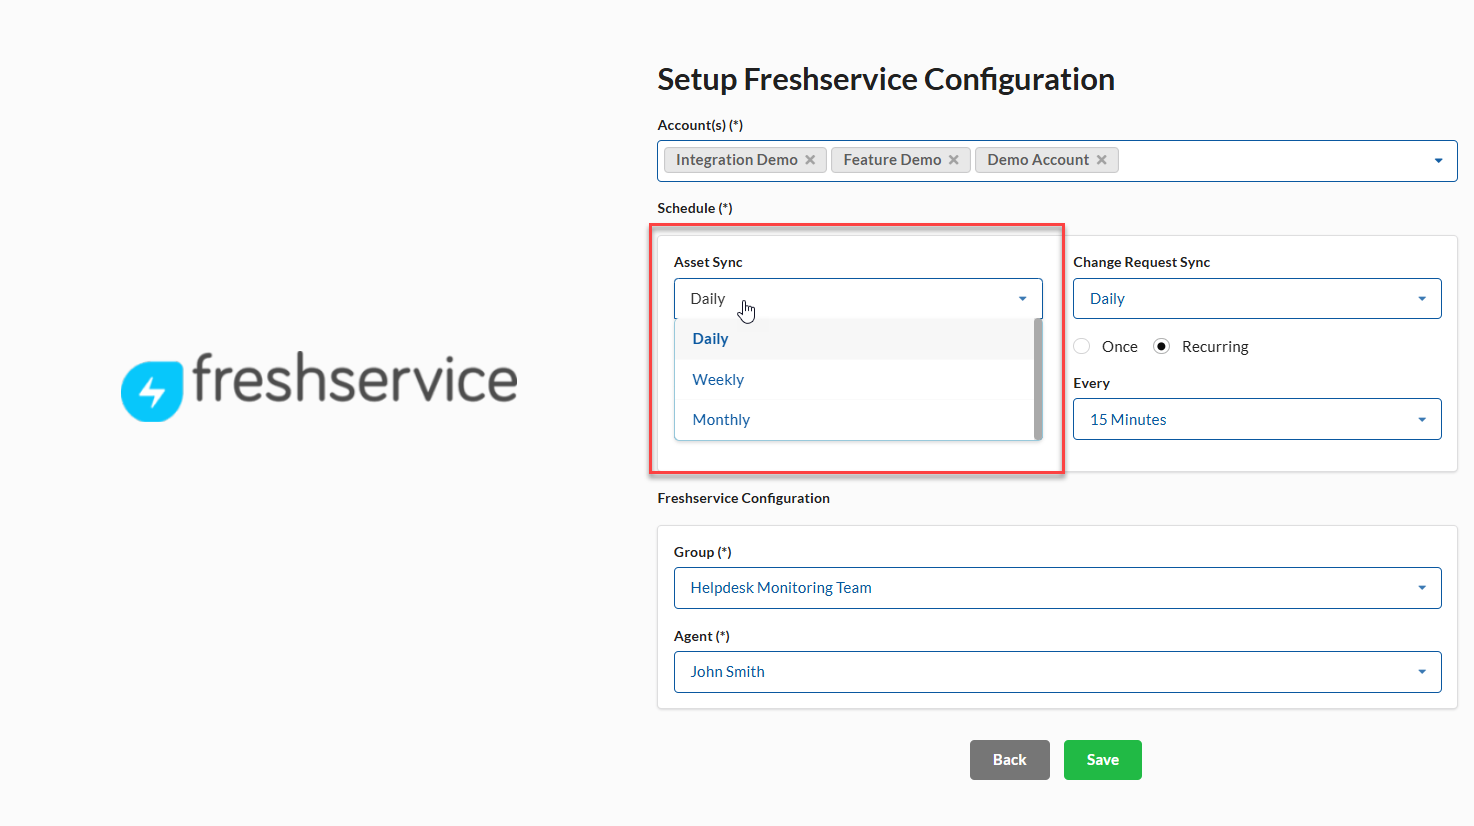
9. Choose whether to run the asset sync once or on a recurring schedule.
- If you select Recurring, define the interval between syncs using the Every drop-down list.
- If you select Once, specify the sync time using the Start Time pop-up.
10. From the Change Request Sync drop-down list, select a schedule that meets your requirements. You can choose to sync change requests Daily, Weekly, or Monthly.
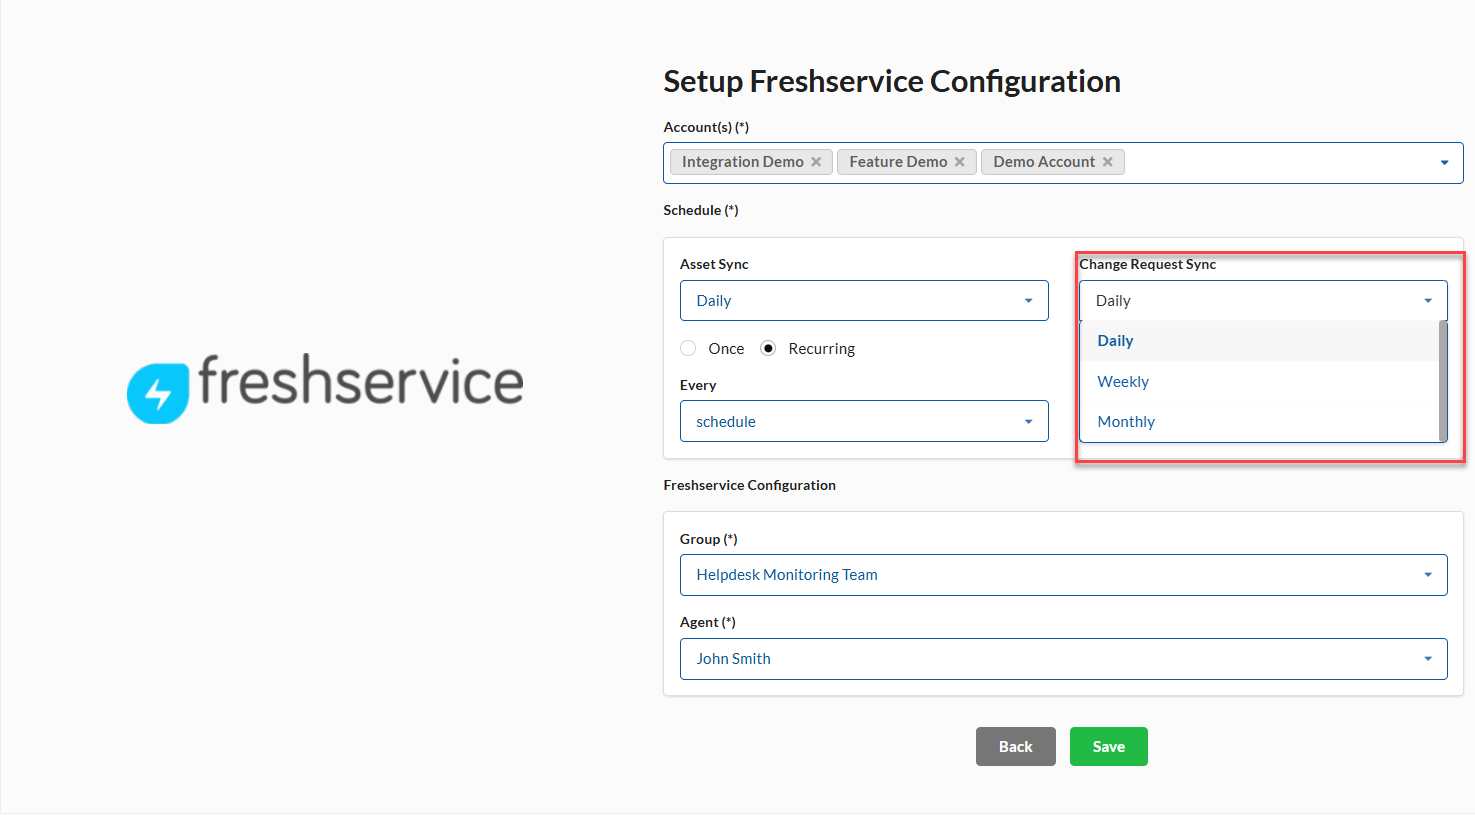
11. Choose whether to run the Change Request Sync once or on a recurring schedule.
- If you select Recurring, define the interval between syncs using the Every drop-down list.
- If you select Once, specify the sync time using the Start Time pop-up.
12. From the Group drop-down list, select the group in Freshservice to which the change request should be assigned.
13. From the Agent drop-down list, select the agent responsible for approving the change request in Freshservice.
| Note You can select only one group and a user at a time. However, ensure that the user is part of the group you selected in the Group drop-down box in Freshservice. If there are no users available for the selected group, the Agent drop-down box is disabled. |
14. Click Save.
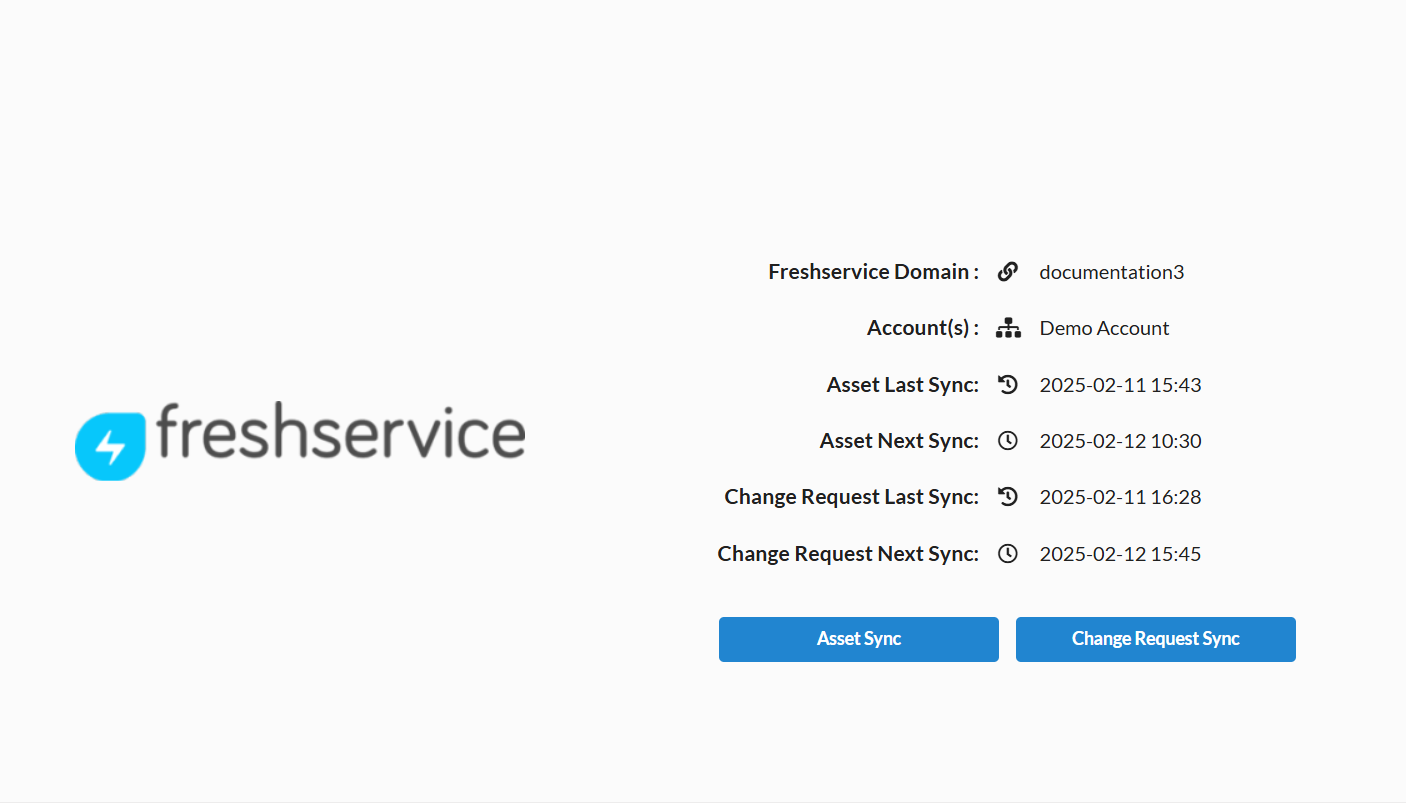
Saner CVEM displays the configuration summary, including the Freshservice domain, selected accounts, and sync schedules for asset and change request scans.
The sync process starts automatically. The duration may vary depending on how many accounts and assets are selected.
After the sync completes, the synced assets are available in Freshservice.
Change sync settings between Freshservice and Saner CVEM
Follow these steps to change sync settings between Freshservice and Saner CVEM.
1. Sign in to the Saner CVEM web console and go to the Control Panel.
2. From the organization ![]() drop-down menu, select the organization you want to configure.
drop-down menu, select the organization you want to configure.
3. In the left navigation pane, select Integration, then select Freshservice.
4. Select ![]() Settings.
Settings.
5. On the Modify Freshservice Configuration page, make the necessary changes.
6. Click Update to save the updated sync settings.
Delete sync settings between Freshservice and Saner CVEM
Follow these steps to change sync settings between Freshservice and Saner CVEM.
1. Sign in to the Saner CVEM web console and go to the Control Panel.
2. From the organization ![]() drop-down menu, select the organization you want to configure.
drop-down menu, select the organization you want to configure.
3. In the left navigation pane, select Integration, then select Freshservice.
4. Select ![]() Settings.
Settings.
5. Click Delete to delete the sync settings.
A confirmation message appears:
Do you want to delete the configurations? Note that the deletion does not remove the data from Freshservice account. Do you still want to proceed?
Click OK to confirm and delete the configuration.
View integration logs for Freshservice and Saner CVEM
Follow these steps to change sync settings between Freshservice and Saner CVEM.
1. Sign in to the Saner CVEM web console and go to the Control Panel.
2. From the organization ![]() drop-down menu, select the organization you want to configure.
drop-down menu, select the organization you want to configure.
3. In the left navigation pane, select Integration, then select Freshservice.
4. Select ![]() Logs.
Logs.
5. Click Get Logs to view the integration logs.
Navigating to Synced Assets in Freshservice
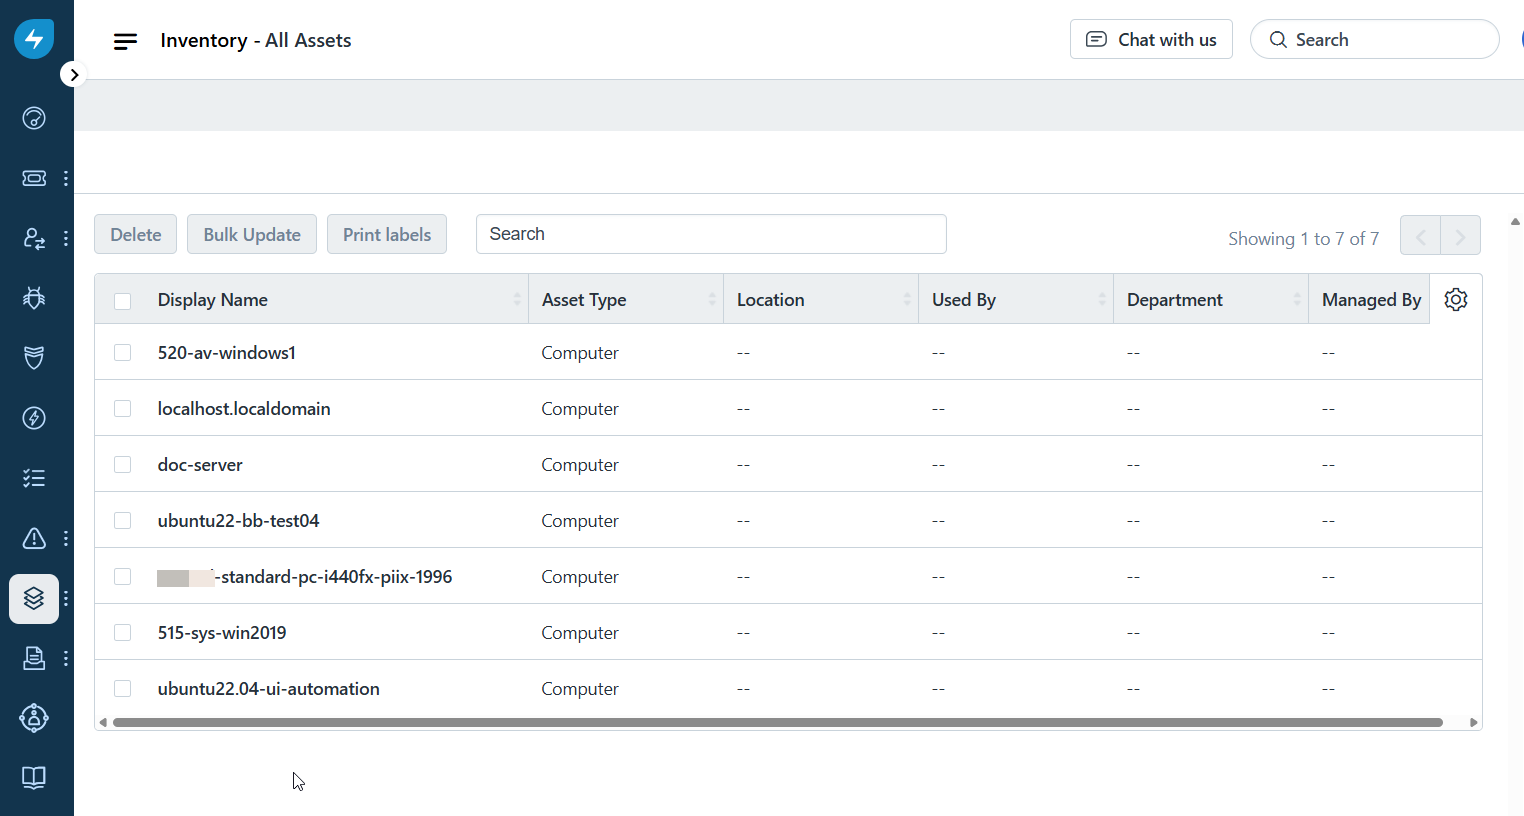
Devices associated with the selected accounts during the Freshservice sync configuration with Saner CVEM appear on the Assets page. Changes to Saner CVEM devices are updated in Freshservice only after a successful asset sync.
To view synced assets, go to Assets > Inventory.
View Asset Information
During an asset sync, Saner CVEM collects device details such as hostname, operating system and version, available memory, and installed software.
Select a device on the All Assets page to view its details.
The Overview tab displays asset details, including the operating system, memory, disk space, hostname, and MAC address.
The Software tab lists all software installed on the asset.
The Associations tab lists all change requests linked to the asset.
Accessing Change Requests
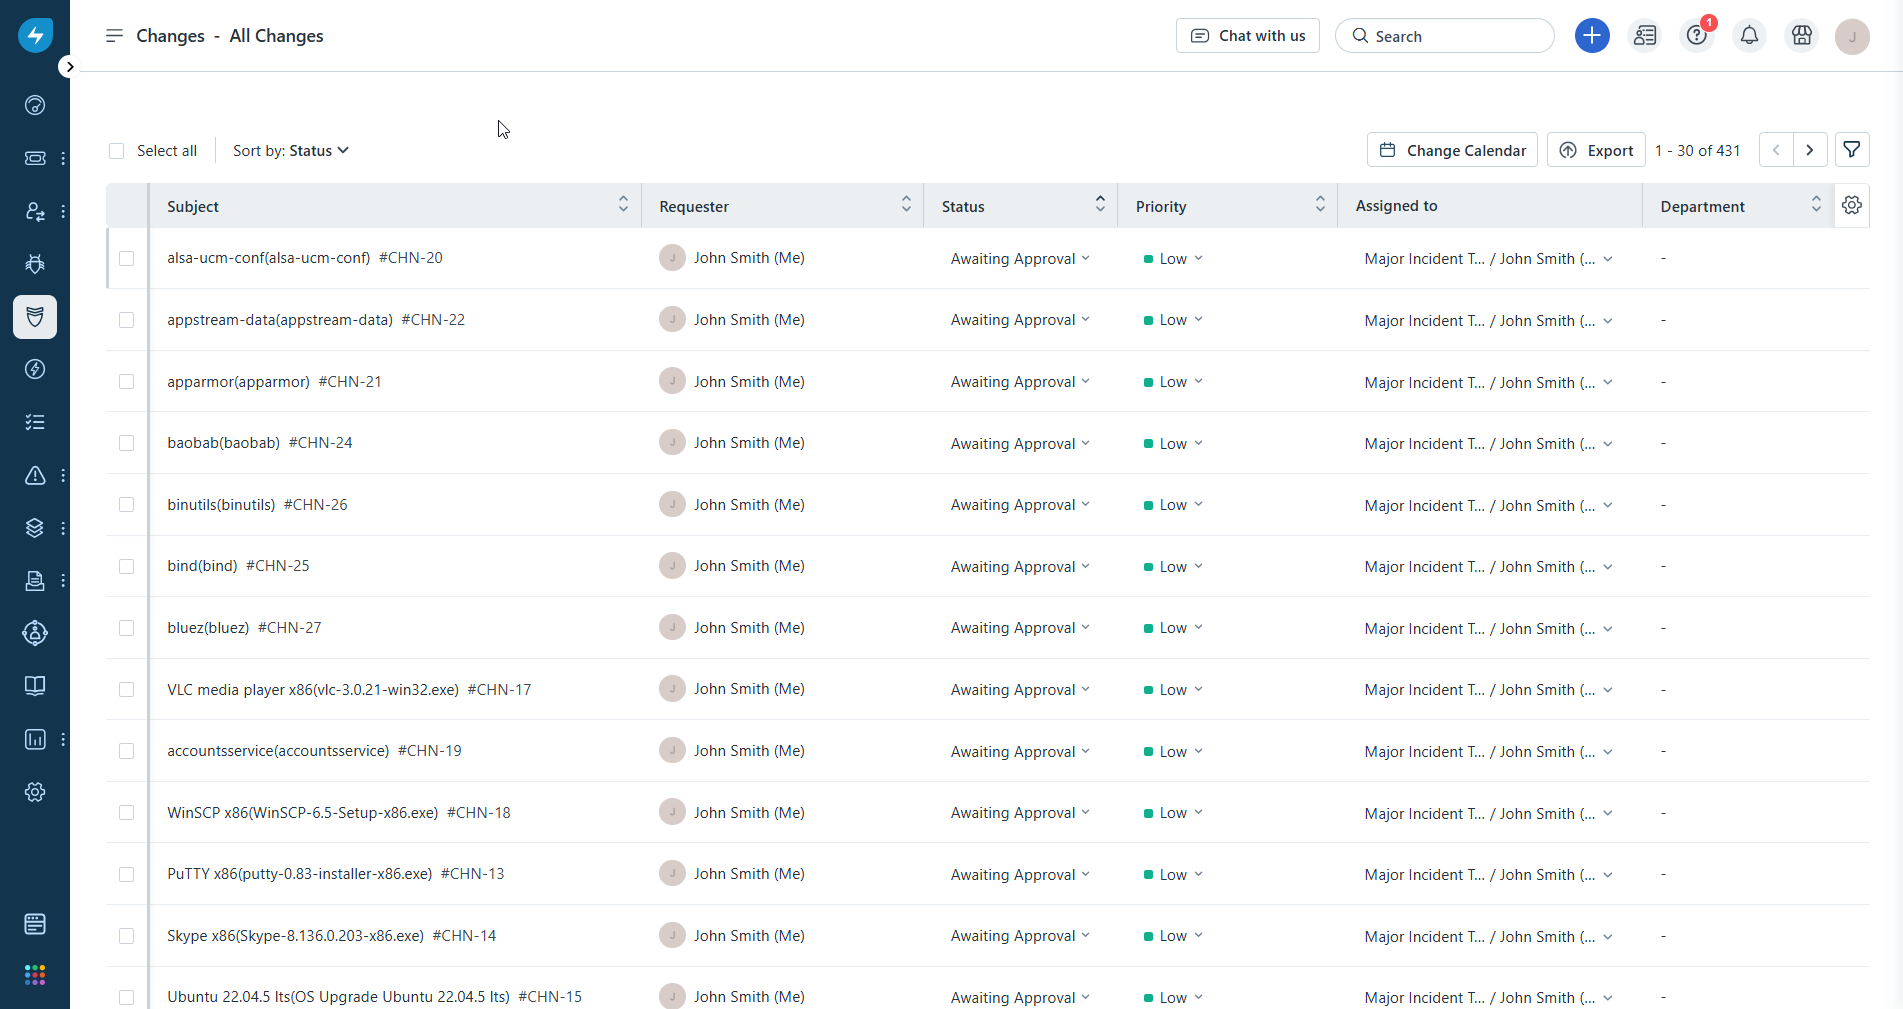
Saner CVEM creates a change request in Freshservice for each vulnerability detected on devices associated with the account specified during the integration sync. Newly created change requests are in the Awaiting Approval state.
To view unapproved change requests, go to Changes > My Unapproved Changes.
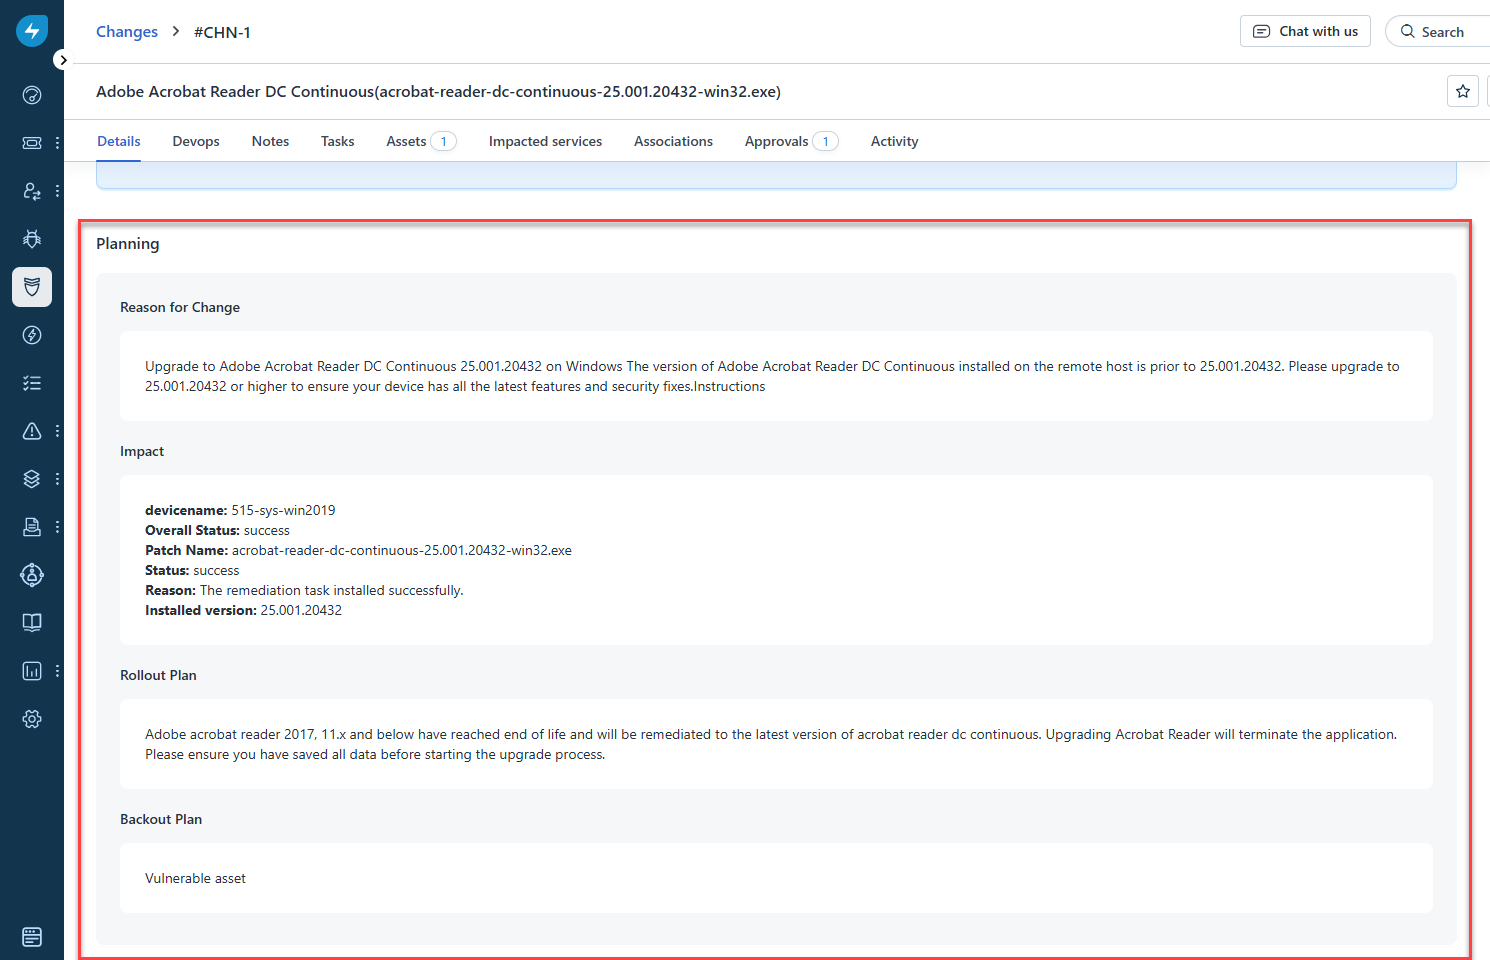
Change Request Details
Change requests in Freshservice are assigned to the group and user specified during integration setup and are moved to the Awaiting Approval state.
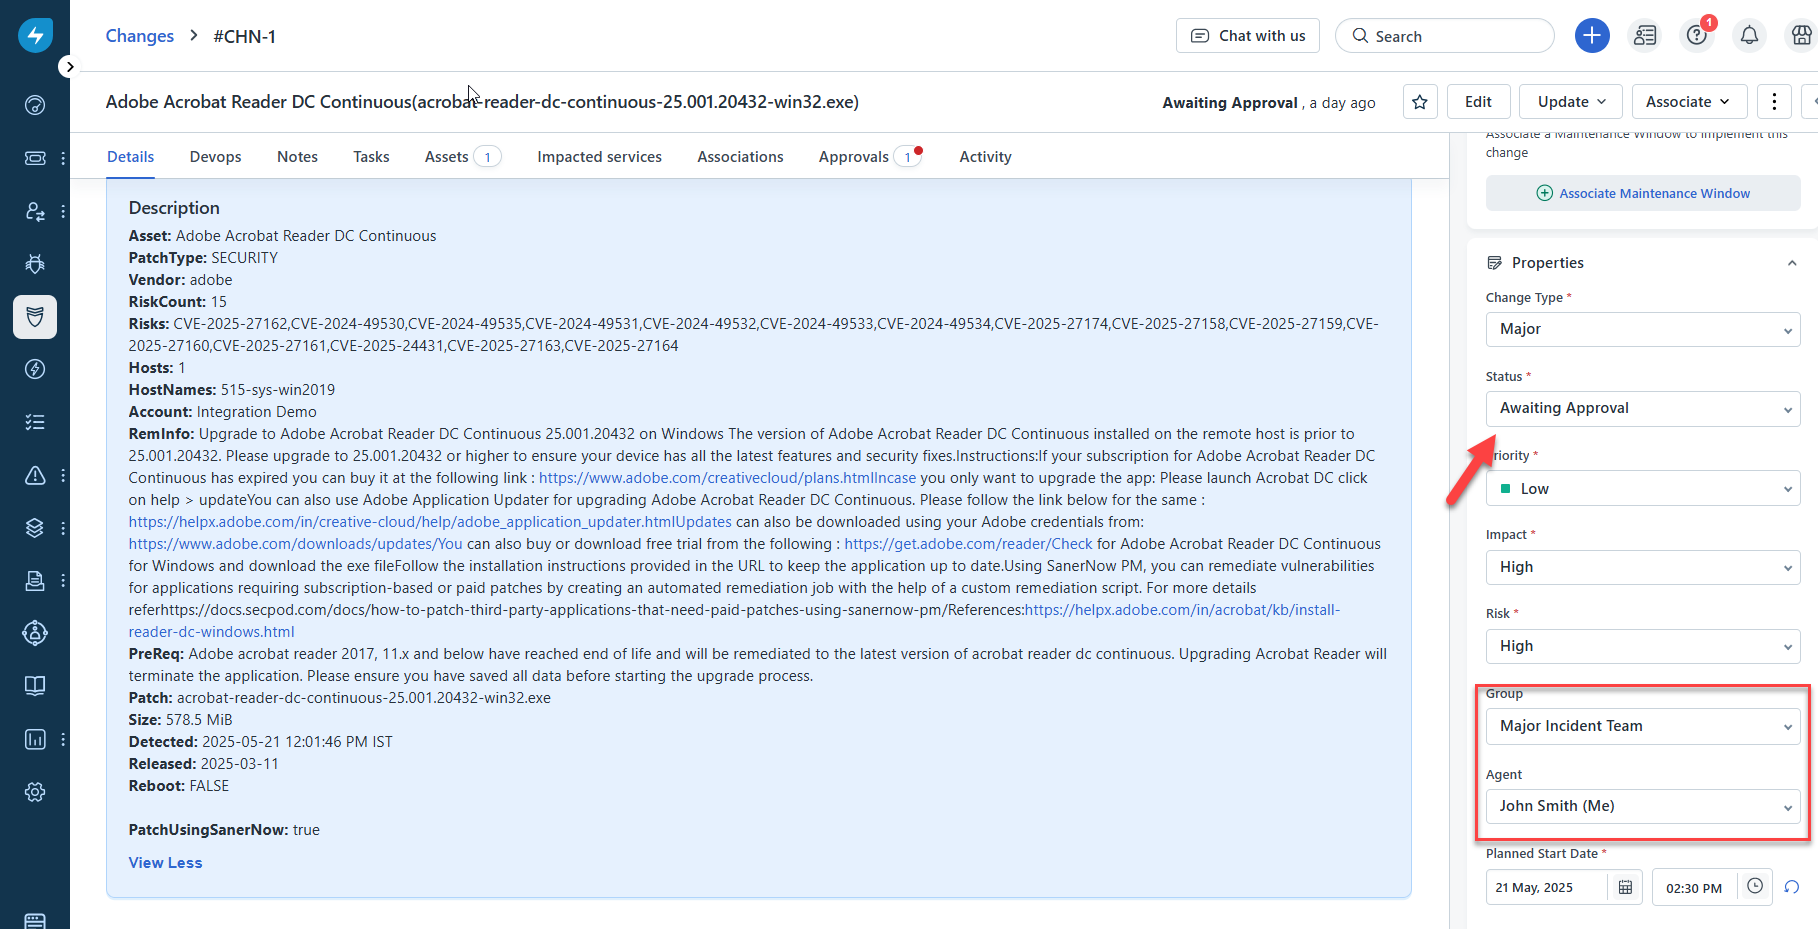
The Details tab of a change request includes a description of the vulnerability found on the asset. The Description section includes the following information:
- Asset: Name of the vulnerable asset.
- Patch Type: Type of patch—either a security or non-security patch.
- Vendor: Name of the company that developed the patch or software.
- RiskCount: Total number of risks found on the device.
- Risks: CVEs associated with the vulnerable asset.
- Hosts: Number of hosts that contain the vulnerable asset.
- HostNames: Hostname of the device on which the vulnerable asset exists.
- Account: Saner CVEM account to which the device belongs.
- RemInfo: Summary of how to remediate the vulnerability.
- PreReq: Pre-requisites needed before applying the patch.
- Patch: Name of the patch to be applied.
- Size: Size of the patch.
- Detected: Date and time when Saner CVEM detected the vulnerability.
- Released: Date when the vendor released the patch.
- Reboot: Indicates whether a reboot is required after applying the patch (
Trueif required,Falseif not).
The Assets tab displays a list of assets where Saner CVEM detected the vulnerability.
The Approvals tab displays a list of approvers who can approve the change request. Once approved, the change request moves to the Pending Release state. During a change request sync, a remediation job is created only for change requests in the Pending Release state.
Approve Change Requests
Change requests must be approved before they can move to the Pending Release state. After approval, a remediation job is created in Saner CVEM during the next successful change request sync.
To approve a change request in Freshservice, go to the Approvals tab in the change request, and then select Approve.
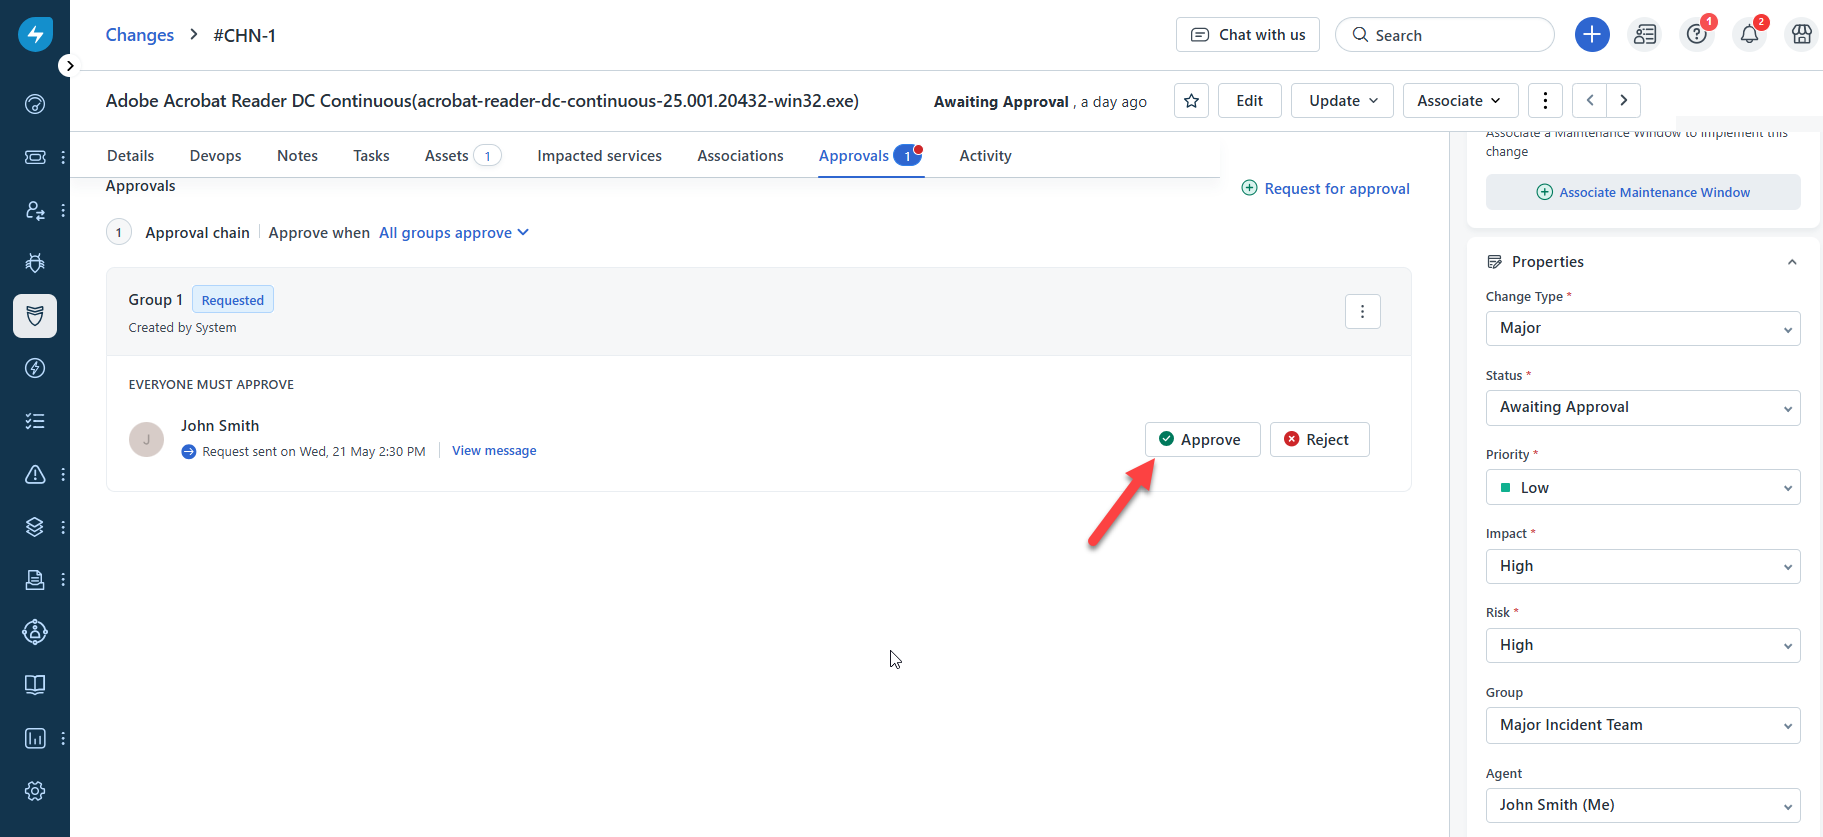
After you approve the change request, it moves to the Pending Release state.
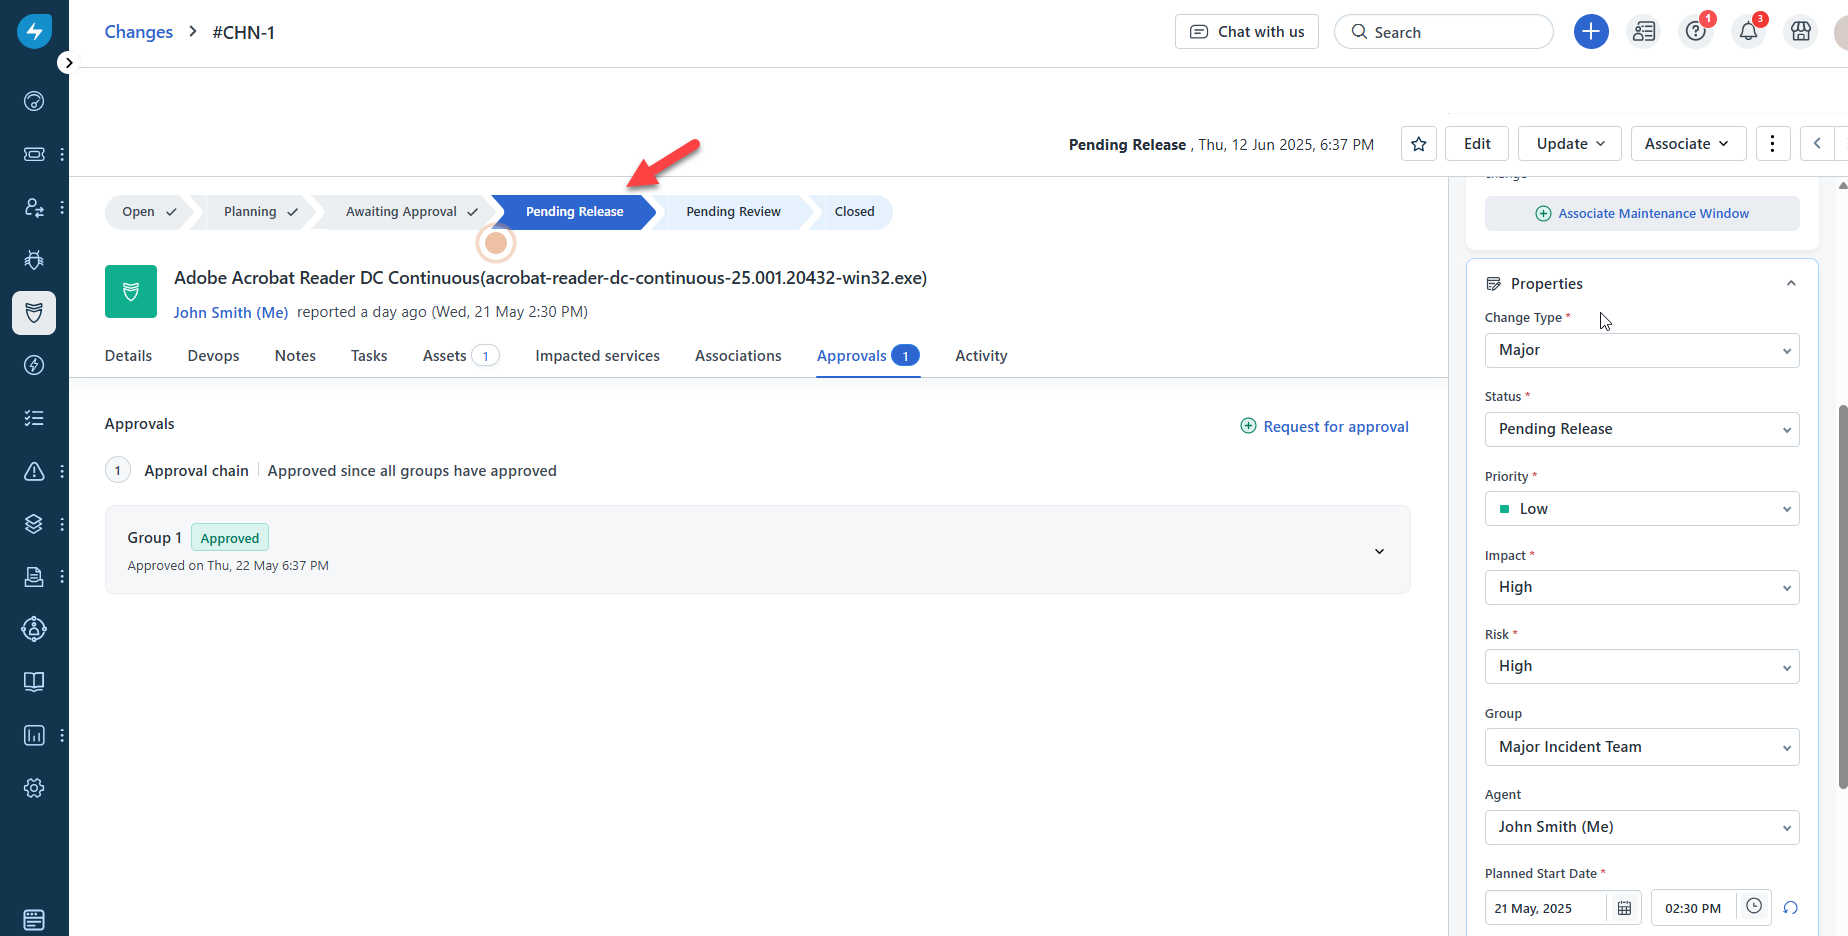
Based on the configured change request sync schedule, Saner CVEM creates a remediation job after a successful sync. The outcome determines the change request status:
- If the remediation job is partially successful: The change request moves to the Pending Review state.
- If the remediation job completes successfully: The change request moves to the Closed state after the next sync. Saner CVEM automatically populates the Planning section of a change request with the required information when the request reaches the Closed state.