Compliance management is the ongoing process of monitoring and assessing systems to comply with the industry and security standards and regulatory policies. Saner Compliance Management will help identify systems that are non-compliant and missing patches with the help of compliance management. It provides regular proactive system scans and automates remediation actions and customizable results. Saner CM includes regulatory compliance templates for PCI, HIPAA, ISO 27001, NIST 800-53, and NIST 800-171. Compliance profiles can be created and customized to suit an organization’s needs. Once the profile is deployed, Saner CM monitors the organization’s assets for deviations from the profile and helps fix deviations. Saner CM performs daily checks to detect configuration discrepancies that can be manually or automatically fixed.
Saner CM supports three aspects of compliance:
- Default Compliance – Each operating system will have individual rules by default. Saner CM sets the values for this.
- Generic Compliance – Generic compliance is designed to correspond to the different operating systems and security settings such as Account Lockout Policy, Administrative Templates, Authentication Types, etc.
- Regulatory Compliance defines standards, such as the PCI, HIPAA, and NIST standards.
Organizations must be aware of and take steps to meet relevant laws and regulations.
To access the Compliance Management tool:
- Log in to Saner Prevent platform using your credentials.
- Suppose an account already exists and the Saner Agent has been deployed on the endpoints; the organization level dashboard is displayed.
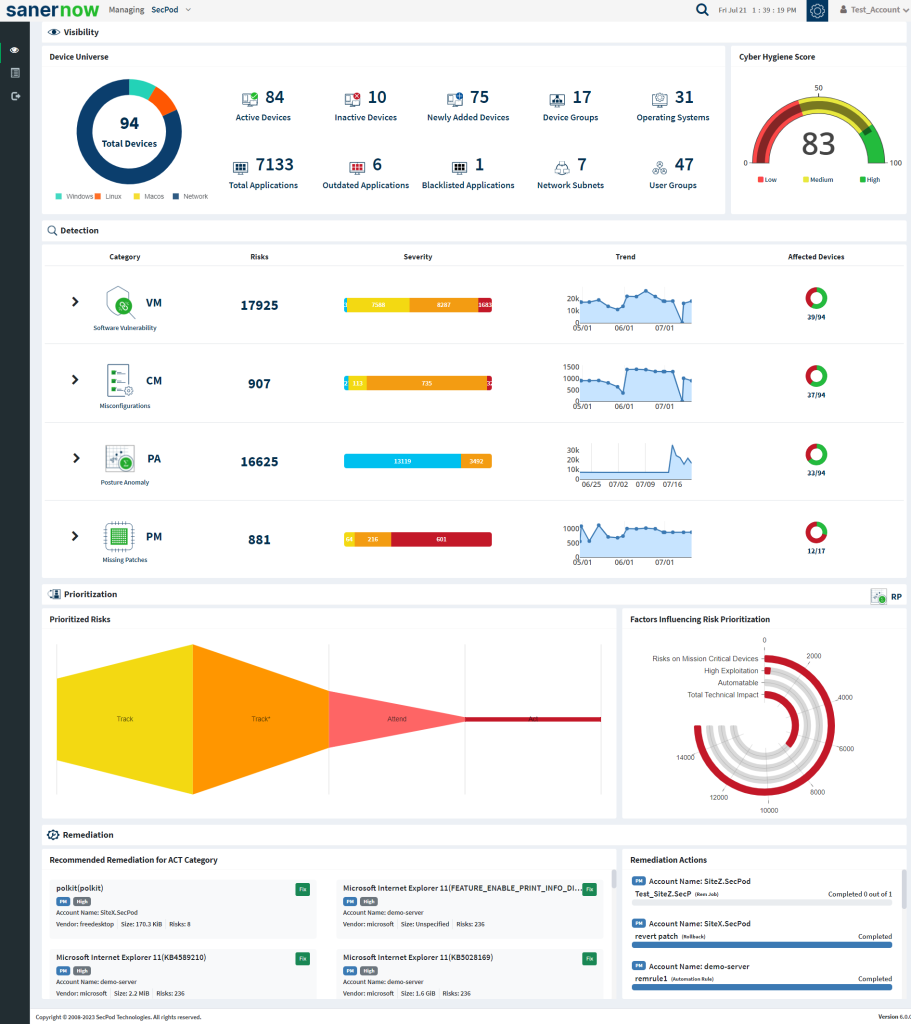
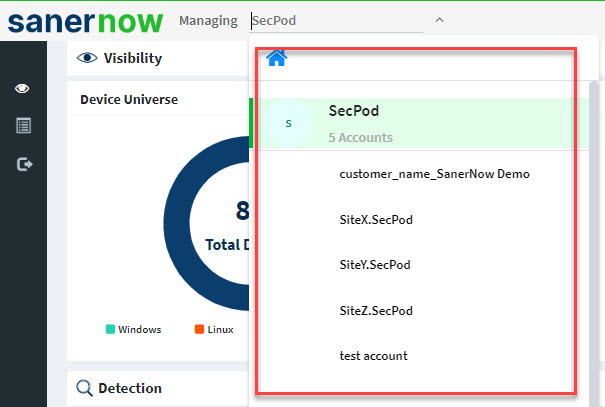
- To select an account, click the drop-down box on the top left corner of the dashboard. The Organizations and the Accounts belonging to the Organization are listed.
- Click the Saner tools icon on the header. It will display all the provision tools, as shown below.

- Click the Compliance Management (CM) icon.
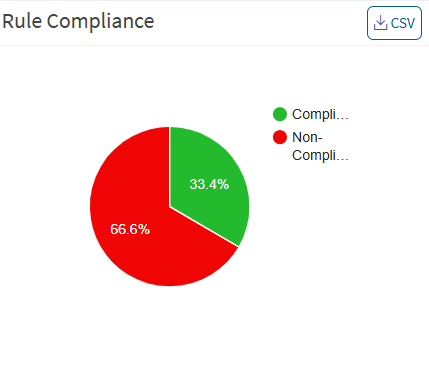
Rule Compliance
This pane shows the organization’s compliance posture and highlights the percentage of non-compliant devices based on the rules.
Device Compliance
This page shows the percentage of compliant and non-compliant devices.
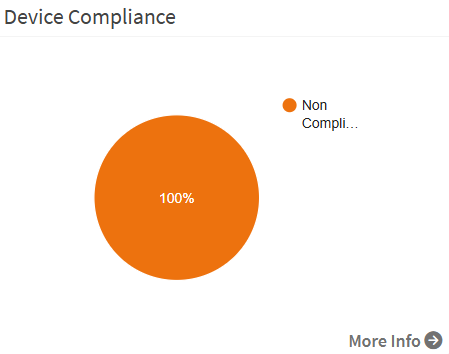
Click on the More Info arrow to view compliance details by groups or unassigned devices, by the top non-compliant hosts, top misconfigurations, or greatest non-compliant assets. You can download the device compliance information by clicking on the CSV icon.

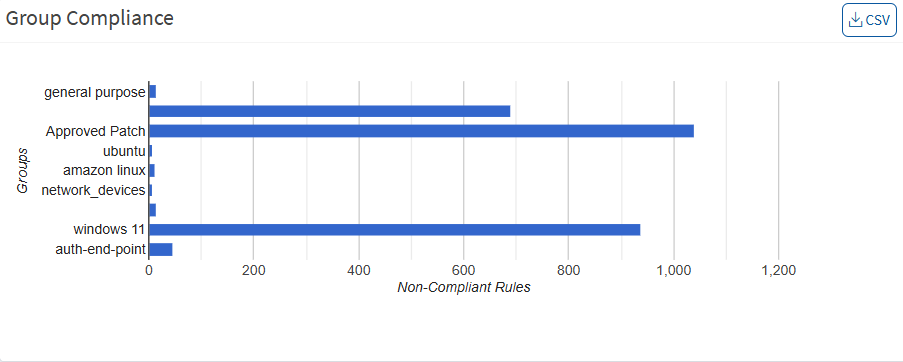
Group Compliance
This pane shows the distribution of deviations based on the group. You can download the excel sheet of group compliance information by clicking on the CSV icon.
Benchmarks
This page shows the list of benchmarks, the groups to which the benchmark is assigned, and the compliance statistics. You will get a list of rules associated with that benchmark with detailed information on expanding each benchmark. You can download the excel sheet of benchmark details by clicking on the CSV icon. You can also get the CSV file for each benchmark with a detailed list of rules available in that benchmark.

Click on the Expand icon, which will redirect to the Benchmarks page. You can see a list of benchmarks. Click on the edit icon to apply the benchmark to different groups or delete the benchmark. The CSV icon is available to download the excel sheet with benchmark details. You can create a new benchmark from this page.
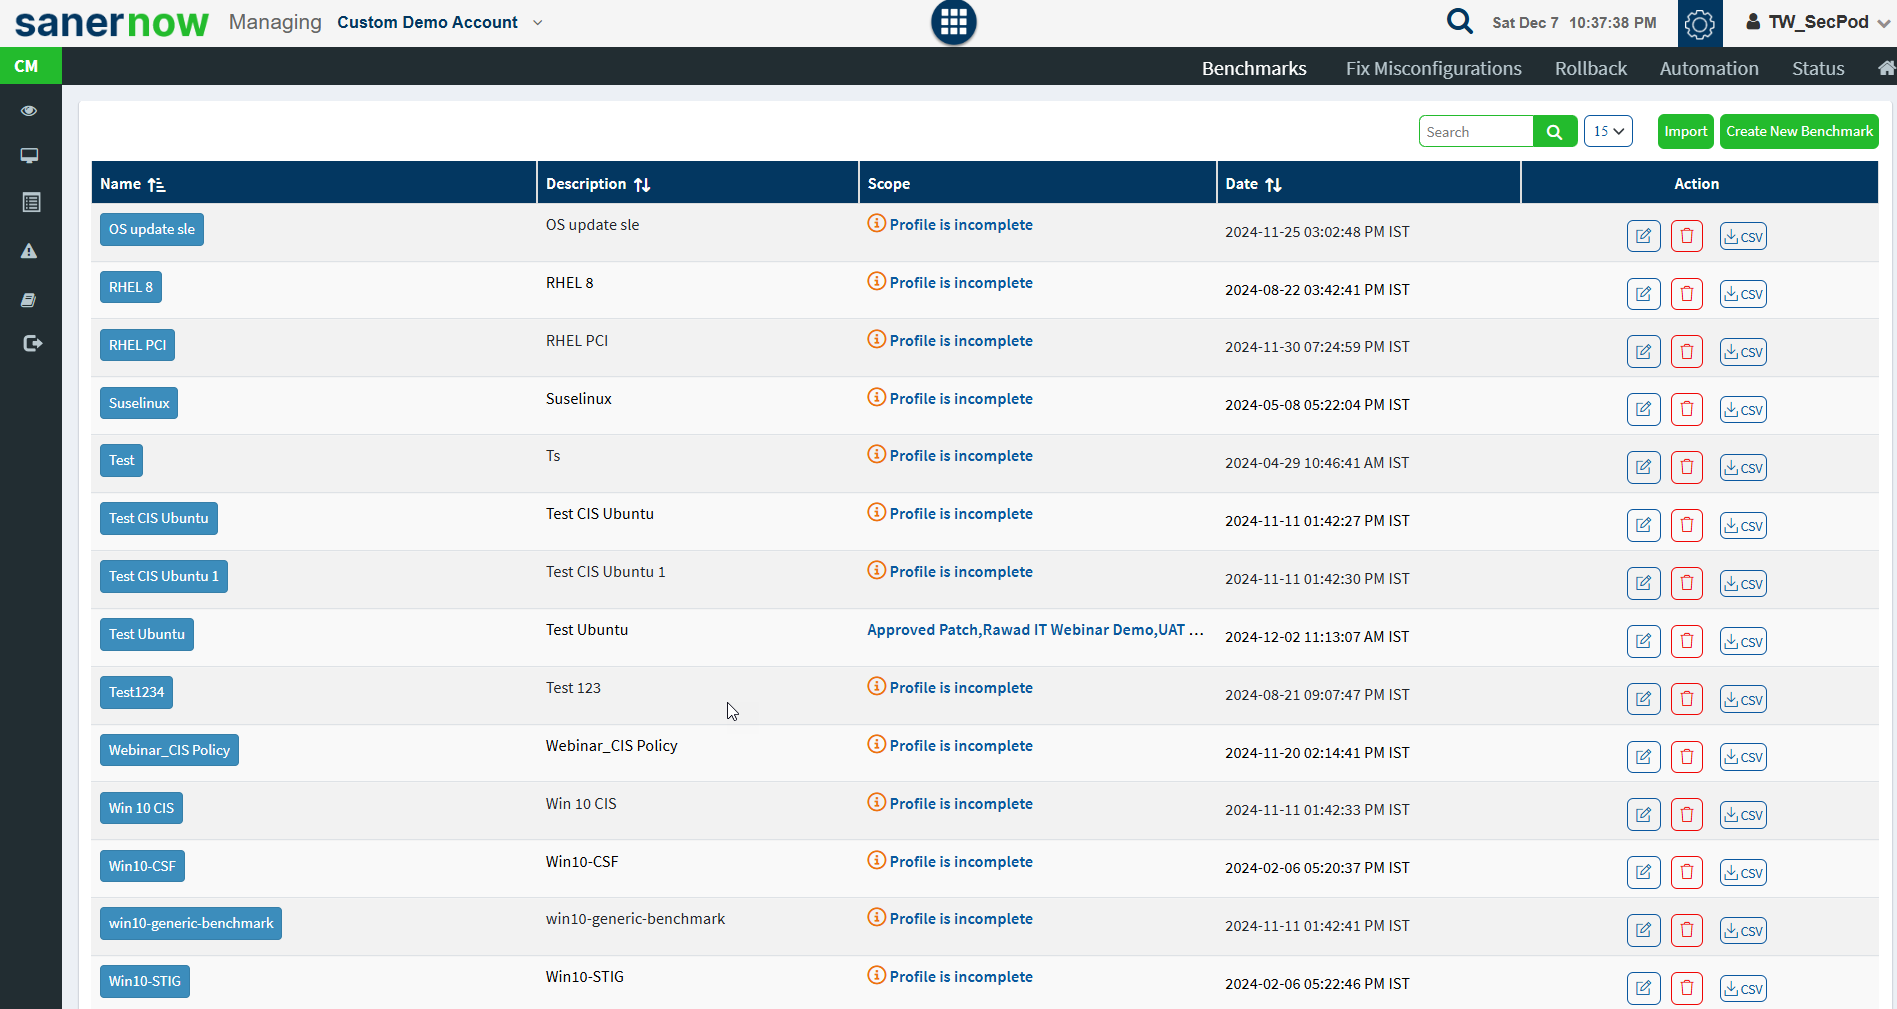
To create a new benchmark:
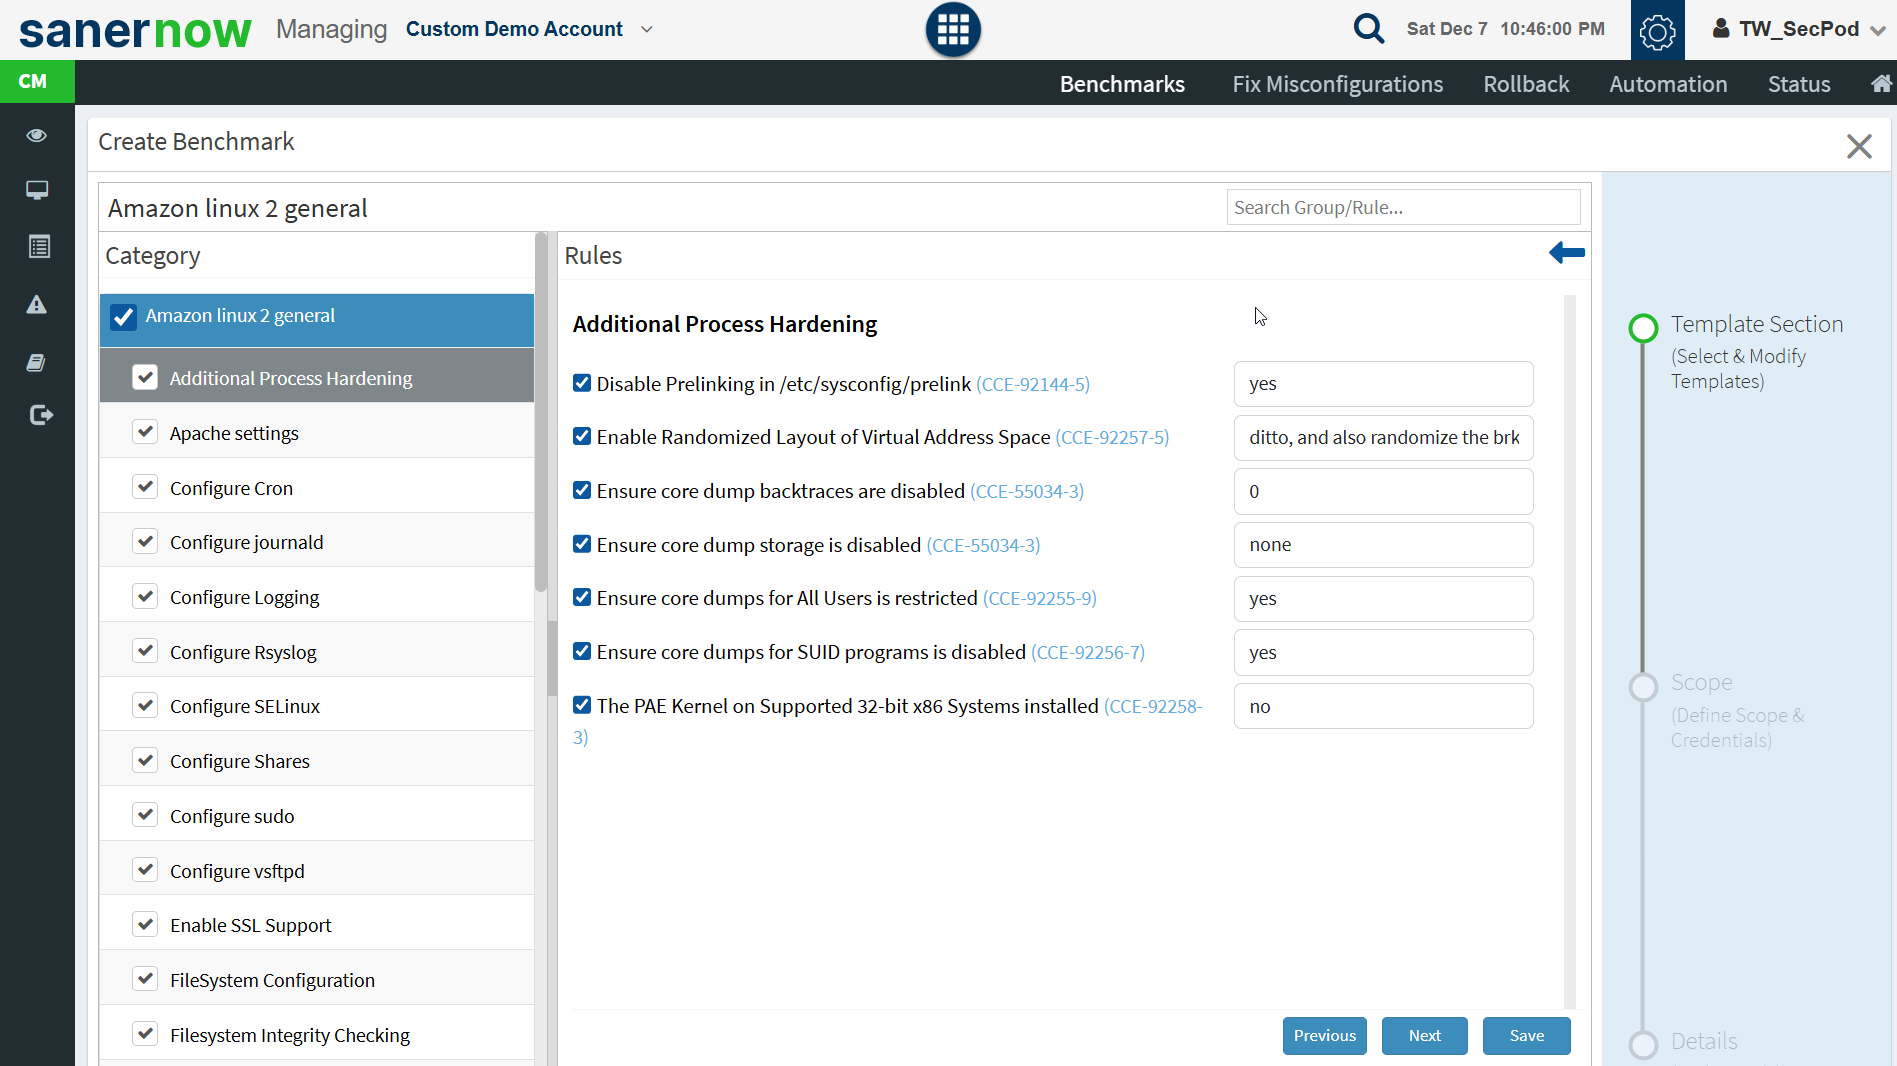
- Click the expand icon on the Benchmarks pane and click on the Create New Benchmark button. The Create Benchmark page is displayed, as shown in the below image.
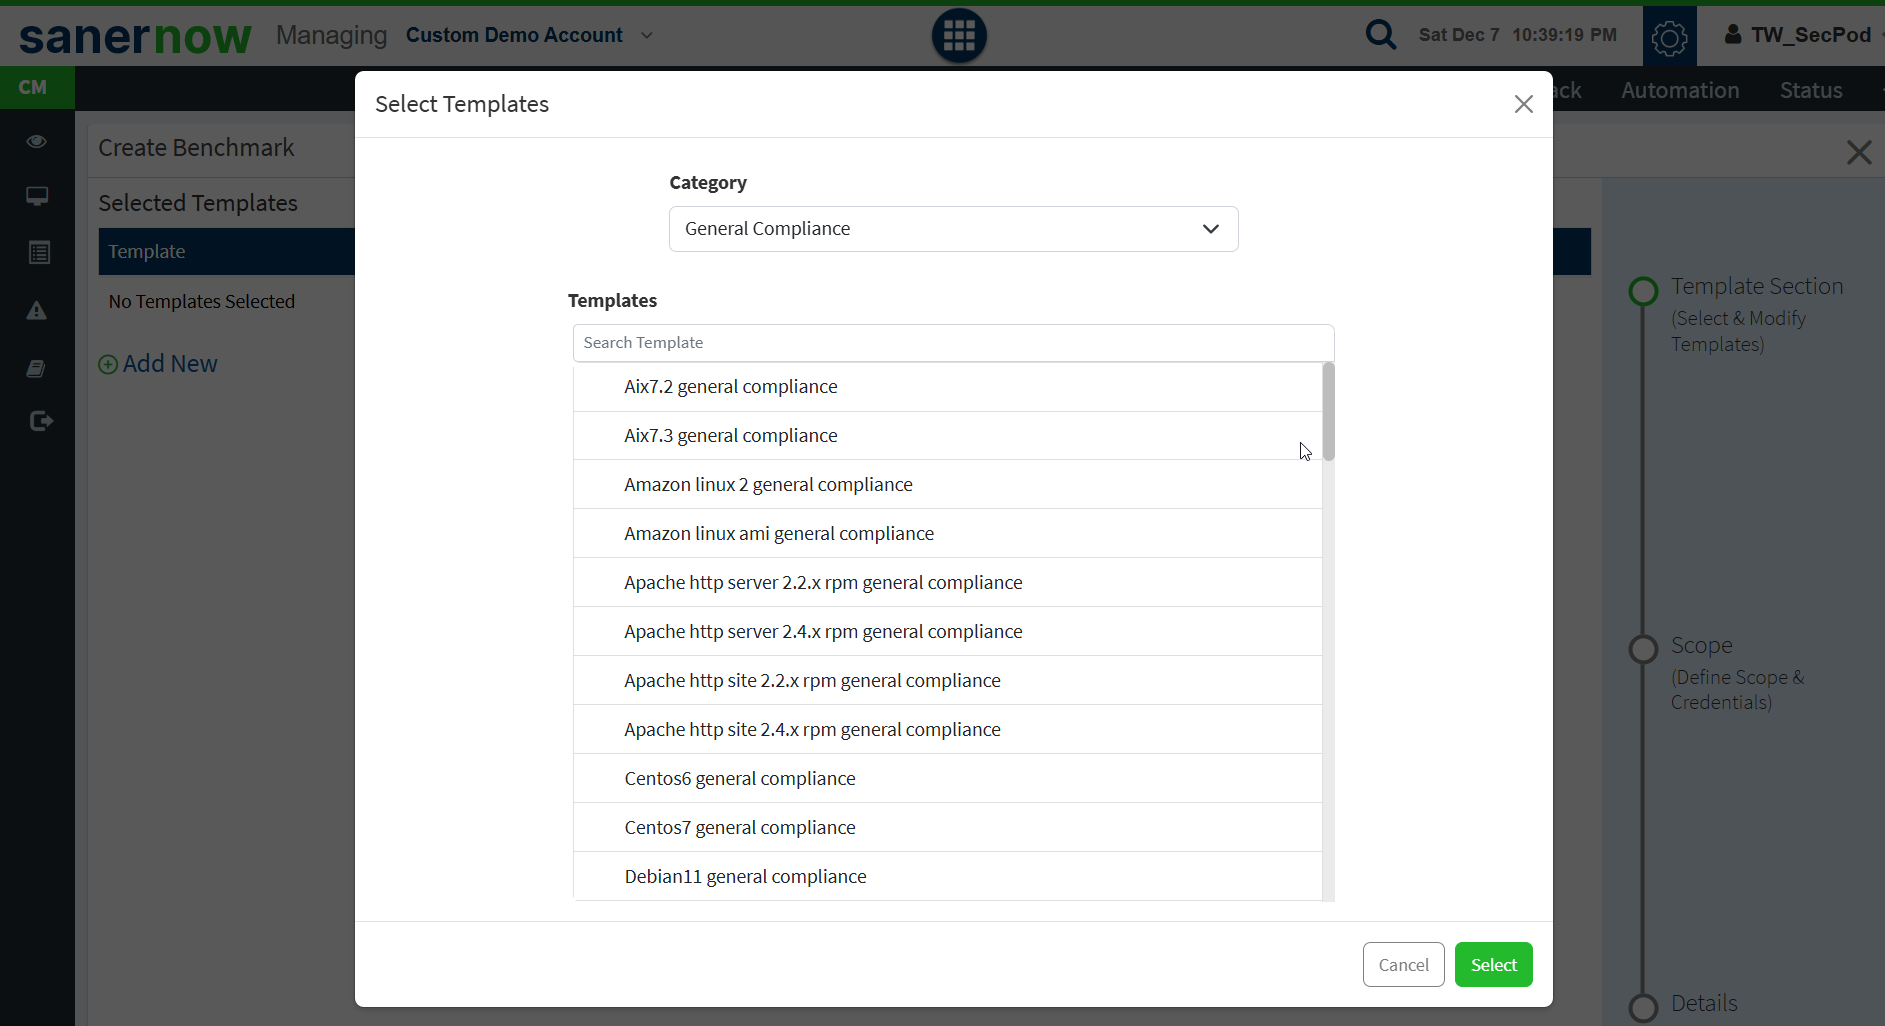
- Select the compliance template as per your requirement.
- Click Select.
- Once the template is selected, click Verify.
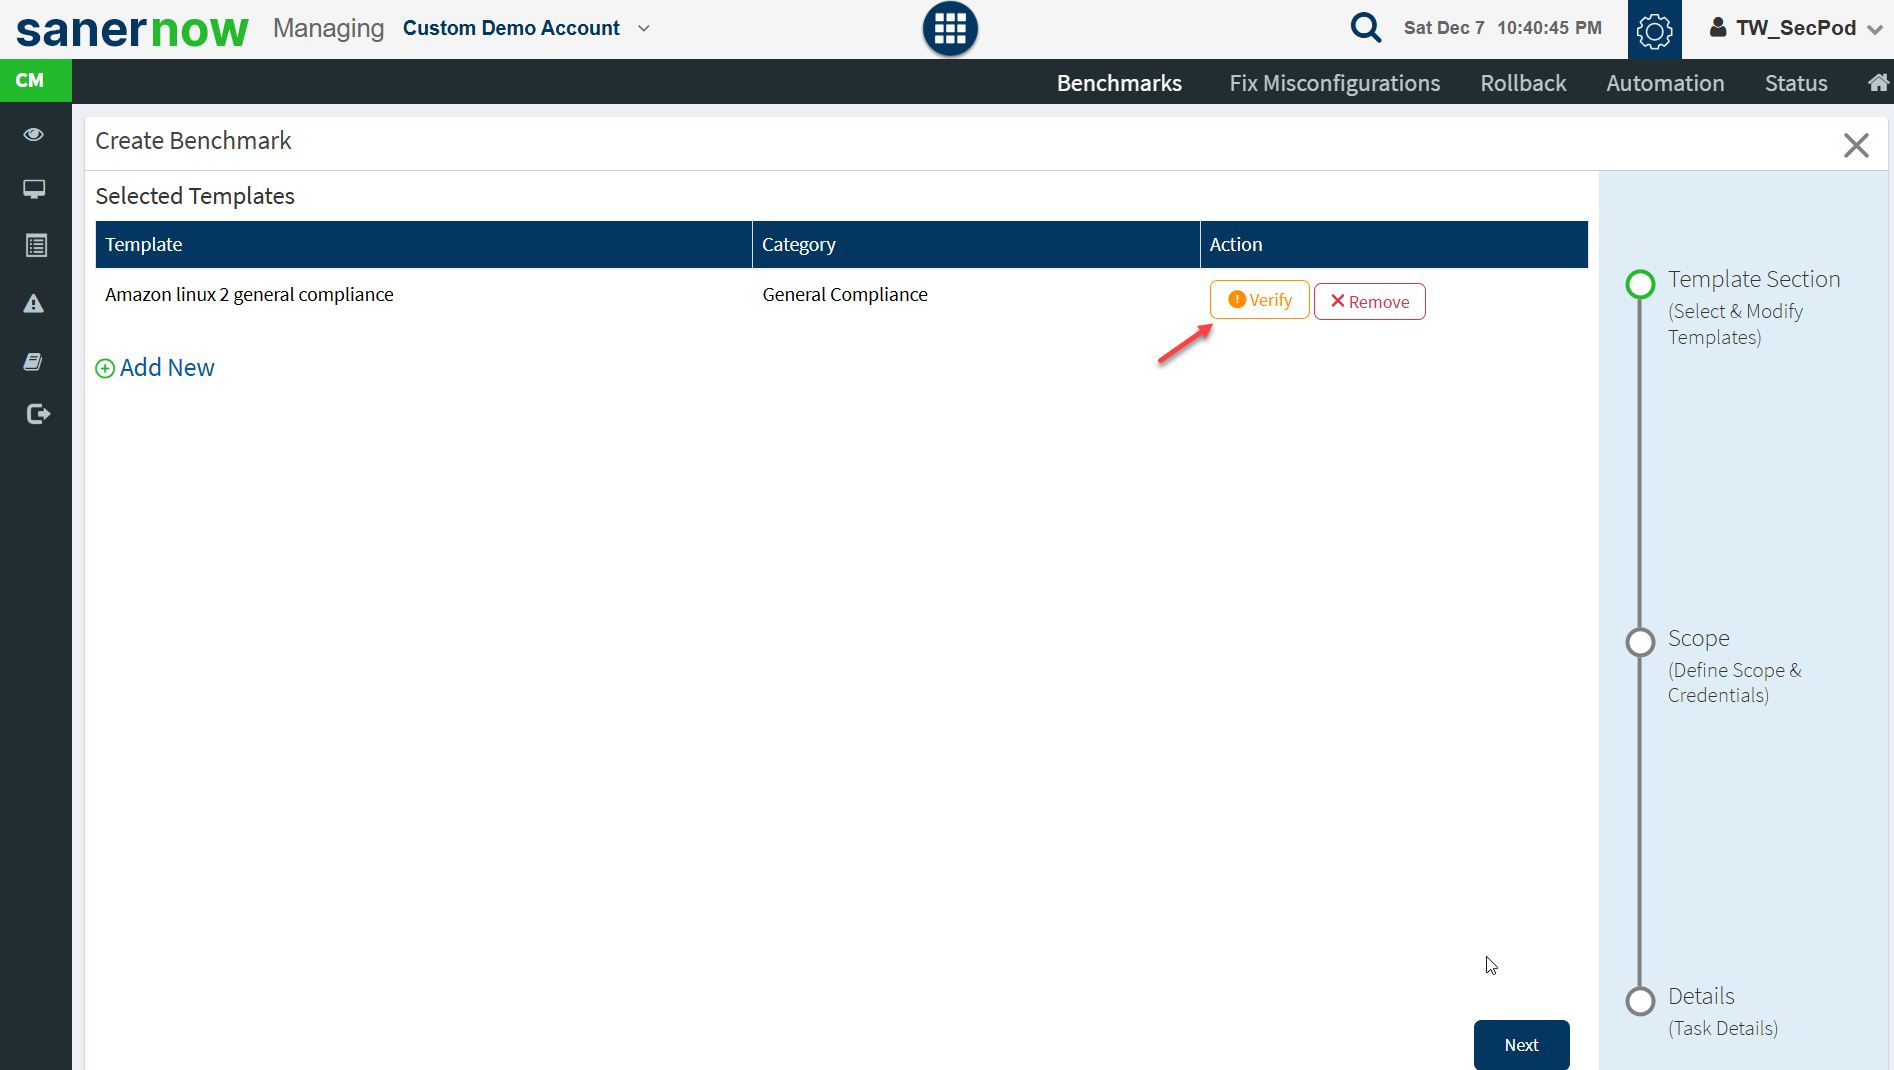
- Verify the rules in the selected compliance template. Click Save.
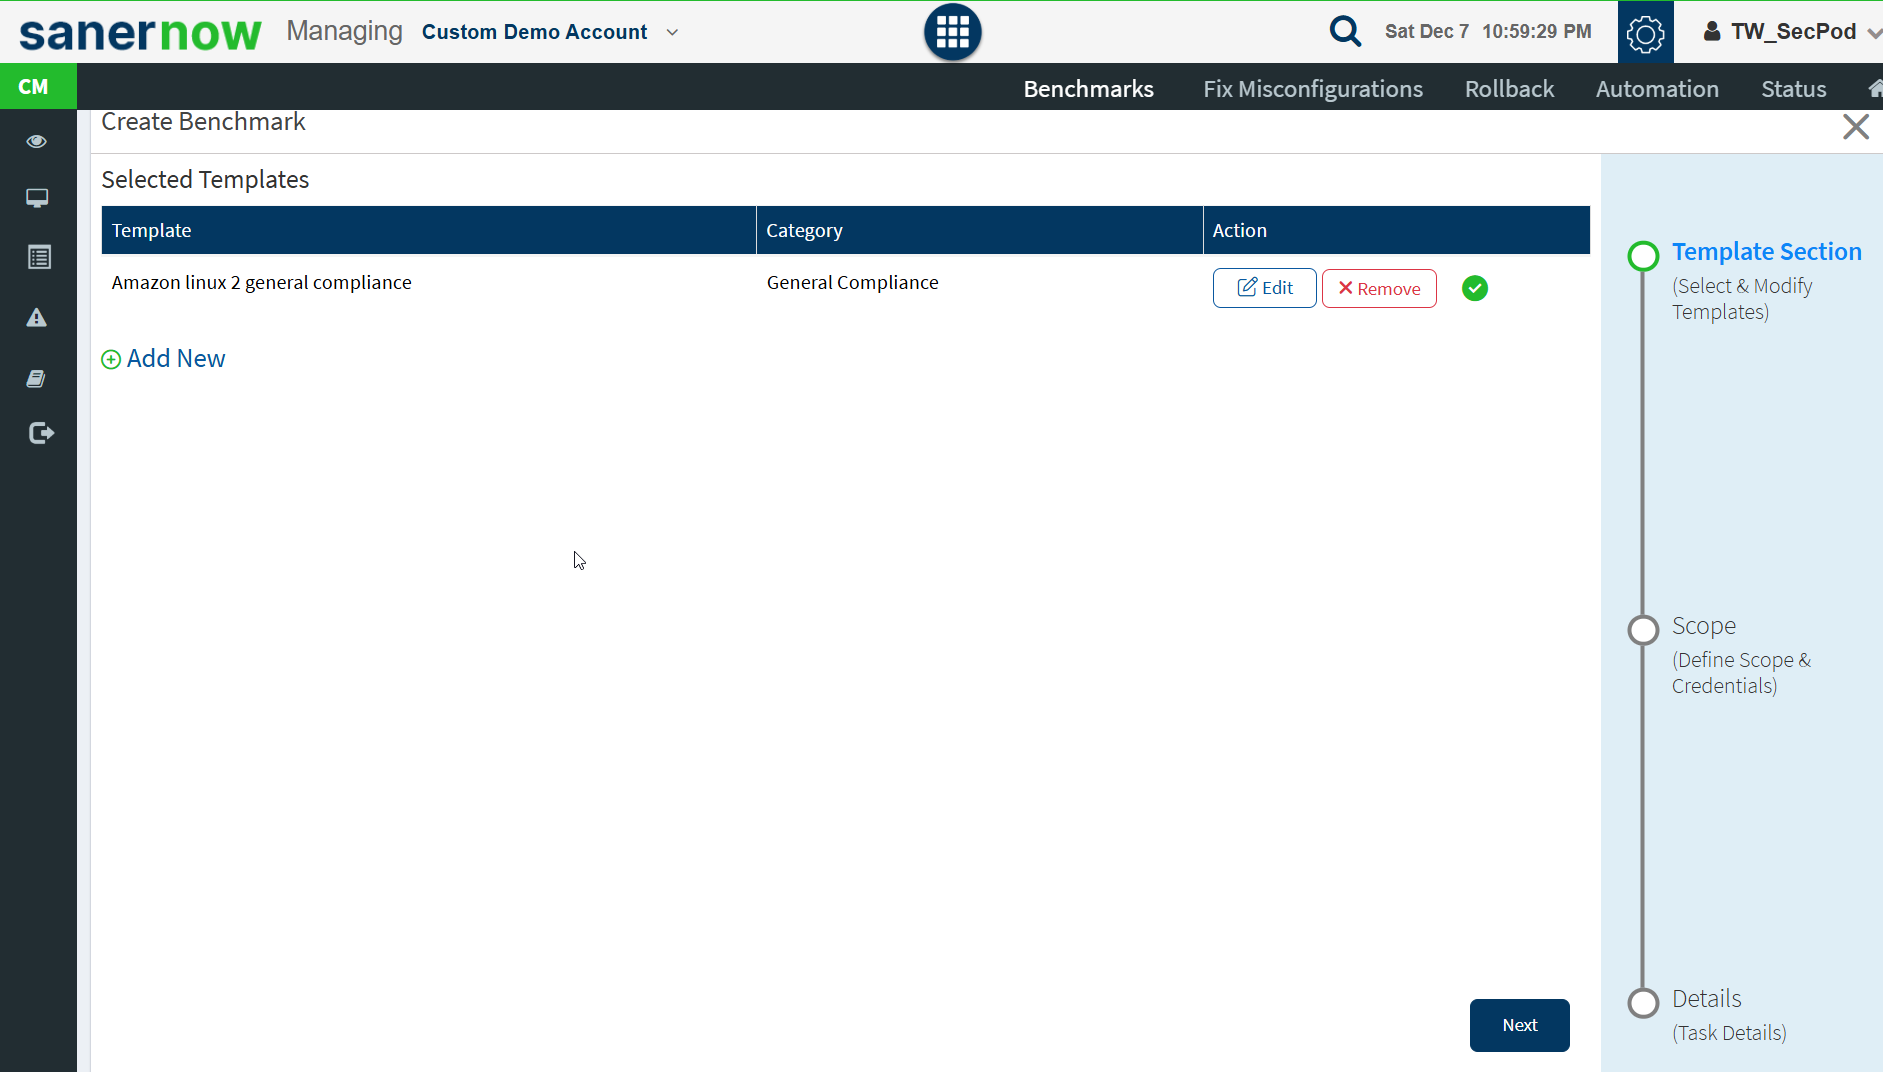
Click Next
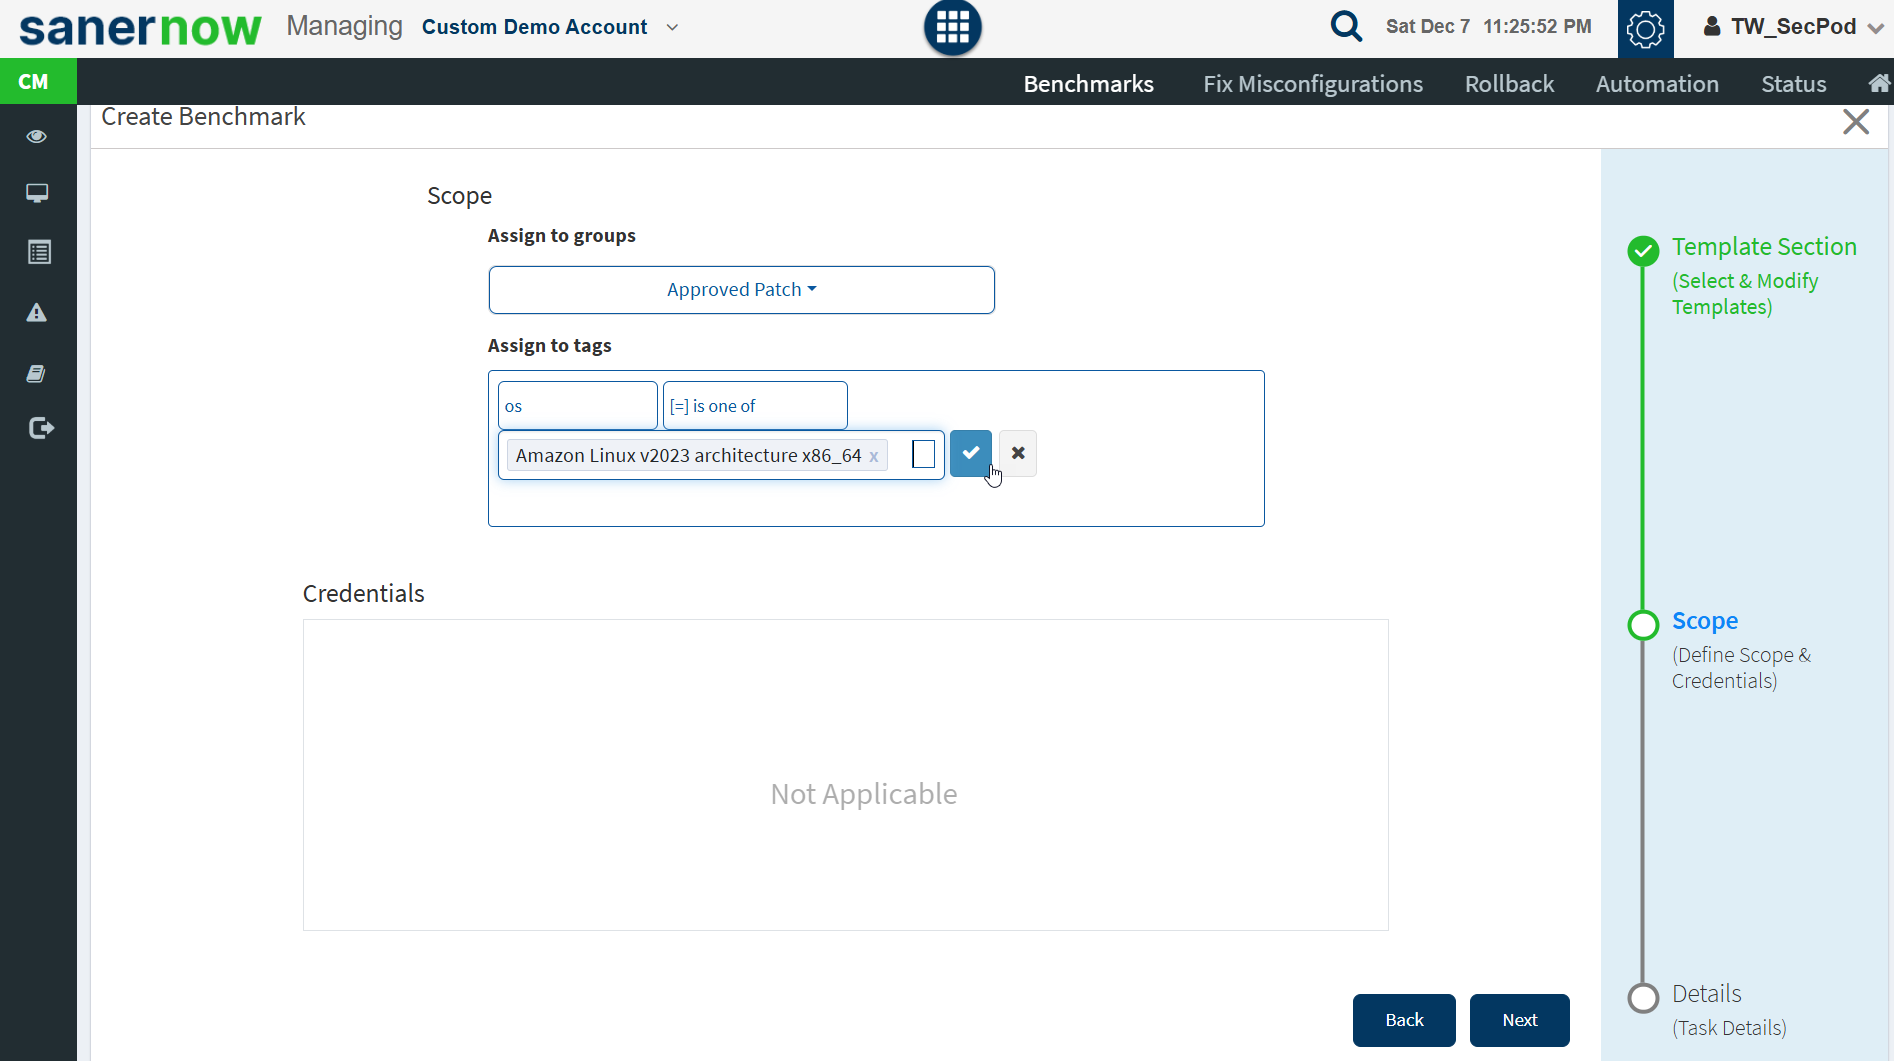
- Specify the Scope. Select the groups you want the compliance template to be applied to.
- Click Next.
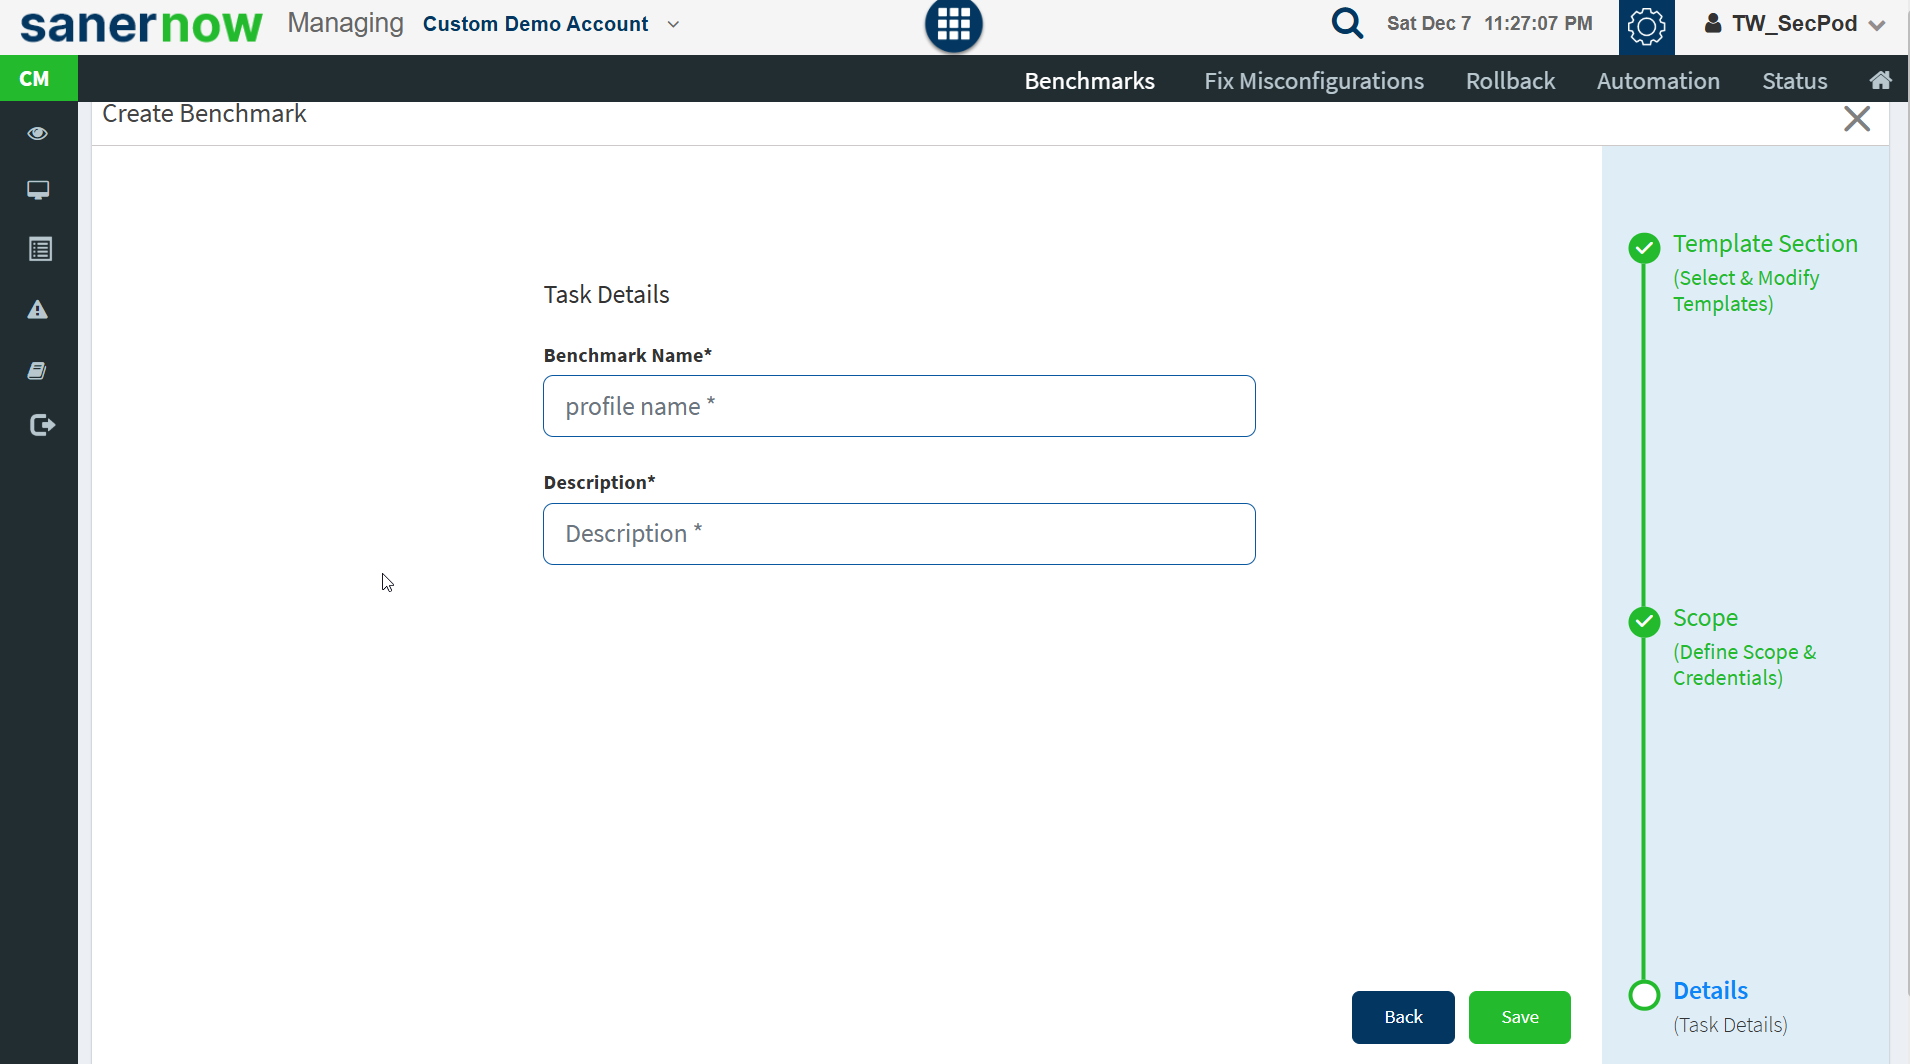
- Provide a name for the benchmark and a description. Click Save.
Mis-Configured Devices
This page shows the list of devices with missing configuration details. You can apply the filters to get a specific list of devices. You can filter the devices – by the Groups, Operating System, Family, Severity, and device status. You can search the devices by the Hostname, Operating System, and Group name. Click on the CSV icon to download the excel file with detailed device information.

Mis-Configurations
This pane shows the misconfigurations where risk scoring is based on Common Configuration Scoring System(CCSS). Each CCE score is computed based on the CCSS algorithm and categorized as Critical, High, Medium, and Low. You will get the CCE ID, Title, Severity percentage of the missing configuration, number of hosts affected, and the detected date. You can apply the Group, Family, and Severity filter options to get the list of assets with misconfiguration details. You can search the misconfigurations by the CCE ID, Title, and Asset name. Click on the CSV icon to download the excel file of mis-configuration information. Click on the information (i) icon to get the fixed information.

Top Deviant Assets
This pane shows top deviant assets with the number of non-compliant devices and affected hosts. Click on the CSV icon to download the list of top deviant assets.

Top Remediation Recommendation
This pane shows the top recommended remediation actions with detailed information. You will get the remediation id, asset name, patch id, CCE ID, affected hosts, and the remediation information. You can download the excel file with the list of top remediation recommendations by clicking on the CSV icon.

Fix Misconfigurations
This page shows assets that require an update or patch, the level of risk, the hosts that need the update or patch, and other related details. This pane shows the level of risk due to the missing patch, the size, date, vendor who publishes the patch, whether a reboot will be required to apply the patch, and the number of affected hosts. Search and filter options are available to view specific assets. You can download an excel sheet of misconfigurations details by clicking the CSV icon.

Click on the down arrow on the Patch and Rollback column to expand the list of patches and rules.
To install configuration changes:
- Select the patches you want to install. Click on the Apply Selected Configurations button at the top right corner of the missing configuration page. The Create Patching Task dialog is displayed in the below image.

- Specify a task name, and provide patching notification messages for end users.
- Select the options to backup remediation scripts before or after the remediation action – Pre-script and Post-script
- Test the patches using the Test and Deploy option instead of deploying patches on the actual environment. Use this testing environment to test and deploy patches.

- Schedule the job immediately or after a scheduled scan and set the time counter accordingly in the test schedule fields. You can also choose to set the job to execute on a different date.
- Click on the Next button. Specify the details in the Deployment Criteria section. Click on the Test and Deploy Selected Configurations button.

You will get a confirmation message that you created the job successfully.
Rollback
Click on the Rollback option at the top of the CM page. It will list the installed patches for each device and asset.
- Select the assets you want to rollback patching and click the Revert Selected Patches button.

The Create Rollback Task dialog is displayed.
- Specify a job name and select rollback schedule from the drop-down menu.
- Specify whether you want the job done immediately or after a scan and set the time counter accordingly. You can also choose to set the job to execute on a different date.
- Provide the rollback notification message to display when the task is completed.
- Click on the Revert Selected Patches button after specifying the details.

Automation
To install missing configuration patches using an automated task, click on the Automation button at the top of the CM page. The Automation page will display the list of non-compliant assets.

Select an asset you want to remediate non-compliant assets automatically and click on the Create Automation Rule button to schedule a task. Schedule a Task dialog is displayed as shown in the below image.

Select patches based on severity and click on the Next button.

Specify how often you need to run a scan and select the option to reboot. Choose to set the task to execute on a different date, either weekly, monthly, or daily. If weekly, specify the days and time. If monthly, specify the dates and time. Select scripts to run while rebooting, specify the task name and provide the patching notification message to display after completing the activity. You can also select groups to apply the rule settings. Click on the Create Automation Rule button.
Status
Users can rollback patches, remove devices, and reboot devices from the Status page. Select a device and click on the Rollback patches button to apply patches to the device.

To remove a job applied for the device, select a device, and click on the Remove Device button. Select a device from the device list and click on the Reboot Device button. Specify the task name, reboot message, and select schedule options as immediate or custom date. After filling in the details, click on the Reboot button. A reboot task will be applied to the device.

Setting Alerts for Compliance Issues
The Alerts feature sends a notification to the specified email on compliance issues. This setting must be configured before the first scheduled scan.
To set alerts for compliance issues
- Click on the Alerts option on the left pane.
- Turn on Subscription Status to enable compliance alerts.
- Specify an email address to which the alerts will be sent.
- You can have alerts sent for all compliance issues or custom conditions based on CCEs.
- Click on the Update button.

Compliance Reporting
After the scheduled scan, the agent uploads the configuration compliance report. The Compliance Report displays the configuration issues and impacted hosts and assets. It provides compliance details based on the device groups and specific devices. It also includes non-compliant instances for each asset and a description of each non-compliant rule.
We recommend generating a compliance report before and after remediation actions to compare the status of the compliant devices and understand your organization’s compliance level. Users can customize the reports based on the requirements.
To generate a compliance report.
- Click on the Reports > Saved Report > Compliance Report.
To export the report to a PDF.
- Click on the download icon to download the PDF report.
To export the report and send it via email:
- Click on the Mail icon in the saved report section to email the report.
- Specify the email addresses.
To Back Up Reports
The backup settings under Reports allow IT, administrators, to maintain a compliance history. The backup time should be scheduled. The backup report can be scheduled to run automatically daily or weekly.
To Back Up Reports
To configure backup settings for reports:
- Click Reports on the left pane.
- Click on Saved Reports and select the Compliance Report option.
- Select the Settings option beside the Asset Report.
- Report Settings (Compliance Report) pop-up will be displayed below.

- Click the Omit filter statement in the exported report check box, and users can set the on/off button whether they want to back up the report.
- If a backup is on, select the weekly or daily option to back up the reports.
- Set a number in the Keep only the latest entry box. The report for the specified number of days is archived. If the number is three and the backup option is daily, then the reports from the last three days are maintained. Older files are deleted. You can maintain backups for a maximum of 30 days.
- Specify Email ID address.
- Select the organization and accounts you want to apply these settings.
- Click on the Save button.


