Saner Remote Access is an easy-to-use, highly secure, on-demand remote support tool in Saner Endpoint Management (EM) that helps IT administrators resolve end-user issues remotely. Using Remote Access, you can assist users using Windows, macOS, and Linux devices without installing additional software.
Pre-requisites
- Saner Agent 6.2 and above.
- Latest version of Google Chrome / Mozilla Firefox/ Microsoft Edge /Apple Safari.
- Active subscription to Saner EM (Endpoint Management) tool.
- Ensure relay.secpod.com domain is part of your firewall’s whitelist.
- Ensure both inbound and outbound communication is allowed on port 5349.
- If you are based in the EU region, ensure eu.relay.secpod.com domain is part of your firewall’s whitelist.
- On Windows machines, whitelist the below items in your antivirus.
- Whitelist C:\ProgramData\SecPod Saner folder.
- Whitelist spremoteconnector.exe process.
- On Linux and OS X machines, whitelist the below items in your antivirus.
- Whitelist /opt/saner folder.
- Whitelist spremoteconnector process.
Supported Operating Systems Platforms
| Operating System | Remote Screen | Remote Shell |
| Windows 11 | ||
| Windows 11 IoT Enterprise | ||
| Windows IoT Enterprise | ||
| Windows 10 (64 & 32 bit)* | ||
| Windows 8.1 | ||
| Windows 7 (64 & 32 bit) | ||
| Windows Server 2022 | ||
| Windows Server 2019 | ||
| Windows Server 2016 | ||
| Windows Server 2012 R2 | ||
| Windows Server 2012 | ||
| Hyper-V Server | ||
| Alma Linux 9.x | ||
| Alma Linux 8.5 | ||
| Alma Linux 8.4 | ||
| Amazon Linux 2023 | ||
| CentOS 8.x | ||
| Debian 12 | ||
| Debian 11 | ||
| Fedora 40 | ||
| Linux Mint 21.x | ||
| Linux Mint 20.x | ||
| Oracle Linux 9 | ||
| Oracle Linux 8 | ||
| Red Hat Enterprise Linux 9 | ||
| Red Hat Enterprise Linux 8 | ||
| Rocky Linux 9 | ||
| Rocky Linux 8.5 | ||
| Rocky Linux 8.4 | ||
| Rocky Linux 8.3 | ||
| Ubuntu 23.04 | ||
| Ubuntu 22.04 | ||
| Ubuntu 21.10 | ||
| Ubuntu 20.04 | ||
| macOS 14.0 | ||
| macOS 13.0 | ||
| macOS12.0 | ||
| macOS11.0 | ||
| macOS 10.15 |
*Only Remote Screen is supported on devices running Win 10 OS with version less than 1903.
| Note: Saner Remote Access won’t work on devices running AIX, Alpine, and Linux 32-bit operating systems. |
Features of Saner Remote Access
Graphical and CLI Support: Saner Remote Access lets you connect to a device’s graphical and command-line interfaces. While initiating a remote support session, the IT administrator can choose which interface they want to connect to the device.
Built-in User Approval: Saner Remote Access has a built-in user approval feature that asks for user consent before starting the remote session. Similarly, the end user can terminate the session at will once the remote session is established.
Auto-connect with End-user: Saner Remote Access allows IT administrators to auto-connect with end users in the future to help them fix issues if the end-user has opted in for it.
Share Files with End-user and vice versa: Saner Remote Access allows you to share files with the end users remotely. At the same time, the end users can also share files with the IT technician remotely.
Unattended Remote Access: The IT administrators can access a machine even if the machine is locked or the user is not logged in. Using Saner Remote Access, IT administrators can set up unattended remote access on server-class devices. This allows them to launch a remote command prompt or terminal window and work on these devices anytime.
In-session support for User Access Control Elevation Requests: Using Saner Remote Access, the IT administrator can provide the credentials to the UAC prompt without interrupting the remote session.
Multi-User Session Support: IT administrators can easily switch between different user profiles on an end-user machine during an ongoing remote session without disconnecting the session.
On-screen shortcut keys: We have introduced virtual keys that can be used individually or in combination to perform tasks on an end-user machine during a remote session.
| Note: For Saner Remote Access features such as the Unattended Remote Access, In-session support for User Access Control Elevation Requests, Multi-User session support, and On-screen shortcut keys to work, you must have Saner Agent 6.2.1 and above. |
Accessing the Saner Remote Access tool
Follow the below steps to access Saner Remote Access.
Step 1: Launch the Saner EM (Endpoint Management) tool. On the Saner EM dashboard, click the Actions button on the top right side of the page.
Step 2: Click the Remote Access icon ![]() to launch the Remote Access tool dashboard.
to launch the Remote Access tool dashboard.

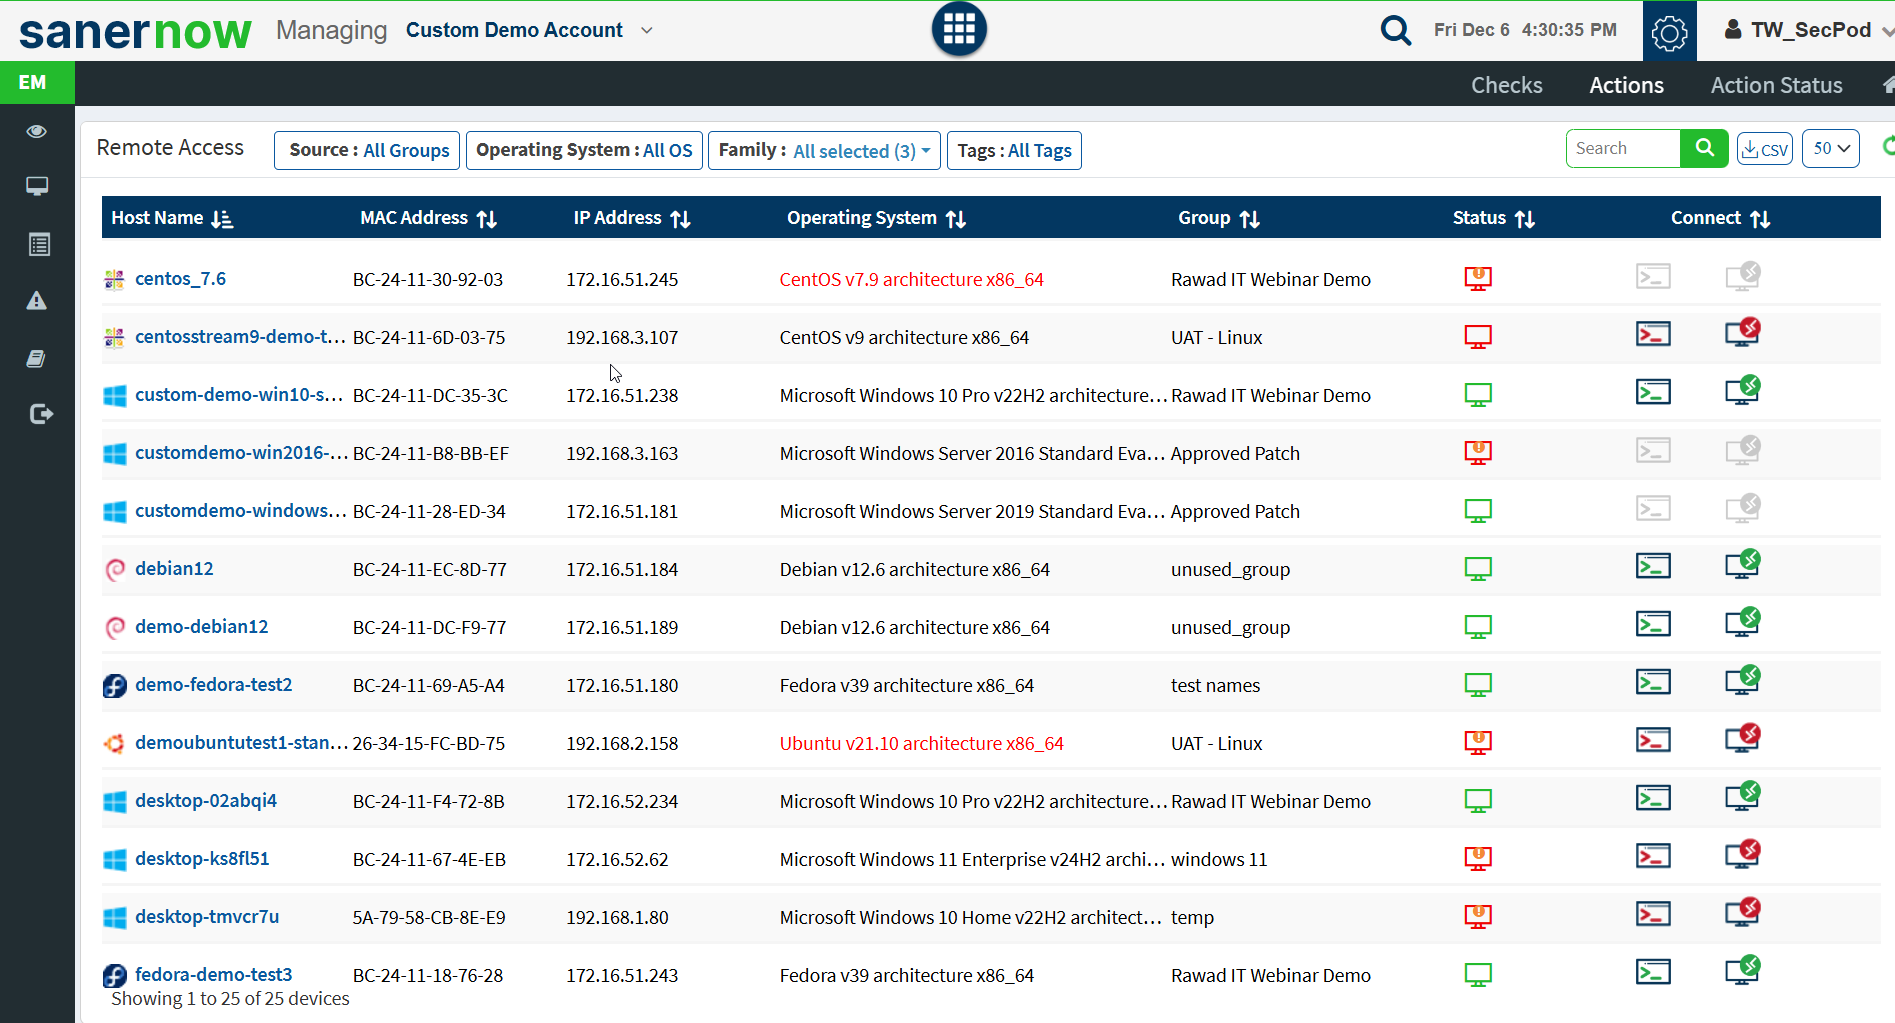
You are presented with the Remote Access tool dashboard.
Getting familiarized with the Saner Remote Access tool
Saner Remote Access dashboard lists all the devices in the account. The dashboard table contains the below columns.
Host Name – This column contains the hostname of the devices.
Mac Address – This column contains the MAC Address associated with the device.
IP Address – This column contains the IP address associated with the device.
Operating System – This column displays the operating system installed on the device.
Group – This column displays the group of which the device is part.
Status – This column displays whether the device is Active or Inactive.
| Icon | Table |
 | Device is active. |
 | Device is inactive. |
Connect – This column displays the modes available for remote access on the device.
| Icon | Table |
| You can connect to the device’s command prompt /terminal using Saner Remote Access. | |
| You can connect to the device’s Graphical Interface using Saner Remote Access. | |
| Saner Remote Access session is active on the device. |
| Note: If the icons are disabled in the Connect column, you can’t connect to the device remotely using Saner Remote Access tool. |
Built-in User Approval and Auto connect in Remote Access
Saner Remote Access comes with built-in user approval. The IT administrator cannot connect to the machine until the logged-in user approves the connection request. The logged-in user can temporarily approve the remote connection request from the IT administrator or provide their consent for future remote access sessions.
The user will see a similar prompt on their machine while the IT administrator tries connecting to their machine.
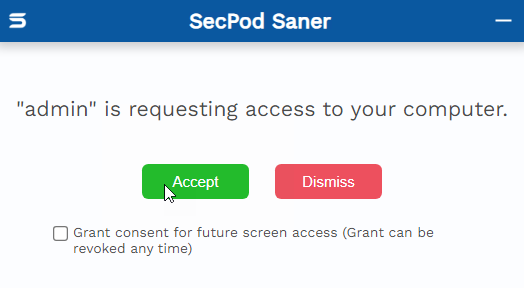
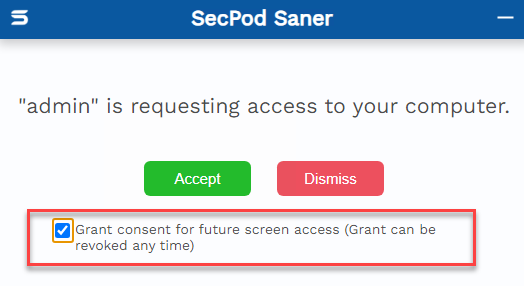
User can click on the Accept button to allow the remote connection. They can click the Dismiss button if they don’t want the remote connection. If the user wants to allow the IT administrator to connect to their machine without seeking their approval, they can click the checkbox on the pop-up that says Grant consent for future screen access (Grant can be revoked any time). Once the user clicks the checkbox and provides approval, they won’t see the user consent pop-up during future remote connection sessions. In the future, the IT administrator can connect directly to the user’s machine.
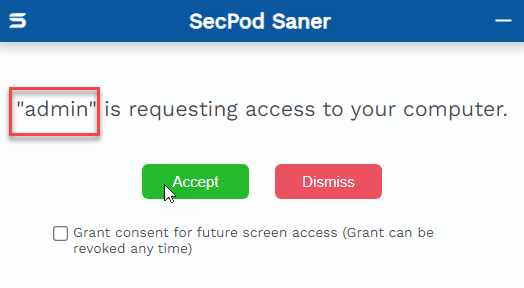
In the user consent approval pop-up, the username the IT administrator used to log in to Saner gets displayed in the pop-up message.
Saner Remote Access functionality available for Users
Saner Remote Access allows users to perform the following actions.
- Revoke the Remote Access connection.
- Share file with the IT administrator.
- Stop the Remote Access connection.
Once SanerRemo te Access successfully connects to a user’s machine, they will see an ![]() icon in the system tray.
icon in the system tray.

The ![]() icon provides the user with the following options. User has to right-click on the
icon provides the user with the following options. User has to right-click on the ![]() icon to access the below options.
icon to access the below options.
- Revoke Auto connect permission.
- Share File
- Stop Connection
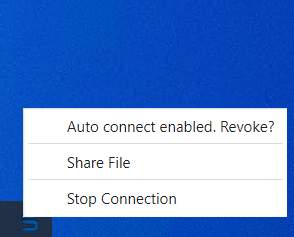
Revoke Auto connect permission for Remote Access
If the user consented to their machine to be auto-connected with the IT administrator in the future, they will see the message Auto connect enabled. Revoke? when they right-click the ![]() icon. Click the Auto connect enabled. Revoke? message to revoke the permission. User will receive a confirmation message asking to confirm revoking auto connect permissions.
icon. Click the Auto connect enabled. Revoke? message to revoke the permission. User will receive a confirmation message asking to confirm revoking auto connect permissions.

User has to click the Yes button to revoke Remote Access tool’s permission for Auto consent in the future.
Sharing File Remotely with IT Administrator
User can right-click the ![]() icon and click the Share File option to share files with the IT administrator. A pop-up is presented to the user to select the file they want to share with the IT administrator. Saner Remote Access doesn’t restrict the files user can send to the IT Administrator using the Remote Access tool.
icon and click the Share File option to share files with the IT administrator. A pop-up is presented to the user to select the file they want to share with the IT administrator. Saner Remote Access doesn’t restrict the files user can send to the IT Administrator using the Remote Access tool.
Stopping the Remote Connection
User can right-click the ![]() icon and click the Stop Connection to stop the remote connection. The remote connection gets terminated immediately.
icon and click the Stop Connection to stop the remote connection. The remote connection gets terminated immediately.
Saner Remote Access functionality available for IT Administrators
Saner Remote Access provides the following control once the Remote Access connection is established.
- Close
- Disconnect
- Share File
- Special keys
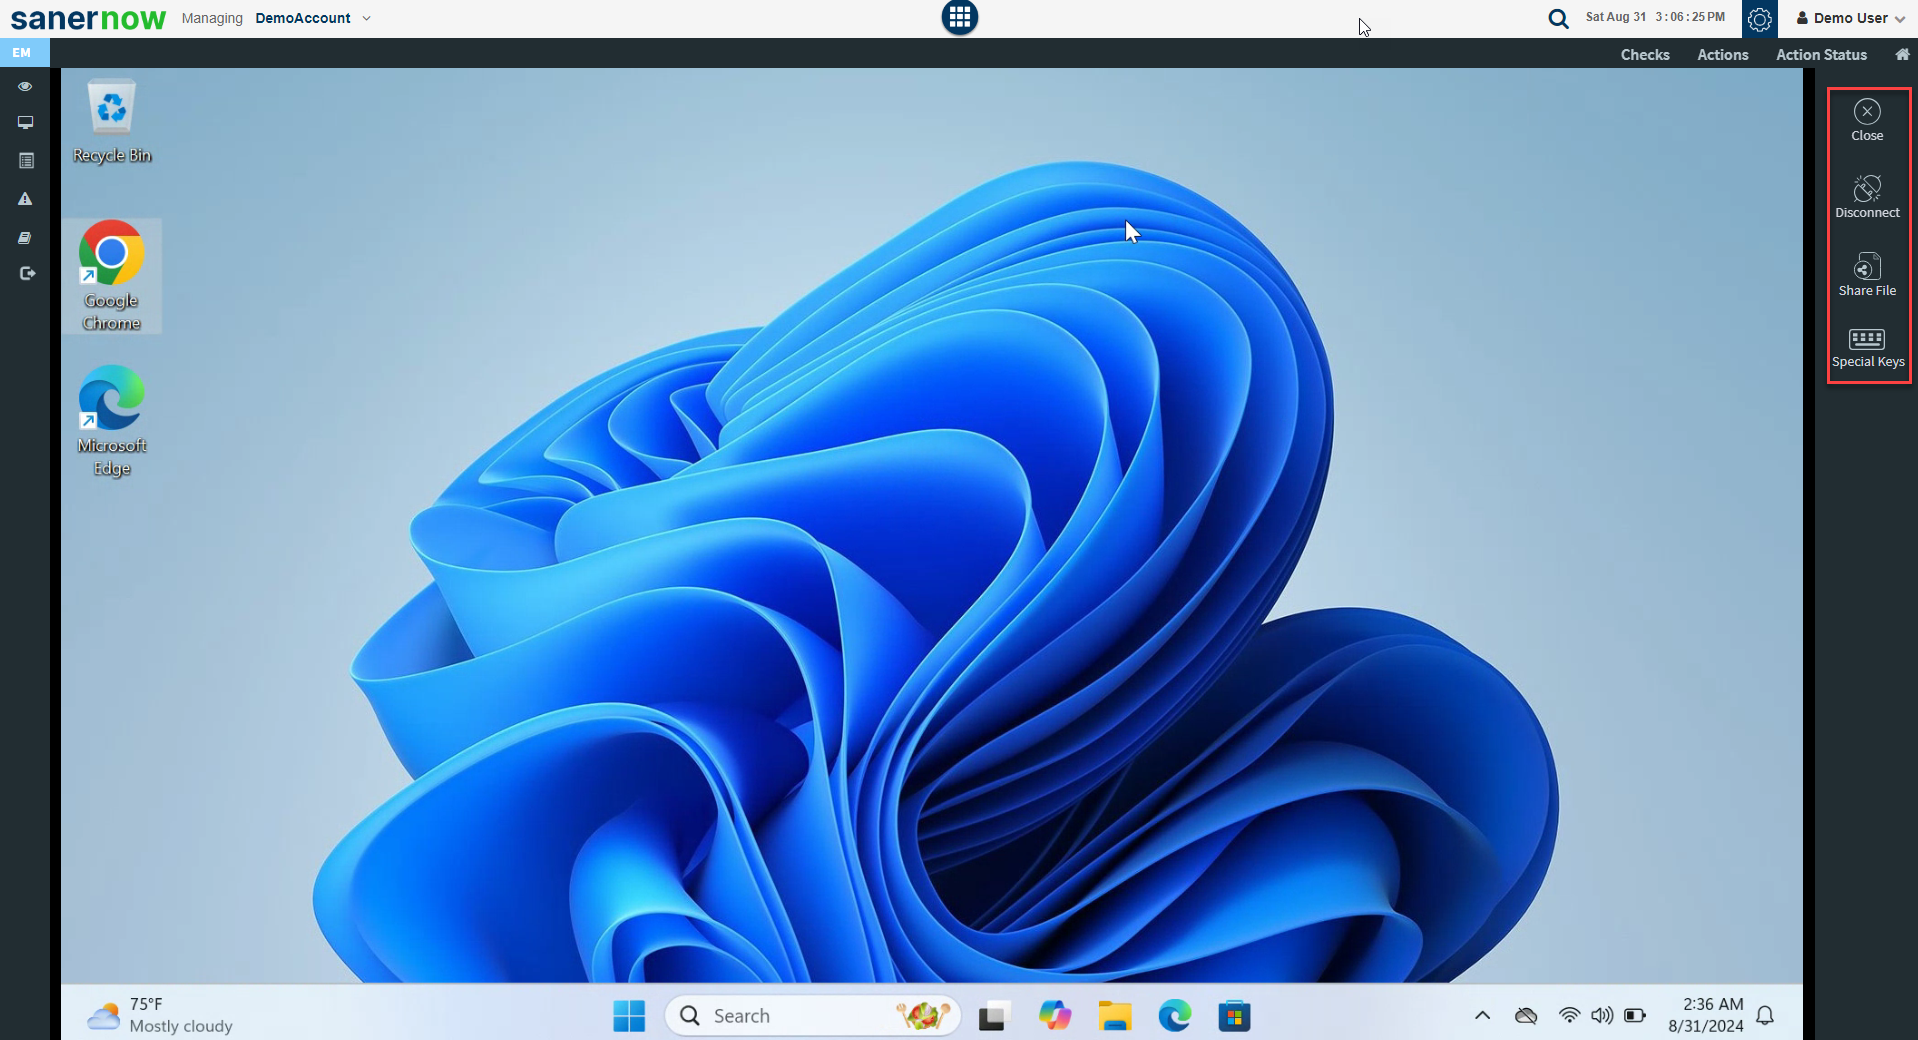
Close – The Remote Access connection is closed, and the IT administrator must establish a new connection if they want to connect to the user’s machine in the future.
Disconnect – The Remote Access connection gets disconnected; however, the session window is kept open. The IT administrator must establish a new connection to connect to the user’s machine.
Share File – The IT administrator can send files to the user’s machine using the Saner Remote Access tool.
Special Keys – The IT administrator can use the special keys individually or in a combination to send inputs to the machine during a remote session. The newly introduced virtual keys are Ctrl, Alt, Esc, Win key, Tab key, and Ctrl+Alt+Del.
Connect to a client machine graphically using Saner Remote Access.
Follow the below steps to connect to a client machine’s graphical interface using Saner Remote Access.
1: Go to the Saner Remote Access dashboard and click the ![]() icon to connect to the client machine graphically.
icon to connect to the client machine graphically.
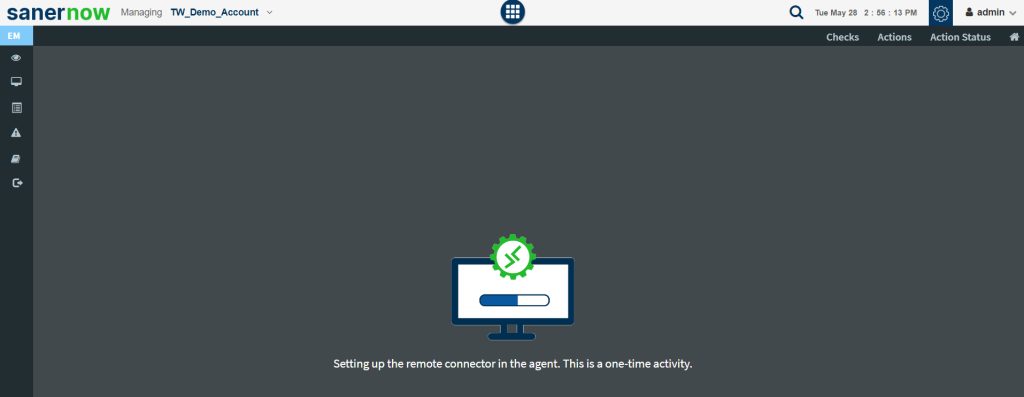
A splash screen appears. You must wait for the Saner Agent installed on the client device to be enhanced so that Saner Remote Access can work. This happens only for the first time when you are connecting to a machine using Saner Remote Access. When initiating remote access using Saner Remote Access, the splash screen won’t appear.
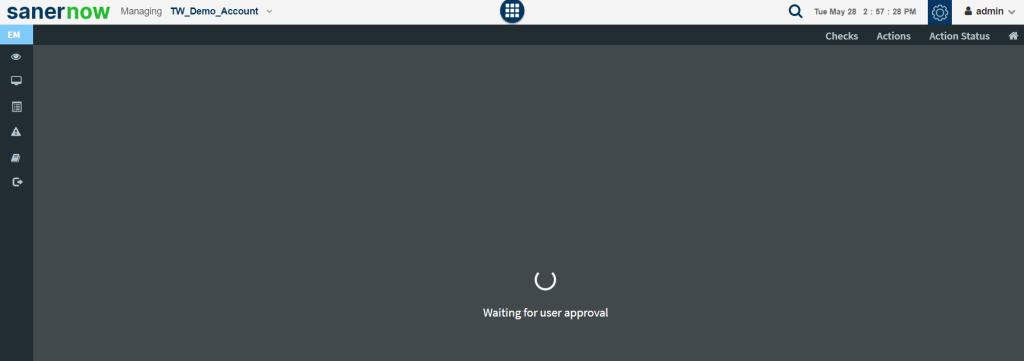
Saner Remote Access tool requests approval from the client device. The user logged into the client machine must authorize Saner Remote Access to connect graphically to the device. You will see a similar screen on the Saner web console.
2: The user logged in on the client machine will see a similar screen. The user must click on the Accept button for Saner Remote Access tool to establish the connection. If the user does not want Saner Remote Access tool to establish the connection, they can click the Dismiss button to deny the connection request.

On the Saner EM dashboard, you will see a similar screen, once the user approves Saner Remote Access connection request.
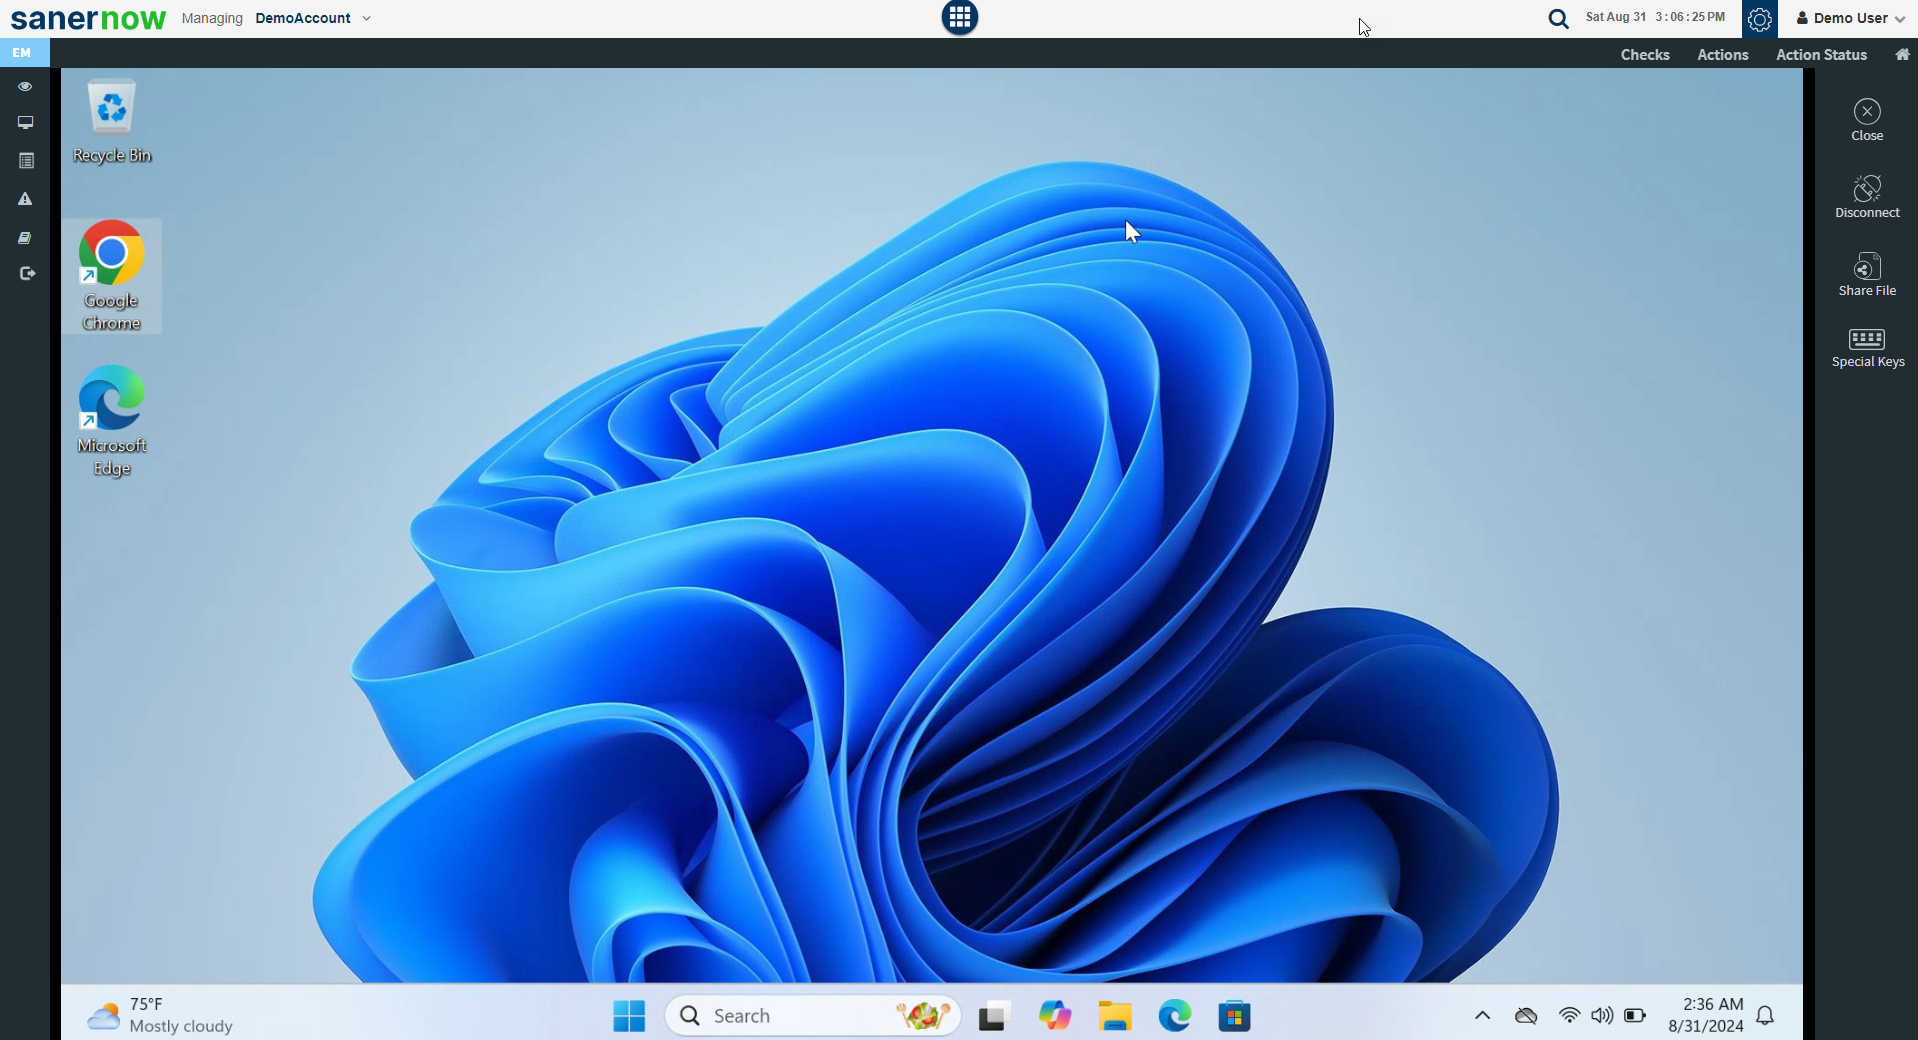
Connect to a client machine’s command prompt/terminal using Saner Remote Access.
Follow the below steps to connect to a client machine’s graphical interface using Saner Remote Access.
Step 1: Go to the Saner Remote Access dashboard and click the ![]() icon to connect to the client machine’s command prompt/terminal.
icon to connect to the client machine’s command prompt/terminal.
A splash screen appears. You must wait for the Saner Agent installed on the client device to be enhanced so that Saner Remote Access can work. This happens only for the first time when you are connecting to a machine using Saner Remote Access. When initiating remote access using Saner Remote Access, the splash screen won’t appear.

Saner Remote Access tool requests approval from the client device. The user logged into the client machine must authorize Saner Remote Access to connect graphically to the device. You will see a similar screen on the Saner web console.

Step 2: The user logged in on the client machine will see a similar screen. The user must click on the Accept button for Saner Remote Access tool to establish the connection. If the user does not want Saner Remote Access tool to establish the connection, they can click the Dismiss button to deny the connection request.

On the Saner EM dashboard, you will see a similar screen, once the user approves Saner Remote Access connection request.
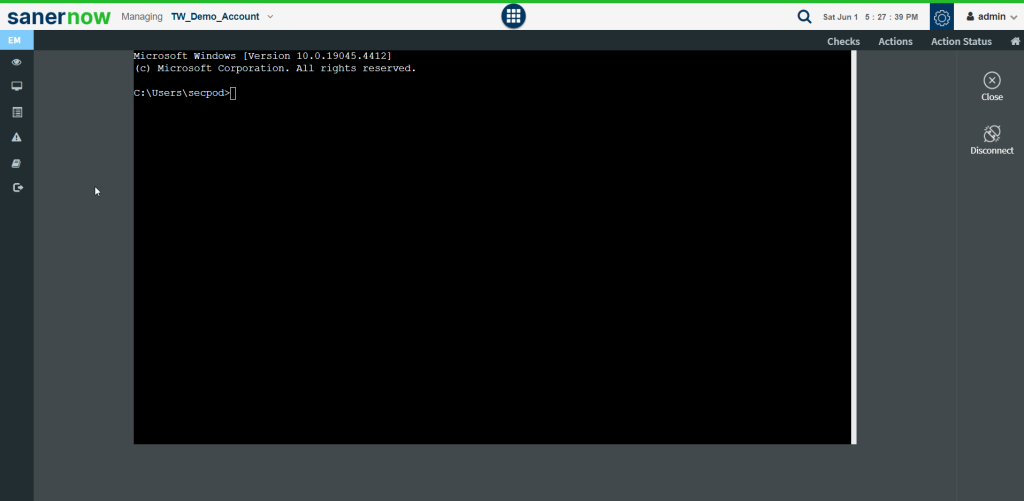
Connecting to a client machine using the command prompt/terminal unattended
Step 1: Go to the Saner Remote Access dashboard and click the ![]() icon to connect to the client machine’s command prompt/terminal.
icon to connect to the client machine’s command prompt/terminal.
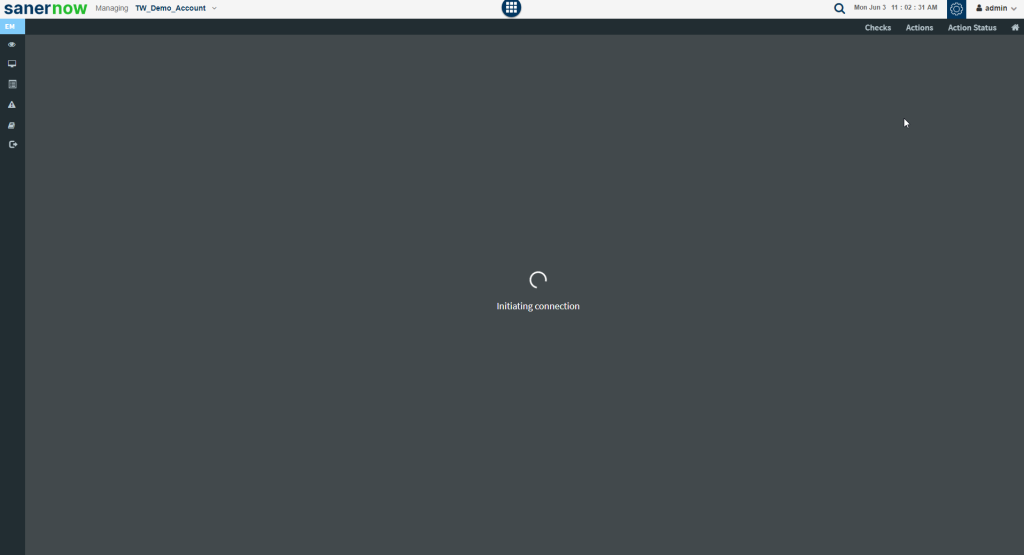
You will see the Initiating Connection request. There won’t be any access request pop-up on the machine.
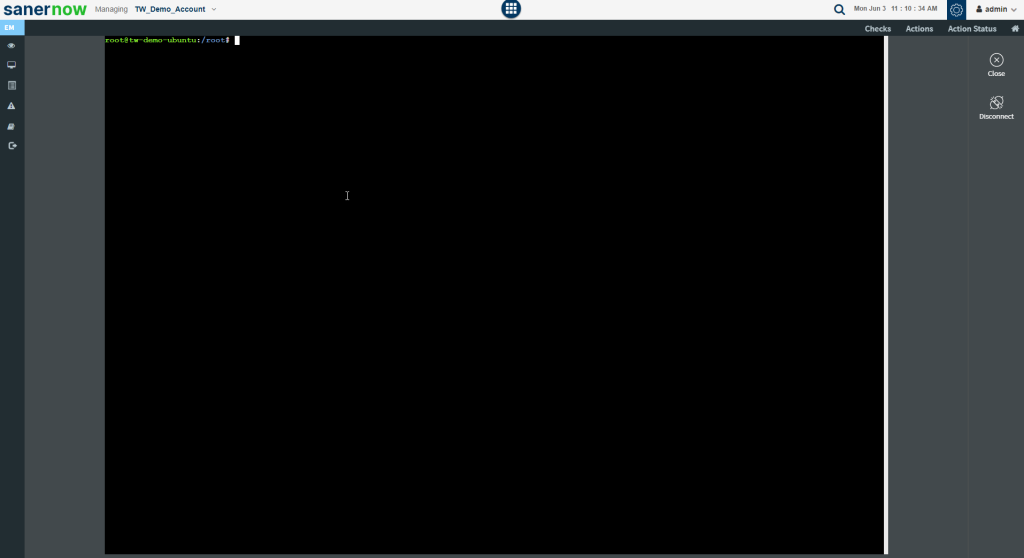
The command prompt/terminal of the client machine appears on the screen.
Sharing File with the Client machine using Remote Access
Step 1: Connect to the client’s machine using Saner Remote Access. Refer to the Connect to a client machine graphically using Saner Remote Access section for steps.
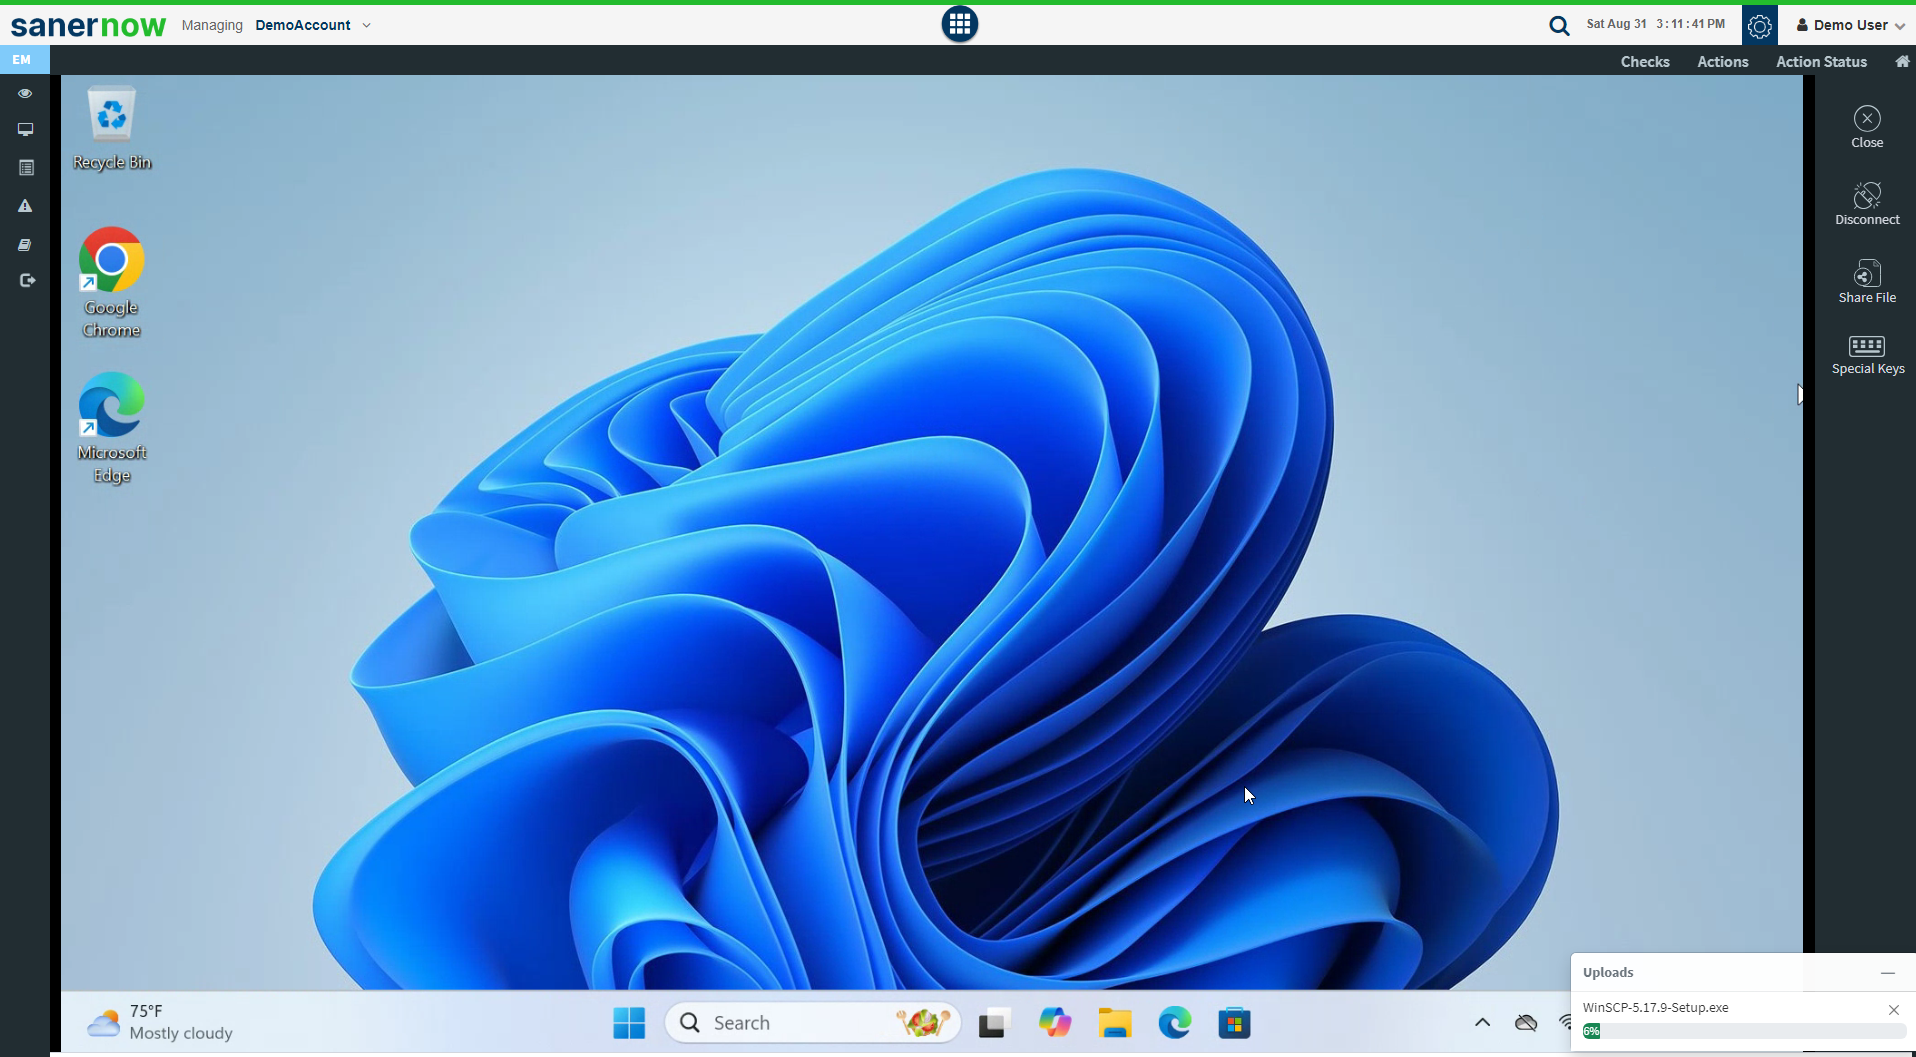
Step 2: Click the Share File option to send files to the client’s machine.
A pop-up will appear on the screen where you can select the file that needs to be sent to the user. A progress bar appears at the bottom right of the screen, indicating the file upload status.
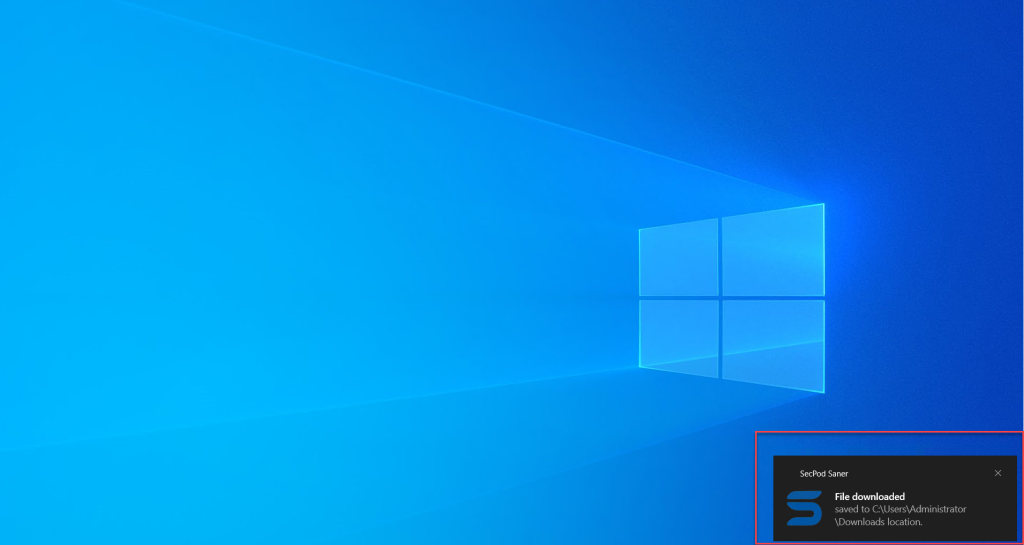
The files get downloaded to the default download directory on the client’s machine.
Saner Remote Access Audit Logs
Saner stores a log of the activities performed using Saner Remote Access. You can view the logs by visiting Audit Logs page.
| Audit Code | Description |
| 8009 | Established Remote Access |
| 8010 | Failed to Establish Remote Access |
| 8011 | Set Up Remote Access |
| 8012 | Failed to Set Up Remote Access |
| 8013 | Stop Remote Access |
| 8014 | Initiating Remote Access |
| 8015 | Initiated file transfer to remote device |
| 8016 | Completed file transfer to remote device |
| 8017 | Initiated file transfer from remote device |
| 8018 | Completed file transfer from remote device |
| 8019 | Aborted file transfer to remote device |
| 8020 | Failed to complete file transfer to remote device |
| 8021 | Aborted file transfer from remote device |
| 8022 | Failed to complete file transfer from remote device |
Watch the video tutorial to learn more about Saner Remote Access


