Pre-requisites
You can onboard a single Kubernetes cluster to one Saner COSP account. During onboarding, a ClusterRole, ServiceAccount, and ClusterRoleBinding gets created within the saner-cosp namespace. To complete the setup, you must have sudo access to the cluster’s master node CLI and possess Kubernetes cluster-admin privileges. In addition, make sure that you have Kubernetes API server’s URL with a public IP.
Create a New Account in Saner COSP
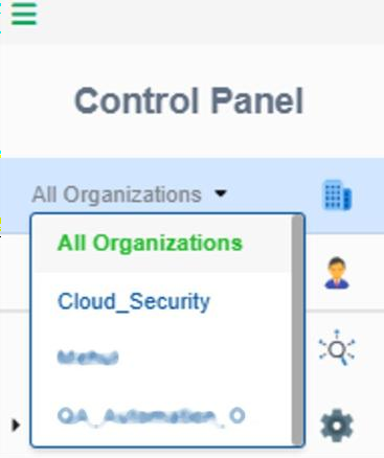
Step1: In the Control Panel, open the All Organizations drop-down menu and select the organization for which you want to create the new account.
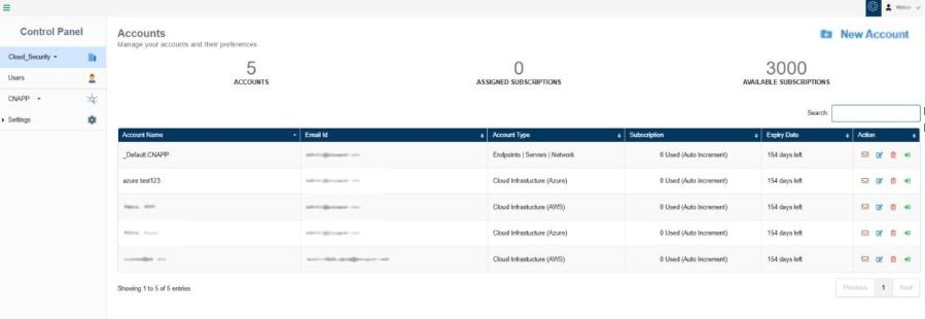
Step2: To create a new account, click the New Account button on the top- right of the page.
Step3: Complete all the details required to create the New Account.
- Provide the name of the COSP account
- Key in a valid email address
- Choose the account type “Container Orchestration” from the drop-down list
- Choose the Account Kind as the orchestration platform that you wish to onboard to this account from the
drop-down list. For example, “Kubernetes” - Turn on the slider to provision the relevant tool for the account

Step4: Click the Create button.
The newly created account displays in the Accounts page within a tabular format with the following details:
- Account Name
- Email ID
- Account Type
- Subscription
- Expiry Date
- Action
Note:
In the Action column, you have the facility to set up the mail settings for the corresponding account, edit the current account details, delete the account, and redirect to the dashboard view of this account.
Download the Cluster Onboarding Script “.py” OR “.sh”
Make sure to have logged into the application with administrator privileges.
You can download the .py or .sh files from the Manual Onboarding page in Container Security Deployment.
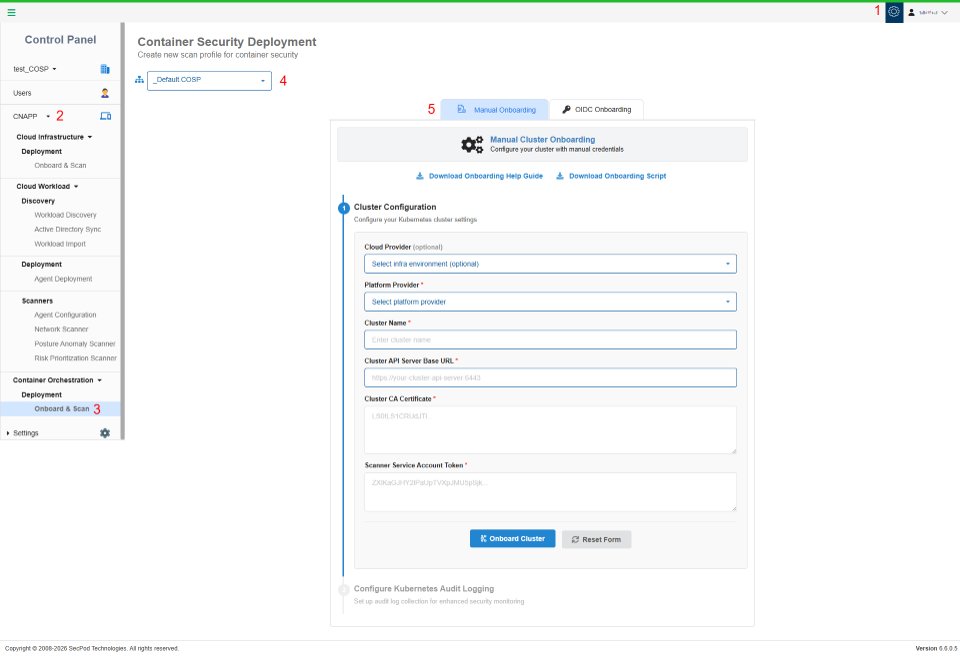
- Access the Control Panel and choose the relevant organization.
- Click on the CNAPP menu from the sidebar.
- Choose Onboard and Scan under Container Orchestration Deployment.
- Choose the Account Name that you want to onboard. The K8s Onboarding page opens.
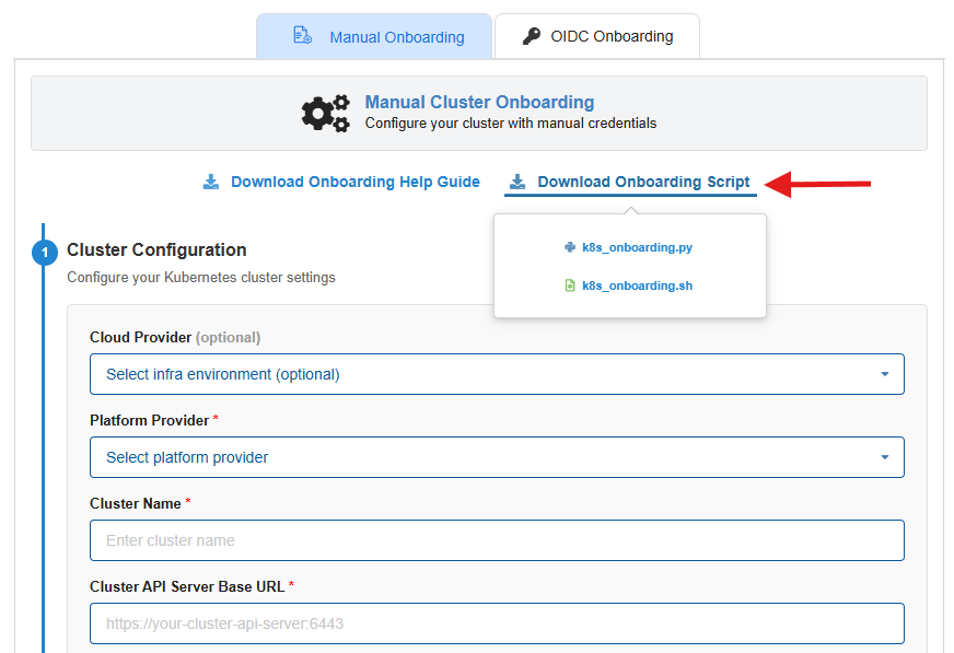
- Click the link “Download Onboarding Script” and click the script you choose to download.
Note: Make sure you extract the script files from the compressed (.zip) folder.
Onboard K8s Project to Saner COSP
Step 1: Generate Onboarding Credentials using K8s Master Node CLI
From the K8s Marster node’s CLI:
- From your local terminal, connect to one of the K8s Master node’s CLI of your Cluster through SSH command.
- Upload the script to K8s master node’s CLI. Transfer the download onboarding script to the K8s Master node’s CLI of your Cluster to which you have taken SSH. To achieve this, use the scp command or tool like winscp.
Example: scp user1@server1:/path/to/file user2@server2:/path/to/destination/ - Verify with the ls command to check if the script successfully uploaded on the K8s master node.
- Generate the onboarding credentials by executing below command with the uploaded “.sh” OR “.py” Scripts.
Generate the Onboarding Credentials by Executing “.sh” Script
Before starting with credential creation:
Step 1: Download the required manifest files.
wget https://sp-saner-cnapp-prod-public.s3.us-west-2.amazonaws.com/SP-COSP-Manifests.zip
Step 2: Unzip the files.
unzip SP-COSP-Manifests.zip -d manifests/
Notes:
Make sure you unzipped and downloaded the shell script in the same directory and same level.
In-order to run the “.sh” script, it is mandatory that you provide the execute permission using the following command:
chmod + x saner-cosp-k8s-cluster-enable-onboarding-permissions.sh
For usage instructions, run the script with –help for .sh file
./saner-cosp-k8s-cluster-enable-onboarding-permissions.sh –help
- For onboarding K8s cluster to a Saner Account with only scan permissions:
./saner-cosp-k8s-cluster-enable-onboarding-permissions.sh scan
On completing the execution, continue from Step #2.
- For onboarding K8s cluster to a Saner Account with Scan and Remediation permissions:
./saner-cosp-k8s-cluster-enable-onboarding-permissions.sh rem
On completing the execution, continue from Step #2.
Generate the Onboarding Credentials by Executing “.py” Script
Before starting with credential creation:
Step 1: Download the required manifest files.
wget https://sp-saner-cnapp-prod-public.s3.us-west-2.amazonaws.com/SP-COSP-Manifests.zip
Step 2: Unzip the files.
unzip SP-COSP-Manifests.zip -d manifests/
Notes:
Make sure you unzipped and downloaded the python script in the same directory and same level.
For usage instructions, run the script with –help for .py file.
python3 saner-cosp-k8s-cluster-enable-onboarding-permissions.py –help
a) For onboarding K8s cluster to a Saner Account with only Scan Permissions:
python3 saner-cosp-k8s-cluster-enable-onboarding-permissions.py –mode scan
On completing the execution, continue from Step #2.
b) For onboarding K8s cluster to a Saner Account with Scan and Remediation Permissions:
Permissions:
python3 saner-cosp-k8s-cluster-enable-onboarding-permissions.py –mode rem
On completing the execution, continue from Step #2.
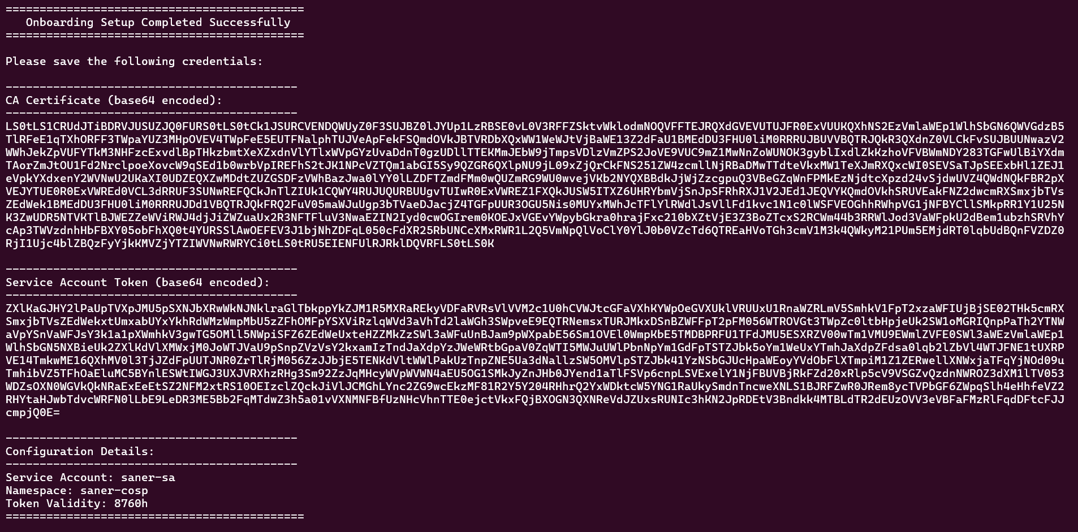
Once the script execution completes, the output provides the information needed for K8s Cluster onboarding in Saner COSP.
Recommendation: Record the values of the output as you need to provide these values as input when you complete the onboarding for your account subscription in Saner COSP.
Step 2: Complete the Onboarding on Saner COSP Account
Return to the Saner COSP Onboarding Portal and add the details generated by the scripts as mentioned below:
- Select the Cloud Provider where your Cluster is present from the drop-down menu.
- Select the Platform Provider of your Cluster.
- Enter the Cluster Name.
Enter your preferred name for the cluster. Note that this name is only for your ease to identify and visualise it on the Saner COSP tool and not used for any verification purposes.
The Cluster Name supports Alpha numeric, – and _
Example: k8sc04m01 - Enter your cluster API Server’s URL under the Cluster Base URL field
- Enter the Cluster CA Certificate generated as part of Step 1.
- Enter the Service Account Token generated as part of Step 1.
Once complete adding all the details, click on “Onboard Cluster”.
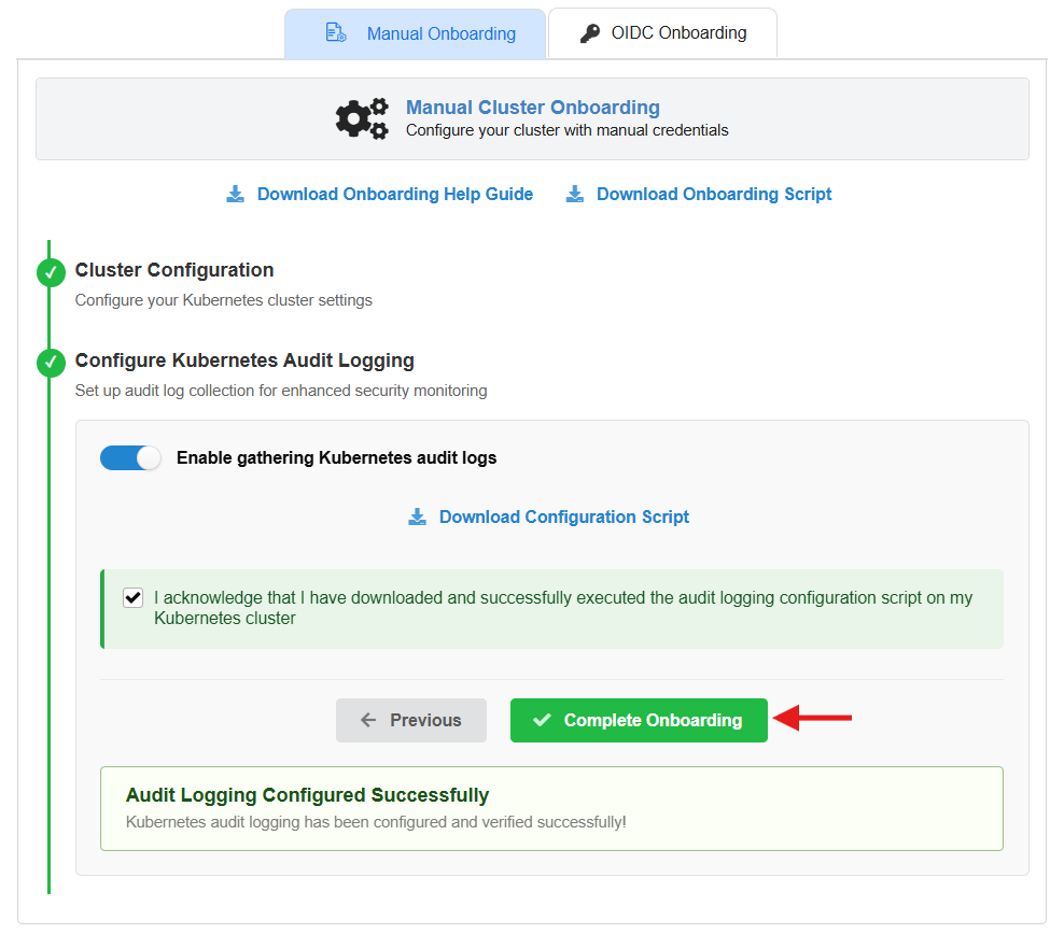
[Optional] Configure K8s Audit Logging
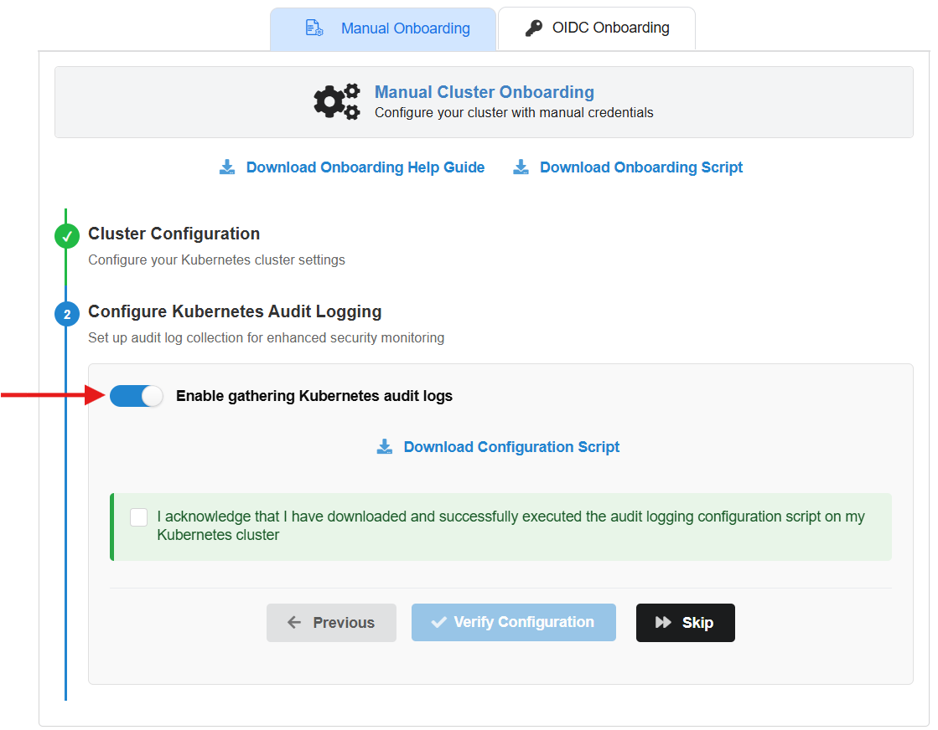
You can set up audit log collection for enhanced security monitoring and for visibility purposes. To activate this functionality, use the toggle button “Enable gathering Kubernetes audit logs.”
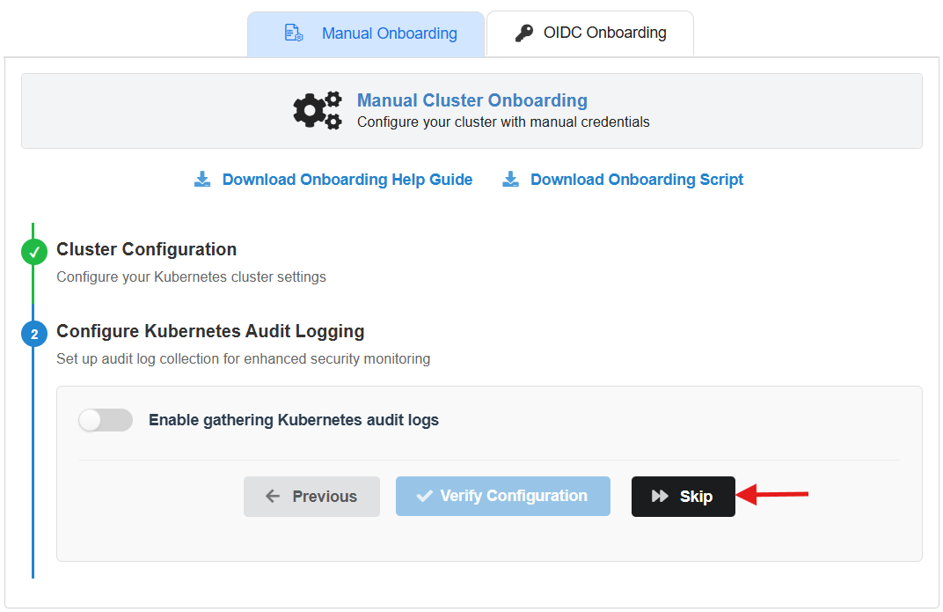
Else, click on the “Skip” button to complete the onboarding process without Kubernetes audit logs.
Setting up Kubernetes Audit logging on Saner COSP
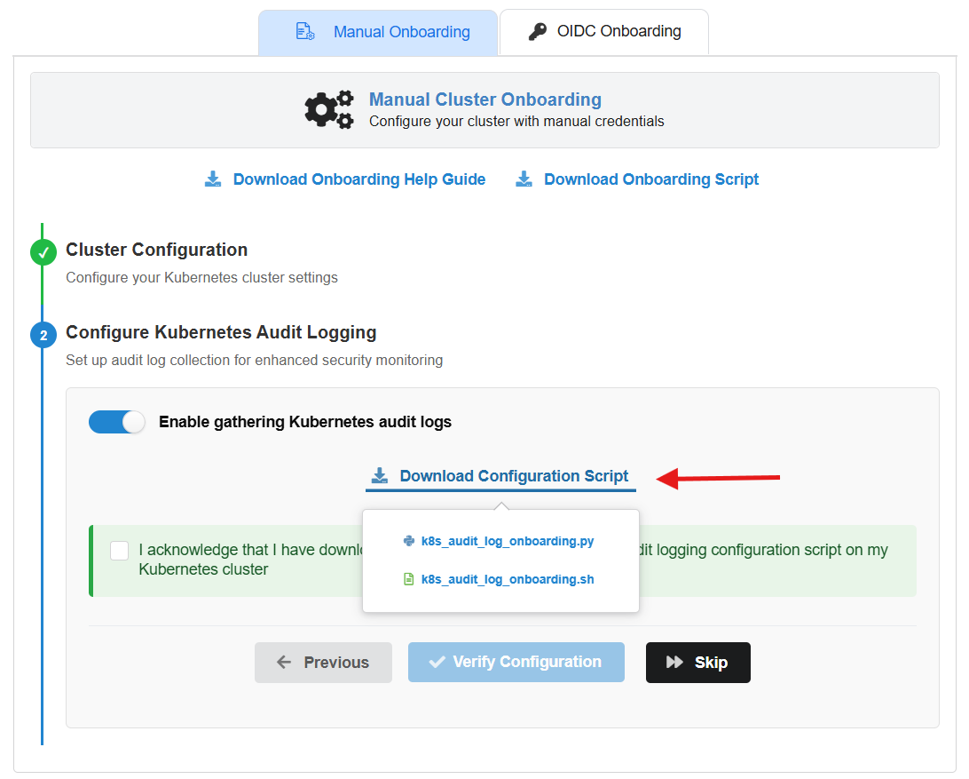
After enabling the audit logging functionality by using the toggle button “Enable gathering Kubernetes audit logs,” follow the below steps.
Step 1: Configure Audit Logging using K8s master node CLI
Download the audit_logging script (“.sh” OR “.py”) by clicking on the link as shown in the screenshot. Make sure that you extract the file before using it.
From the K8s Marster node’s CLI:
- From your local terminal, connect to one of the K8s Master node’s CLI of your Cluster through SSH command
- Upload the audit_logging script to K8s master node’s CLI.
- Verify with the ls command to check if the script successfully uploaded on the terminal.
- Configure audit logging of K8s cluster to Saner by executing the bellow command with the uploaded “.sh” OR “.py” Scripts.
Configure the Kubernetes Audit Logs by Executing “.sh” Script
In-order to run the “.sh” script, it is mandatory that you provide the “execute” permission using the following command:
chmod +x saner-cosp-k8s-audit-log-enable-onboarding-permissions.sh
For configuring audit logging of K8s cluster to a Saner Account run the below command:
./saner-cosp-k8s-audit-log-enable-onboarding-permissions.sh

Once the script has finished executing with success message, continue from Step #2.
Configure the Kubernetes Audit Logs by Executing “.py” Script
For configuring audit logging of K8s cluster to a Saner Account run the below command:
python3 saner-cosp-k8s-audit-log-enable-onboarding-permissions.py
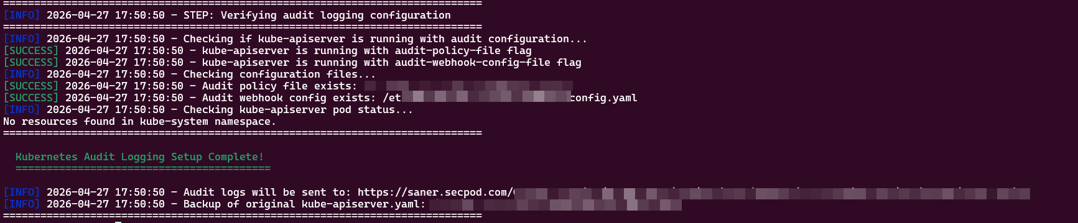
Once the script has finished executing a success message, continue from Step #2.
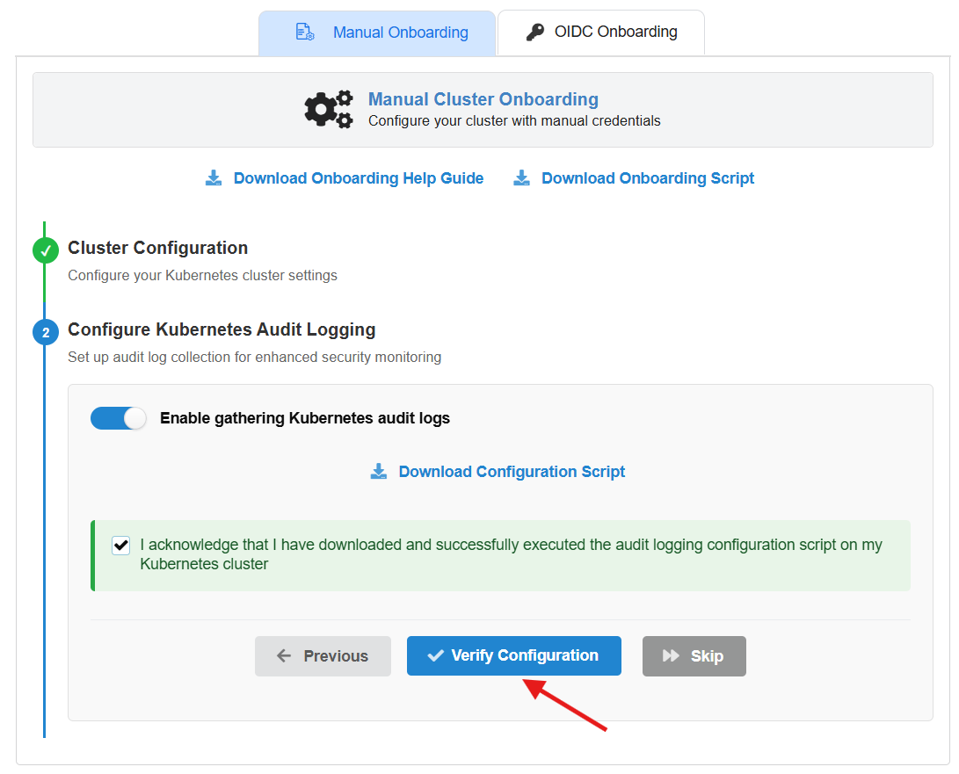
Step 2: Complete the Configuration on Your Saner COSP Account
- Return to the Saner COSP Onboarding Portal.
- After the script has run successfully, acknowledge the checkbox “I acknowledge that I have downloaded and successfully executed the audit logging configuration script on my Kubernetes cluster” and click on “Verify Configuration.”
Once onboarded successfully, you see the “Audit Logging Configured Successfully” message.
3. Clicking on the “Complete Onboarding” button redirects you to the Scan page, where you run the scan on demand as well as schedule or pause a scan.