
Remediation rollback allows administrators to revert configuration changes previously applied to Kubernetes resources. This helps restore workloads to their earlier configuration if a remediation causes unexpected operational issues while allowing administrators to plan an alternative fix for the underlying security misconfiguration.
Recommendation: Use rollback as a temporary recovery measure. After restoring the original configuration, evaluate and apply an alternative remediation to resolve the identified security risk without compromising the cluster’s security posture.
Before You Begin
Make sure that:
- A remediation task is already executed for the Kubernetes resource
- You have the required permissions to perform the rollback operations
- The resource is still available and supports rollback
Perform a Remediation Rollback
Step 1: Access the Remediated Resources for Rollback
Navigate across CSPM, CSPA, or CIEM and click the Rollback button on the top-right of the page. The Remediation listing page opens displaying the resources that you want to rollback.

Step 2: Create Rollback Task for Resources
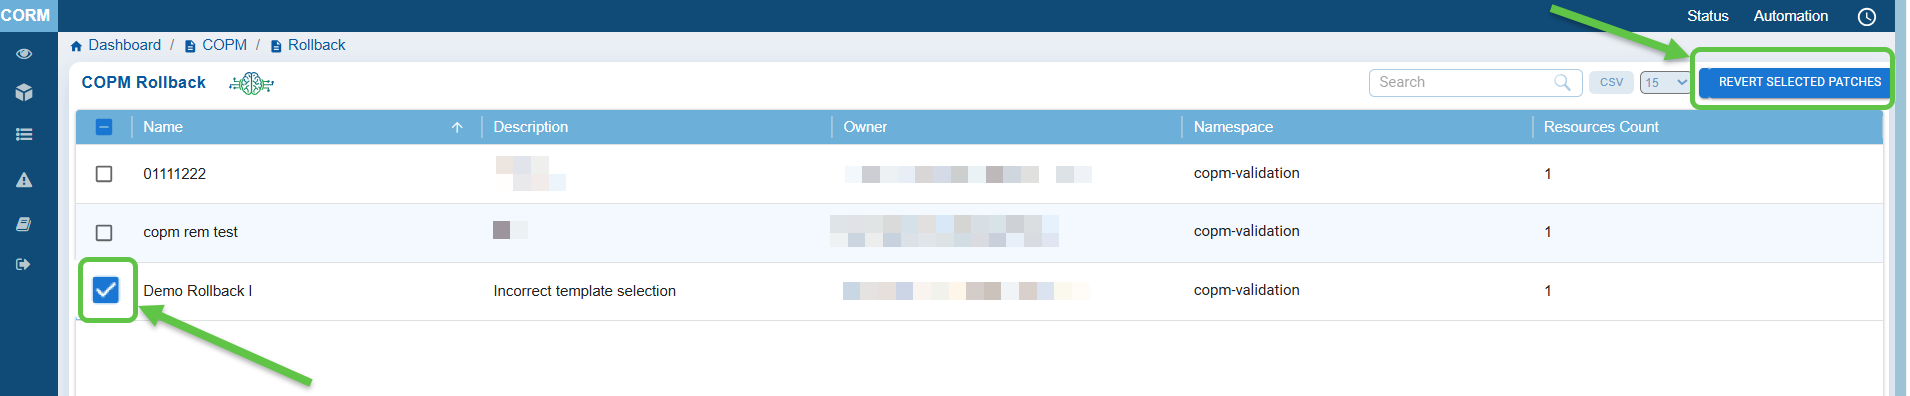
- Select one or more resources and click the Revert Selected Patches button. The Create Rollback Task window opens.
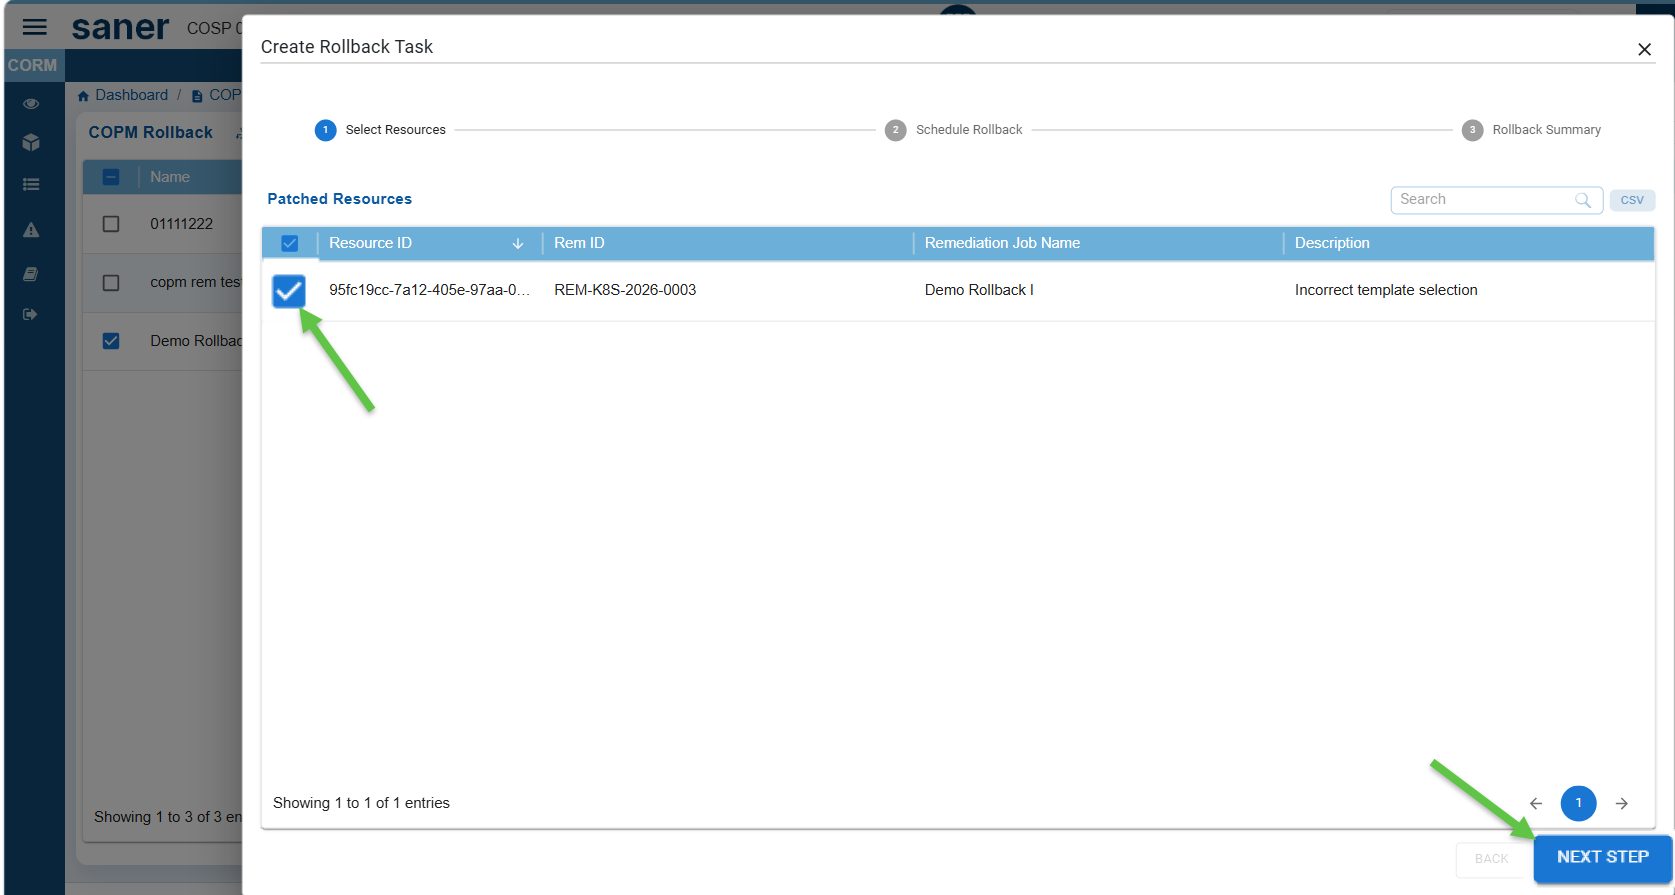
- Select one or more resources from the Patched Resources list for which you want to create the rollback task and click Next Step.
Step 3: Schedule the Rollback
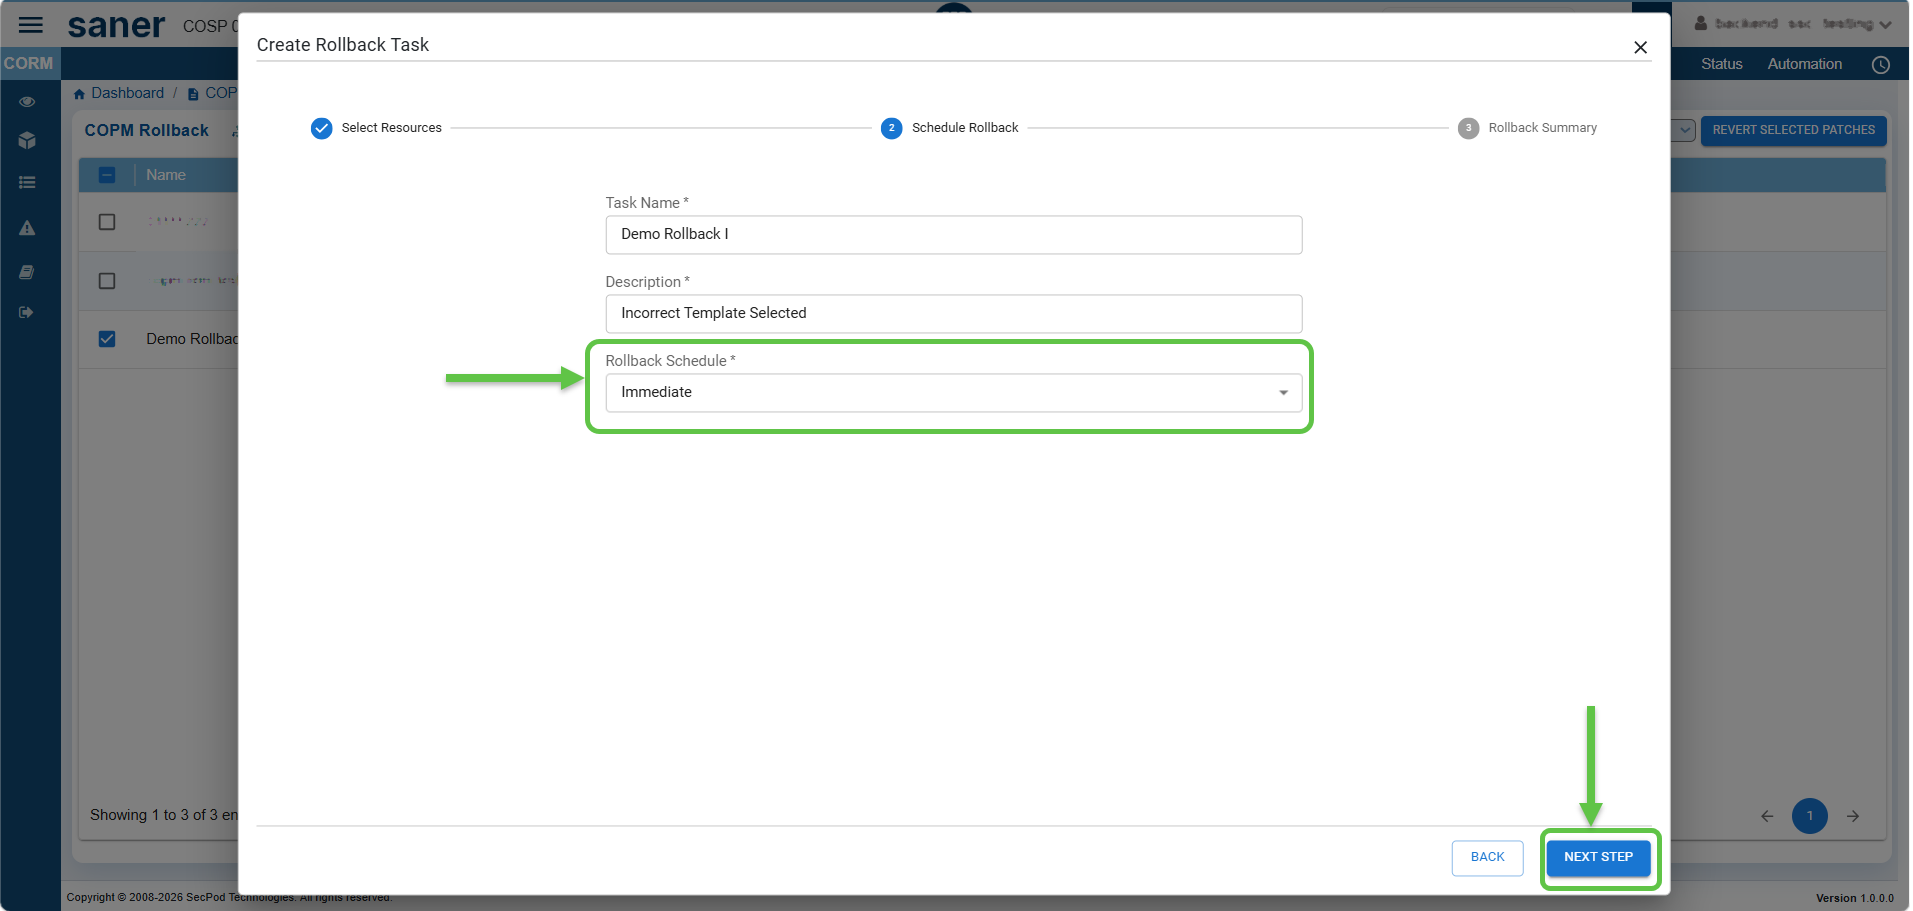
- Enter a Task Name and Description.
- Choose one of the following rollback schedules:
- Immediate – Executes the rollback immediately
- Scheduled – Runs the rollback at the specified date and time
- Click Next Step.
Step 4: Review and Consent to Complete the Rollback Task
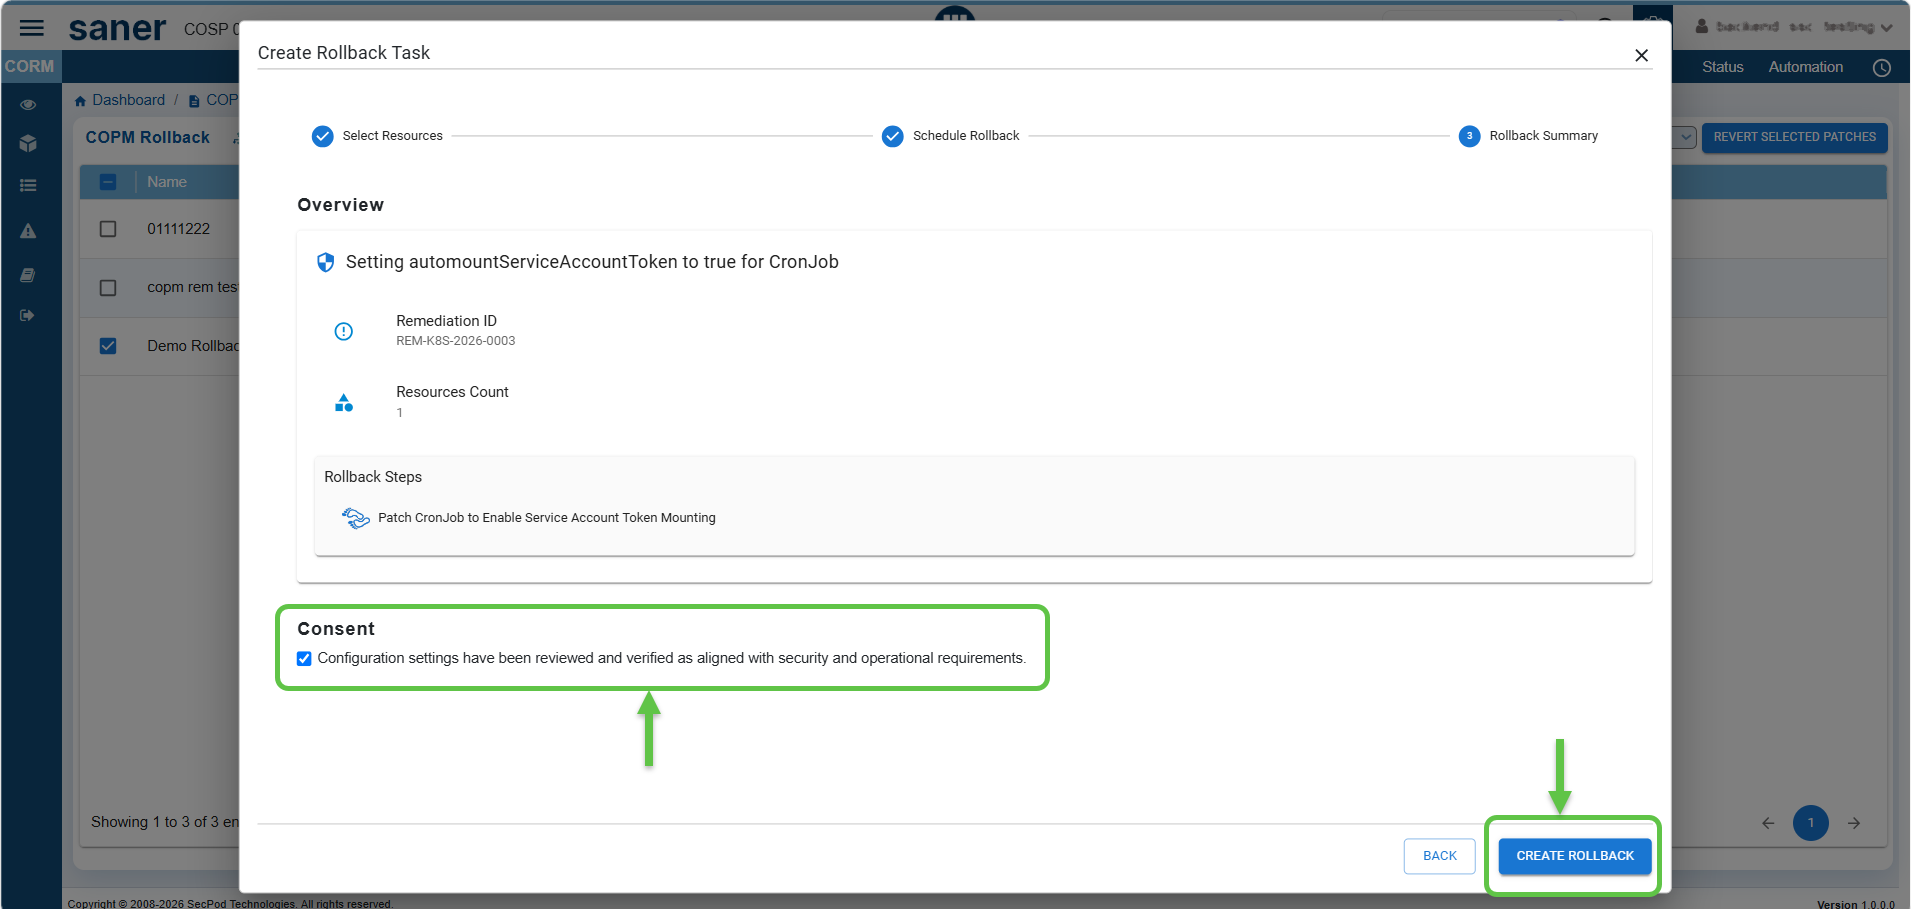
- Admin Users: “Consent” checkbox enabled for admins to directly approve and execute the rollback task
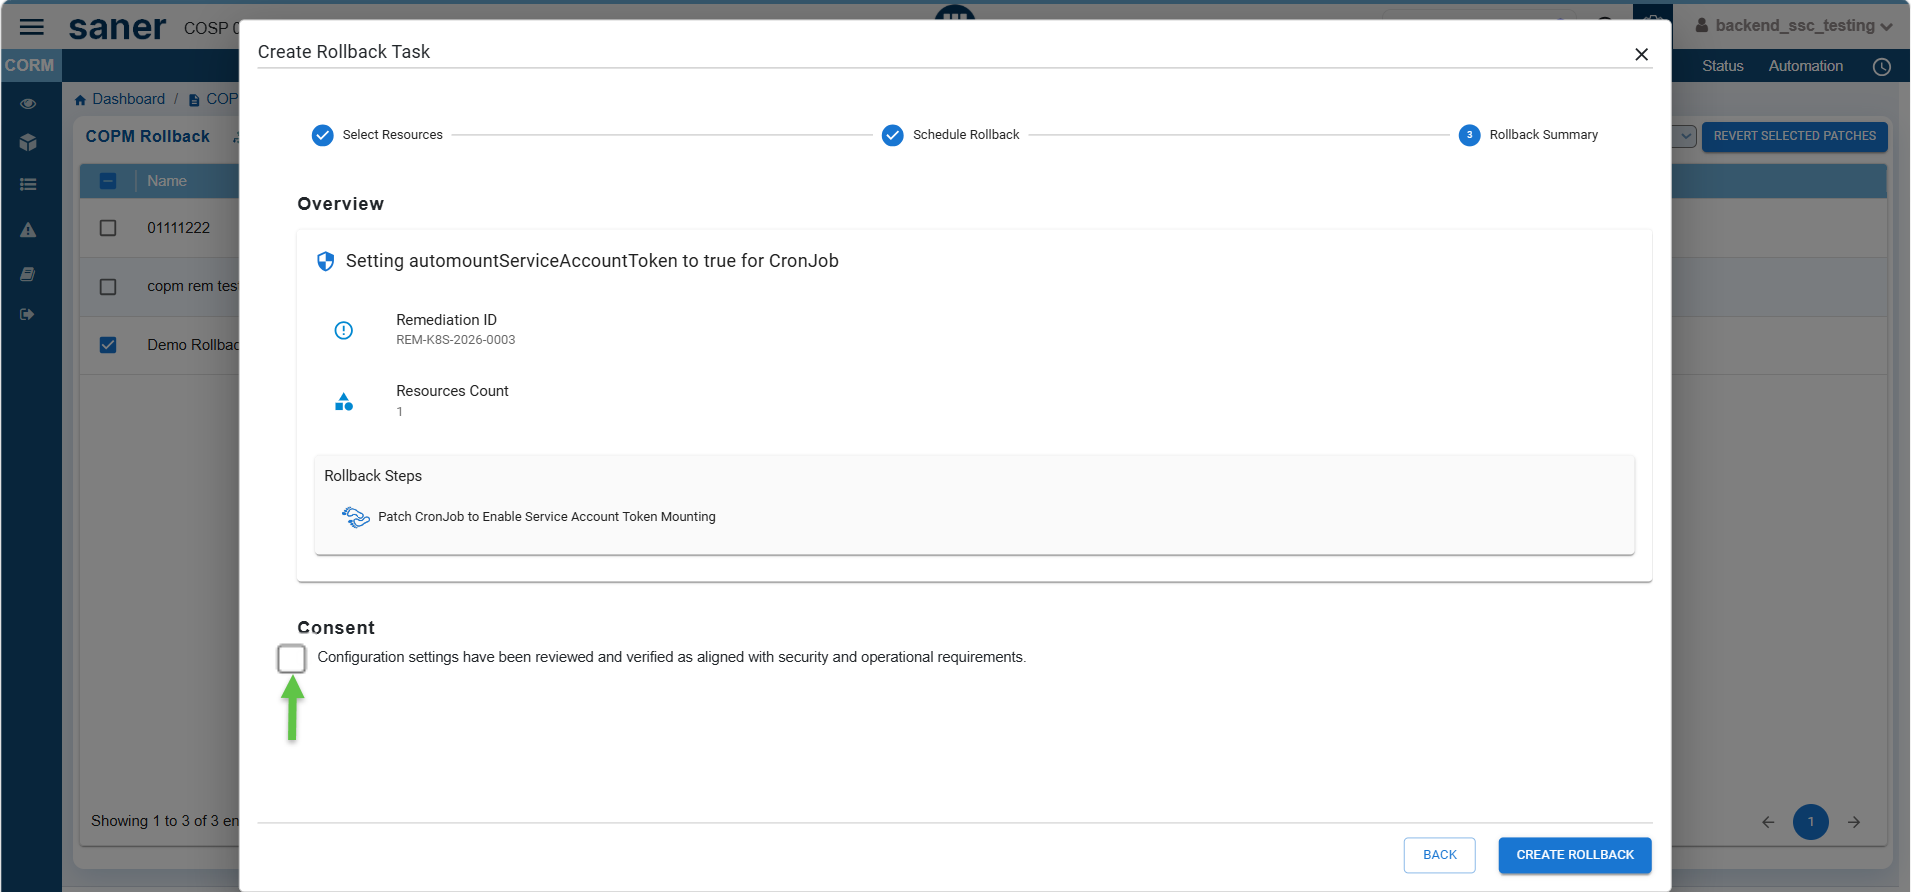
- Regular Users: The “Consent“ checkbox displays in a disabled mode. Users must create the rollback task, and the system automatically routes the task to the admin for review and approval.
After scheduling the rollback job, review the details from the summary. Click the Back button in case you want to make changes. If everything looks correct, click the Consent check box followed by the CREATE ROLLBACK button if you want to proceed further.
Step 5: Monitor Rollback Task Job Status
After the rollback task is created, monitor its progress from the Job Status page.
Possible job states include:
- Pending Approval – Awaiting administrator approval
- Not Initiated – Rollback has been created but has not started
- In Progress – Rollback is currently executing
- Success – Configuration has been restored successfully
- Failed – Rollback could not be completed and requires investigation
- Completed – Rollback task has completed successfully
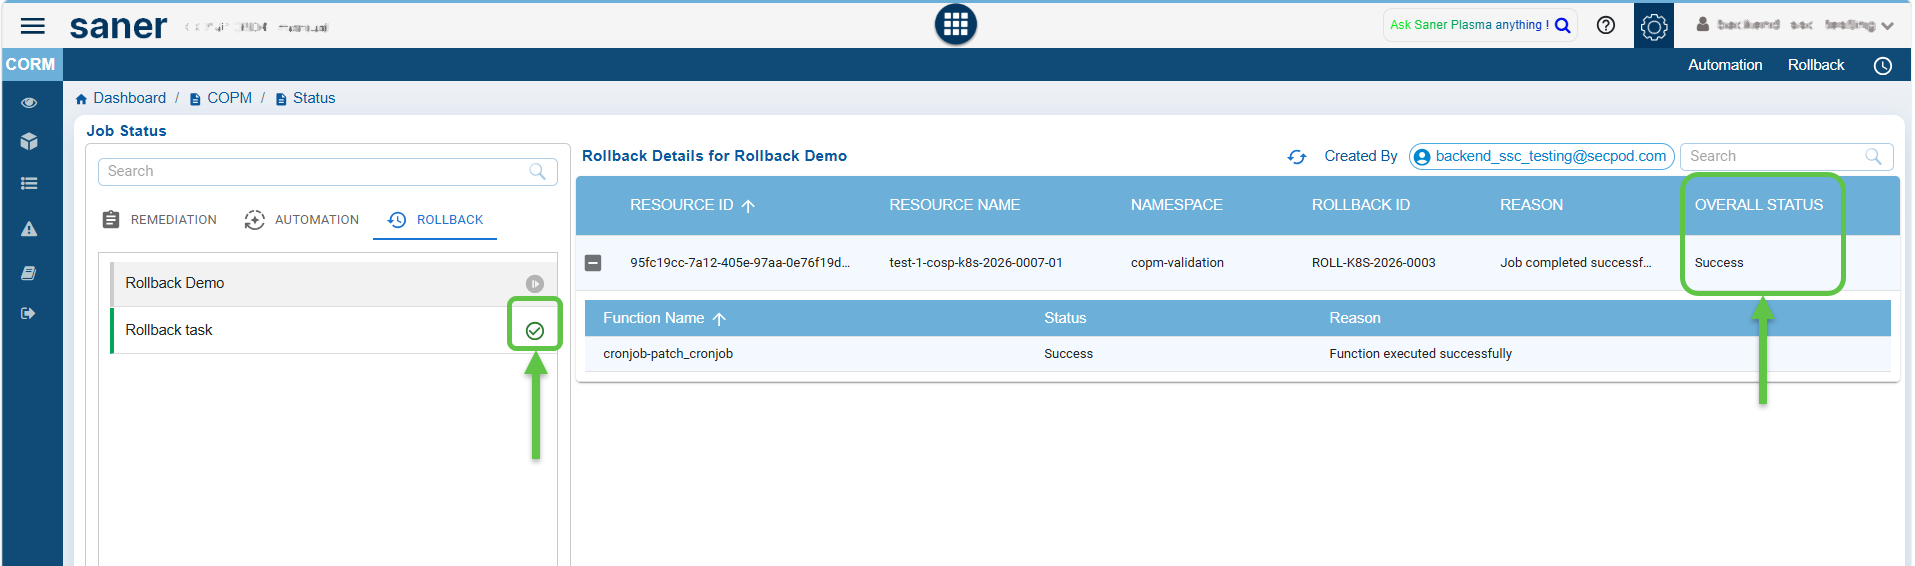
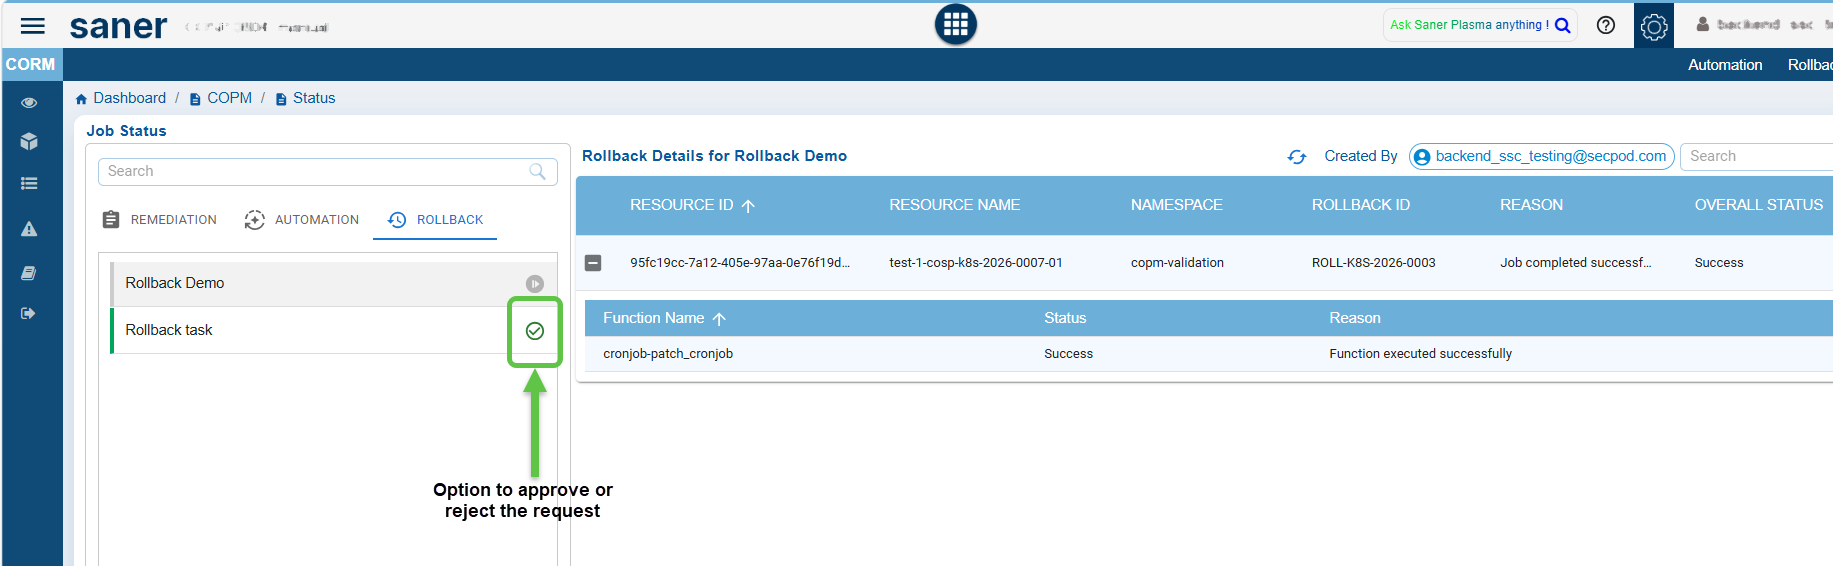
On completing the rollback task successfully, the system reverts the remediation to its original state. Observe the Job Status as success(indicated by a green circle with a tick mark) in the Rollback tab and Overall Status column displaying the value “Success”.
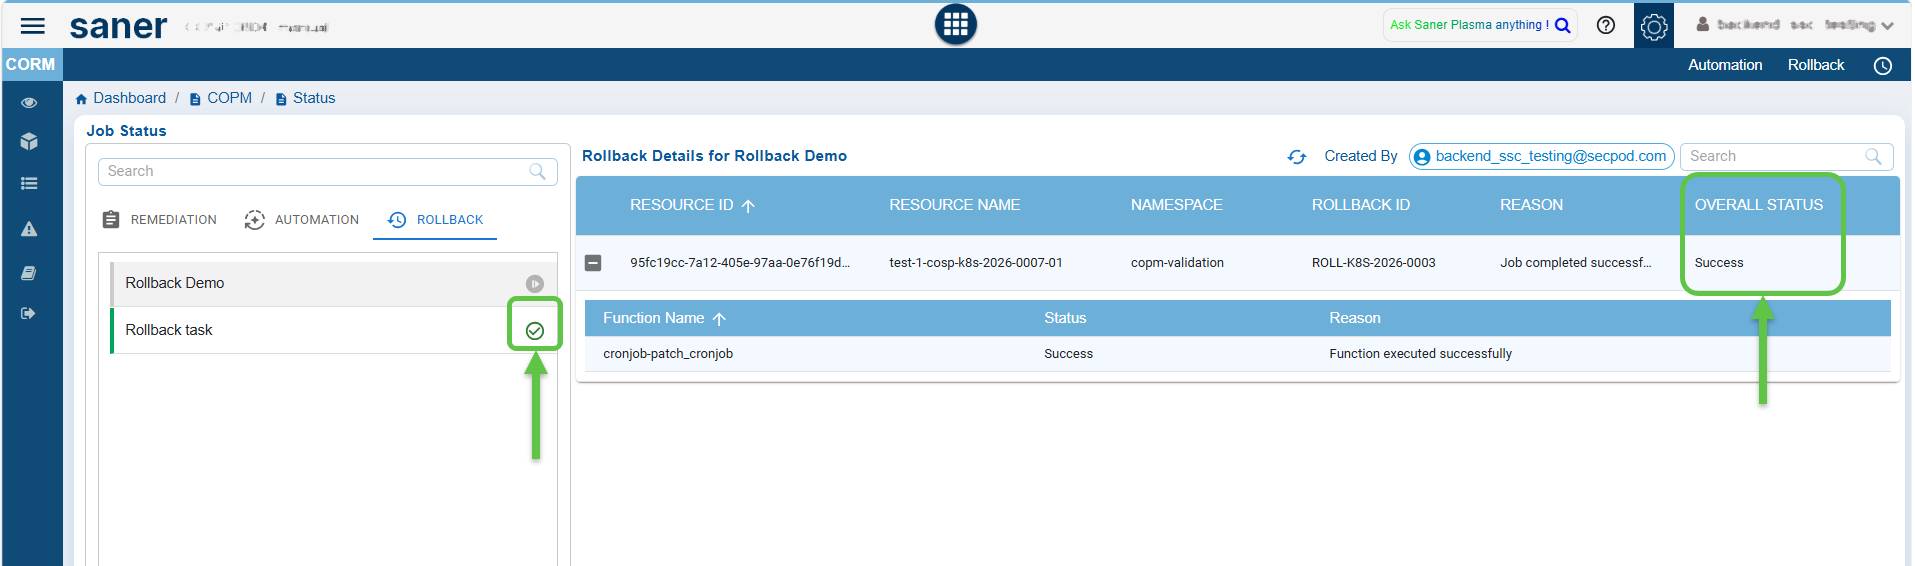
Note: If you completed the rollback activity without providing the consent, then the task moves into the Approval Pending state, and you get to view the task in the Task Status section.
[Optional] Approve or Reject the Rollback Task
If the rollback task is submitted without administrative consent:
- Navigate to Task Status.
- Observe:
- the Overall Status column displays Approval Pending
- Rollback list displays the option to approve or the reject the request
Review the rollback request:
- Click the option to approve or reject the request. This opens the Review Rollback Task for the request.
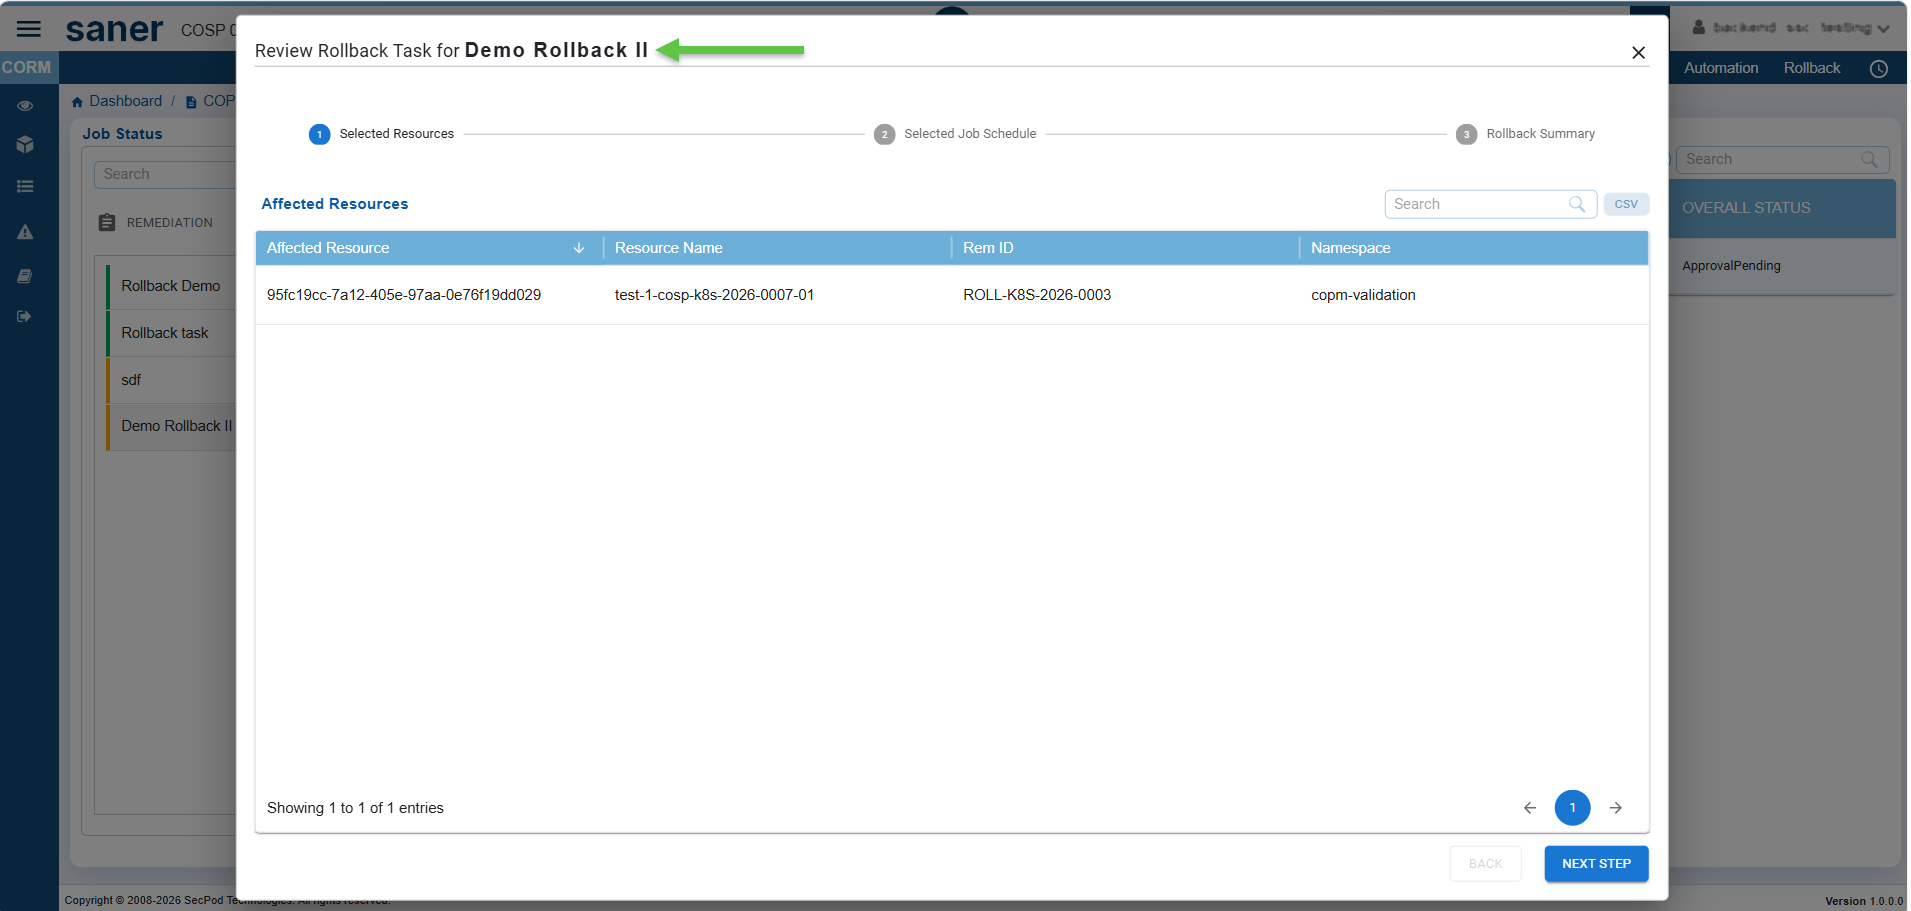
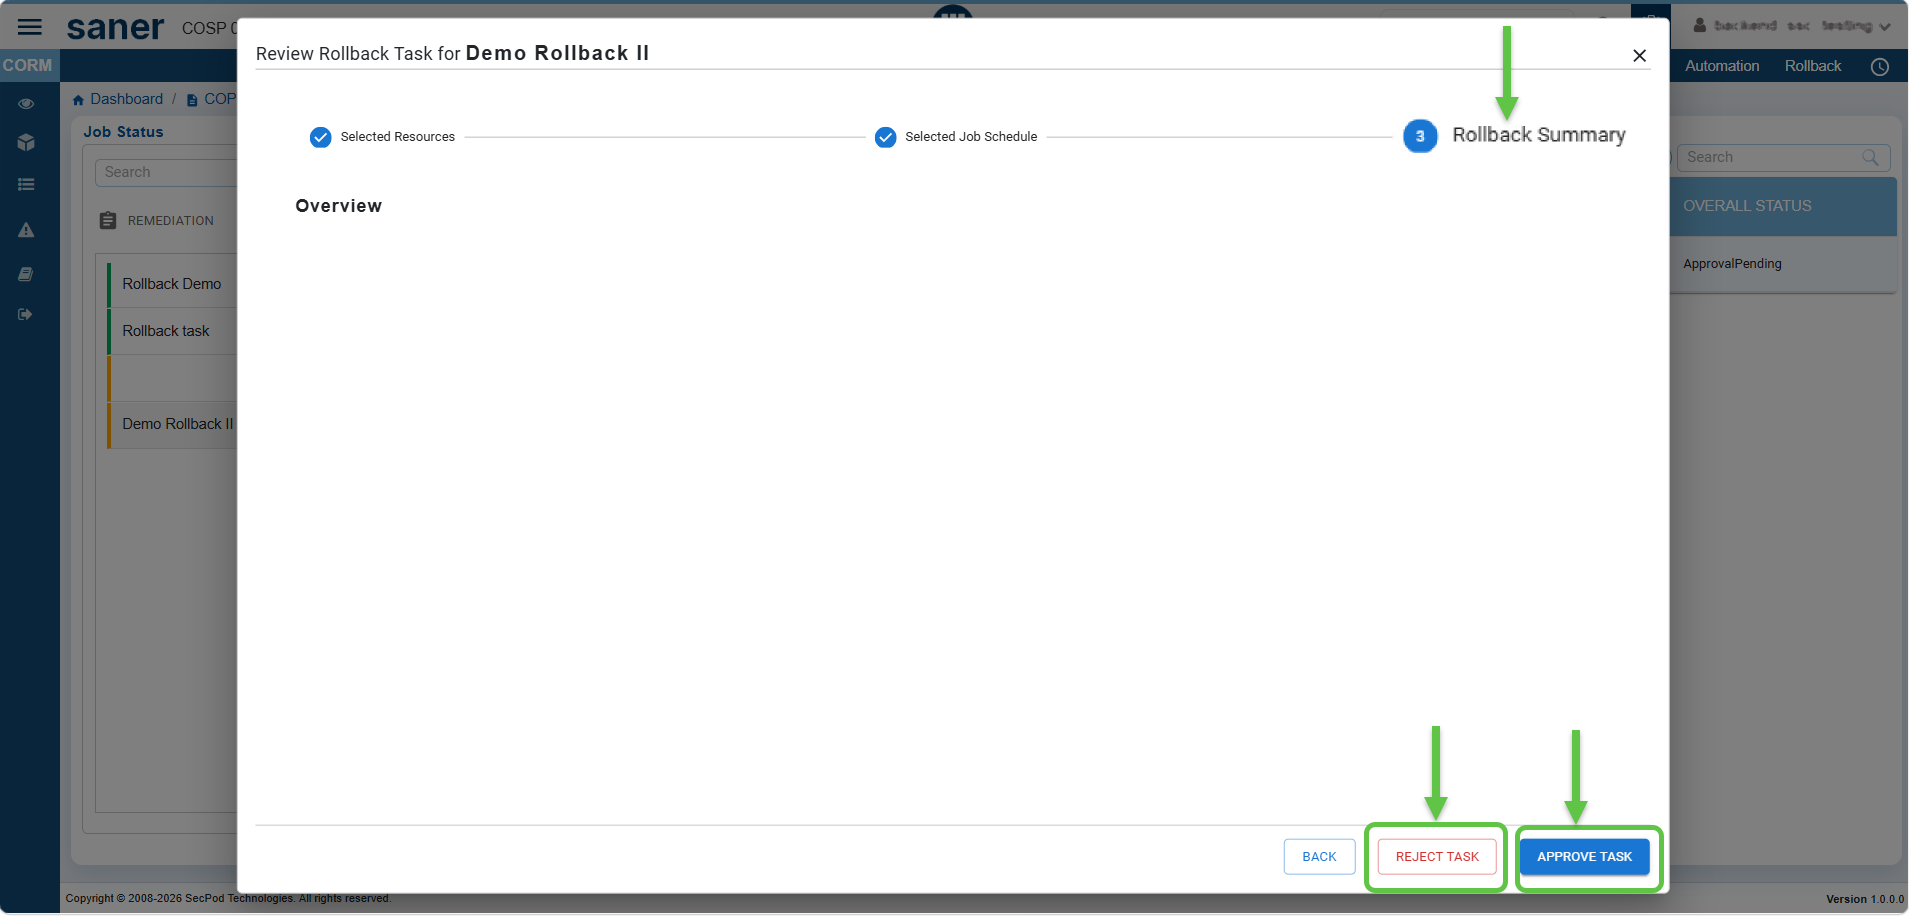
2. Keep clicking Next Step until you reach the Rollback Summary where you see the Approve Task and Reject Task buttons.
Related Topics
Container Orchestration Remediation Management(CORM) Userguide

